Apple Releases New MacBook Air and Mac Mini

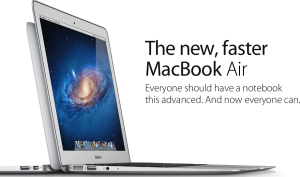
Yesterday, everyone was so caught up in the Lion release that almost nobody knew that Apple also released a new MacBook Air and Mac mini.

The new lines of MacBook Airs and Mac Minis is merely a performance upgrade.

The MacBook Air finally comes with a Core i5 Processor, filling the complaints of a low-power Core 2 Duo. It also has a thunderbolt port – whatever (click here to learn why) –  and comes with the latest operating system OS X Lion. Other than those few internal improvements, there’s nothing new; it has the same price, design, thickness, storage, graphics, etc.

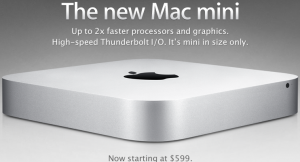
The Mac Mini gets these same improvements featuring an Core i5 Processor, Thunderbolt, and OS X Lion. In addition it has an HDMI port and a little bit smaller of a form factor. It also now comes with a 500GB hard drive standard. Other than that, same price and general design.

These improvements are just that – improvements. Welcome ones, at that, but still not the big leaps forward everyone expects from Apple.

MacBook Air Homepage

Mac Mini Homepage

Mac OS X Lion

Two days ago, I wrote a post saying that Lion was coming the next day.

Right again.

We’ve been waiting to hear the mighty roar for quite a while, and it’s finally audible to all who desire to hear its beautiful outpour (too far?).

Mission Control

Mission Control

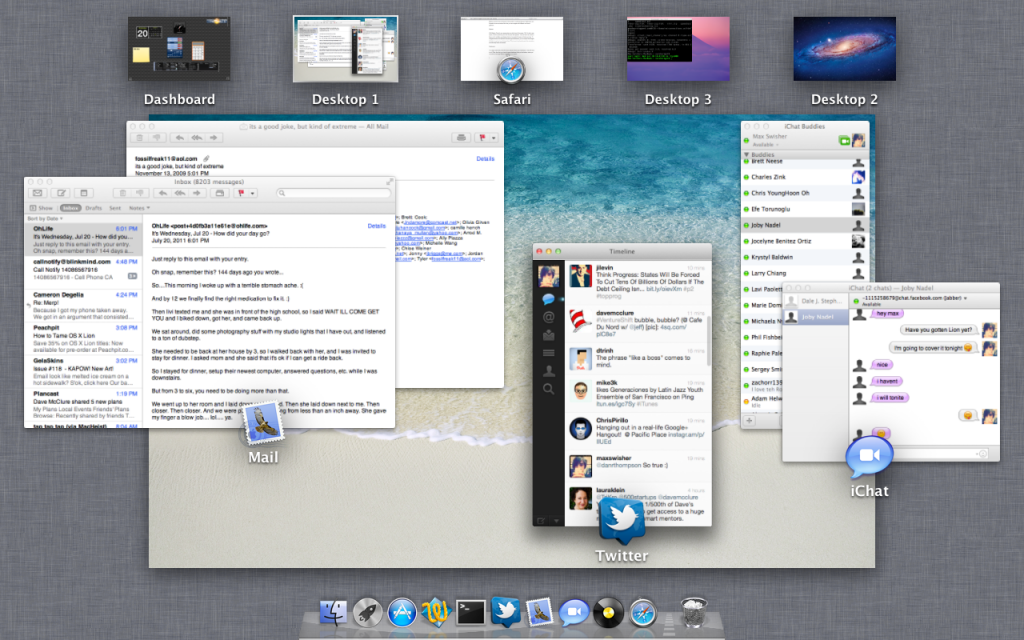
Mission control is the real big part of this update. It combines Spaces, Dashboard, and Exposé into one convenient view that you can navigate with different multi-touch gestures.

To access Mission Control, just swipe up with three fingers.

Spaces:

With Mission Control, your spaces show up at the top of the screen. (Tip: To add a new space, hold the option key and click the plus that appears – this one took me a while to figure out.) In addition, applications that you’ve made full screen will show up here. To navigate between the Spaces/Fullscreen apps/Dashboard, you can swipe three fingers left/right at any time to go between them. This is one of my favorite parts; the animations are extremely fluent and smooth.

Dashboard:

You might notice that on the left of your spaces, there’s your dashboard – that’s all there is to it! Other than that, you have the same dashboard that you had before, where you can add and arrange different widgets for your needs.

Exposé:

As you can tell by the picture above, all of your running applications in your current space will group and display with an icon and a label. It’s just like the previous exposé, with a couple of little visual upgrades.


As I mentioned, there is now support for full-screen apps. I could make a completely separate section for this, but what is there to say? You can click a little icon in the top right and the app will take up the whole screen. Whoopdidoo!

Launchpad

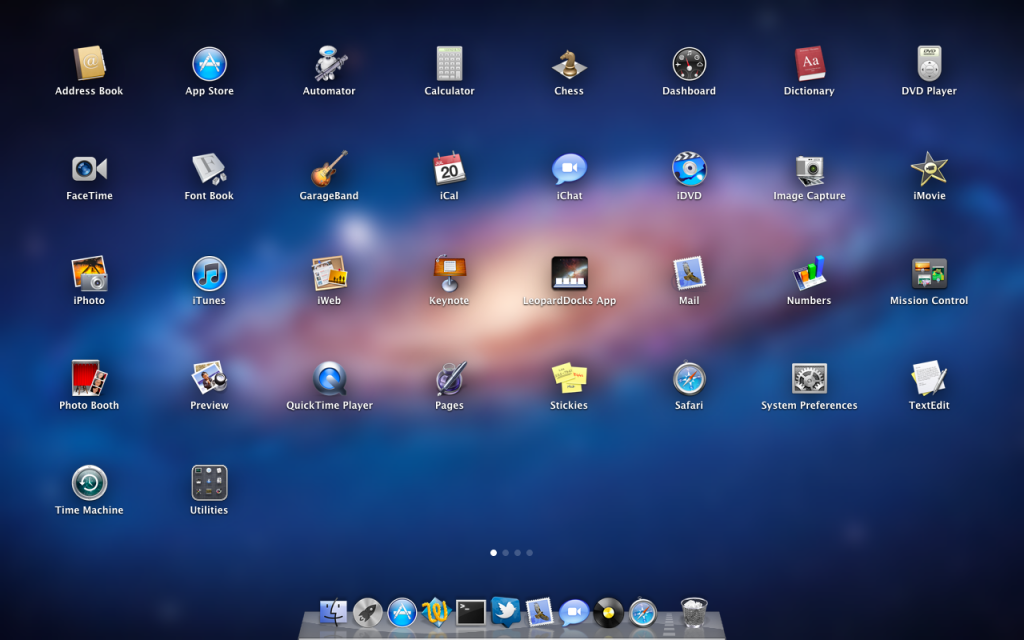
Launchpad is basically the iOS home screen for mac. You’ll get a little rocket icon in your dock, and clicking it brings up Launchpad which looks a bit like this:

Launchpad


You can swipe between the screens with two fingers. If you’ve ever used an iOS device, you know how this works: click and hold to rearrange the icons, or even move them into folders. You can even remove an app by clicking the X. Looks like iOS to me.

Versions, auto-save

I’m not going to cover this in too much detail.

Versions will keep track of all of your changes in your documents, and if you want to revert to an older version or get older elements, you can scroll through different “versions” of your document. Unfortunately, this isn’t available in many applications yet – mostly just the iWork suite – but should become more available as apps are updated to be compatible with Lion.

Auto-save is fairly self-explanatory: Your documents will be automatically saved.

Conclusion

There’s TONS of other features in Lion, and I’ll be posting different tips/tricks as I find them. There’s TONS of other new things in Lion, like a new prettier Mail app and more effects in Photo Booth – however these are small improvements. You can read more about all 250+ little new features over here.

Where can I get it?!

Unlike previous versions of OS X, this update won’t come on a disc. Instead, just go to the Mac App Store and Lion will be in there for $30. You can download and install instantly (time may vary, depending on your internet speed of course). Click here to open Lion in the Mac App Store.

Enjoy the roar of the lion.

RAWR!


How-to: Make Your Dock REALLY Big!

Okay, this post is FAR from useful. But if you’re bored, or want to play a prank on someone, this is a cool visual effect.

If you go into System Preferences > Dock, you’ll be able to enable dock magnification. This will cause the dock icons to magnify when you hover over them.

But using this simple trick, you can make it even BIGGER!

Open Terminal (in Applications/Utilities) and type in:

defaults write com.apple.dock largesize -float 256.000000

You can change 256 to be even bigger or smaller, depending on how big or small you want your dock magnification to be.

Hit the enter key and, well, nothing will happen.

Next, type:

killall Dock

Your dock will disappear and reappear.

Now hover and enjoy!

To set it back, just type the same thing you did to activate it but replace 256 with 128.

This has absolutely nothing useful about it. But it’s fun if you’re really bored, or you’re just waiting for Lion to come out.


Mac OS X Lion: Coming Tomorrow!

During an earnings call with Apple, the CFO nonchalantly announced that Lion is being released tomorrow.

Lion is the “big cat” name for Mac OS X 10.7, the next operating system for Mac Computers. It was announced a little while ago, and was said to be announced in “July.” Lion brings some new features in Exposé and Spaces, fullscreen apps, and an iOS-like homescreen called Launchpad.

The update will be available in the Mac App Store for $30, and there’s no more discs available.

If you have a Mac, I recommend that you read this post to make sure your mac is ready for Lion.

After using Lion for a little while, I will write a post describing the good and bad of the new features.

Integrate Google Voice into Built-in Apps

So, you’ve been using Google Voice for a while now. Everyone is switched to your new number, and everything works fine. But there’s one drawback: to send messages, you need to open the Google Voice app. Unfortunately, that google voice app is kinda buggy. Then, you have to hide the messages app so you don’t accidentally send messages with it instead of Google Voice.

However, if you’ve jailbroken, there’s a plugin that will allow you to integrate Google Voice into the Messages app.

To download it, Open cydia and search for SMS GV Extension. Install the first result.

You’ll get a trial, but it’s a good idea to get a license as a couple of times a day it will remind you asking you to buy a license. Purchase isn’t as simple as it should be, but you can read the detailed purchase method by clicking here.

Aside from the purchase of a license, setup is unfortunately not as simple as it should be.

Open Settings>SMS GV Extension. Here, put in your Google credentials and turn the send box to on.

That was easy.

For receiving, you’ll actually have to have the official app installed and working – so don’t go uninstalling just yet!

Go into Receive settings and turn on Official GV App.
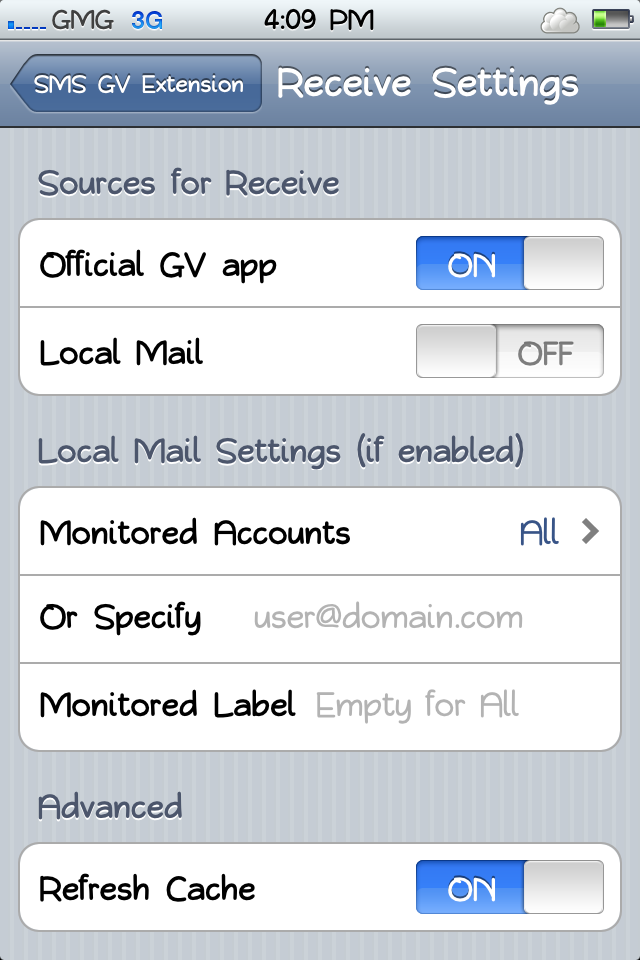
You should now be able to send and receive texts through the Messages app. Functionality wasn’t too reliable, but after a little while it started working 99% of the time.

Okay, now you have Messages working. But you still want to get rid of the darned Google Voice app!

Instead of moving it to a folder somewhere secret, you can actually use a free app from Cydia to hide it.

The app is called SBsettings. It’s primary use is that you can swipe across the status bar (the bar with the time and battery at the top) and toggle WiFi, 3G, and more. But it can also hide apps.

To download it, just search SBsettings in Cydia and install the first result.

Once that’s installed, swipe across your menubar and click “more.” Here, scroll down and find “Hidden Apps.” Scroll down in the list and turn off Google Voice. You’ll never know it was there!

So now you’ve gotten messages done. But what about phone?

It’s actually much easier to get the phone to work.

Search in Cydia for GV Phone Extension. It’s made by the same creator as the Messages integrator, and it’s also the same registration and price.

Go into Settings>GV Phone Extension and enter your credentials.

That’s all the setup that’s needed!

That’s how to get Google Voice totally integrated into your phone. Your original phone number will still work, but you won’t be able to tell what the difference is between them!

If you have the Verizon iPhone 4, I would usually direct you to my post on easy jailbreaking. However, JailbreakMe.com is back! To jailbreak, just go to jailbreakme.com and you’re set from there. Easy!

The Google voice app is a bit buggy, but you no longer have to suffer. Enjoy! 🙂
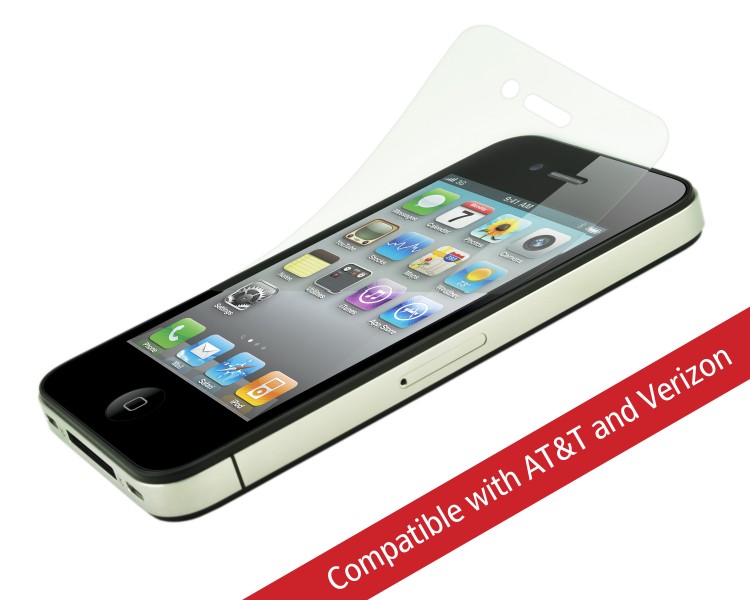
Power Support HD Anti-Glare Screen Protector for iPhone 4

When I first got my iPhone 4, the screen seemed really durable. Through the first couple of weeks I didn’t have a single scratch. I wasn’t worried or careful about it, and that still hasn’t proved a problem.

However I was definitely sick of all the smudges and fingerprints, and how if there was enough fingerprints on the screen it would get difficult to even move my finger across the screen.

I didn’t think I would benefit from any kind of screen protector until I was at a class and tried a friend’s.  The anti-glare cover made it much easier and smoother to run my finger across the screen. It also didn’t attract fingerprints. Cool!

I got one of these for myself, and I’m quite happy with it. As I said, it doesn’t attract fingerprints, and makes it much easier to move my finger across the screen – two things you will benefit from every time you take the phone out of your pocket.

It all sounds good, right?

Well there’s only one drawback: having the screen protector will make your screen the tiniest bit blurry.

No, it’s not terrible – you can still easily read the text, and it doesn’t make much of a difference. But if you are picky about super sharp edges on everything, this may cause a problem to arise.

Sometimes people have a VERY hard time installing the protectors, usually because of lint and air bubbles.

Well, this screen protector has something new: a sticky, clingy sticker thing that you press against the screen and remove, bringing all of the dirt and dust with it.

However, if you’re buying this at an Apple store, you can usually get around all of that. They will install it for you, and they’re pretty good at it, too. They know all of the tips and tricks, and actually installed my screen protector FLAWLESSLY. Yes, there’s not a SINGLE SPECK of dust under that screen protector, and it lines up perfectly.

If you’re looking for a screen protector, this is the way to go. However, if you’re picky about your sharp lines, you should look into a crystal style screen protector, which, in addition to providing sharper edges, attracts more fingerprints.

The Power Support Anti-Glare Film Set (a pack of two) is available online here and at most Apple Retail Stores for only $15.

Mac OS X Lion is Right Around the Corner!

Mac OS X Lion was announced a while ago and brings new features like Launchpad, an iOS like App Launcher; Mission Control, which combines Spaces and Exposé into one, easy to view panel; and plenty of other new features.

The announcement stated that the update would be released in July 2011, and would be downloaded directly from the Mac App Store for $30.

Well would you like at the time, it’s July!

The Mac OS X Lion update is estimated to be released to the public in the next couple of weeks, according to my reliable sources.

There’s a few things you should probably do to make sure your computer is ready

  1.  Make sure you have some disk space available!

If you don’t, you’ll download the Lion update and your computer won’t be able to easily boot. Make sure you have at least 6 gigs of disk space free. If you don’t, you’re in trouble whether you’re installing Lion or not! Try an app called GrandPerspective (reviewed here) and delete the biggest files.

2. Say goodbye to PowerPC

Over the years, Intel machines have been compatible with PowerPC Apps through a bridge called Rosetta. Now, with Lion, Rosetta is no longer compatible. If you have any apps that run on Rosetta, it’s time to find Intel compatible alternatives.

3. Install all available updates

Go to the Apple Menu > Software Update… and install any available updates. After you’ve installed the updates, re-check for updates in case there are updates for the other updates.

As I said, OS X Lion should be available from the Mac App Store in the next couple of weeks for only $30.

How-to: Change fonts in iOS

Almost everyone is very used to the default iPhone font – Helvetica. It’s plain, simple, and easy to read.

People are usually just fine with Helvetica – but if you’re jailbroken, it might be a nice unique touch to change your font. And because text shows up EVERYWHERE in iOS, you’ll always get to enjoy your font change.

To change the font(s) on your iPhone, you’ll need an app called BytaFont from Cydia. Just open up Cydia, go to search, and type BytaFont and install it – no additional repos needed ;). If you have a Verizon iPhone 4, click here to read my post about 2 step jailbreaking.

After you’ve downloaded BytaFont, you can tap “Browse Fonts” to get a few options for browsing: Staff picks, most recent, most downloaded, most appreciated, alphabetical, and by category. Unfortunately it’s as hard to navigate as it sounds. The fonts under most appreciated are nearly impossible to read, and looking through a huge list of fonts (where all you see is the title of the font in Helvetica) doesn’t help me determine which font I’m looking for.

There are tons of fonts that are available for you to use (all for free, of course) from BytaFont. Some of them are basic, like Tin Birdhouse. Some of them are complex, like Halo 3 (which I simply just can’t read).

I decided that I liked the Ubuntu font. It’s clear and still easy to read, but it’s still different from boring helvetica. Here’s how it looks in a few situations on iOS.

Where’s those thunderbolt devices?

Fourth months ago, a new MacBook Pro line was released. And as I said here, it was a total disappointment. The biggest thing on it was probably the new “Thunderbolt” port, which is a port with the same form-factor as the Mini DisplayPort, however it allows for transfer up to 10 GBPS. Yah, that’s fast.

Everyone I talked to said that it was awesome; it would be so good to use.

My argument was that it was too proprietary – Only three models of computers have that port, so why would a manufacturer go after making products for it?

The usual argument was that “It will standardize and products will be released for it eventually.”

Okay…

So here we are four months later, and the only product I’ve ever seen compatible with the thunderbolt port is an external hard drive from LaCie.

That’s it.

So….. Where’s those thunderbolt devices?

I believe that thunderbolt was (and still is) a total failure. Nobody uses it – and because no body uses it, manufacturers won’t create devices for it. And because manufacturers won’t create devices for it, nobody uses it. It’s a total loop – a manufacturer would have to make a product for it, so people would use it, so other manufacturers would make more products for it.

Nowadays, the only other computer line with a thunderbolt port is the most recent line-up of iMacs, which few people have.

But there still is hope for Thunderbolt. If every single Mac gets a thunderbolt port, after a while every Mac that is in use will have a port – that’s when manufacturers will start making products for it.

But until then, don’t expect much from Thunderbolt.

Google+ iPhone App Awaiting Approval

Google+ is already available via the web and an Android app, and now Google has submitted their iPhone app to Apple for approval into the app store.

Everyone knew that Google was going to develop an iPhone app for Google+ eventually, but we weren’t aware that they had already created a full app and submitted it.

If all goes well, the app will be available to iOS users in about two weeks.

But…

Who was here for Google Voice?

You may remember that the Google Voice app sat waiting for approval for months, and was eventually rejected.

Then google resubmitted it, this time not so happy. Apple finally approved it, and I currently have Google Voice on my iPhone.

I hope that Google+ doesn’t end up going down this same disapproval tunnel…

Only time will tell if Apple wants to really battle Google in this way, which could be cause for some kind of lawsuit from Google.

(Personally, I just want to get Google+ on my iPhone, lawsuits not necessary)

(via Mashable)


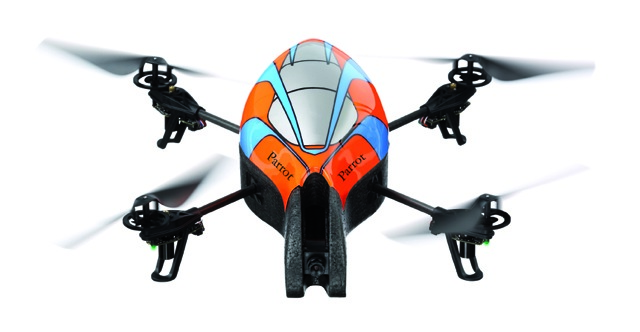
Parrot AR.Drone

The AR.Drone is a french developed electronically advanced quatracopter. It’s a helicopter, but it has three blades. It is controlled via an iOS device through WiFi.

And It’s fun, but hard to fly.

I could go farther into depth with this, but I’m not going to.

Although it’s cool, it’s also ridiculously time consuming and expensive. Now, the AR.Drone itself is only $300. But over the course of three weeks it’s costed me over $500. Did I mentioned that I probably only got about two hours of time being able to fly it?

The real reason it’s so expensive is the repairs. You’re going to break every single piece of this thing, and the pieces aren’t too cheap when they all add up.

First, I broke a crosspiece. $30, plus two days shipping and an hour replacing it.

Then, I busted a gear. $30 later, I waited two days and spent about ten minutes replacing it.

Next, one of my batteries went bad. $40 and two days later, I fixed it.

And now, my main board is bad. But after all of those repairs, I’m not going to even order the replacement, as it’s $160 and would of course take another two days to come. Then I’d break something else and pay for another part.

This thing is fun when it works, but that’s a very small amount of time. That’s why I’m not going in to detail about it, as I’m going to save you the trouble to tell you this: Unless you have a college fund built up to repair it, don’t buy an AR.Drone.

Free WiFi Tethering with iPhone

You may have read my post on tethering with Android.

However, I did switch over to iPhone!

Now, you can tether using the iPhone by paying AT&T or Verizon, and you’ll get a portable hotspot.

But that’s extremely expensive!

Here’s an easier way: MiWi.

MiWi is an application available from Cydia (you need to be jailbroken, if you have a Verizon iPhone 4 click here) for $20. That may sound expensive, but it’s much cheaper than spending $20 each month! If you have read elsewhere about the Sinful repo, you can get it for free, but that’s cheating the developer out of what he has earned, so I don’t encourage it.

Installation

If you know how to get apps from Cydia, skip this paragraph. If you don’t, continue reading. To get MiWi, open the Cydia app from your homescreen, wait for all of the data to “reload,” and click search. Type in MiWi, and tap the result. Then, click “Install” in the top right corner, followed by “Confirm.” Let it install, and then click the big black button at the bottom. MiWi will now be on your homescreen.

Use

MiWi is an extremely simple app.

Upon opening it, you will be greeted with three tethering possibilities: USB, Bluetooth, and WiFi.

Bluetooth is advertised to use mainly with iDevices, however I don’t like bluetooth tethering as it is unreliable compared to USB and WiFi tethering.

USB Tethering only works with Laptops, and I had a terrible experience with it. Although it may boast a faster connection, you need to get it connected in the first place. That’s where I had my problems.

So that leaves WiFi. And let me just say, getting WiFi to work is painlessly easy.

You can easily setup a WiFi Password, change your SSID (network name), and even control which computers are on the network. Even better, you will get a notification bar at the top of your screen that tells you how much has been downloaded and uploaded. Handy!

The speed isn’t too shabby either! I was able to crank 1.0MB/s down, which isn’t too bad. It works great for email and basic web browsing, but I wouldn’t try to stream video over it.

Conclusion

MiWi works great for WiFi tethering. But I wouldn’t recommend it for USB or Bluetooth, as they are far less reliable.