Apple Says Things at WWDC

So Apple had some fun at the WWDC Keynote this year.

Siri did stand-up comedy to open.

No really, I’m excited about the new Samsung. Not the phone, the refrigerator.

I must admit, that was pretty funny.

First of all, Apple updated its notebooks. The MacBook Air finally got a speed boost, the MacBook Pro got a speed boost, and the 17″ MacBook Pro bid farewell.

Apple also announced their next generation MagBook Pro, which is almost as thin as an Air, has a retina display, and a new Magsafe Port. Great.

All of these computers have gotten upgrades to USB 3, which is nice for those people who actually have devices that can take advantage of that.

Then, our friend iOS got an update.

Finally, iOS has turn by turn navigation. Siri is available on the new iPad, and has supposedly gotten a bit better. Facebook is now integrated as much as twitter. FaceTime is available on cellular networks. Photo streams can be shared. A new app called Passbook allows you to store tickets for planes, movies, and stores. There’s also a few other things that aren’t worth mentioning.

Mac OS X Mountain Lion didn’t get anything new from what we knew already, except thatdictation will be available in any text field. For many people, this will definitely come in handy.

Some people were unhappy with the absence of an iPhone 5. But I think we should be content with iOS 6, and expect the new iPhone this fall – along with the public release of iOS 6.

I’ve been playing around with iOS 6, and so far it works well. Siri works just as expected, and the Facebook and twitter integration is also very handy.

The MacBooks that were updated are available now, but iOS will be available in fall. Mountain Lion will be available this July.

MacBook Pro

Macbook Air

iOS 6

Mountain Lion

Instagram for Android

Finally. At long, long, long, long, long, long, long last. Instagram has released their official Android Application.

In case you don’t know, Instagram is a photo-sharing platform which incorporates different fun-style effects and third party sharing into the mix. It’s been available for the iPhone since late 2010 and has collected over 30 million users. Yeah. Whow.

There were many speculations of an Android App over the past while, but no confirmed release date.

Now that Instagram has released their Android version, they are well on their way to a giant user base. After all, Android does have more of a market share than the iPhone.

As far as the application goes, it’s the exact same as the iPhone with one important exception: The android application does not have the tilt-shift function, a popular option among Instagrammers. (Tilt-shift is where a selected part of the photo is in focus and the rest is not.)

If you are an android user longing for some instagrammal love, click here to download the free app for android. Enjoy!

Verizon Can’t Get it Right

One of the most anticipated phones if the year is the Galaxy Nexus. It boasts a ton of new features, courtesy of Andoid 4.0.

One of Apple’s strongest points is how they release their phones. They send out an invite to an event, then at the event make a clear availability date. This causes people to get excited for the product and even line up for it.

Verizon took a different approach. They added a release date of Dec. 9 to the stores’ databases, and never made an official announcement. Everyone gets excited for that day, but Verizon has decided to stamp that down as well. Verizon took down the date from the databases and replaced it with “Launch Date Coming Soon.”

I don’t understand what Verizon is going for. Are they trying to get hype? Are they attempting to draw more in with their deadline extension? Or are the marketing people really just that clueless?

Many people have their two year upgrades coming up and would like to upgrade to the Nexus, but with so much waiting and games people are beginning to lose patience with Verizon. It’s not sure whether the phone isn’t actually going to be released on the 9th, and other sources are saying that it could be on the 13th. Who knows?

Verizon either needs to stick to the leaked dates to encourage more hype assurance or just give us a solid, set release date.

KillBackground: Kill All iOS Background Apps at Once

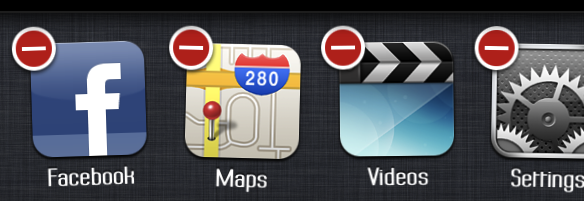
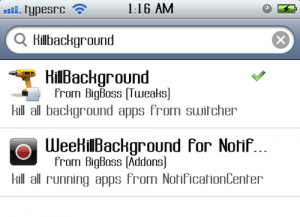
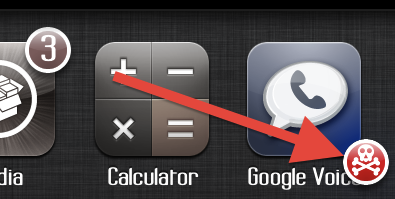
One of the most prized new features of iOS 4 and on was the ability to run many apps at the same time and switch between them easily. One of the little issues with this is that when you close an application, it stays running in the background. Normally this wouldn’t be a problem. But contrary to popular belief, background apps take up a ton of battery life! By the end of the day, you could have every single one of your apps running in the background of your iPhone! Of course you can double-click the home button, tap and hold one of the app icons for a second, then hit the red circle in the top left. Then hit it again for the next app. And again. And again. And again. You’ll have to tap once for every single app that’s open. Done yet? Well, if you happen to be jailbroken, here’s a little tweak from Cydia that will help you. Open Cydia and search for KillBackground. Install the free package by Mathieu Bdard and respring your device. When your phone comes back, you won’t immediately be able to tell that anything is different. But open up a few apps, then double-tap the home button. Tap and hold one of the apps for 1 second, and voilà! You’ll see a little red crossbones icon in the bottom left. One tap and all of your apps are killed! You can also open up your settings app and select KillBackground to configure some different options. Enjoy!

Apple Announces iPhone 4S – Where’s the innovation?

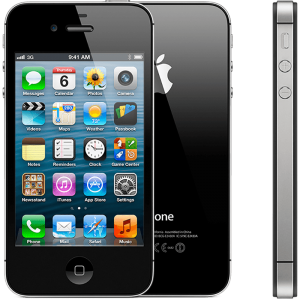
Look familiar?

Today, Apple announced the iPhone 4S. It’s so simple I can say it in a single sentence.

The iPhone 4S features a better camera, A5 processor, Sprint support, another antenna, and a voice assistant. 

That’s it.

The better camera is 8 megapixels which is capable of recording 1080p video, and the other aspect of the new camera is an additional lens and a wider aperture.

The A5 processor is dual-core and can run things quite a bit faster.

Apple decided that the iPhone needs two antennas to make calls – one to transmit and one to receive. After all, one antenna just doesn’t seem to do quite well on other phones…?

Last but not least there’s Siri. Apple bought this company a while back to create a fancy digital assistant, and my have they succeeded. Siri can understand what you say and create reminders, events, schedule meetings, move meetings, reply to text messages, find restaurants, and more with just your voice. I think it looks pretty cool – but there’s one question that I can’t seem to find the answer to: will it be available on the iPhone 4? If they only have it on the 4S it will really just be a letdown. After all, the iPhone 4’s hardware is definitely capable of handling that kind of processing pressure, and I don’t think Apple should use its software as an incentive to get the hardware.

This leads me to my next point – where’s the innovation?

With the last iOS announcement being the iPad 2, this leaves me wondering what Apple is thinking. The iPhone 4 was completely revolutionary compared to it’s predecessor. The iPad was completely revolutionary compared to it’s predecessor as well (there was no predecessor). But with the iPhone 4S and the iPad 2, I feel like Apple is having a hard time thinking of something revolutionary to release.


Apple Board Member Confirms new iPhone in October – That’s plural

Everyone has been waiting for the new iPhone for quite a while now. But at the Discovery Invest Leadership Summit today, Apple board member Al Gore said that the new iPhones come out in a month.

Oddly, this all makes sense. Would Apple really skip their usual Summer update to bring us just a performance bump?

This is what I think – there is going to be a model of iPhone with a performance bump, however there will also be a new iPhone 5 that is a complete do-over. 

The performance bumped iPhone 4 would most likely be called the iPhone 4S, and would sell for cheap – $99-$150 ish. Then, there would be the long-anticipated iPhone 5 for the usual price of $199-$299 with the complete reinvention thing going on.

That’s the interpretive, bright side of this quote.

However, we don’t really know Al Gore’s actual perspective. It’s possible that he could have accidentally added an S to the end of iPhone, and/or it was just amplified by the sound system. It’s also possible that he meant next iPhones as there will be one model of new iPhone, but MANY will be sold.

The one thing that couldn’t have been a mistake is the fact that he said “next month.” That means October – So for those of you who have been waiting months and months for the next iPhone, it will be coming next month – whether it has an extra model or not.

Photojojo Mini Lenses


The iPhone can take some pretty dang good pictures. In fact, many different phones can take mind-blowing shots. But your little phone can do even more if you treat it to these mini-lenses from Photojojo!


Contents/Installation

There are three lenses available from Photojojo: 2X telephoto, 180 Fisheye, and a 0.68x wide/macro lens. I won’t go over individual pricing, but the whole pack is $50.

Installing the lenses is painless. In your package you’ll get a few tiny, metal magnetic rings. Undo the plastic on the adhesive side and stick it around the lens of your device. If you have an iPhone, however, you should probably put the ring on a case; the sleek glass doesn’t play well with their adhesive.

Now to use the lenses, you just attach the lens to the metal ring and it magnetically locks on. Neat!

2x Telephoto

For those times when you want to get closer to your subject, the 2x telephoto lens will do exactly what you’d expect. Unfortunately it will cause a tiny bit of distortion, but not enough to make a big difference.

Without, With

As you can tell by that comparison, the lens does a nice job of zooming in, but has a bit of distortion (visible near the door handle).

Fisheye

This lens I believe is my favorite. It can capture just about everything you can see without turning your head. If you want to really capture an entire scene, this is exactly what you need.

Without, With

Pretty cool, right? Unfortunately, this lens causes a particularly noticeable amount of vignetting, but I think that it adds a nice effect. If you want to get rid of it, you can always crop it with whatever application you desire, however you’ll end up losing a bit of the image.

Wide Angle / Macro

This lens confuses a lot of people. Is it wide angle or is it macro?!

Alone, the magnetic part of the lens is just Macro. However, there’s an adaptor that screws in to the macro lens to convert it to a wide angle lens.

The macro lens doesn’t zoom in at all. It just allows you to focus WAY closer to objects. Here’s a comparison – remember, I took the first picture as close as I could while staying in focus, then I took the second as close as I could while staying in focus. This lens does NOT zoom.

Without, With


Pretty cool, right? You can get ridiculously close to capture textures that previously went unnoticed. On the second picture, I’m holding my iPhone a tiny bit less than an inch away from the keyboard.

The wide angle addition to this lens isn’t very fancy, it just makes the picture a tiny bit wider. It will cause some straight lines to bend in odd ways, but it still comes in handy when wanting to capture wide shots without going crazy with the fisheye.

Without, With

Doesn’t that doorway look kind of round? As you can tell, it makes the picture a bit wider but can’t capture the amount (and distortion) of the wide angle lens.

Cool uses

Yup, these work great with a phone camera. But there’s one use that I recently found – your webcam! It’s a small camera, just about as small as the one in an iPhone. Take a metal ring and stick it around, and you can use these lenses while video chatting! I personally have an LED cinema display, and although it makes my screen look a little funny, the results are totally worth it.

Here’s the display:

Ha! By the way, those things on top of my monitor are dinosaurs; you’ll get one with every photojojo order! I’ve ordered two things from Photojojo, so that’s why I have two dinosaurs.

Here’s what it looks like straight on:
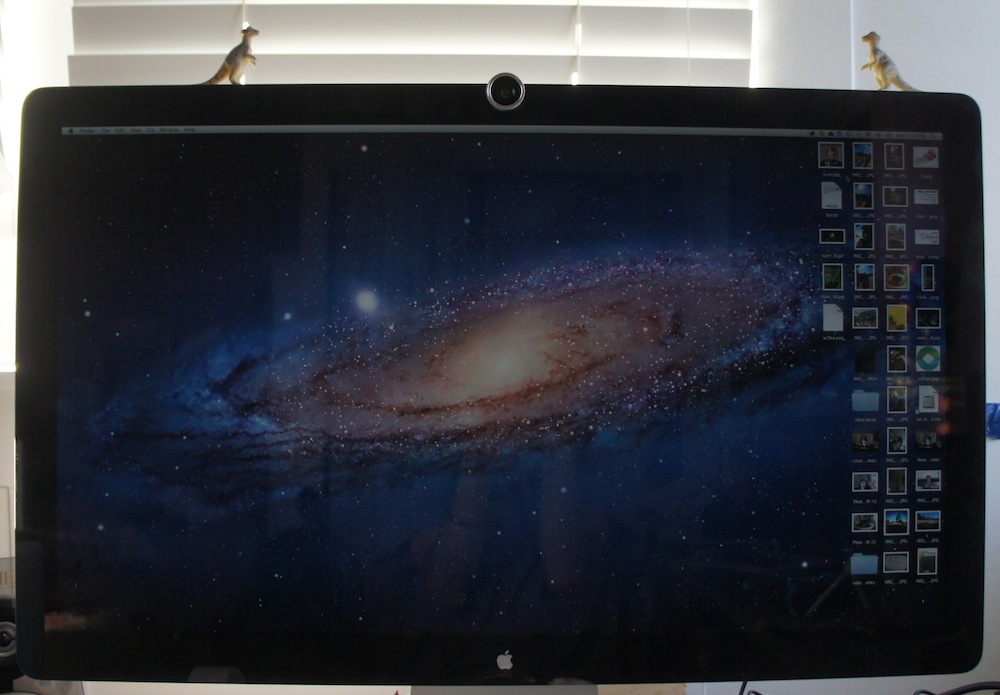
Pretty cool, right?

Here’s the results:

Sweet! You can even see my keyboard!

Conclusion

These lenses are quite handy, and because they work with anything you don’t have to worry about compatibility. The whole set of lenses is $50, and if you’re interested click here to be redirected to the photojojo store!

How-To: Create Instagram Photo Booth Strips in 3 Easy Steps

You’ve been using Instagram, the social network of quirky and cool pictures.

So now you have a profile with all these awesome pictures with comments, and all this other techy stuff.

But sometimes it’s nice to convert all that cool digital stuff into something analog.

And that’s why today, I’m going to show you how to make photo booth reminiscent photo strips.

You will need:

  • An instagram account with pictures
  • Photo paper
  • Photo printer
  • Rotary cutter, paper cutter, or at least scissors
Step 1: Get your photos

The first part of this project is to make strips of all of your photos.

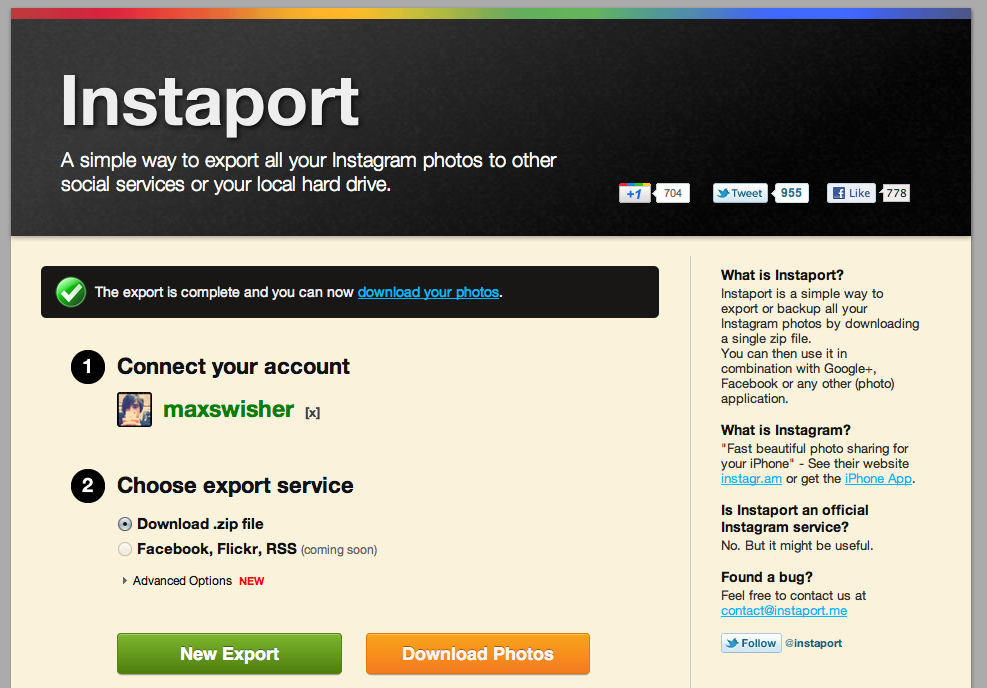
Start out by going to http://instaport.me and downloading all of your pictures to your computer as a zip. Instaport is a simple service that allows you to download all of your instagram photos as JPGs for free.

Once you have a zip saved and you can view your instagram images, you might want to go through deleting the ones that you don’t want to be included in your photo strips.

Step 2: Print your Photos

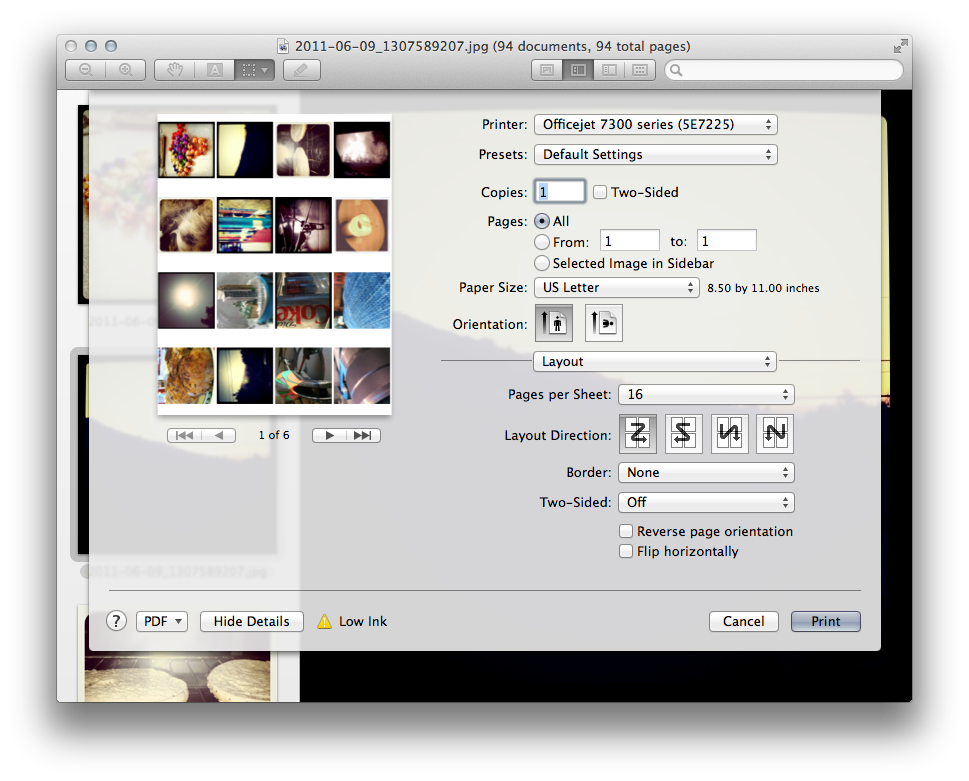
The next step is to open all of them up in preview. Go into the instagram folder (the folder containing all of the JPG images from instaport) and press Command A. This will select all of your instagram photos. Then just double click anywhere in the window and you will eventually get a preview window with all of your images open.

Next, press File>Print and configure the settings to look like so:

If possible, try to print borderless – your printer may or may not support this feature.

Next, hit the big Print button and let the magic happen. In a few minutes, you should have a few pages of instagram photos.

Step 3: Cut your Photos

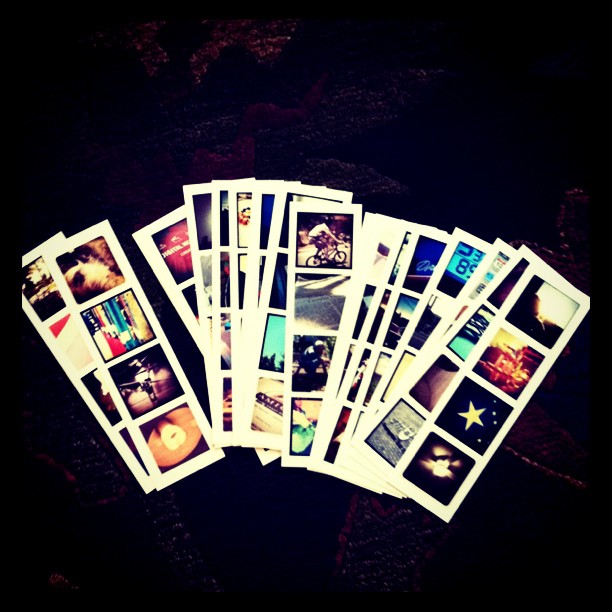
Get out your rotary cutter / paper cutter / scissors and cut them into even strips horizontally (so that you have strips of four). Here I’m using a rotary cutter to to cut the strips evenly and cleanly.

Step 3: You’re done!

Once you’ve done that, you’ll have a ton of cool instagram photo strips.


Step 3.5: Do stuff with them

Well, now you have these cool strips! There’s tons of things you can do with them. Use them as bookmarks, give them to friends, collect them, hang them, use them as business cards, or my favorite: start an instant photo wall!

Also, feel free to follow me in instagram! My username is maxswisher.

Google+ for iOS released, Welcome to Crash Central

Google+ is Google’s stab at facebook that has some great new features that really puts it in the competition (read more here). The Android app was available immediately; the iOS app was supposed to come a few weeks after.

Well, it’s here. Unfortunately, it’s not worth getting.

You are greeted with a front page where you can view your stream, profile, huddles, circles, etc. Everything works until you hit stream; that’s where it crashes. It will give you a spinner saying that it’s loading… then it will keep spinning… and spinning… and spinning… and when you’re sick and tired of it, you just hit the grid to go back to the home screen. But it doesn’t go. So you hit it again. Same result. So you start frantically hitting buttons, but it’s not going to respond. Then, there’s the crash.

For now, this is all you’ll get. Jailbroken or not, iOS 5 or 4. The app is just a crasher.

Integrate Google Voice into Built-in Apps

So, you’ve been using Google Voice for a while now. Everyone is switched to your new number, and everything works fine. But there’s one drawback: to send messages, you need to open the Google Voice app. Unfortunately, that google voice app is kinda buggy. Then, you have to hide the messages app so you don’t accidentally send messages with it instead of Google Voice.

However, if you’ve jailbroken, there’s a plugin that will allow you to integrate Google Voice into the Messages app.

To download it, Open cydia and search for SMS GV Extension. Install the first result.

You’ll get a trial, but it’s a good idea to get a license as a couple of times a day it will remind you asking you to buy a license. Purchase isn’t as simple as it should be, but you can read the detailed purchase method by clicking here.

Aside from the purchase of a license, setup is unfortunately not as simple as it should be.

Open Settings>SMS GV Extension. Here, put in your Google credentials and turn the send box to on.

That was easy.

For receiving, you’ll actually have to have the official app installed and working – so don’t go uninstalling just yet!

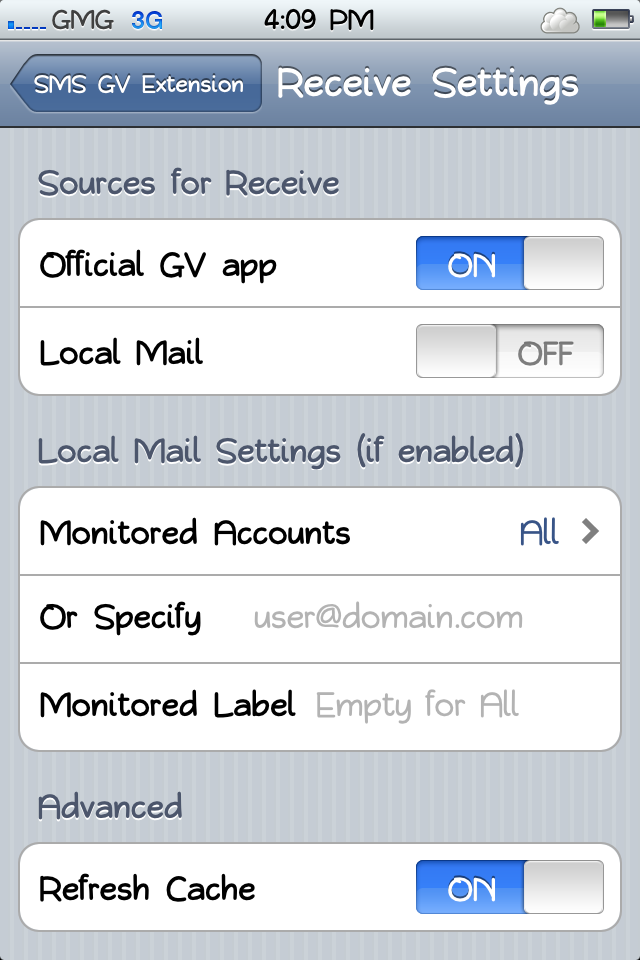
Go into Receive settings and turn on Official GV App.

You should now be able to send and receive texts through the Messages app. Functionality wasn’t too reliable, but after a little while it started working 99% of the time.

Okay, now you have Messages working. But you still want to get rid of the darned Google Voice app!

Instead of moving it to a folder somewhere secret, you can actually use a free app from Cydia to hide it.

The app is called SBsettings. It’s primary use is that you can swipe across the status bar (the bar with the time and battery at the top) and toggle WiFi, 3G, and more. But it can also hide apps.

To download it, just search SBsettings in Cydia and install the first result.

Once that’s installed, swipe across your menubar and click “more.” Here, scroll down and find “Hidden Apps.” Scroll down in the list and turn off Google Voice. You’ll never know it was there!

So now you’ve gotten messages done. But what about phone?

It’s actually much easier to get the phone to work.

Search in Cydia for GV Phone Extension. It’s made by the same creator as the Messages integrator, and it’s also the same registration and price.

Go into Settings>GV Phone Extension and enter your credentials.

That’s all the setup that’s needed!

That’s how to get Google Voice totally integrated into your phone. Your original phone number will still work, but you won’t be able to tell what the difference is between them!

If you have the Verizon iPhone 4, I would usually direct you to my post on easy jailbreaking. However, JailbreakMe.com is back! To jailbreak, just go to jailbreakme.com and you’re set from there. Easy!

The Google voice app is a bit buggy, but you no longer have to suffer. Enjoy! 🙂

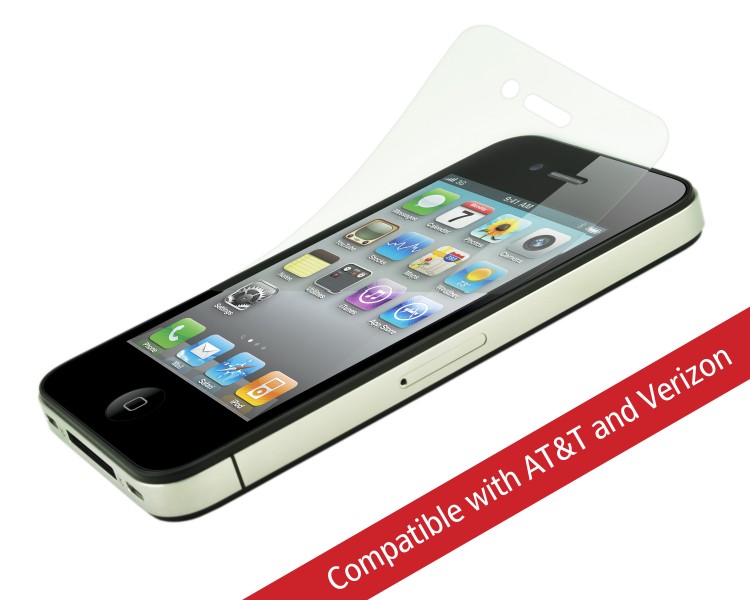
Power Support HD Anti-Glare Screen Protector for iPhone 4

When I first got my iPhone 4, the screen seemed really durable. Through the first couple of weeks I didn’t have a single scratch. I wasn’t worried or careful about it, and that still hasn’t proved a problem.

However I was definitely sick of all the smudges and fingerprints, and how if there was enough fingerprints on the screen it would get difficult to even move my finger across the screen.

I didn’t think I would benefit from any kind of screen protector until I was at a class and tried a friend’s.  The anti-glare cover made it much easier and smoother to run my finger across the screen. It also didn’t attract fingerprints. Cool!

I got one of these for myself, and I’m quite happy with it. As I said, it doesn’t attract fingerprints, and makes it much easier to move my finger across the screen – two things you will benefit from every time you take the phone out of your pocket.

It all sounds good, right?

Well there’s only one drawback: having the screen protector will make your screen the tiniest bit blurry.

No, it’s not terrible – you can still easily read the text, and it doesn’t make much of a difference. But if you are picky about super sharp edges on everything, this may cause a problem to arise.

Sometimes people have a VERY hard time installing the protectors, usually because of lint and air bubbles.

Well, this screen protector has something new: a sticky, clingy sticker thing that you press against the screen and remove, bringing all of the dirt and dust with it.

However, if you’re buying this at an Apple store, you can usually get around all of that. They will install it for you, and they’re pretty good at it, too. They know all of the tips and tricks, and actually installed my screen protector FLAWLESSLY. Yes, there’s not a SINGLE SPECK of dust under that screen protector, and it lines up perfectly.

If you’re looking for a screen protector, this is the way to go. However, if you’re picky about your sharp lines, you should look into a crystal style screen protector, which, in addition to providing sharper edges, attracts more fingerprints.

The Power Support Anti-Glare Film Set (a pack of two) is available online here and at most Apple Retail Stores for only $15.

How-to: Change fonts in iOS

Almost everyone is very used to the default iPhone font – Helvetica. It’s plain, simple, and easy to read.

People are usually just fine with Helvetica – but if you’re jailbroken, it might be a nice unique touch to change your font. And because text shows up EVERYWHERE in iOS, you’ll always get to enjoy your font change.

To change the font(s) on your iPhone, you’ll need an app called BytaFont from Cydia. Just open up Cydia, go to search, and type BytaFont and install it – no additional repos needed ;). If you have a Verizon iPhone 4, click here to read my post about 2 step jailbreaking.

After you’ve downloaded BytaFont, you can tap “Browse Fonts” to get a few options for browsing: Staff picks, most recent, most downloaded, most appreciated, alphabetical, and by category. Unfortunately it’s as hard to navigate as it sounds. The fonts under most appreciated are nearly impossible to read, and looking through a huge list of fonts (where all you see is the title of the font in Helvetica) doesn’t help me determine which font I’m looking for.

There are tons of fonts that are available for you to use (all for free, of course) from BytaFont. Some of them are basic, like Tin Birdhouse. Some of them are complex, like Halo 3 (which I simply just can’t read).

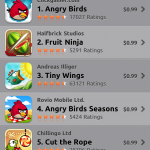
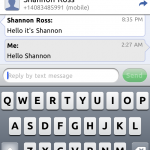
I decided that I liked the Ubuntu font. It’s clear and still easy to read, but it’s still different from boring helvetica. Here’s how it looks in a few situations on iOS.