Otterbox Defender Series for Galaxy Nexus

Over my years of reviewing and testing, no other case company has ever been able to  replicate the protective properties of Otterbox’s cases. When I plan on dropping my phone off of a two story building, they’re the only ones with a case I can trust.

That’s why when I got my Galaxy Nexus, I knew that the case I would be getting would be from otterbox. Here’s my scoop.

Design
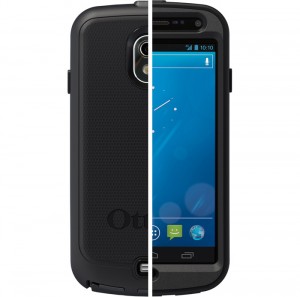
The case consists of two main parts: an outer silicone skin, and an inner hard plastic shell (with a screen protector built in).

The outer silicone skin has a nice grip and absorbs a majority of the initial shock if you happen to drop the device. It has openings for all ports, so you can attach everything you need without having to ever remove the case. This is a nice feature, although it does add more parts and complexity to the overall design of the case.

The Flaw

The inner shell is the hard layer of protection for the device. It has two parts: a bottom and a top section, which snap around the phone. This is where the only problem with the case is.

A "practically indestructible" case?

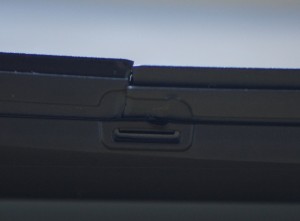
The top section is a frame around the screen (with openings for speakers, cameras, lights, etc.) which also has a screen protecter glued in. This means that you need to clean off the screen protector of the case in addition to your phone’s screen and try to get them together before any other dust settles. The only issue with this is that if any dust settles after you’ve snapped it on, good luck getting it off – without breaking it, that is. After my first attempt at putting it together, I noticed a bunch of dust particles under the protector. So I take the case off, but the tiny snaps on the edges that hold the case together aren’t willing to let go. In the end, I need to pry them apart to even get to my phone. This bent the frame a bit. On my second attempt at taking the case off, I tried to use a key in the tiny slots next to the snaps. I ended up cracking the frame, and it still took a good ten minutes for me to get the case off of the device.

Conclusion

Otterbox was always (and most likely will always be) known for it’s super-protective lines of cases. At $50, the materials are not very well-built and are extremely prone to cracking and bending. Although it may protect your device, the case is oddly fragile for its super-hefty title. I can’t say I don’t recommend this case, as the protection it offers is above-par, but I can’t highly recommend it as it is fragile and the plastic materials are prone to breaking and bending.

If you want to pick one up for yourself, click here to be redirected to the Otterbox page.

P.S. Thank you otterbox for sending me this awesome (but fragile) case!

Photojojo Mini Lenses


The iPhone can take some pretty dang good pictures. In fact, many different phones can take mind-blowing shots. But your little phone can do even more if you treat it to these mini-lenses from Photojojo!


Contents/Installation

There are three lenses available from Photojojo: 2X telephoto, 180 Fisheye, and a 0.68x wide/macro lens. I won’t go over individual pricing, but the whole pack is $50.

Installing the lenses is painless. In your package you’ll get a few tiny, metal magnetic rings. Undo the plastic on the adhesive side and stick it around the lens of your device. If you have an iPhone, however, you should probably put the ring on a case; the sleek glass doesn’t play well with their adhesive.

Now to use the lenses, you just attach the lens to the metal ring and it magnetically locks on. Neat!

2x Telephoto

For those times when you want to get closer to your subject, the 2x telephoto lens will do exactly what you’d expect. Unfortunately it will cause a tiny bit of distortion, but not enough to make a big difference.

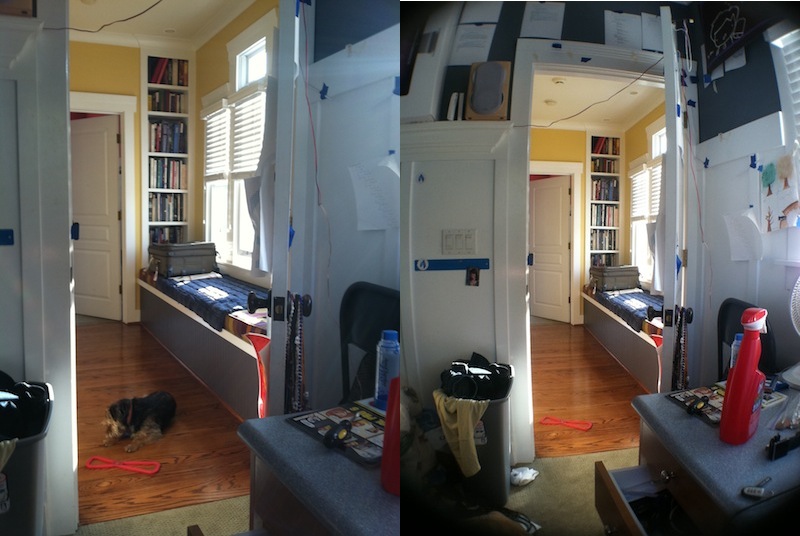
Without, With

As you can tell by that comparison, the lens does a nice job of zooming in, but has a bit of distortion (visible near the door handle).

Fisheye

This lens I believe is my favorite. It can capture just about everything you can see without turning your head. If you want to really capture an entire scene, this is exactly what you need.

Without, With

Pretty cool, right? Unfortunately, this lens causes a particularly noticeable amount of vignetting, but I think that it adds a nice effect. If you want to get rid of it, you can always crop it with whatever application you desire, however you’ll end up losing a bit of the image.

Wide Angle / Macro

This lens confuses a lot of people. Is it wide angle or is it macro?!

Alone, the magnetic part of the lens is just Macro. However, there’s an adaptor that screws in to the macro lens to convert it to a wide angle lens.

The macro lens doesn’t zoom in at all. It just allows you to focus WAY closer to objects. Here’s a comparison – remember, I took the first picture as close as I could while staying in focus, then I took the second as close as I could while staying in focus. This lens does NOT zoom.

Without, With


Pretty cool, right? You can get ridiculously close to capture textures that previously went unnoticed. On the second picture, I’m holding my iPhone a tiny bit less than an inch away from the keyboard.

The wide angle addition to this lens isn’t very fancy, it just makes the picture a tiny bit wider. It will cause some straight lines to bend in odd ways, but it still comes in handy when wanting to capture wide shots without going crazy with the fisheye.

Without, With

Doesn’t that doorway look kind of round? As you can tell, it makes the picture a bit wider but can’t capture the amount (and distortion) of the wide angle lens.

Cool uses

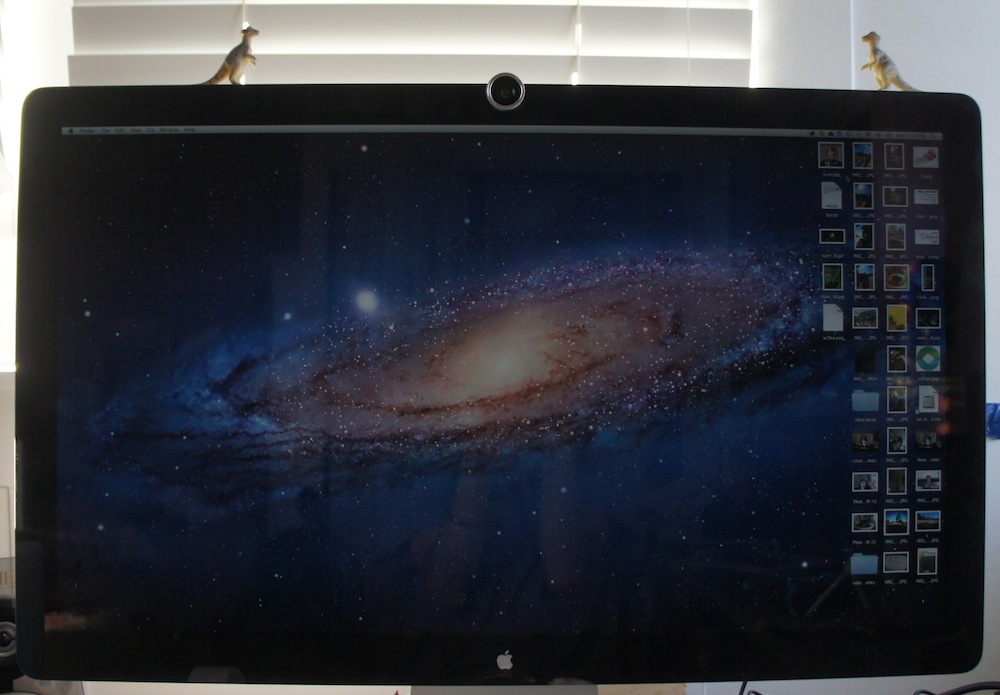
Yup, these work great with a phone camera. But there’s one use that I recently found – your webcam! It’s a small camera, just about as small as the one in an iPhone. Take a metal ring and stick it around, and you can use these lenses while video chatting! I personally have an LED cinema display, and although it makes my screen look a little funny, the results are totally worth it.

Here’s the display:

Ha! By the way, those things on top of my monitor are dinosaurs; you’ll get one with every photojojo order! I’ve ordered two things from Photojojo, so that’s why I have two dinosaurs.

Here’s what it looks like straight on:

Pretty cool, right?

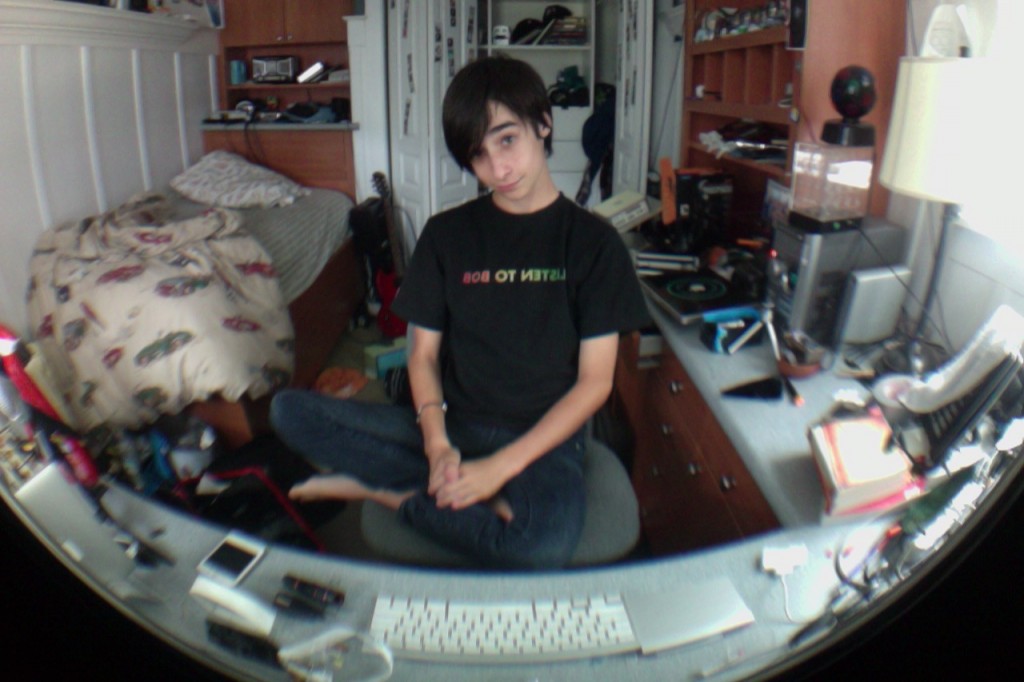
Here’s the results:

Sweet! You can even see my keyboard!

Conclusion

These lenses are quite handy, and because they work with anything you don’t have to worry about compatibility. The whole set of lenses is $50, and if you’re interested click here to be redirected to the photojojo store!

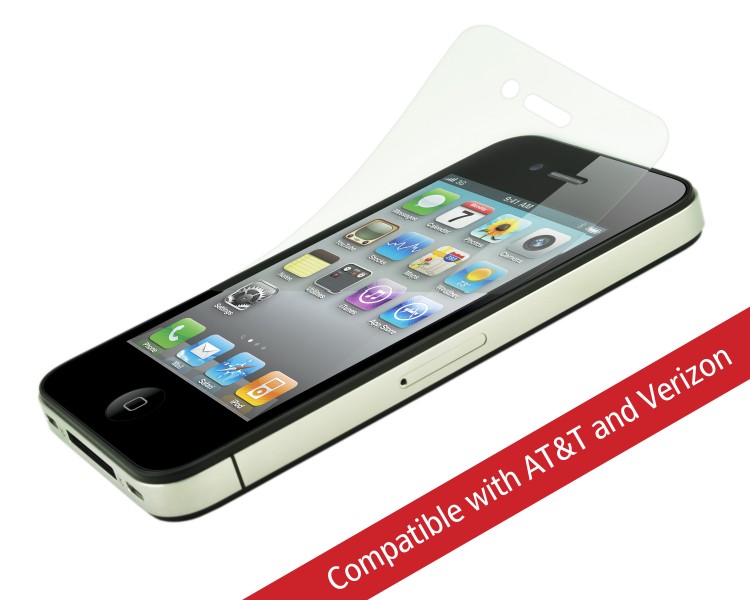
Power Support HD Anti-Glare Screen Protector for iPhone 4

When I first got my iPhone 4, the screen seemed really durable. Through the first couple of weeks I didn’t have a single scratch. I wasn’t worried or careful about it, and that still hasn’t proved a problem.

However I was definitely sick of all the smudges and fingerprints, and how if there was enough fingerprints on the screen it would get difficult to even move my finger across the screen.

I didn’t think I would benefit from any kind of screen protector until I was at a class and tried a friend’s.  The anti-glare cover made it much easier and smoother to run my finger across the screen. It also didn’t attract fingerprints. Cool!

I got one of these for myself, and I’m quite happy with it. As I said, it doesn’t attract fingerprints, and makes it much easier to move my finger across the screen – two things you will benefit from every time you take the phone out of your pocket.

It all sounds good, right?

Well there’s only one drawback: having the screen protector will make your screen the tiniest bit blurry.

No, it’s not terrible – you can still easily read the text, and it doesn’t make much of a difference. But if you are picky about super sharp edges on everything, this may cause a problem to arise.

Sometimes people have a VERY hard time installing the protectors, usually because of lint and air bubbles.

Well, this screen protector has something new: a sticky, clingy sticker thing that you press against the screen and remove, bringing all of the dirt and dust with it.

However, if you’re buying this at an Apple store, you can usually get around all of that. They will install it for you, and they’re pretty good at it, too. They know all of the tips and tricks, and actually installed my screen protector FLAWLESSLY. Yes, there’s not a SINGLE SPECK of dust under that screen protector, and it lines up perfectly.

If you’re looking for a screen protector, this is the way to go. However, if you’re picky about your sharp lines, you should look into a crystal style screen protector, which, in addition to providing sharper edges, attracts more fingerprints.

The Power Support Anti-Glare Film Set (a pack of two) is available online here and at most Apple Retail Stores for only $15.

Finally, a good use for an iPod Nano!


You may remember that I wrote this post hating on the new iPod nano because of it’s size and the idiotic idea of a clip. Also, the size of it! You’d lose it in an instant!

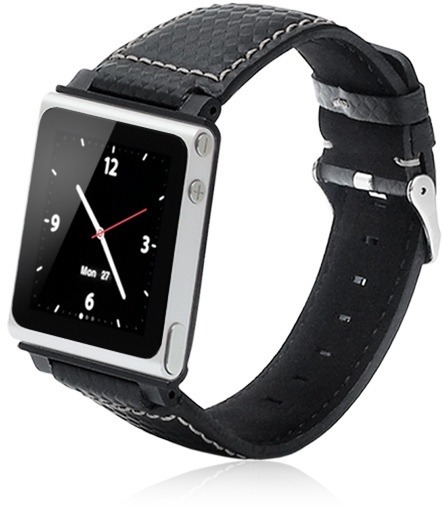
Well, I’m changing my views on this. And it’s all thanks to one accessory called the iWatchz.

Basically, this turns the iPod Nano into a wristband. I thought that sounded stupid, until I tried it. I realized that as a wristband, the iPod nano opens up to a whole other world of possibility. The Nano can act as a stylish watch, which will surely show off your geekyness. But in addition, to have your wristwatch actually be a music player, photo viewer, and FM radio can all come in handy. You don’t have to worry about bringing your iPod with you – you already have all of your music on your wrist. Ha!

Having a wristwatch is something you’re probably already used to. So being able to have all of the iPod features with you EVERYWHERE without having to remember it or lose it? Handy!

The reason I really didn’t like the nano was because they asked you to clip it on to your shirt and proudly display what you’re listening to. You could lose it, it could fall off, and you’d probably forget about it fairly frequently.

Having it as a wristband solves all of the above problems, and allows you to be sure about where your iPod is and not worry about it falling off or losing it.

You can get the iWatchz here, and you can get yourself an iPod nano here. Together, it’ll cost ya about $200. In my opinion, it’s quite a genius combination.

HTC Droid Incredible – RED COVER!

I was recently stalking around the HTC Incredible site, and I came across a page where you can order HTC-made battery covers – in different colors! You can order a red cover or a white cover.

From the images, I expected the surface to be like the stock cover – that soft platsticy rubber. However, the cover is actually glossy! It feels nice in the hand, and I like it a lot. It also makes the phone look quite awesome, as the volume buttons, USB port, and power switch are all still black. It gives the phone a very cool multi-colored look – and imagine the look on your friend’s face when one day you have a white phone, the next day a red one!

This is a great way to customize your phone, as you can change the color of it without breaking anything or adding a bulky case.

You can order either color for $16.99, which is EXTREMELY expensive for a little piece of plastic. It probably cost less than a cent to make that cover, so that’s QUITE the nice margin you got there, HTC! $16.98 in profit. Wow. That’s 99.95%!

Aside from the high price, there’s no shipping, which should make you feel a little better. You can order one for yourself here. Enjoy!

Otterbox Reflex Series for iPhone

Otterbox is well known for their amazingly stylish yet rugged cases. The Reflex series is a new case from otterbox, and it boasts a whole new design.

Here’s how cases work: When there is a shock in one part of the case, it is absorbed by the rest of the case, usually by a form of flexibility that causes shock absorption. This is sometimes accomplished by rubber, the flexing of plastic, or other various materials.

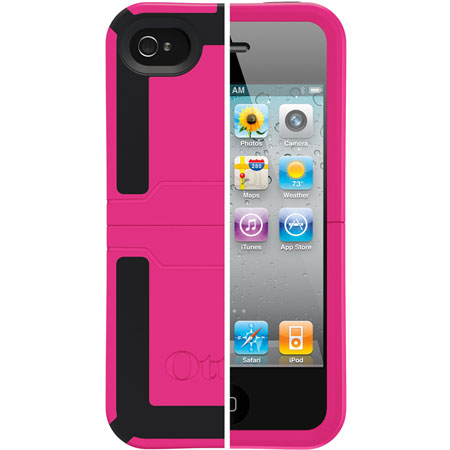
What the Reflex series does is brings a hard plastic shell, but in places of the shell there is flexible rubber that crumples and flexes to absorb the shock. This design was inspired by the crumple zone of a car, and from the result of shock on the case it works very well.

The other feature that Otterbox is known for is style. The Reflex Series comes in a variety of colors, all of which have nice, even, black rubber highlights where the crumple zone is. Instead of hiding the crumple zone, otterbox has used it to enhance the style of the case. Genius!

A new feature of the case would be that the bottom half slides off for docking access. In the past, you had to completely remove the otterbox cases to accomplish this, but thanks to the innovation in this version full case removal is no longer necessary.

The Reflex Series is available only for the iPhone at the moment, but in the future will be available for the BlackBerry Curve and iPod Touch (4th Generation). You can purchase it by clicking here for about $45.

[Thanks to Otterbox for sending this to me for review! You guys make awesome cases! :D]

Otterbox Commuter Series for Droid Incredible

While the Defender series takes care of the extremely rugged duties for a variety of phones, the commuter takes a more stylish approach and still provides quite the nice amount of protection.

The Commuter Series case for the incredible seems a bit like an inverted defender series case. It has an inner shock absorbing silicone skin and an outer hard shell to protect from initial shock. It has a nice brushed texture with an embossed Otterbox logo at the bottom. It adds a tad bit of bulk to the phone itself but you get used to it after a while.

And this case really works. Giving otterbox even more credit for well-made cases, this is the case that you can trust for the usual, well, commuter.

I must admit, however, that I have had (and used) this case for quite a while now. And I’m giving it such a good review out of experience.

I take pride in having a thick(er) phone.

“I didn’t think that droids were so thick!”

“They’re not. I have a case on it. “

I drop the phone from 3 feet up and I don’t even cringe.

“See?”

Another good example of having a phone would be a new invention in modern sports called droid soccer. This is where you kick the phone around and use it as a soccer ball (but it ends up sliding a bit more like a hockey puck). You can use either sides of a room or yard as a goal. And with otterbox protection, there’s nothing to worry about. They talk about having Sports apps as wherever-you-go fun, but phone soccer redefines that.

Many people accuse me of only having the case so I can drop it all the time and play soccer with it. And although I must admit that it’s fun, there’s always the times when it’s an accident and you drop your phone. One example would be when I was walking downtown with my friend Emma and I was talking on the phone with someone we were going to meet up with. She says to hand the phone to emma, and I do, but somehow at one point neither of us were holding the phone. The phone falls to the ground with a prominent click. Whoops! Good thing I have that case on there or that phone would be toast.

I picked up the phone and handed it to her.

“Here ya go. “

“Thanks.”

If I didn’t have a case, my phone would be cracked, my battery 4 feet away, and thoughts about my current warrantee. Thanks to this case, none of that even came to mind.

The Otterbox Commuter Series for Droid Incredible sells for $35, which is the price of the average case, with abnormal protection. Click here to order one for yourself.

Also, I wanted to thank Otterbox for sending me this case for keeps. Wonderful case, and plenty of “wherever-you-go” fun. 🙂

Otterbox Defender Case for iPhone

Otterbox is known for their high quality cases. They have many series of cases, each with their own level of protection, and here I have the series that boasts highest level of ruggedness, the Defender Series (for iPhone).

This case takes heavy duty to a new level. It features multiple layers of protection, starting with a silicone layer the outside, a hard shell inside, then in that soft felt against the phone itself.

In addition to the shock protection, it has rubber plugs to keep dust out of the ports, and has plastic protection over the screen, camera(s), and apple logo in the back (a stylish touch I guess).

Unlike other cases, the plastic protection over the screen isn’t adhesive. The screen protector is actually part of the case. This is definitely very cool (so if you don’t want the case on it then the screen protector comes off too), but there is a downside. If you have scratched up the screen cover and want a new one, then you have to get a new/different case.

Also, if you get dirt on any of the camera protectors, then you can see a bit of a haze over the camera. Yes, this can be solved by simply wiping off the cover, but this is bittersweet. The camera itself ends up being more protected against dirt and scratches, but when you get the cover dirty/scratched you can see the results in your pictures/video.

So who is this case for? I’d think that this case would be for the people who really handle their device harshly. If you’re a construction worker and drop this off a roof, then whoops! The phone should be fine. This is great if construction workers want to have a fancy expensive smartphone but don’t want to replace it all the time because it’s broken.

This is also good for those clutzes who tend to drop their phone all the time. If you don’t drop your phone that much at all, then you might want to go with the commuter series, which still offers good protection but has a little bit more style. But this case seems to be up for some of the worst conditions someone could throw at it.

But I have a droid! Or a Nokia! and I don’t like black! I want pink! No I want blue! No red!

Calm down internetgoer, there’s hope. Otterbox sells this case for a large range of models in many different colors.

The case sells online for $50, which seems a bit excessive but you’re getting protection that’s worth the price.

Otterbox Defender Homepage

Defender for iPhone

Incase Neoprene Slip Sleeve Plus for iPad

Looks just like the one for my laptop!

Yes, Apple did come out with a cool case for the iPad. It’s good for day to day use because you can use it without it being bare naked and exposed to the elements of dust and air. But it’s thin rubber construction will not help when you drop it. Also, when you put the iPad in the case it eels like the rubber is about to rip. Overall, it just seems like  crappy construction. It’s thin rubber and it’s NOT worth the $40.

So I returned one of the Apple cases and got the Incase Neoprene Slip sleeve Plus. Now that I think of it, it might have been better not to get the slip sleeve and instead have gotten the zippered one.

Like the Neoprene sleeve for my MacBook, it has a faux interior and side protection, but unlike the sleeve for my Macbook the Slip Sleeve has an opening close to the top where you can slip the iPad in, but then you have to pull the top part over the edge of the iPad which can become quite difficult. Here is a picture of the opening:

Put the iPad in where the slit is and then pull the top part over the edge.

The Neoprene is like a shock-absorbing gel, and I’m confident dropping it onto the ground from abut 6 inches. Past that, it’s not recommended. And just incase (pun intended) you drop it on it’s most vulnerable area (the sides), it has that extra protection.

I must say that this case covers the whole thing up. I still can’t figure out whether to put it in with the screen towards the front or back. Hmm…

Also, this sleeve is TSA airport security safe. HOWEVER, the iPad is not required to be removed from your bag at security because of it’s thin profile. I guess it is now posed as more of a traveler, now isn’t it?

When you are traveling, this is definitely what you might want to put your precious iPad in. Luckily, the back is NOT Chrome, it’s Aluminum so it’s much less vulnerable to scratches and fingerprints. Only problem is trying to get the thing into the case, but try to do it gently and you’ll be fine.

The Incase Neoprene Slip Sleeve Plus is sold for $39.95, and is available at your local Apple Retail Store. Click HERE to visit the Homepage. It is available in Silver and Black (I got black to match my laptop sleeve).

Incase Neoprene Sleeve Plus

Do you have a laptop? Chances are you do. And because you are reading this, chances are, it’s a Mac. Probably a MacBook or MacBook Pro. And I’m guessing you travel with it (after all, it’s a laptop). Instead of just throwing it into your suitcase, protect it. And now with just any case, protect it with a custom-fitted incase neoprene sleeve.

These cases don’t fit with any laptop. They are custom-fitted for particular computers. The 13-inch version works with the new 13″ MacBook and MacBook Pro. If you have a 13″ MacBook (late 2008, aluminum unibody) it works as well (that’s what I have).

The computer snugly fits it, so it doesn’t bump around in the sleeve. It is lined with a faux-fur interior, which will not scratch that precious laptop in a million years (as long as you don’t get sand in it for some reason). It even has a cool protective border around the edges, so in case something bumps in to it your MacBook will be just fine.
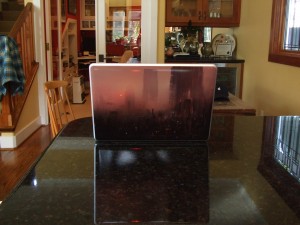
And last but DEFINITELY not last, you are rushing through airport security. Avoid everybody in the line behind you yelling at you for taking too much time, because this sleeve is airport safe. Just slip the whole thing out of your backpack and safely through security it goes. Another benefit of this is you don’t have to expose your MacBook to where all sorts of things go (in the bins, I mean). If there is sand in one of those bins and you put your precious but bare MacBNook in there, SCRRRRRATCH! Not good, and that will NOT put a smile on my face. Also, if any of you consult support from me (feel free to by emailing support@goodmorninggeek.com), I highly recommend use thus case. It is available in multiple colors and also for 15″ MaxBook Pro, among many other diferent computers.

Let me warn you, it’s $40 (er, $39.95), but definitely worth it. Get yours below!

13″ MacBook and MacBook Pro

15″ MacBook Pro

17″ MacBook Pro

MacBook Air

Review: GelaSkins for Laptops

As you may know, I recently attended the Macworld Expo, which I sadly thought was a bit of a letdown [link].

But I did get something cool, and that would be a Gelaskin. Thanks to Macworld, I was able to get mine at HALF PRICE!’

I got the Gelaskin with a piece of artwork called Cohabitations by Philip Straub, and here’s what it looks like on my Mac:

Stylish!

One of the great things about this thing is that the surface is scratch resistant. Yay!

There are so many great aspects of this, and because of my 100GB of hosting space at mediatemple, I’ll happily list all of them.

The adhesive is sticky, but not gooey, which gives easy removal. Yay!

It’s not bulky at all, its very thin. Yet it is quite durable!

As you may tell by that picture up there, there is a border of aluminum around it (actually it’s the lid of my MacBook which the skin dosn’t [and isn’t supposed to!] cover up). This makes it so it’s easier to put on, it shows of the “still-aluminum-ness” of my MacBook, and it doesn’t have to be aligned completely perfectly. This also makes it less prone to waring at the edges.

I must say, this is a great way to get “protection with style, not bulk” for your iPod, phone, laptop, and so on. GelaSkins makes custom cuts for a large array of devices. You can even make your own Gelaskin using your own image and text. Cool!

Gelaskins range from $15-$30, depending on your device.

Get your own at gelaskins.com!