Instagram Announces Web Profiles

Instagram, the mobile photo sharing network that was recently bought by facebook for a large sum, has now announced a web-based interface.

In the past, to view someone’s instagram profile, you needed a mobile device with the Instagram app installed. There were many online profile alternatives that were based off of Instagram’s API, but none of them were worth writing home about.

With this update, you’ll be able to find a facebook-like profile of someone’s instagram account by simply visiting instagram.com/username.

Source: Instagram

Even more importantly, Web Profiles also brings instagram to the web. It will now be possible to like and comment on photos as well as follow other users with the new web interface, and will eliminate the mobile-exclusivity aspect.

Just like the web profile, this has been done in the past with the Instagram API – in fact, quite well in one case. However, the Instagram-made site is bound to be impressive and a nice addition to the Instagram portfolio.

One thing worth mentioning is that the updated site will still not support photo uploads from a computer as “Instagram is focused on the production of photos from mobile devices” (Press Release). I don’t believe that the functionality will ever exist for this reason, however there are ways to upload a photo not taken with a mobile device to Instagram (such as dropbox).

All of these features will be rolled out to different accounts over the course of the next week.

My account has not gotten the update yet, but feel free to check by going to http://instagram.com/maxswisher.

Also, follow me on instagram! @maxswisher


Apple’s Announcement in 330 Words

Today, Apple announced things. Here’s a basic outline:

  • 13″ Retina MacBook Pro
  • Mac Mini Upgrade
  • New iMacs
  • 4th Generation iPad
  • iPad Mini

13″ Retina MacBook Pro

Apple took their best-selling notebook and took out the optical drive and made it thinner and lighter. It has flash memory and a processor upgrade and will start at $1699.


Mac Mini

Apple added some ports (HDMI, Thunderbolts, USB3) and an option to have flash storage. Upgraded i5 or i7 Ivy Bridge Processors, and it will start at $599.

iMac

The new iMac has a nicer (though non-retina) display and they removed the optical drivemaking it only 5mm thick at the edges. It still has an SD card reader in the back though, and has i5 or i7 Ivy Bridge processors. They added USB3 and more thunderbolt ports. Apple also showed us their “Apple Fusion” Drive, which is basically a RAID of a 128GB SSD and a 1-2TB HDD which intelligently moves around files depending on use, meaning you get a lot of storage capacity for things you don’t use much and a bit of high performance storage for things used quite often. This drive is also available in the Mac Mini. The iMac will start at $1299.

iPad

Apple took their current iPad and upgraded the chip to an A6X and made the front camera “FaceTime HD” (720p resolution). They also added more LTE carriers and a lightning port. The new iPad will have the same pricing as the old one (starting at $499).

iPad Mini

A new Apple invention that is as thin as a pencil, as light as a pad of paper, has a 7.9″ screen, and the same screen resolution as a non-retina iPad. This means that all apps will run on it (although they will be non-retina). It also has a lightning connector, front (720p) and back (5MP) cameras, a battery life of 10 hours, and will start at $329 – which is a bit pricey to compete with a Nexus 7 which you can get for $199.

Koush Brings us Root Free Tethering

Koush, you have improved the lives of android users once again.

In case you don’t know, Koush is the creator of ClockworkMod, the custom recovery that is used by rooters worldwide.

Koush has now brought us a root free USB tethering solution, for all of you who are either having problems with rooting (like if you have a rooted Galaxy Nexus and you updated to 4.0.4 OTA and your root is gone and no matter what you do you can’t get it back, *cough* *cough*) or if you don’t want to root your phone out of fear of destroying it.

It’s an extremely simple application. On your phone, you download the app for free from the android market Google Play. The free app is a 14 day trial, but you can buy the full version as an in-app purchase for $4.99 (worth it!).

Once you’ve downloaded the app on your phone, you just need to get the drivers for your computer. Now, you’re probably going to be downloading this app because at the time you don’t have internet, and Koush has thought of that as well. In the android app, you can download the app files onto your phone then transfer them onto your computer for installation. Genius!

The small connection application is available for Mac, Windows, and even Linux. Ubuntu users rejoice!

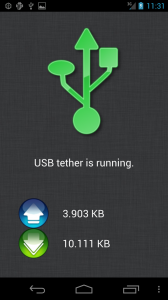
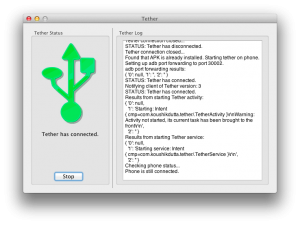
Once you’ve installed the driver, you’re ready to go. Tap the USB icon on your phone, click start on your computer, and in a few seconds, your computer will be connected to the internet through your phone’s network. Easy as that!

If this comes in handy for you, I highly recommend that you buy the app. Koush has created some amazing things for android, and without him flashing ROMs would be nearly impossible.

Thank you Koush for all of your contributions to Android!

Click here to download the app for Android.

How-to: Change fonts in iOS

Almost everyone is very used to the default iPhone font – Helvetica. It’s plain, simple, and easy to read.

People are usually just fine with Helvetica – but if you’re jailbroken, it might be a nice unique touch to change your font. And because text shows up EVERYWHERE in iOS, you’ll always get to enjoy your font change.

To change the font(s) on your iPhone, you’ll need an app called BytaFont from Cydia. Just open up Cydia, go to search, and type BytaFont and install it – no additional repos needed ;). If you have a Verizon iPhone 4, click here to read my post about 2 step jailbreaking.

After you’ve downloaded BytaFont, you can tap “Browse Fonts” to get a few options for browsing: Staff picks, most recent, most downloaded, most appreciated, alphabetical, and by category. Unfortunately it’s as hard to navigate as it sounds. The fonts under most appreciated are nearly impossible to read, and looking through a huge list of fonts (where all you see is the title of the font in Helvetica) doesn’t help me determine which font I’m looking for.

There are tons of fonts that are available for you to use (all for free, of course) from BytaFont. Some of them are basic, like Tin Birdhouse. Some of them are complex, like Halo 3 (which I simply just can’t read).

I decided that I liked the Ubuntu font. It’s clear and still easy to read, but it’s still different from boring helvetica. Here’s how it looks in a few situations on iOS.

INSTALLING ROMS ON YOUR DROID INCREDIBLE: FULL GUIDE

1. Background check and root

If you haven’t yet, click here to read the guide on rooting your droid incredible.

2. Find some ROMs

The first thing you need to install a ROM would be the ROM itself (go figure).

If you have a droid incredible, I highly recommend downloading the fusion ROM from this post. Fusion is an extremely well-done and compatible ROM based off of CyanogenMod7 (another ROM), so you’ll get the dimension-opening power of 2.3.2 gingerbread.

If you don’t want this ROM, you can always do a google search. Not too hard, eh?

2. Download the ROMs

With the example I’m using (fusion), there are two ROMs. It includes first the base gingerbread ROM, but on top of that it also has a ROM for the Android Market, Gmail, YouTube, and Maps applications, as they do not come by default on the Android base operating system.

For now, I am only going to discuss installing the base, but for other ROMs it is sometimes the same situation with the two seperate ROMs. So later on I’ll discuss installing the gapps (dev talk for Google Apps).

There are two ways you can get the ROM to your device.

The first one involves your computer. Download the ZIP file(s) onto your desktop, then plug in your phone and move the zip(s) onto the root of your SD card.

The second way requires an app called Root Explorer (I discussed it in the guide to rooting). On the phone itself, use the web browser to download the ZIP file(s). Then, open up root explorer and navigate to the downloads folder (probably on your sdcard). Then, tap and hold the zip and select move. Navigate to the root of the sd card and tap paste. (Do this with the second ROM if you have one).

3. BACK UP!

This is an extremely important step to this, because if you forget to backup then you will never be able to restore your phone to the condition it was in when you rooted. That means that the HTC sense operating system that came on your phone will be GONE.

So, you’ll need to boot into recovery and backup.

Turn off your phone and turn it back on while holding the down volume button. It will boot into HBOOT, a diagnostics screen. Once it is done checking for update images on the SDcard, use the volume and power buttons to navigate to and select RECOVERY in the menu that you see.

It will show the HTC booting screen, but then boot into recovery (with very small fonts, I might add).

In this screen, scroll down and select backups (you can now use the optical trackball to do this). Then, select create a backup (or something like that).

It might take a while, but eventually a backup should be made of all of your stuff on your phone. So we shall now proceed to the next step.

Install the ROMS

Now is the fun part.

Boot back into the recovery screen by holding the down key and the power button at the same time.

Then, hit Wipe Data/Factory Reset.

This will wipe all of the data off of the phone.

WAIT WAIT WAIT! I STILL WANT MY BACKUPS!

Calm your caps lock keys, wiping the data from the phone doesn’t wipe out the sd card, which is where the backups are.

Now, select install zip from SD card.

Select choose zip from SD card

then, select the zip that you either downloaded or transferred over.

Then, select the yes, and magically, the ROM will install.

Wait a while, and it should be installed and working!

Upon first boot it will take a very long time to load. It has to configure everything and get it working. But every time you reboot the device the reboot time should be less and less until it is less than 30 seconds.

Anything else?

You might have downloaded 2 zip files to your SD card which you downloaded from the site that gives out the ROMs. This is probably because one of them is a Google Apps zip.

Make sure that before you move the two zips on to the sd card, you name them so you can tell which one is the base OS and which is the Gapps. (if you have no idea what I’m talking about, you need to click here and read up on your background info.) Make sure that first you install the Base OS zip, then, after it’s done, select Install zip from sdcard once again and select the gapps zip. Make sure that you don’t hit wipe data/factory reset, because what that will do is wipe out the base OS so you only have gapps and nothing to run it on. Not too functional if I may say so myself.

Where to find these ROMs?

As I said, the best ROM for the Droid Incredible at the moment is the Fusion ROM.

But there’s other ROMS too.

One of the most popular is CyanogenMod. They’ve been releasing ROMs with upgraded features since the dawn of time (or android).

However, after a little mixup with google, they are no longer allowed to have Gapps on their OS. So you’ll have an android phone with…. no android market. Or gmail. Or youtube. Have fun!

One of the easiest ways to find ROMS for your droid incredible is to just google it.

If you google Droid Incredible ROMs, a large amount of different websites will show up. If you are too lazy, here’s a direct link to that google search for ya. You’re welcome.

Better alternative to OMGB-6! HELLO FUSION!

OMGB-6 is great. It’s a simple, well made Gingerbread build for the droid incredible that worked really well.

But it had a couple problems.

First of all, it didn’t support google voice.

Also, many apps didn’t work. Twitter didn’t work, and the app I am doing testing for didn’t even work. Also, the version of the market was outdated.

Well, if you want a fuller and better and more supported phone, then say hello to the fusion rom.

Fusion is built on CM7, and has a base of 2.3.2. This gingerbread is tasting FRESH.

It boasts a newer version of the android market, FULL app support, and it also supports google voice.

If you don’t know how to install ROMS, then you have a bit of reading to do.

First, click here to learn what all of this means and do your background reading.

Then, do steps 1-4 on this page.

Downloads

BASE

GAPPS

Installation

Put both of those on your SD Card.

Then, reboot into recovery and BACK IT UP. BACK IT UP. BACK IT UP… STEADY….. BACK IT UP…. STOP! Don’t do this with ROM manager. Why, I don’t know. But apparently bad things happen and black wholes open into other dimensions when you use the ROM manager to install this. O.o

Once you’ve backed up hit Wipe data/factory reset in the recovery.

Done?

Ok.

Now, hit “install zip from sd card”, select “choose zip from sd card”.

And in the list that appears, select fusionbase.zip.

Then hit yes out of the large groups of nos.

(tic toc tic toc)

Done yet?

No?

Ok…

(tictoctictoctictoc)

Done now?

Good.

Now, go through the same screens, but when you select the zip select the gapps zip and install it.

While that’s installing, I’ll explain why there are two separate zips for this ROM.

Android is a base operating system. It doesn’t include the android market. It doesn’t include gmail. It just includes the base operating system.

So the base zip is the 2.3.2 base operating system without the android market or gmail or anything like that.

So you could just install the base and nothing else. But I don’t think you would be too happy when you can’t download any apps.

Done yet?

Ok good.

Now, select “Wipe cache partition.”

Done?

That didn’t take long.

Now, hit reboot, and wait a LONG time. It will probably be 5 minutes or so of the flashing android logo before it actually boots.

But once it does, you’re in business! Enjoy the new market, full app support, and using your Google Voice account, all without sacrificing the magnificent dimension-opening speed (and bragging rights) of Gingerbread 2.3.2.

Rooting, Recovery, and ROMs: What it’s all about.


So you’ve got an android phone.

And you can use the stock operating system with all of the manufacturer’s skinning and apps and versions and keyboard and everything.

Congratulations.

But if you are feeling a bit ballsy, then you can really take your phone to a true mobile computing level.

Here’s the steps to this.

  • Root
  • Install a recovery
  • Find ROMS
  • Make backups
  • Install ROMS
  • Use Wireless Tether

Lets explain what all of this is.

Rooting

Rooting means that you can create a way for apps to get superuser access. This is handy for getting to wifi, modifying files, or installing ROMs.

Recovery

For the Recovery, that will usually be installed when you root the phone. The recovery is where you can make and recover backups of the phone, install ROMs, and a slew of other stuff that might come in handy (but could also kill your phone).

Backup

Once you have the recovery installed (you can’t have the recovery without the root FYI) then the first thing you need to do is make a backup of your phone.

This is pretty easy. Just boot into Recovery (just hold down volume on boot and select recovery when given the option), Select backups, and select make a backup now. Your screen will flash many random things, and no matter how long it takes, don’t force shut it down or take out the battery. It will almost always finish.

ROMs

Once you have a backup of your normal operating system, you can go crazy with other ROMs.

ROM stands for Read Only Memory. In android poweruser terms, it is an operating system that can be installed on the phone using the recovery mode.

You can find many roms on the internet all over the place. XDA-developers is a great place to get ROMs. Sometimes a ROM will even be for the next Android version that htc hasn’t released yet.

When you download a ROM, it will come as an easy to handle zip file. And from here it’s simple.

Plug in your phone to your computer and mount it as a disk drive/USB Mass Storage. Then, just click and drag the ROM from your computer onto the root of the SD card. Eject and unplug the phone, then reboot into recovery.

Select install zip from sdcard and select the name of the file that you moved over. Then, choose the yes among the long list of nos to confirm you really want to install it and whabam, you will be installing a new operating system.

Then, reboot your phone, and you will be with your brand new OS that you yourself downloaded from the internet and installed on your phone.

Unfortunately, this process is different for every android phone. Sometimes there is a one-click root. Sometimes you have to use a command line application to open a port on the phone and install the root like that. But once you have gotten the phone rooted, installing zips is a piece of cake.

Wireless Tether

Aside from installing ROMs, another thing you can do is install and use apps that usually wouldn’t be possible if you weren’t rooted.

The one example I am going to use here is called Wireless Tether. And basically, it’s just that.

You can make your phone into a wi-fi hotspot with no hassle, just using verizon’s mobile hotspot plan. But that will cost you an extra $20 a month and you have a 5 GB limit before you start getting overage fees. Ouch.

With Wireless tether, you can connect unlimited devices, the data comes out of your data plan for your phone, and that also means there’s no overage fees.

Once you are rooted, just search for Wireless Tether in the android market and you will be able to install it on your phone and use it. You can change the SSID of the WiFi network, and you can even enable encryption and a password on your network. In addition, it allows you to use access control, where you can disable a device’s access to the network. Very handy sometimes.

Do it yourself

So that is the whole concept of rooting, recovery, and roms. You can find roms for things using google: Just do a search for “[your phone] 2.3 ROMS” or “[your phone] Cyanogenmod” and you should have plenty of luck. If you want to find out how to root your phone, just do a google search for “[your phone] root” and that should turn up some helpful results.

If you have a rooted droid incredible, click here to learn about the stable and functional gingerbread rom by WeDoDroid.

Failz to you Verizon, Failz to you.

How I feel. 🙂

So my Droid Incredible started to act up. Things weren’t quite working, and the phone kept rebooting itself. It also wouldn’t update to the 2.2 OTA. So we call Verizon and they tell us to go into the vrizon store because they had “More information.” So we schlep all the way over to a Verizon store and they say the EACT same things that they said over the phone. So we leave with absolutely no help. So the next day we call verizon AGAIN and we finally get a replacement phone shipped. But this hasn’t been the last of your problems. First of all, they tried to ship the phone to some invalid address in South Dakota, wherever THAT is. They were off only by half of a country. So then they send it to the correct address. Nope, it gets BETTER. I open it up and turn it on and activate it and sync it and everything, so it all looks good. Until I make the mistake of opening up the camera app. Low and behold, the camera wouldn’t focus properly. At all. It just didn’t focus. I changed every single setting possible. SD card in, SD card out, hard reset, soft reset, reprogramming. Nope. So I call verizon again and I tell them the problem and they say “Well, we can send you a replacement phone,” and I just say “That would be great. Thanks!”

So here I am with 2 faulty Droid Incredibles, and one of then happens to be a certified like-new replacement. That’s odd, because like new phones aren’t usually faulty like that.

So verizon, FAILz to you. I Hope this one works. It took 3 calls, a trip to the verizon store, and 2 weeks to get a phone that STILL doesn’t work properly. First time in 10 years. Yup, my WHOLE FAMILY have been verizon customers for 10 years. But from the way your customer service is, I’m not sure if it will last to much longer.This is your last chance Verizon, and I HIGHLY RECOMMEND you get it right.

Recent verizon support call: the good and the bad

So my Droid Incredible has been doing some odd things.

First of all, it didn’t update to 2.2 correctly. It tried and failed.

Second of all, it keeps rebooting itself randomly.

So we call up verizon support about both problems. Lets start with the bad:

The Bad:

We called and a nice lady answered who had us go through some simple procedures like a hard reset. We changed some settings to try and help the rebooting. As far as the update goes, she told us to go to our local verizon store because they had “more information”. So the next day we went and waited in line and everything and what does the guy say? There’s nothing we can do. You’ll just have to wait for the update. Now inferring logically, I argued that “The system has the phone marked as upgraded, even though it failed the install.” The guy says “WELL, it takes about a month to roll it out and everything.” He really didn’t get that we HAD gotten the update, it just didn’t install. Once again, “Well, you just have to wait about a month and see.” Thanks for the help. We schlepped all the way over to a verizon store, waited in line, and we get absolutely no valuable information. Great.

The good:

So after that, we call verizon again and someone knowledgeable picks up. We had to wait on hold for 8 minutes but let me say, it was well worth the wait. He asked about the water activation sticker and had us look at the firmware on the device. And he says (finally) “Well, the system has your device marked as upgraded, even though your phone says differently.” THANK YOU. I’M RIGHT. THE TWO OTHER PEOPLE WE TALKED TO WERE WRONG. So he asked if there was any physical damage and hallelujah, a replacement phone is on it’s way.

But the real question is, why did the two other people there have no idea what they were talking about? I mean, come on verizon. Why would you hire them if they aren’t knowledgeable? These are questions that may never be answered, but in the mean time, here comes a device with 2.2 pre-installed. Yay!

LG env2

I must say, the last phone I had was definitely not the nicest one in the world. and It was SO not the nicest one in the world that I barely used it. Now, all of that has changed. I now have a very nice phone, which is running on verizon. Now, as you can see it’s not an iPhone. And I have a very good reason for that – AT&T. When it comes out for verizon I will have it about instantly. But the phone I got is still a nice phone, when it comes to verizon. As you can see by the title it is the env2. Flip, with an internal and an external display. Full QWERTY keyboard, as well as a keypad on the front. Black, with a funky USB slot (not something I appreciate). The env2 is definitely a cool, affordable phone. I have just pretty much explained it. But something I didn’t mention was the camera. The camera is 2.0 mega pixels, and unlike the original env, is flat with the surface so it now lays flat on a table or hard surface. Also, compared to the original env the env2 is a little bit more square (shorter and wider). Sadly, I don’t have a micro SD card inserted, but of course it does still have some internal memory (I have no idea how much). The speakerphone is average quality, but when using the phone normally (no speakerphone), the quality is great. I can very clearly hear someone talking from across the country. I don’t have a headset, so I wouldn’t know if it changes the sound before it goes through the headset port. Also, the charging ports are completely different. I don’t even know if the charging port on the original env is even a USB port. It is pretty much just a hyped up and prettier env. Below are some visual comparisons from the original env, which happens to be my sister which she has dropped many times, and it still works. Sadly I hear the env2 is not quite as durable (I wonder if they did that on purpose to get more purchases).