iPad vs. MacBook

Sure, the iPad does NOT replace a computer. Apple was not targeting this towards the laptop market at all (but don’t you think that it’s enough to carry around 3 different devices?). But even so, I find myself using my iPad more than my MacBook.

But why? Well, to find this out lets look at what my laptop does:
•Email
•Internet
•Flash
•Desktop Applications
•Word Processing

Lets look at what my iPad does:

•Email
•Internet
•Mobile Applications
•Word Processing
•eBooks

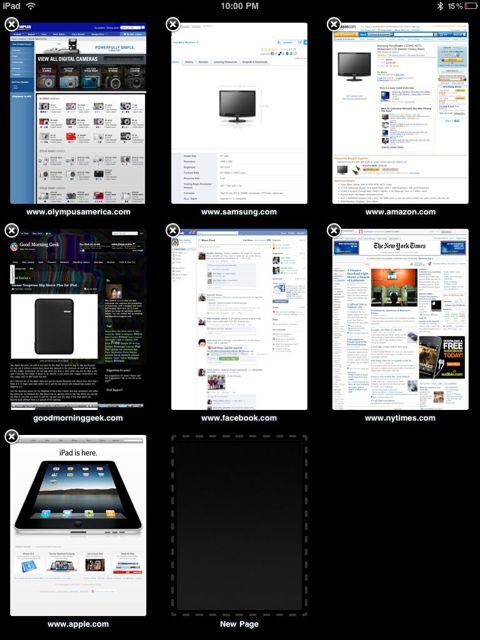
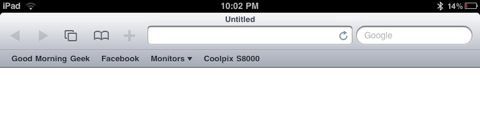
As you can tell, I can do most of the things with the iPad as I can my desktop. I can run apps, check Facebook, read email, and I have the word press app so I can post to Good Morning Geek. Thanks to the internet aspect I can do everything that I can do on my computer except flash (Which I don’t use very often anyways, YouTube doesn’t count because it is in HTML5!!). But what can’t I do? I don’t use that many special desktop apps on my MacBook, and many of them run on my iPad (such as MindNode, one of my favorites and Cooliris). Other than that, the only thing I can’t do is multi-task, which I don’t really need right now.

When I type blog posts on it (like this one!), I can connect a bluetooth keyboard to it so I don’t have to power up my computer to work on a post with a physical keyboard. I just take out my handy (not so) little iPad, connect my bluetooth keyboard, and start typing. I can also just use the case as a stand for the typing, or I can use the dock.

So because functionality isn’t an issue, why do I use my iPad instead of my MacBook?
•No time to startup
•I can use it anywhere I want without overheating
•Much lighter than my MacBook

Reasons I would use the MacBook instead of my iPad:
•Power
•Multitasking

Flash could be on that list, but I don’t use it often enough to make a difference.

So there you go. My MacBook has been away for a couple of days because I can do pretty much everything my MacBook could on the iPad. In fact, my mac is still in my laptop bag after 3 days. Cool!

Which would (and do) you use more? Comments welcome.

Written on my iPad

Web Browsing on iPad

The iPad is a wonderful touchscreen device, and I would categorize as a tablet. As all tablets must be, it of course can connect to the internet (like all apple devices except for iPods, and why would you want an iPod to connect to the internet?). And I must say, that when I just want to look at a couple of websites, I would rather just take out this super-thin lightweight iPad then my powerful big Mac. Yes, I would use my MacBook for somethings instead of the iPad but for simple light internet browsing, the iPad is what I go for. I don’t have to worry about it overheating, which is quite important to me. So how is it?

First off, WiFi.
Many people have reported problems with WiFi and I’m among them. The WiFi range is not that large, so you need to move closer to the AP than in a laptop. But if you are close enough to the AP, then the internet is quite speedy.

Next, speed.
The internet browser is (of course) safari, which has been redesigned and given a speed boost. At the moment, I can’t give you any specific specs, but it definitely feels pretty speedy.

After that, design.
Apple has redesigned Safari just for the iPad. Now, it features a Bookmarks bar, so you can get easy access to all of your favorite sites with a single tap. Also, all of the controls were promote to the top toolbar, so you canto forward/back, add to home screen, bookmark, email, enter a URL, or do a google search all from the top toolbar.this allows for more space to view the webpage (although not much). You can keep up to 9 pages open, and to switch the pages you are shown a sleep thumbnail view (picture at bottom). To interact with webpages, i would be as expected. Doubletap a paragraph to zoom so it perfectly fits, pinch to zoom in/out, swipe to scroll around the page, and tap on a link to visit it.

The pictures look vibrant on the LED backlit display, even on a webpage.

Only catch: It doesn’t support flash. But really, is this much of a surprise? Has there ever been a single mobile apple device running iPhone OS that has supported flash? No, and i’m not guessing there will be. But not to worry, many sites have converted to HTML5 so you can view them on your treasured, beautiful iPad.

Oh, and just an FYI: I actually created this post using the free WordPress app on the iPad. If you have a wordpress site, then it is a must-have as it is great for moderating comments and adding and editing posts. I also used my Apple WirelessKeyboard through Bluetooth to type this, so I didn’t have to use the touchscreen keyboard. Another post on that soon… 😉

HD Video on iPad

Well, I’ve had the iPad for a little while, and my first aspect for a review is HD video.

To test the HD video, I downloaded Star Trek from iTunes. Sadly, it was quite the whopping twenty bucks, but I suffered and bought it anyway.

The movie interface is great. The cover interface is quite pleasing. ADHD just like they said in the video, the movie saves your spot and starts playing instantly. Also, the LED backlit display is amazing. The colors are incredibly vibrant, and the IPS technology really makes a difference. For those who don’t know, IPS is a technology in a screen that allows the contrast to stay consistent through a 170 degrees viewing angle.

However: Star Trek from the iTunes store is formatted extremely wide screen (picture two at the bottom of the post), in fact almost panoramic. Also, many shots the main subject is off to one side. So you have to view the movie as a little strip across your screen or you have to miss a part of the action (or at least the parts on the edges of the movie, picture three at the bottom of the post). So, you always have to miss out on a part of it. I don’t know if it is the same story for other movies in the iTunes store, but this is the one I tested with.

Overall, this is an amazing movie watching experience. Attach bluetooth headphones or just lug em in, and you can watch about 7 hours of video (estimated that I’ve gotten ten hours doing general music listening, email, web surfing, etc.). The IPS makes it great to show the movie to the people crowding around you (after all, you ARE holding an iPad…). So if you have one of these, go get some moooovies!

The iPad experience

The date is April third. 7:00 AM. Where’s am I? Of Course, at the Apple Store. There are about fifteen people in front of me, and one behind. The black screen is up, hiding everything in the apple store.

One hour and a half later, across the street from the store is the local high school jazz band warming up for some reason. There are now 20 people behind me.

Ten minutes later (8:40) there are about 80 people behind me. There are hands over the black screen and everybody in the apple store is coating down a from ten. Once at zero, the screen is dropped and the iPad signs are all up in the apple store.

Five minutes later the apple store employees are running down the line and giving high-fives.

Five minutes later the doors open and the local high school band starts to play. The first twenty or so people are let in going through a line of apple employees giving you high-fives. I am then greeted by the manager (who I happened to know) and we pick what we want: a 32GB iPad, an iPad case, an iPad dock, and some headphones. We check out and at the bottom of the post there is a picture I got.

I get home and unbox the thing. I sync and start exploring. I download some apps, hookup email and everything.

I put on the case and started playing some games.

Then, I open the word press app and I write this post.

There you go, the iPad experience. I caught most of it on HD video, which I will put up very soon.

There will be reviews of every aspect up over the next few weeks.

This thing rocks!

I’m getting an iPad. Why?

Yup, you saw the title. I am in fact getting an iPad. Why?

Recently, My iPod touch got soaking wet, and died. I could go out and get another iPod touch, but there is the iPad coming out. Although the iPaf is simply a huge iPod touch, it isstill useful if you don’t already have an uPod touch. If you had the choice, the iPad has more potential. Longer battery life, a bigger screen, and the super-speedy A4 processor. The iPad has more flexibility than the touch. It as the normal app store PLUS special iPad apps like the new beautiful NYTimes reader. It ha a stunning LED backlit display. AND, it has the iBookstore. The built-in apps were all beautifully designed for the new screen.

Say you already have in iPhone/iPod touch. Why do you need an iPad? you don’t. But if you don’t own an iPhone/touch, then you should consider the iPad. Prepare for an iPad Review!

Apple Time Capsule!

Sleek!

As you saw in this post, I wrote the following:

Time Machine is incredibly specific about the things it is happy about.

And I’d agree. But when you get the Time Capsule, because it is made for time machine, al of your problems disintegrate.

Wireless Networking

The Time Capsule is actually an AirPort Extreme and a 1/2TB hard drive built in. The Time Capsule has dual-band connecting 802.11g and 802.11n. On the back, you connect the Time Capsule to [ethernet] WAN and then using the AirPort Utility to configure all of your options. Then, plug in a wireless printer! To configure it, go to the Print & Fax pane in system Preferences. Click the + icon and select your printer from the list that appears. Tada! You can now wirelessly print to your USB printer! Then, in the WiFi menu in your Mac’s Menu bar select yur time capsule’s network name, enter a password and now you are connected to the internet through your Time Capsule!

Time Machine

The Time Machine Icon

Once you have configured your time capsule using the AirPort Utility you can now backup to it with Time Machine. Time Machine comes on very mac and is a functional backup tool. To start using time machine, open the time Machine preference pane in System Preferences and turn the big switch on. If a dialog doesn’t automatically appear click Select Disk…. In the dialog that appears select your Time Capsule (Usually Data on [your Time Capsule’s Name]) and click Use For Backup. It will then backup all of your data in what is called the initial backup. This one first bakup wil usually take about 3-7 hours depending on how much data you have (4-5 for 30GB in my experience). It will backup wirelessly, so feel free to move around the house while it backs up. After the initial backup is done, it will create a backup of new files every hour. DON’T WORRY! It doesn’t replace duplicate files, so the backup’s size shouldn’t change that much over the use of it unless of course you make some huge deletion or addition.

Uh-oh, you deleted that one special file[/folder]! It’s easy to get it back using using Time Capsule with Time Machine. On your mac, open a finder window where the file you deleted existed (before you deleted it, of course). Then, open the time machine APPLICAtION (NOT System Preference Pane!). The finder window will then slide up to a cool wormhole-like interface with windows going back. Each window going back is hourly into the past. You can quickly navigate using the lines on the right of the interface. You can click a window a ways back to fly over to it. Now browse  found the file you want to restore in one of the windows! Before bringing it back to life (or your hard drive) check to see if it is in any more recent backups: you probably want the latest version of it. Once you’ve found the latest version, click on it once to select it. Then, in the bottom right, click restore. The file will be”magically pulled from the past into the present” with a cool effect. Tada! your file has now been revived (or stored on your local hard drive)!

In case you have a LOT of data, you an always select particular parts of your hard drive to backup. If you are a system file experimenter (like me) you probably want to keep backups of your whole hard drive, as that will include the configuration of all of your setting etc, which when reformatting you can restore from a backup an hour before the one with the screwed over file (happened many times when messing around with system settings, I screw over one file which gets backed up, so make sure that if you had screwed a file and the hard drive hadn’t crashed you use a backup older than the most recent one!).

Just in case you have a LOT of data, you can select which folders you want to exclude in the Options… dialog in the Time Machine system preference pane. If you tend to accidentally screw with your system files and you happen to destroy your mac (or part of it) doing so, Then when reformatting you can actually reformat using a backup from your Time Capsule. If I were you, I would use a backup prior to the one that was made when your mac was screwed over (as a result of screwing with a system file) or else it will just be the exact same. OORRR, while in the reformat menu you can select restore from the Time Capsule but DESELECT SETTINGS AND CONFIGUREATION. This will put all of your applications and files back, but leave the system config files (the ones that would screw up your mac) brand new right from the disk. Smart!

Whoops, I forot to mention: If (and possible when) your Time Capsule runs out of space because of backup, it will delete older backups first instead of giving you a “Out of space, delete everything” kind of error. Once again, smart!

Network Disk

Your time machine will show up in the Shared section of the left sidebar. Click on it and authenticate using the parameters you setup with the AirPort Utility, and there will be a share called Data by default. Double-click it and if you bacup using Time MAchine, you will see a .sparsebundle there. You can now utilize that HUGE hard drive in there to save stuff on. Just click and drag any file into the Data share of your Time Capsule in finder to store it on the 1-2TB hard drive. Sweet!

The Time Capsule is available at a 1TB version for only $300 and a 2TB version for $500.

Homepage

Store Page

My thoughts on the new iPad

The iPad was THE BIG announcement on 1/27. It is the once-rumored tablet was awaited for months, and it’s finally here. the wall street journal said, “the last time I saw this much excitement about a tablet it had some commandments written on it.” Well, here it is with positive and negative opinion, but here are my thoughts:

Many of the negative opinions state that the iPad is just “an oversized iPod Touch”, which I don’t disagree with. But it’s so much better. Between the amazing redesign taking advantage of the bigger screen Also, the keyboard is now almost full-sized. Plus you can get the keyboard dock for it to use a physical keyboard, or if you already have the apple wireless keyboard you can connect that through bluetooth as well. I completely forgive the keyboard for these two things.

Another amazing thing is the iBookstore, the store of iBooks. I find it quite awesome, but the prices NOT so awesome….

The iPad has a custom built silicone chip called the A4, built by apple’s hardware team in constant with the software team, which gives an amazing level of performance. this is absent in the iPod touch and iPhone. I assume you have heard of the game DoodleJump, #1 in the App Store. Now imagine playing that on a ten inch screen. who can’t call that awesome?

10 Hours of battery life? Wow….. That’s a lot…. The movie watching experience is so amazing due to the LED backlit display, which also has IPS allowing you to view the iPad from 178º with a completely clear contrast of color etc.they have also redesigned the iWork suite for the iPad. Now I’m sold. Yet only a few more months….. Did I mention they are coming out with a 3G version? Check this out: for 250MB per month, you only have to pay $15. Even better, for UNLIMITED 3G data you can pay a monthly fee for only $30!! Also, there is NOO contract, and you can cancel anytime. There is still one HUUUGEE flaw in well not exactly the device, but the network the 3G plan is on: AT&T SUCKS!!! I might be okay If I didn’t have any dropped calls but all of the dropped calls and lack of service AT MY HOUSE made me switch…. I have had 1 dropped call since I’ve had Verizon, and that doesn’t mean the 3G data coverage would be any better….

But I must say my favorite feature is the price. Everybody was so sure that it would be $999, which apple mentioned was predicted at the announcements. But the price for the lowest end 16GB WiFi only model is……. $499!!!!!!1 WOOHOO!!!! For 32 to 64, you need to add a hundred bucks more…. worth it? I dunno… Also, the same applies for the WiFi +3G version, but it all costs an extra $130 for the 3G radio… Overall, my opinion concludes to….

OMG I WANT ONE

Wireless Magic Mouse

Remember this post [link] (hover over link to see without opening a new page!)?

Remember this picture [link]?

Well, it’s all changed. The new Magic Mouse is slimmer, more sleek, more responsive, and multi-touch.

Visual Aspects

Below is a picture of the old Mighty Mouse.

Old Mighty Mouse...

Here is a picture of the new Mouse.

Sleek Magic Mouse!

As you can see, there are definitely some changes in the design.

  • Slimmer!
  • No more scroll wheel
  • Aluminum not plastic
  • No more side sensors
  • Apple logo is under the outer shell instead of an imprint

Also, the edges are a sharp (not too sharp) after the top of the shell, unlike it’s predecessor which was round all around.

The bottom also got a new look.

Bottom

Aluminum!

Ya. Aluminum. Also, the laser tracker is much smaller, but it seems to not make a difference at all.

Here is my own comparison.

Use

Yes, although it has nothing on it, it still clicks scrolls, and then some.

You can use it as a normal point and click mouse. Just put your finger on the left or right of the shell (both fingers are thought of as one) and push down towards the front. The whole outer shell will pivot forward with a mouse-like click (I wonder why). You can configure the mouse to be lefty or righty. No discrimination for dominant hands!

Scrolling

Wheels (and spheres) are now a thing of the past. The new Magic Mouse uses the touch-sensitive shell to take scrolling to a whole new level.

To scroll, just move one finger across the shell. Scrolling is 360º, so you can scroll left, right, and diagonally.

Another cool new feature about scrolling with the Magic Mouse is that it scrolls with momentum. If you scroll quickly and lift your finger off the mouse it will continue for a short amount of time and quickly scroll to a stop. Below is a screen capture of what it looks like.

[youtube=http://www.youtube.com/watch?v=UUGws9tkSnE]

Pretty awesome.

Multi-touch gestures

Well, they have to make everything multi-touch.

Sorry guys, but the only multi-touch gestures that it uses are 2 fingers left and right to go forward or back in safari and between pictures in iPhoto and Preview

Versatility

This is what it says on the Apple Website:

“Magic Mouse uses powerful laser tracking that’s far more sensitive and responsive on more surfaces than traditional optical tracking. That means it tracks with precision on nearly every surface — whether it’s a table at your favorite cafe or the desk in your home office — without the need for a mousepad.”

Well, I don’t know. But I don’t want the little pads on the bottom to ware out, so I use a mousepad. But yes, it does work on pretty much every surface. I had a problem with my Mighty Mouse on glass tables, but I haven’t tried that with the Magic Mouse.

Ergonomics

This is the first time I have ever done an ergonomics view on a piece of hardware.

This analysis is done by Vivienne Fleischer, Co-founder and president of Performance Based Ergonomics (A.K.A. PBErgo).

This is what she had to say:

[youtube=http://www.youtube.com/watch?v=gUfiB61wqt0]

Conclusion

Five Stars!!! *****

Pros: Multi-touch, wireless, sleek, thin, ergonomic, made by Apple

Cons: Doesn’t work with PC. Wait… That shouldn’t be there. No cons!

Magic Mouse homepage

Snow Leopard: Released into the wild

Well, here it is. Snow Leopard, 10.6. Although, to a standard casual user, it’s more like a snow cover, because most of the work is internal ad under the hood. But if you are sensitive to speed and power, you will definitely feel quite the speediness with snow leopard compared to the previous operating system leopard. This is due to a new technology called Grand Central Dispatch. This bridges the gap from Leopard in multi-core processing because it is able to take full advantage by making all of Mac OS X multicore aware and optimizing it for allocating tasks across multiple cores and processors. Grand Central Dispatch also makes it much easier for developers to create programs that squeeze every last drop of power from multicore systems. Also, Snow Leopard is now completely 64-bit compatible, and all of the built-in apps (Mail, iCal, Address Book, Quicktime, Automator, Photo Booth, Finder, etc.) are all 64-bit. So there isn’t much else going on under the hood, but there are a couple of new features in Snow Leopard compared to Leopard. So the upgrade from Leopard to Snow Leopard was much much much less of an upgrade than from Tiger to Leopard. There is no full interface change, just that under the hood stuff and a new wallpaper and some little new features. These new features include:
A new wallpaper (Yay!)
A new Quicktime (Yay!)
New stack features (Yay!)
A super fast Finder with new features (Yay!)
Compatibility issues (NOT Yay.)
So, yup! a New Wallpaper!
Here’s a screenshot. Hey, also it calls screenshots Screen shot [DATE] instead of Picture 1,2 etc.

Do there’s your pretty new wallpaper!
Now Quicktime. They are now calling the version of quicktime in snow leopard Quicktime X. It has some of the features as Quicktime pro, and it also has a SWEET new borderless interface.
Here’s a screenshot of the interface.

When I hover my mouse back over the window, it looks like this.

Also, Quicktime X has movie trimming and now you can record with amovie with your webcam in Quicktime and even record your screen with Quicktime.

The new Finder does not have too many visual changes, but it definitely is much snappier. The changes are a sider in the bottom right to control thumbnail size when in thumbnail view, and video and document previews right in the thumbnails. Below, you can see I can flip through the pages of a PDF right in the thumbnail.

Also, finder now features video playback right in the thumbnail! As you can see, I can pause the video anytime I would like, and If I move my mouse away from the thumbnail the pause button will disappear.

Also, I can even reduce or enlarge the size of the thumbnail with the slider while the video is playing in the thumbnail. I must say, I do like the new Finder!

Other than that, the only other big improvements are new stacks features and a fair amount of work on Exposé.

The new stacks is great. Remember those days where you could only view so many files in stacks, ad for the rest you would have to open it in Finder? Now anymore!! Now you can scroll inside of a stack while it is in grid view.

Also, one of the most asked for features in stacks, one that it was lacking–Looking inside of folders without having to launch finder.

All I did to get to this folder that was in the stack two pictures up was click on it, and there is not a window in sight!

Now for some awesome new features in Exposé:
Now, it organizes the windows into a neat grid. Now, it shows the minimized windows below a small but noticeable divider. And now, you can click and hold any application’s dock icon so that Exposé is activated for that application’s windows only, and that the windows of other applications fade away. No, people without a right click mouse, it still does show the options to hide and quit, but it does Exposé at the same time.
In the below picture, you can see that I have many windows open. Many from the Mail application and many from Safari. What a cluttered desktop…

As you can see, I have a Mail window and a Safari window minimized. Now, I will click the Exposé icon in the dock, or press F3, or do a four finger swipe down (all depends on your machine) to activate Exposé for all windows.

As you can see, it organizes the windows into a much more orderly grid fashion unlike the previous version of 10.5. Also, the two windows on the bottom are minimized, and you may need to click on the image to enlarge it so you can see the small but noticeable divider separating open from minimized windows.

In the below screenshot, I click and held the Safari icon in the dock.

As you can see, it did it’s showing all of it’s windows thing, and still has the divider to separate minimized windows. Also, the dock icon is lit up, and there are options to Quit, Hide, and putting your mouse over Options lets you choose if you want to keep it in the dock, open at login, or show the applica
tion in Finder. The same thing will apply for all other applications when activating Exposé on them.

Now for those incompatibilities. The list of confirmed compatibilities is too long to list here, so click right here to go to the Snow Leopard wikidot page.

Snow Leopard Homepage

iPod Touch OS 3.0


Well, this is sadly not free. But the extra (and very desired) features are worth the 10 bucks. There are new features in pretty much every default application. Better stability as well. Here are the new features:
1.
A new default application! It’s called Voice Memos. Everybody has been waiting for this, but there are $0.99 apps in the app store, but I really wanted something straight from the Apple HQ, not some third party paid app. For the iPod touch, you need to have the headphones with remote and mic, which I do. To start recording, simply touch the red button and start talking. There is a little volume meter that goes up as you speak. Try to go in the middle. If you go too loud and the meter goes into the red zone, a small red light comes on telling you that you are talking too loud. Now, since this is for voice memos and talking 8 inches away from the microphone, it is not god at all for recording room conversations. Then again, it’s meant for leaving yourself notes such as, “Remember to reply to the important email from Google” or “eggs, milk, butter, bread batter, oranges” etc. Basically this is not meant for recording convorsations. To listen to your voice memos, click on the button that looks like this:
Then, you can listen to, delete, and even share voice memos. by share, I mean email it as an m4a file. Overall, it’s good for making voice memos, and voice memos only.
2. Calendar. Not a new one, and nothing big, but the events have now changed colors. eh.
3. Mail! FINALLY! a landscape keyboard! and landscape viewing of messages! This has been so wanted and everyone can be really happy now. 🙂
4. Contacts. Now you can view/edit them in landscape.
5. YouTube! Now, you can sign in and comment, rate and flag videos! Check it out.
Sorry, The order is kinda opposite.

6. Stocks! Same kind of interface, but where you see the graph at the bottom, you can go left or right to view news, extra info (high, low, open, vol, P/E, etc.) and of course the original graph. But then, rotate it landscape. Finally! Landscape graph, with a little more info. When in landscape view, the graph now also shows volume in the form of bars at the bottom. Check it out:

Extra Info

News

Landscape

7. Maps! Now uses a small blue dot to find your current location. Also can now try to estimate the current address, which for me got it exactly. Also, Maps is able to track your current location even without a WiFi connection. It simply finds the latitude and longitude of the networks around you (without connecting to the WiFi network) then locates it on the map. Sadly, since it doesn’t actually connect to the WiFi, It can’t load the map around your current location. But if you are using directions, it saves all of the needed map images to the RAM. Sadly, on the highway,there isn’t always a WiFi network around. Therefore, the Not quite GPS tracking is very unreliable on the highways. The feature works a lot better when traveling around the city.
New Current Location Marker
8. Notes. You can now use the landscape view and keyboard to make your notes.
9. Settings. Fetch New Data has been replaced with Notifications. Apps from the app store can now take advantage of that. Bluetooth capability now. Before the 3.0 update, there was no bluetooth. Get the 3.0 update, and there it is. I am convinced that the bluetooth hardware was there all along, but no software to drive it. now the 3.0 can! You can use the bluetooth to connect with certain compatible stereo headphones.
10. App Store. A little change in the interface while browsing through categories. Also, you can now view your iTunes account information.


Other than all of that, the only new thing is a Spotlight Search.
Overall, the 3.0 update rocks. It was worth the $10. The update went really smoothly, too!
But what it doesn’t tell you to do (and it should!) is to restart your iPhone/iPod touch after the update completes. I mean hold the power button, slide, then hold the power button again.
Thank you Apple for the update!!

Review: Wireless Keyboard


“The best wireless keyboard out there”–Me.
Yup, I love this thing. There is an amazing responsiveness to the keys, and it is TINY, but the keys themselves are the same size as huger keyboards. The new wireless keyboard is a huge leap from older apple keyboards. Only one thing, that isn’t actually a bad thing: I hope I don’t crack it in half!
The first setup is REALLY easy, and actually kind of enjoyable. First, you take it out of the box and of course, put it on your desk to see how it looks. Wow. now that’s an improvement of desk space. But it wireless, so it’s a little different from just plugging it in. So of course, you take out the rest of the stuff. Hey, look! there are 3 Energizer batteries that are AA. So the first step is to take them out of the packaging and untwist the left knob of the keyboard
and put in the three AA batteries, like shown in the picture below.
Then press the on button on the right of the keyboard, it should look like the picture below

Then you will see a small green light appear.


Now it is time to hook it up with your computer. Easy. Now what you have to do is go up to the bluetooth icon in the top right and click Setup Bluetooth Device like shown in the picture below.
Select Keyboard in the window that appears.
It will look for keyboards that are there. I have already paired and named mine before, and I unpaired it to do this demo. So this is why it has the actual name of my keyboard there. Select the keyboard and click continue.
It will connect and tell you a passkey to put in followed by the return key to confirm that you are actually pairing it with your own keyboard, not someone Else’s somewhere else.
Tada!
Now in the Keyboard and Mouse preferences you can name your keyboard and change other settings for your new keyboard!
So there’s the setup. Using the keyboard is great. It has the perfect angle for typing. And it is SO much thinner than the older keyboards, as demonstrated in the pictures below.
And look at the size of it. The exact same size as my MacBook, and way way way smaller than those older keyboards!!!
And with the Wireless Mighty Mouse it makes the ultimate wireless workstation, way better compared to the old ones, as compared below.
BEFORE:
AFTER:

And I’m sure that it looks great on your desk. Interested? Go get one for yourself.
Get a Mighty Mouse Here
EDIT: The above link is no longer active, because the new mouse is the Magic Mouse. The review on that Can be found HERE.

Review: Wireless Mighty Mouse


I have always been interested in Apple’s buttonless mouse. But I used to be so aggravated by the lack of scroll capabilities and right-click. That was an an Apple Pro Mouse, which was the standard for the old tinted dome iMac. But now, all of that has changed.

Pros: Sleek buttonless feeling, wireless, right and left click, 360º scrolling, amazing laser precision, side buttons, and every one is completely customizable.
Cons: Side buttons a little hard to squeeze.
It is amazing how responsive the click is. It’s actually a, click!, loud, but you barely have to press on the mouse itself. It is also an amazing shape to the hand, for all sizes. It can run on 1 AA battery, but for longer life put in two. Also, If you have a mac, the Mighty Mouse works riot out of the box. It even comes with 2 Energizer Lithium Non-rechargeable batteries! All you need to do is pair it with your mac, and then you can start using it! I think that the default tracking speed is too slow, and I have it one notch away from fast. I also turned up the scrolling speed. The default is a little different from what you hear it is. Even the scroll ball isn’t set to 360º scrolling. I think that the best configuration is this:
Also, the precision of the mouse is amazing. I have never seen the kind of laser technology they use before. The light from the laser is completely invisible. The only indicator is a small green light above the laser. Also, the mouse turns off, by moving a slider over the laser. Reverse that to turn it on. But it doesn’t auto-connect, so to connect it, I need to use my trackpad and go to the little bluetooth symbol in the menu bar, hover over my mouse, and click connect, like below. The keyboard shortcut I assigned myself in system preferences, and that is not by default.
Also under the mouse preferences, you can rename the mouse, and see the battery level. If you have a bluetooth keyboard, you can do the same, but as you can see, I don’t have one (yet).