Speck SeeThru Case

We have cases for our phones, iPods, and tablets. But your laptop shouldn’t go unprotected either!

The Speck SeeThru Case is one of the only hard cases for macs that doesn’t limit the range of motion of your lid. Many other different cases will limit the range and not allow you to open the lid of your computer fully, but not this one.

The Speck SeeThru Case is a hard plastic that is totally see thru. This is really cool because you can hardly tell that the case is on the computer, but you still have your computer totally protected.

The case secures to the MacBook by a few small clips that clip over the side. Removing it is a little bit of a pain but lets hope that you don’t have to do that very often. The packaging recommends that you remove it fairly often and clean off the case and the laptop but I think it’s only necessary when you can visibly see debris build up.

But what does the case protect from? Unfortunately, a case that protects a six pound computer from a drop from four feet would be quite bulky. However this case does a great job of protecting the computer from scuffs and scratches, which is a nice assurance.

I have also noticed a problem when it comes to heating. Having a big piece of plastic across the bottom of the computer tends to interrupt the cooling flow, even if it doesn’t get in the way of the vents. On the bottom piece of the case there is a space where it has many holes in it (I’d think it would be over the processor) but that doesn’t provide too much space for the air to flow.

The SeeThru Case is a great protective case that can cover a lot of your computer and still allow easy access to all of the features. And although it has a little bit of a heating problem, the amount of protection that it provides is well worth it (especially if you are on a flat surface).

The case sells for about $49.95 and you can find it here.

Android vs. iPhone

Android and iPhone have always been one of the biggest disputes in the technology world ever since Mac vs. PC (which still isn’t decided). There are many factors to which makes one better, and with the iPhone soon on verizon, network coverage and carrier subscriptions are no longer some of them.

Why iPhone is better than Android

Lets start out with the iPhone.

The iPhone is made by one vendor, Apple. Apple does everything that has to do with the device: sells it, supports it, updates it, designs it, authorizes apps, etc.

And this allows for a kind of unity that is not found on android devices.

On iPhones, almost 80% of the users are updated to the latest version. Which means that if you develop and app that requires the latest verson of iOS, then 80% of all iPhone users can download it. Also, the updating system is flawless. All of your media, apps, mail, etc. can be synced over a single app on your Mac or PC that you can download for free. In addition to all that, you can also install software updates with the click of a button when prompted. And because apple all works as one system, when the update is available to one iPhone, it’s available to the rest.

With android, things are different. Very very VERY few are updated to the latest version, mostly because there are so many different android phones on so many different vendors that only some of the vendors update some of the phones some of the time. So if you develop an app for only one of the versions of android, few people are going to be able to use it. Some people are still on android 1.5! And if you develop an app for the newest version, same thing. There’s always going to be many users that aren’t able to use your freshly developed application.

In addition, androids have a much  bigger learning curve. To do advanced things like install new unofficial OSes, you have to root your phone and know how to install roms and things along those lines.

Another thing would be apps. The applications for iPhone are coded in objective C, which has a lot more possibility then Java. Many people say that when coding for android, they feel very confined in what they can allow their applications to do. Also, apple has to approve all apps submitted. These combined result in very high quality apps, which are easy to use and have a lot of functionality.

Why Android is better than iPhone

Android also has some nice benefits. First of all, it’s open source. This means that any developer can legally take the software and customize it and install drivers for different devices and do whatever they want with it, all legally.

This also means that if you do the right things to your android, you can install different versions of the operating system that have been modified by people ranging from people in office buildings to hobos living on the streets that happen to have coding skills and an internet connection. Having the ability to customize even the core operating system on the device is a big benefit with androids. And even though the manufacturers may take a year to come out with the new version of the OS officially for your phone, there is almost always someone porting the OS to the device early so you can get it before any of your friends.

Android is also not restricted to the Android Market. On iPhones, to install apps that aren’t in the app store you have to jailbreak. But with android, it’s as easy as checking a box in your application settings. Once that box is checked, you can download APK files from anywhere online and install them without a problem. This is good if an app maker doesn’t feel like putting their app in the market or just wants to keep a closed beta of it. Either way, having this feature is definitely a big plus for android.

And yet another benfit would be the huge variety. There are hundreds of android phones (all of which you can find on android.com) and as many vendors as you can imagine. This gives you a wide variety of different software, skins, hardware, power, price, coverage, and many different plans with different prices and different speeds and different features. Because of the wide variety of phones available, Android is now taking up a bigger market share than iPhone.

Conclusion

Androids and iPhones both have their ups and downs. But I think that I might admit to getting an iPhone when my upgrade is available. Even though I like the availability of open source on androids, I still feel like there is a wider variety of higher quality apps on the App Store that I could use.

Sphero by Orbotix

While at CES I paid a visit to Sphero.

Sphero, in a nutshell, is a small robotic ball controlled by your smartphone.

The ball itself measures a few inches across and can glow any color across the RGB spectrum.

This thing is pretty cool.
There is a simple (but not too intuitive) driving app on your phone (Android or iPhone) that can control the Sphero as it just rolls around. However because sphero has an open API, the hope is that developers can use the sphero and integrate it into their apps. This means that game developers could create some really cool augmented reality (AR) games. And because it’s open, anybody can integrate the code into their apps.

Because of this I got to be an exhibitor for them. No, not an official exhibitor, but since I was such a good driver I got a t-shirt, and next thing you know all of the people at the booth are asking me questions (which of course I could answer). That was a really cool experience because I got to see both sides of CES.

One of the most popular questions was: Where can I get this thing?

Answer: We’ll see.

These little robots are still in prototype form, and there are less than 17 (maybe more by now) in existence, and the shells are pretty fragile at the moment.

The release of these guys is going to be in late 2011, where they will be available for less than $100. Yes, less than $100.

HOWEVER, you can pre-order one for yourself at http://gosphero.com.

These little things seem to have a lot of potential with one of my favorite associations: OPEN SOURCE!

Top 3 Trends at CES 2011

CES 2011 was awesome. It was my first CES and I had a blast (but my feet didn’t). I befriended everyone at Eye-fi, met Altec Angel, got a free headset, took 1000 pictures, played a 3D racing game, and became an exhibitor for a booth for a few hours (more on that in the next post). Here are the things I saw that were extremely trending.

Number 3: Mobile
Mobile was as expected,a huge trend at CES. There were new phones announced by different makers, 4G technology, high res displays, and more.

A subtrend of this area would be accessories. There were headphones, mobile speakers, docking stations, backup batteries, a LOT of stands, and a lot of cases.

Number 2: Tablets
Tablets tablets and more tablets!

I got a chance to play with the Galaxy Tab (which I personally didn’t like) the BlackBerry PlayBook (which I loved, more on that later), and I played around with a lot of crappy android tablets.

Many companies all around the world are trying and failing to enter the tablet market. They all use android which is good for apps, but the devices themselves are TERRIBLE! The biggest mistake I saw was the use of resistive touch screens. Basically, instead of electrical content triggering a touch point (which takes the lightest touch) you have to “touch” hard enough to press two plastic sheets together that are over the screen. When I picked one up that had been made in china and tried to use it like I could my phone, iPad, iPod touch, or any other touch device I had, I thought it was broken. After PRESSING on the screen I could get a result.

Another problem is that the creators of these things were making them powerless. They had android 1.6, a 400 mhz processor, a terrible touch screen, poor design, bad graphics, terrible cameras, it was all just terrible.

I think that the tablet situation will be similar to the one with the iPod, where one vendor will rule over all others (in this case Apple).

AND NOW… FOR THE NUMBER ONE TREND AT CES….

NUMBER ONE:

There was so much 3d it was crazy.

Optoma had their whole booth all about 3d. All about 3d projectors and technologies.
Intel’s whole booth (which is quite large let me have you know) was all about their 3d processors which could drive 3d graphics to a 3d tv.

There were 3d cameras, 3d tvs, 3d camcorders, 3d monitors, 3d phones, 3d that you didn’t need glasses for, 3d that made you confused, and 3d that didn’t work. There was a LOT of 3d!

CES was an extremely cool event, but there wasn’t much eye-popping stuff. Everything was mostly just improvement on other things. 3D was big last year too, but here it’s being moved to more devices and more applications.

Creative at CES 2011

Creative is known for it’s video cameras, software, etc. At CES they released a competitor to Cisco’s UMI called InPerson HD. It allows you to have up to a four way HD video conversation right from your TV.

InPerson HD works with a seperate box from your telivision and requires a subscription to use the service. The subscription price ranges from $10 to $40 depending on the flavour you select from single point to point to 4 person multipoint.

Here’s a picture of what it would look like if you were using it:
This service runs on a box that is powered by android which looks something like this:

This whole setup is scheduled to be released to the public in the second quarter of 2011. The box will cost about $500 (same price as the currently available InPerson which is mostly a video chat only laptop) plus the subscription.

Rain Design mStand

I finally got fed up with having to have my laptop sitting on a couple of pieces of wood. I wanted something sturdier that also freed up some desk space. So I got the best laptop stand I have ever heard of, the rain design mStand.

The mStand was designed to go with the series of aluminum MacBook pros, so it went great with mine.

This thing is simple. Look at the design.
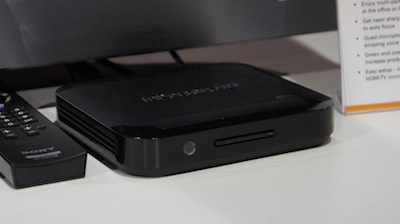
Simple. It’s just a single piece of aluminum!

The whole thing is a hunk of fairly thick aluminum, but to avoid scratching the whole thing is nicely padded with rubber.\

It has a small hole in the back that you can put your cables through to try and keep things a tad more organized.

It works with all laptops, and will work with even the full sized 17 inch MacBook Pro.

Unlike some other stands, this one doesn’t have arms, so it ends up being much sturdier.

Luckily, this thing both keeps the MacBook in place and doesn’t let it slide off, but doesn’t block you from opening the computer, the IR sensor, the CD slot, or anything.

So now I’m trying to think of what else to say. That’s pretty much it. Aluminum, nice design, simple, matching, that’s it!

I love how the simplest things are the best and don’t require me to type a long review 😉

You can go and get yourself one of these things for just $50, right here.

I love mine. It makes my desk look so much cleaner and brings my MacBook to the same eye level as my monitor.

Sony NEX-5

Over the past few months I have seen so many great photo oppurtunities that I have had to miss out on because I don’t have a high enough quality camera. Yes, an 8 megapixel camera on my phone is nice, but you can still tell that it’s a phone picture. The features just aren’t advanced enough for you to get the perfect shot.

So I decided to invest all of the money I had into this camera (so don’t expect many paid reviews for a little while) and let me say, I’m happy with the results.

When you take a look at this thing, you do a double take. If you have half of the picture you see a compact digital body. The other half looks like a DSLR lens. And take a look at the whole thing and holy crap, they’re just stuck together.

Now let me note that this does provide one big problem: It doesn’t fit in any standard case. The lens will NEVER fit in a compact digital case, but the camera is flying loose in a DSLR case. Luckily it does come with a shoulder strap, but that still leaves the body exposed.

Lets get into the details.

Design

The design of the NEX-5 is an interesting concept that bridges the compact digital and DSLR worlds. It features a standard compact digital body but with a few twists.

DSLR like features:

It features a full APSC sized sensor that is found in DSLRs and also has a mirorless design. They kicked the image stabalization out of the camera body and are packing that into the lens.

Speaking of the lens, it’s interchangeable.

Now having interchangeable lenses is what really puts this camera farther towards the DSLR type cameras. The lenses are a bit smaller than full size DSLR lenses but they are still pretty large for the size of body.

Compact digital like features:

The NEX-5 is very much so also like a compact digital camera. It features a very tiny little body that without a huge lens looks very much like a compact digital. Another thing would be the lack of viewfinder and the inclusion of a gorgeous large and vibrant LCD panel.

It doesn’t feature many physical buttons, so all of the features must be accessed through contextual menus.

Overall the design of this camera has advantages and disadvantages. The camera is nice and small and light and features the flexibility of interchangeable lenses, but you lose an optical viewfinder and many physical controls.

Interface

As I mentioned the camera settings mostly have to be set using contextual menus on the screen.

One of the big catches that sony puts you through is having two menu items: one for camera and one for brightness/color.

If I want HDR, which one do I go into?? If I want to change the autofocus which one do I go into?? You have to answer these questions mostly by just playing around with the camera. Unfortunately this also means that every time you want to change around a feature you have to sort through these menus which can become a real pain if you just want to quickly change something to get that perfect shot.

But there’s another HUGE pain. This one will REALLY annoy you.

NO FLASH!!

Actually, that’s a lie. It does come with a flash but you have to attach it using the proprietary “accessory port” on the camera. So you have to plan ahad that if you’re doing night shooting to bring that little flash with you in your pocket.

Another huge pain with the interface is that sometimes a function is “disabled” but it wont tell you why. For example, if you go to the settings to change the flash but it says “this function is disabled” you know that it’s because you don’t have the flash plugged in.

But it’s not always that simple. One example would be that it wouldn’t let me enable Auto-HDR (where it takes three pictures of different exposures and combines them) and I couldn’t figure out why. All it would tell me is that “this function is disabled”. After an hour of research I finally found out that it was because I was shooting in raw not jpeg. Life would be so much easier with this camera if it could just tell you why something is “disabled.”

Features

The NEX-5 has many features that you would find on a full size DSLR.

Of course one of the big parts of that would be the interchangeable lenses. This adds a huge amount of dslrness to this camera.

It also features the usual stuff you would find on a dslr like HDR, image stabilization, raw, etc.

But a couple of things really stand out.

Set to shoot at JPEG, this camera can do a burst of 7fps. That’s pretty damn fast.

Now the amount of time that it can do a burst like this depends on the class of SD card you have in the camera and after a little while it will start slowing down.

Something that makes this camera different from the others is that it’s mirrorless. This means that there is no mirror that flips to expose the light to the CCD sensor, instead the CCD is smack in front without a mirror or anything. This was mostly done to keep the body of the camera even smaller. But instead of having a mirror it has a shade like thing that comes down and back up, which is what makes a distinct clicking noise.

And last but not least on my features list would be the screen. It’s more than just a standard screen it can do more.

In addition to being a ridiculously hi res screen (900,000 or so dots), it can also adjust. So you can tilt the screen up (80º) to take pictures from lower, and you can tilt the screen down (20º or so) to take pictures from higher. This has proven REALLY helpful, as I can hold the camera at my waist and look at the camera screen and take pictures with it without too many people noticing (creepy, but good).

Picture Quality

This is perhaps the most important thing when it comes to a camera. And let me say, I’m pretty impressed with this thing.

I took my best shot ever with this camera on auto. I didn’t stage it. I was just there taking hundreds of photos with joy. Check out this photo.

Best picture ive ever taken.

As you can tell the lens flare adds a nice effect.

Look at the quality of that picture. the colors are great, the focus is great, everything about that photo is great.

The pictures you can get out of this thing are amazing. The auto setting works perfectly for taking lots of photos without much notice. This is the kind of camera that you can bring with you everywhere you go and still take great pictures.

For more samples, check out the photoset of mine on flickr that has all of the pictures I took at a place behind my house called the NOLG.
Created with Admarket’s flickrSLiDR.
Those are some pretty cool shots. All of those were taken in auto mode.

Value

Now theres a brother to the NEX-5, which is the NEX-3. It has a less pronounced grip and is made of plastic and can’t do full HD recording, but other than that, it is the exact same.

Now the NEX-5 seem pretty overpriced. You can get the NEX with a 16mm fixed lens or the 18-55mm lens.
Here’s a pricing diagram:

NEX-3 NEX-5
16mm $500 $650
18-55mm $550 $700

As you can tell they can be a tad pricey.

One thing that sony doesn’t make clear is that if you go for the cheapest model, you won’t have any zoom!! So make sure you are careful when choosing which model you want 🙂

Go get yours at Sony

GUI Install Gingerbread (Android 2.3) on HTC Droid Incredible

GINGERBREAD!!! AAAAHHH!!!

Gingerbread brings some incredible but simple interface and speed improvements. Here’s a step by step guide on how to get it.

1. Root your phone

This process was described in the post about how to install froyo (Which you should have now gotten the update for) but I’ll go over the basics again.

Go to unrevoked.com and click on the droid incredible. Then, download the application and run it on your computer. Plug in your phone with the USB cable and choose to mount the phone as a disk drive. Then, go into settings>Applications>Developer and check the box for USB debugging (if it isn’t checked already). Then, click flash clockworkmod recovery (or something like that) button and let your phone and the computer do the rest.

Rooting allows for a LOT more than just reflashing operating systems (like free wi-fi tethering and other cool apps like that) but I’ll go over those in different post.

2. Download the ROM from xda-developers

A ROM is basically the operating system for an android phone.

Go to THIS SITE and at the bottom click on the OMGB-*** with the HIGHEST NUMBER for the ***. This will ENSURE that you get the LATEST VERSION from xda-developers.

3. Put the ROM on your SD Card

Once again, plug in your phone and select Disk Drive. You should see both your internal storage and your SD card mounted on your computer (to find out right click on the drive and click get info. The internal storage on your phone is about 8GB). Click and drag the zip that you downloaded from xda-developers onto the root of your SD card. Then eject the SD card and phone storage and unplug your phone.

4. BACKUP BACKUP BACKUP!

Open ROM manager and tap backup current rom. It will reboot and create a backup of your phone’s current state. Don’t get scared if it takes a long time on some things or if the progress bar doesn’t move, and NEVER  take out the battery (no matter how worried you are) while it’s in the middle of this process. If you if you skip this step you will never be able to return your phone back to normal.

5. Flash the ROM with ROM Manager

Open ROM manager on your phone and tap Install ROM from SD Card.

Then in the next menu tap on the ZIP file that you moved onto the SD card.

In the screen that appears check Wipe Data and Cache and click OK. The phone will reboot into a screen that looks identical to the one where you did your backup.

6. Wait while it installs

The process should only take a minute or two.

7. Congratulations!

You should see a gingerbread followed by the interface of gingerbread. Congratulations, you have installed Gingerbread on your Droid Incredible!

Monitor Configurations

If you are a multiple monitor maniac, you would know that sometimes it’s hard to decide to put your monitors. Placement can depend on use, ergonomics, functionality, placement of speakers, space, and available equipment.

I’ve gone through many different monitor configurations.

My first ever multiple monitor configuration looked like this:

Then I decided to kick out the PC and attach my Mac to that monitor.  I also found out that I could use my iPad as an external display.

TAfter this configuration I got another Mac that I decided to use for all of my media. So I added that to the mix and for the first time I rose up the monitor over the others, and it created a four monitor grid.

Then I decided to take the two laptops i had and make it two rows of three.

And then I did something crazy. I put the monitor from the top left on the opposite side of my desk and got rid of those two laptop screens.

But tonight I decided to pull it all back together. And I ended up with:

As you can tell my MacBook is sideways. But the screen is rotated so i can actually use it properly.

This was not easy to do. In the system preferences pane they don’t give an option to rotate an internal screen, so you have to download a third party app called Display Rotation Menu and change the rotation from the menubar of your computer.

So that’s the story of monitor configurations. Different ones have been cleaner than others, but I just wanted to post about the emphasis that monitor configurations have. My current one has proven to be the most productive so far because I don’t have to move around to work on all of my monitors.

The art of continuous shooting

Continuous shooting is great.

For those who don’t know exactly what it means, it is when you use a camera to take shots as fast as possible. Because the shots are so high resolution it can’t be as fast as video, but if you are trying to take a picture of something moving it can help you to increase your chances of getting the right shot.

In general, most cameras can do around 5 frames per second.

My new nNEX-5 can do a burts for a second or two of 7 frames per second, and it also depends on the class and write speed of SD card you have in the camera.

But if you want to take a lot more pictures in a row it does about 5 per second.

Now a cool thing about this is that you can walk around or through a town taking pictures like this and then ut all of the pictures. You obviously can’t tell it’s a video, but it gives it a creative aspect (especially with the right soundtrack).

I was at my friend Gustaf Soderstrom’s house and of course he took my camera and decided to walk around with it. The pictures were kinda uneven, but he inspired me to use the continuous shooting to make a tour  of his house.

Now a tour of a house with standard 30fps video without sound would seem really boring. But if it’s a stop motion video with a cool soundtrack then it ends up looking kinda cool.

Feel free to comment with a link to a video that YOU did with continuous shooting. 🙂

Computer crashed, forgot to backup? Here’s a solution.

Recently, I totally killed Gustaf Soderstrom’s computer.

It’s a mac mini, and on starup it was totally stuck at the apple  loading screen .

He doesn’t backup his data on the Mac Mini, and he had some homework that he needed off of his hard drive.

I have a USB external enclosure so we could take the hard drive out of his computer and get the data off on another computer, but I didn’t have the correct screwdriver to take out the hard drive.

So here’s how I ended up getting the data off.

You will need:

1. No hardware problems! The reason that your computer is dead MUST BE ONLY SOFTWARE RELATED!

2. The original install disk that came with the computer

3. An external hard drive bigger than the estimated amount of data you have on your dead computer.

Lets get to this.


Step 1. boot from the original install CD

Put in the CD and boot up holding the C key. It will take a while to boot but it will boot from the install CD.

Step 2. Plug in the USB hard drive.

Simple enough. USB, Usb. Congratulations.

Step 3. Open Disk utility

At the screen where it asks you to install, go to Utilities>Disk utility.

Wait for it to load, and trust me, it eventually will. 🙂

Step 4. Copy the data.

You should see both your USB drive and your internal hard drive in the list on the left of disk utility. Select the internal hard drive (the one that actually has a name and is grouped under the physical hard drive) and select from the top “Create new disk image.”

Select for it to be read/write and make sure the encryption is set to none. Above where to select that it probably says root with a little home next to it. Click that dropdown and select your usb hard drive. Then, save the disk image.

Step 5. WAIT

This will take forever. for 65 GB, it took about an hour and a half.

Step 6. Eventually the window will close and you will have no idea that you ever started the disk image copy (it doesn’t even tell you that it’s done or anything).

Step 6. 5: Make sure it worked (optional)

If you have another computer, plug in your USB hard drive and open the disk image. Skip the verification process as it’s wasted time. It should open a window and you should see a Users, Library, Applications, etc. folders. If you see these then congratulations, you’re successful!

If you don’t have another computer, you have to skip this step and hope for the best!

Step 7. Install!

Quit disk utility and the installer will reopen. Go through the simple steps (click continue, click install) and it will install a fresh version of your operating system.

Step 8. Put your data back

Plug in your USB drive and mount that disk image. Replace the applications folder already on the fresh installation with the one from your computer and do the same with your whole home folder (especially the library folder as that contains crucial application support).


Congratulations! You just got your stuck computer reformatted and saved your data!

Thanks gustaf for letting me kill your computer and find out how to fix it again! 🙂

Dolby Ok, go event

I recently attended an event at dolby labs with Ok, go there. If you don’t know who Ok, go is, look at this video. I bet you’ve seen it somewhere sometime…. Now why is ok, go at dolby? Well, lets think. Ok, go=music. Dolby=sound. Music, sound, see the connection? The real reason the band was there is because dolby took their latest music video “this too shall pass” and converted it into 7.1 surround sound. They didn’t just expand the two tracks of stereo over all 8 speakers, but they actually got the individual microphone clips and used those to create a quality surround sound experience. The video was played back in full surround sound and quite high volume in the dolby labs theatre, which features some of the best in dolby surround sound technology. If you watch the video and say “I could totally imagine this on dolby surround sound!, ” then you’re wrong. You can’t imagine it. You have to hear it to believe it. It is scary how music can literally invade you if you have the right quality and the right system. If I had this theatre in my house and I played this at the same volume level, the neighbors would call the police who would come to my door for sound violations. The event was fun, as we crowded into the theatre and watched the video without the left and right channels (they had a server error, welcome to a PC dependent company). Then, Ok, go came on stage and did some Q&A with the audience. They emphasized how they are welcoming open source music and how they think that everybody should be able to take songs and remix them to their likings. They also talked about how they really aren’t too crazy about illegal downloads of their songs and it’s really the music labels that go crazy, as ok, go is more on the music side of things than the business (which will really come in handy for creating some great songs). What happened was we crowded into the theatre, they played the video without the left and right channels (server error) and then Ok, go did some Q&A. Every couple of questions they would play a song then get back to the Q&A. And when we were almost out of time they played the video this time with all channels included. Dolby said that they were interested in taking music and upping it into dolby surround sound as it gets publicity for everyone. Dolby gets publicity for converting artists’ music, and the artists get publicity because dolby wants to show off their amazing surround sound technology using their music. Now in addition to Ok, go there was something else extremely great there. Dolby Home theater four is not available to the public yet and who will be vending it is not known either. All of this information will be announced at CES2011. But I was lucky enough to get a preview of the software anyways. Dolby Home Theater v4 can do two exceptionally amazing things: it is able to take computer speakers and extreeeeeeeemely amplify them and it is also able to take standard stereo headphones and make them sound surround soundy. First of all would be computer speaker amplification. He played us a video without dolby on, then he turned it on.  It is amazing the difference. My mother is hard of hearing and without dolby on couldn’t hear the video at all. With it on she could. I think that this is great especially if you are on a train or on a bus. You can’t hear the video/music at all, but with dolby on you can. In addition to amplifying it can make it feel like the sound is coming from a wider range than tiny speakers inside of your computer. It can also boost dialoge in particular, so you can hear voices extremely clearly. The speakers have to be tuned to work best with the speakers which is why the software must be shipped with computers instead of a download. Each computer will have the software a tiny bit different to match the speakers. In addition to this amazing internal speaker improvement, they have added capability that you can use standard stereo headphones to make them like surround sound headphones. I was with my family and a family friend (Same one that did the ergonomics video of the magic mouse) and Kevin (a sound engineer) played for us a channel check. What it does is says “front left. front right. center. back left. back right.” through the corresponding channels. Without dolby turned on, you could barely hear a difference between each one. but with dolby turned on you wanted to look behind you to see who was saying that. The scary part about this is how it actually works. Here is a picture of vivienne’s reaction:

wait...What? Huh? How?!

As you can tell this is extremely perplexing. We have six channels going in through two speakers. I must make note that these aren’t special headphones at all. These headphones aren’t even made by dolby. These are just normal headphones. Now another thing in addition to this is that it can take the sound out of your ear and put the sound around your ear. Dolby makes it sound more like you are in a room, less like sound is being shoved into your ear. Usually using headphones if fatiguing, but dolby solved that problem. Having surround sound in your own personal speakers allows movies to have much more character and much more impact. It sounds more…. real. It’s amazing how people are cramming in 6 speakers into headphones, when really all you need is dolby. 🙂 If you are at CES 2011, I highly suggest you head over to the dolby booth and try this stuff out. Dolby has some great stuff planned and they really know what their doing when it comes to their sound. Here’s a couple of pictures from the event.