HTC Droid Incredible – RED COVER!

I was recently stalking around the HTC Incredible site, and I came across a page where you can order HTC-made battery covers – in different colors! You can order a red cover or a white cover.

From the images, I expected the surface to be like the stock cover – that soft platsticy rubber. However, the cover is actually glossy! It feels nice in the hand, and I like it a lot. It also makes the phone look quite awesome, as the volume buttons, USB port, and power switch are all still black. It gives the phone a very cool multi-colored look – and imagine the look on your friend’s face when one day you have a white phone, the next day a red one!

This is a great way to customize your phone, as you can change the color of it without breaking anything or adding a bulky case.

You can order either color for $16.99, which is EXTREMELY expensive for a little piece of plastic. It probably cost less than a cent to make that cover, so that’s QUITE the nice margin you got there, HTC! $16.98 in profit. Wow. That’s 99.95%!

Aside from the high price, there’s no shipping, which should make you feel a little better. You can order one for yourself here. Enjoy!

Otterbox Reflex Series for iPhone

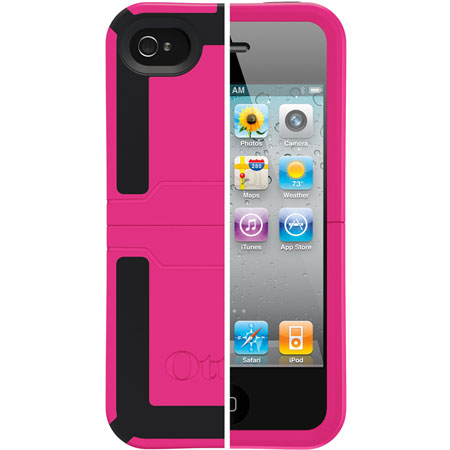
Otterbox is well known for their amazingly stylish yet rugged cases. The Reflex series is a new case from otterbox, and it boasts a whole new design.

Here’s how cases work: When there is a shock in one part of the case, it is absorbed by the rest of the case, usually by a form of flexibility that causes shock absorption. This is sometimes accomplished by rubber, the flexing of plastic, or other various materials.

What the Reflex series does is brings a hard plastic shell, but in places of the shell there is flexible rubber that crumples and flexes to absorb the shock. This design was inspired by the crumple zone of a car, and from the result of shock on the case it works very well.

The other feature that Otterbox is known for is style. The Reflex Series comes in a variety of colors, all of which have nice, even, black rubber highlights where the crumple zone is. Instead of hiding the crumple zone, otterbox has used it to enhance the style of the case. Genius!

A new feature of the case would be that the bottom half slides off for docking access. In the past, you had to completely remove the otterbox cases to accomplish this, but thanks to the innovation in this version full case removal is no longer necessary.

The Reflex Series is available only for the iPhone at the moment, but in the future will be available for the BlackBerry Curve and iPod Touch (4th Generation). You can purchase it by clicking here for about $45.

[Thanks to Otterbox for sending this to me for review! You guys make awesome cases! :D]

How-to: the Ultimate Laptop Upgrade (RAM and SSD)

Your laptop has a few mainly functioning parts. The hard drive, the RAM, and the CPU. The CPU, unfortunately, cannot be replaced, as in Macs they are soldered on to the logic board. however, you can upgrade  the other two things. Lets start with the hard drive.

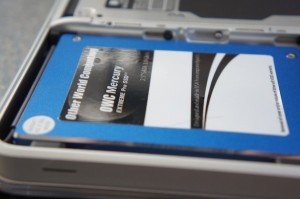
Ultimate Hard Drive Upgrade: OWC Mercury Extreme Pro SSD

When you write and read data from a computer, you write/read from a hard drive. This is a small metal box with a few spinning disks inside and a needly thing that writes the data across.

An SSD looks (on the outside) just like a hard drive. It has the same connections and the same dimensions. But a peek inside reveals lots of chips, and a lack of moving parts.

That’s because SSD stands for Solid State Drive, because they are just that: Solid state.

But one of the biggest advantages to that would be the speed. I can write/read from this thing at a blazing 3GBps. Also, it holds a world record for fastest internal SATA II Drive. What does this mean for the user?

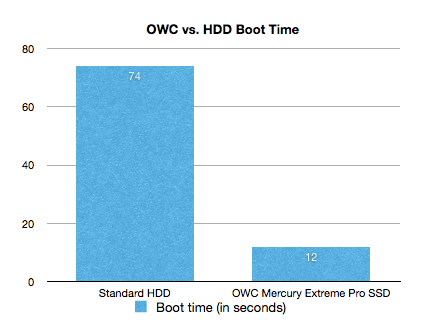
Lets look at some in-house tests.

With a standard hard drive: 1:14 to boot.

With this OWC Mercury Extreme Pro SSD: 00:12.

That’s enough proof for me.

And as far as apps go, they launch FAST. I can launch 6 applications and have them all open and running in less than 4 seconds.

This means that when you open things, they take less time to open. Enough said.

If you’re looking to upgrade your computer, this is probably one of the first things you should upgrade. Even though you might want a faster processor, it won’t speed up how long it takes for something to go from your hard drive to your screen.

The OWC Mercury Extreme Pro SSD comes in many sizes. I purchased the 115GB drive for approximately $230, and you can find this series here.

The ultimate RAM upgrade: Crucial 4GBx2 Kit

When you’re interacting with applications, a buffer of everything is stored in RAM. This is Random Access Memory, and it is made so that you can randomly access it. It’s extremely fast, which is what allows things like pop-up menus to instantly drop down. It’s also what keeps the base operating system going, and if you have so many applications running that your RAM is full, everything becomes hard drive base. Translation: things freeze, slow down, and crash. The easiest solution to this is to get some more RAM.

I ordered crucial’s 8GB RAM kit, as it wasn’t too expensive and seemed like it would work well. Most laptops have two RAM slots, so my 8GB kit came with 2 4GB chips. The amount of RAM that your computer supports varies. If you have an older Aluminum MacBook, then you can fit 8GB in there. However, the current MacBook Pros only support up to 6. Search for your model on crucial.com to find exactly what RAM you need.

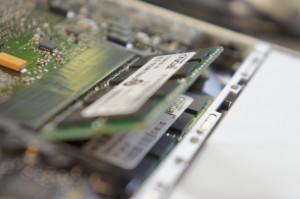
Installation is fairly simple. Just take off the bottom of the laptop with a screwdriver, and move out the tabs next to those flashy green RAM chips. Then, smoothly slide out the chips, and replace them with the new and bigger RAM you got. Seal up that wound on the bottom of your computer, and voila, you have more RAM! No drivers necessary. If you have the MacBook 5,1, click here to get 8GB of RAM. If not, click here to go to the crucial site and find what RAM will work in your model of computer.

The result

Your compter will boot faster. Things will open faster. Things will run faster. Things won’t freeze. Things will crash less. In general, things will be faster and more stable. Enjoy!

Using AirPort express for AirPlay alongside a Time Capsule

You may remember that a long time ago I reviewed the Time Capsule. It’s a wonderful wireless AP, and all of my data is totally safe.

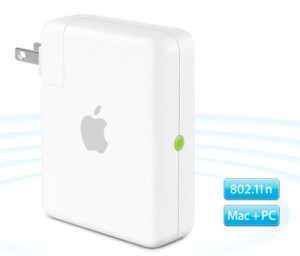
But the Time Capsule doesn’t have AirPlay. On AirPort extremes and expresses, there is a headphone jack, and when connected, you can wirelessly stream your music to your speakers from your iDevice.

I’ve had an airport express for a long time, but I stopped using it when I got my time capsule. After hearing about the AirPlay improvements, I decided to break the thing out.

The AirPort Express creates its own WiFi network, and if I’m connected to that then I won’t be able to backup to my time capsule. Luckily, it is now possible to plug the AirPort Express directly into the Time Capsule, and have them both work as the same wireless network. This means that I can stream music AND backup at the same time!

With this all settled, you will now see the AirPlay icon appear on all of your devices. From this point on, it’s all extremely easy. Just tap the icon and up pops a menu of all AirPlay devices on the network. Tap the speaker system you wish to stream to Voila, we have wireless music!

If you’re on a computer, however, you can only stream your music from iTunes. That is, of course, unless you have an app called AirFoil.

This allows any application on your computer to output sound to your AirPlay speakers.

However, there’s a small issue.

There is a two second delay between when you cause the sound to happen and when it actually comes out of your speakers. On the iDevices, the movies are in sync because they are decoupled 2 seconds back. When you change the volume on your computer, you will see the small notification popup, yet you won’t hear anything for two seconds. Quite annoying.

For videos, AirFoil has included the “AirFoil Video Player.” I don’t know if it’s very good, as I can’t even get it to work without freezing and crashing.

In general, this system is simple and functional. But if you’re trying to stream content from your computer, you will notice an extremely distinct delay. It’s not like that audio quality isn’t good, so all audio (including pandora and other streaming services) work fine.

AirPort Express

AirFoil

Plugable USB 2.0 USB Graphics Adapter

Monitors are an increasingly popular thing. They increase productivity, allow more room for multitasking, and prices are rapidly decreasing.

The poweruser knows:

I can buy a computer with a graphics card with multiple ports on it so I can plug in multiple monitors.

But I hear:

I am going to buy a large bulky computer that i$ really expen$ive $o I can plug in multiple monitors.

So what about the people who get a laptop, and use an external monitor with it, but want more?

That would be me.

There’s only one monitor port on my computer, which was already taken.

So for my third monitor, I used an old Mac Mini that I had lying around.

But the problem with this is that it was a totally different computer, so all of the logins were different, I had to use a network based mouse and keyboard sharing system, it was just terrible. And worst of all, all of the files on each of the computers were different. So when I wanted to open a document on my third screen that was on my first computer’s hard drive, it wasn’t possible without moving around the file first.

Alas, there is now a solution. And the title of this post says it all.

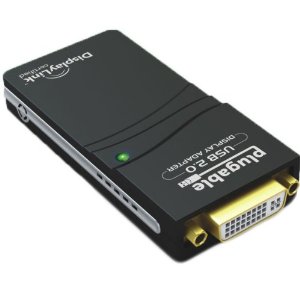
The Plugable USB UGA (Usb Graphics Adapter I’m pretty sure) works just like it should.

In the box

  • Plugable UGA
  • DVI to HDMI Adapter
  • DVI to VGA Adapter
  • Mini USB cable

Setup

Lucky for you, setup is fairly easy.

Before you do anything else, you need to go to the displaylink site and download the Mac drivers. Luckily, there is only one option for a driver, so you don’t have to make that half-minded decision on which one will actually do the trick.

After you have installed the driver and restarted your computer, you can start plugging things in.

As expected, use the mini USB cable to plug the UGA (the biggest piece) into your USB port. Then, plug in your monitor cable, using any adapters if necessary. If your monitor is DVI, then you won’t need any adapters and you can plug your cable straight into the UGA.

If your monitor is VGA, then you can just add the DVI to VGA adapter on top of the UGA, then plug your monitor into that.

Voila, it should start working. Your screens should turn blue and another wallpaper should appear on your USB Monitor.

For further configuration, just go into your System Preferences, click Displays, and click Arrangement. You can arrange your monitors so that they are extended displays and you can move your windows across all of them.

Speed and Usage

As stated in the owner’s manual, when there is nothing happening on the screen, the device itself is refreshing the display. This means that your computer isn’t working to refresh the display.

You can tell that only the device is refreshing when the green light on the UGA itself is solid. When it is flashing it usually means that something is moving on the screen. This means that your CPU is working to move every pixel over to the USB monitor. Because of this, you probably don’t want to run too heavy graphics on the display, as you will most likely overload your CPU.

Besides the CPU load, the speed isn’t perfect. It’s a tiny bit laggy, but not enough to be too concerned about. It works perfectly fine for things like facebook, browsing, spreadsheets, word processing, all that usual stuff. However, don’t try to use it for anything that involves games, videos, or a ton of pixels being constantly rendered.

However, you can’t be too disappointed. It’s not enough lag to make you not want to use it anymore (and I’m very sensitive about my lag, so that’s really saying something). Anyways, it’s going over USB 2.0 for god’s sake! It’s running a whole monitor off of two connectors (there’s four connectors in a USB port, 2 for data 2 for power).

One other thing I noticed was that the device got quite a bit hot when running. I don’t know if it was out of it’s operating range, but it was still quite a bit warm. It worried me a little bit, but it doesn’t seem to lower in performance even when warm, so I don’t think this should be too much of a concern.

And if you want more monitors, this isn’t just the end. You can have up to 6 of these connected to your computer at once (hopefully your CPU can handle it), which means that if you have a laptop with a monitor port built in (which would make two screens), then you can have up to eight screens running off of nothing but a laptop! (You can plug the UGAs into a hub, as you probably don’t have six USB ports on your computer.)

Conclusion

If you want more monitors but don’t have the graphic cards, this is the best way to do it. The resolution and color renders perfectly, and even though it uses some CPU when rendering, it works perfectly for spreadsheets, word processing, and other basic tasks. What it doesn’t work for is heavy graphics rendering, such as video and gaming. Use a directly connected display for those.

These are compatible with windows and linux in addition to mac, so you mac haters are in luck.

They are for sale on amazon for $65, and you can find that here.

Hanging restore after Jailbreak fix

Here’s the storyline.

You jailbreak your iPad.

Then, you find an app called Wi-Fi sync, where you can sync your iPad over Wi-Fi with your computer. This includes both an app from Cydia on your iPad AND it requires an app on your PC/Mac.

Then, you want to undo the jailbreak.

So you go into iTunes and click the Restore button.

It restores for the most part, but then, it hangs at the very end.


Uhoh.

Now your iPad is in recovery mode, and you can’t restore it.

Well, as you might have thought, you need to uninstall Wi-Fi Sync!

Just download the file HERE (mac only) and run the uninstaller. After you uninstall, the restore should go perfectly.

Motorola Xoom Tablet: First Impressions

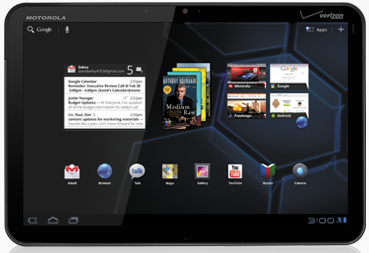
While at the Launch Conference, I got to play with Robert Scoble’s Motorola Xoom. Here’s what I thought.

Software:

Honeycomb was quite a bit mesmerizing. It looked beautiful on that tablet’s screen, and it’s 3D rendering capabilities showed on the home screen. The speed was pretty good, and the browser seemed extremely nice and smooth to use. The software side of this tablet really shined in speed and smoothness of effects, and this tablet would have been terrible with anything but honeycomb.

Also, remember when BumpTop was bought by Google?

Well, turns out they used some of their 3D stuff in Honeycomb. Good to see such an awesome piece of software go to a good cause!

Hardware

Lets start off with this: I hated the widescreen layout. I prefer to use my iPad in horizontal mode because when reading you can see a lot more, therefore you don’t have to scroll as much, and the Xoom sideways resulted in a very overwhelming layout that was like a widescreen monitor turned sideways.

I HATED the location of the power button. It’s in a very odd place in the back. Someone had to literally show me where the power button was. If you can’t immediately turn it on without any doubt of the power button location, you know that there’s a problem with your product.

The two cameras? Absolutely terrible. They don’t even have an auto focus, or a focus at all. I would never even attempt to take a picture with this thing.

Conclusion

Overall, it’s a nice product, but the screen annoyed me, the power button takes getting used to, and the cameras aren’t even worth having. They are worse than nothing, because you get to see what it would be like to have a camera on a tablet, but a terrible implementation of it.

And for $800? Don’t think so.


iPad 2 Launch Comparable to the 3GS Launch

Apple held an event all about the iPad 2 today, and let’s just say I wasn’t happy.

First of all, I can easily compare it to the difference between the iPhone 3G and the iPhone 3GS. Yes, I was really that disappointed.

Here’s the list of new features:

  • Front facing camera
  • Rear facing camera
  • Dual Core A5 Processor
  • 9x faster graphics
  • 8.8mm thin (a third thinner than it’s predecessor)
  • 1.3 Pounds instead of 1.5
  • A white version that will actually ship
  • A handy cover that folds into a stand. The cover had more innovation than the new iPad.

Other than that, it’s your same ol’ iPad. Same size, same screen, same apps.

The cover is really cool though. It has magnets that latch and align to the side, and when you close the cover the iPad turns off and when you open it the iPad turns on. This interested me substantially more than the iPad itself.

If you remember how bummed everyone was after the 3Gs, I am having that same feeling right now, but at least I have a case to be excited about.

The New MacBook Pros Released: What a disappointment.

The rumors of a new MacBook Pro are true. But that’s about as far as the truth goes.

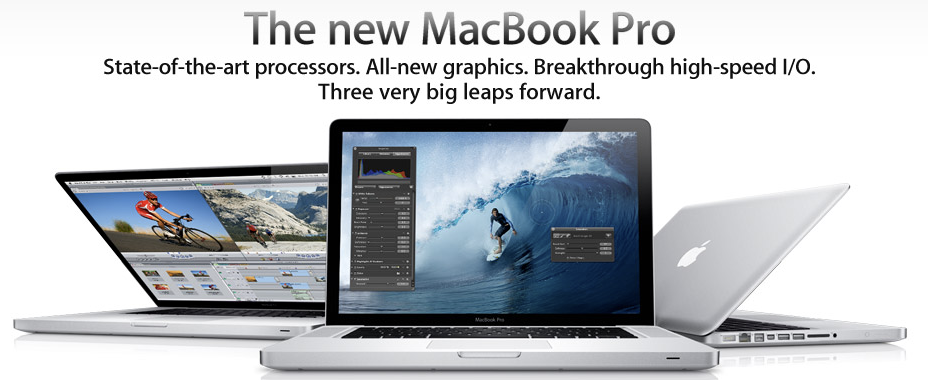
When I went to Apple’s website and they had a huge ad for the new MacBook Pro, I thought it was the old one. Why? Does this seem familiar:

I think I’ve seen this somewhere… Oh yah, every time I’ve gone to apple’s website for the past THREE YEARS.

The “REVOLUTIONARY CHANGES” consist of the tiniest things, and I’m trying to convince myself it’s because Apple’s AMAZING REVOLUTIONARY MacBook Pro just isn’t ready for prime time…. I hope…

Here’s what’s new.

The 13 incher now has a dual core i5. Better than a core 2 duo.

The built-in iSight I MEAN FACETIME camera is now widescreen. Yay… That’s been a popular request……?????

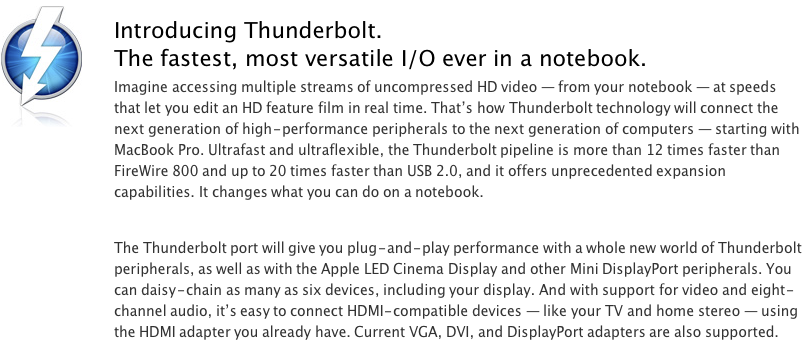
There’s the new Thunderbolt port.

Basically, it’s their new way of creating yet ANOTHER FireWire port.

Luckily, the current display adapters are supported, so it’s still a Mini DisplayPort adapter. But when I see the “Thunderbolt to VGA Adapter” in Apple Stores nationwide, I am going to tip a cow.

And the one other improvement: Battery life. It boasts 7 hours of wireless browsing on a single charge. Nice, but I’d rather see big leaps forward in innovation instead of three performance enhancements.

I’d consider this launch a total failure. The whole line is

Altec Lansing Muzx Ultra

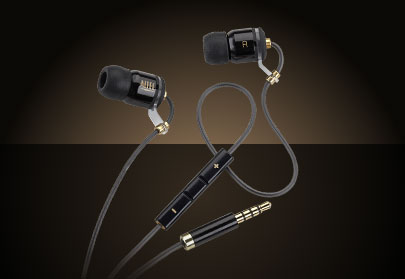
These headphones have single balanced armature technology which delivers great sound quality without any distortion or noise.

Altec Lansing is known for making high quality sound products, and that doesn’t end with speakers.

In addition to theyre speaker systems and docks, Altec Lansing has a series of earbuds too.
They have many different versions, but here Altec Lansing has sent in for review the Muzx Ultra.
The thing that is special about these headphones is that they have a technology called “single balanced armature.”
I still don’t exactly know what it means, but one thing that I do know it means good sound quality.
The Muzx Ultra deliver clear, piercing hi’s and mids that are not to displease. I noticed details in my songs that I hadn’t previously taken note of. There was absolutely no noise except for the noise coming from your music.
In addition to the sound, the SnugFit design is an extremely welcome addition.
These headphones have 26 dB of passive noise isolation, which is great for blocking out everything else around you while trying to listen to your music.
It’s also handy because it means you don’t have to turn your music up as high to block the other sounds out.
The design of the headphones takes away all the possibilities of breaking.
On the earbud there is a small enforcement coming from the bottom to support the cable so it doesn’t bend and break off of the speaker itself. The cable is made of a very slippery plastic coating so you don’t have to deal with friction noise from the cable rubbing against something, which is also a nice addition.
The headphones also have music controls partially up the cable, with a microphone included for your convenience, however I did notice that the controls and microphone were oddly high up the cable.
And look at that, they even threw in a soft case! Don’t want to get these babies dirty or full of crumbs in your backpack, so it’s a very nice and extremely handy addition.
However I did find one bad side to these headphones.
Where’s the Lows?
I mean, I said that they had amazing, piercing highs and mids.

But that’s one downside to single balanced armature technology. In a direct message she sent me, she said:

Balanced armature earphones are used for the best hi & mids, not lows.

So I can’t exactly say I wasn’t caught totally off guard, but it’s a letdown when your hardcore dubstep doesn’t have the same punch as you’d expect.

Overall these are great headphones, that are extremely well made, have great, clear, hi quality sound, and can keep out all of that other sound that you don’t want ruining your listening experience.
The price tag on these is $99.95, which in my opinion, is a bit high for earbuds.
However, single balanced armature technology is a pretty expensive technology at the moment and people are raving about how thanks to these headphones, you can get single balanced armature technology at an affordable price. So can’t complain too much!

If you’re interested in buying a pair, click here to be directed to the product page at Altec Lansing.

Otterbox Commuter Series for Droid Incredible

While the Defender series takes care of the extremely rugged duties for a variety of phones, the commuter takes a more stylish approach and still provides quite the nice amount of protection.

The Commuter Series case for the incredible seems a bit like an inverted defender series case. It has an inner shock absorbing silicone skin and an outer hard shell to protect from initial shock. It has a nice brushed texture with an embossed Otterbox logo at the bottom. It adds a tad bit of bulk to the phone itself but you get used to it after a while.

And this case really works. Giving otterbox even more credit for well-made cases, this is the case that you can trust for the usual, well, commuter.

I must admit, however, that I have had (and used) this case for quite a while now. And I’m giving it such a good review out of experience.

I take pride in having a thick(er) phone.

“I didn’t think that droids were so thick!”

“They’re not. I have a case on it. “

I drop the phone from 3 feet up and I don’t even cringe.

“See?”

Another good example of having a phone would be a new invention in modern sports called droid soccer. This is where you kick the phone around and use it as a soccer ball (but it ends up sliding a bit more like a hockey puck). You can use either sides of a room or yard as a goal. And with otterbox protection, there’s nothing to worry about. They talk about having Sports apps as wherever-you-go fun, but phone soccer redefines that.

Many people accuse me of only having the case so I can drop it all the time and play soccer with it. And although I must admit that it’s fun, there’s always the times when it’s an accident and you drop your phone. One example would be when I was walking downtown with my friend Emma and I was talking on the phone with someone we were going to meet up with. She says to hand the phone to emma, and I do, but somehow at one point neither of us were holding the phone. The phone falls to the ground with a prominent click. Whoops! Good thing I have that case on there or that phone would be toast.

I picked up the phone and handed it to her.

“Here ya go. “

“Thanks.”

If I didn’t have a case, my phone would be cracked, my battery 4 feet away, and thoughts about my current warrantee. Thanks to this case, none of that even came to mind.

The Otterbox Commuter Series for Droid Incredible sells for $35, which is the price of the average case, with abnormal protection. Click here to order one for yourself.

Also, I wanted to thank Otterbox for sending me this case for keeps. Wonderful case, and plenty of “wherever-you-go” fun. 🙂

Otterbox Defender Case for iPhone

Otterbox is known for their high quality cases. They have many series of cases, each with their own level of protection, and here I have the series that boasts highest level of ruggedness, the Defender Series (for iPhone).

This case takes heavy duty to a new level. It features multiple layers of protection, starting with a silicone layer the outside, a hard shell inside, then in that soft felt against the phone itself.

In addition to the shock protection, it has rubber plugs to keep dust out of the ports, and has plastic protection over the screen, camera(s), and apple logo in the back (a stylish touch I guess).

Unlike other cases, the plastic protection over the screen isn’t adhesive. The screen protector is actually part of the case. This is definitely very cool (so if you don’t want the case on it then the screen protector comes off too), but there is a downside. If you have scratched up the screen cover and want a new one, then you have to get a new/different case.

Also, if you get dirt on any of the camera protectors, then you can see a bit of a haze over the camera. Yes, this can be solved by simply wiping off the cover, but this is bittersweet. The camera itself ends up being more protected against dirt and scratches, but when you get the cover dirty/scratched you can see the results in your pictures/video.

So who is this case for? I’d think that this case would be for the people who really handle their device harshly. If you’re a construction worker and drop this off a roof, then whoops! The phone should be fine. This is great if construction workers want to have a fancy expensive smartphone but don’t want to replace it all the time because it’s broken.

This is also good for those clutzes who tend to drop their phone all the time. If you don’t drop your phone that much at all, then you might want to go with the commuter series, which still offers good protection but has a little bit more style. But this case seems to be up for some of the worst conditions someone could throw at it.

But I have a droid! Or a Nokia! and I don’t like black! I want pink! No I want blue! No red!

Calm down internetgoer, there’s hope. Otterbox sells this case for a large range of models in many different colors.

The case sells online for $50, which seems a bit excessive but you’re getting protection that’s worth the price.

Otterbox Defender Homepage

Defender for iPhone