Apple Releases New MacBook Air and Mac Mini

Yesterday, everyone was so caught up in the Lion release that almost nobody knew that Apple also released a new MacBook Air and Mac mini.

The new lines of MacBook Airs and Mac Minis is merely a performance upgrade.

The MacBook Air finally comes with a Core i5 Processor, filling the complaints of a low-power Core 2 Duo. It also has a thunderbolt port – whatever (click here to learn why) –  and comes with the latest operating system OS X Lion. Other than those few internal improvements, there’s nothing new; it has the same price, design, thickness, storage, graphics, etc.

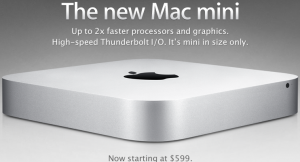
The Mac Mini gets these same improvements featuring an Core i5 Processor, Thunderbolt, and OS X Lion. In addition it has an HDMI port and a little bit smaller of a form factor. It also now comes with a 500GB hard drive standard. Other than that, same price and general design.

These improvements are just that – improvements. Welcome ones, at that, but still not the big leaps forward everyone expects from Apple.

MacBook Air Homepage

Mac Mini Homepage

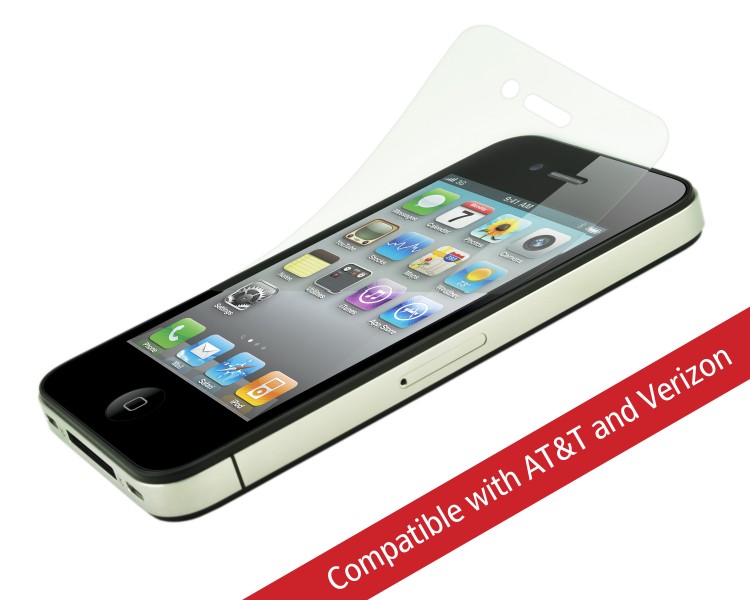
Power Support HD Anti-Glare Screen Protector for iPhone 4

When I first got my iPhone 4, the screen seemed really durable. Through the first couple of weeks I didn’t have a single scratch. I wasn’t worried or careful about it, and that still hasn’t proved a problem.

However I was definitely sick of all the smudges and fingerprints, and how if there was enough fingerprints on the screen it would get difficult to even move my finger across the screen.

I didn’t think I would benefit from any kind of screen protector until I was at a class and tried a friend’s.  The anti-glare cover made it much easier and smoother to run my finger across the screen. It also didn’t attract fingerprints. Cool!

I got one of these for myself, and I’m quite happy with it. As I said, it doesn’t attract fingerprints, and makes it much easier to move my finger across the screen – two things you will benefit from every time you take the phone out of your pocket.

It all sounds good, right?

Well there’s only one drawback: having the screen protector will make your screen the tiniest bit blurry.

No, it’s not terrible – you can still easily read the text, and it doesn’t make much of a difference. But if you are picky about super sharp edges on everything, this may cause a problem to arise.

Sometimes people have a VERY hard time installing the protectors, usually because of lint and air bubbles.

Well, this screen protector has something new: a sticky, clingy sticker thing that you press against the screen and remove, bringing all of the dirt and dust with it.

However, if you’re buying this at an Apple store, you can usually get around all of that. They will install it for you, and they’re pretty good at it, too. They know all of the tips and tricks, and actually installed my screen protector FLAWLESSLY. Yes, there’s not a SINGLE SPECK of dust under that screen protector, and it lines up perfectly.

If you’re looking for a screen protector, this is the way to go. However, if you’re picky about your sharp lines, you should look into a crystal style screen protector, which, in addition to providing sharper edges, attracts more fingerprints.

The Power Support Anti-Glare Film Set (a pack of two) is available online here and at most Apple Retail Stores for only $15.

Where’s those thunderbolt devices?

Fourth months ago, a new MacBook Pro line was released. And as I said here, it was a total disappointment. The biggest thing on it was probably the new “Thunderbolt” port, which is a port with the same form-factor as the Mini DisplayPort, however it allows for transfer up to 10 GBPS. Yah, that’s fast.

Everyone I talked to said that it was awesome; it would be so good to use.

My argument was that it was too proprietary – Only three models of computers have that port, so why would a manufacturer go after making products for it?

The usual argument was that “It will standardize and products will be released for it eventually.”

Okay…

So here we are four months later, and the only product I’ve ever seen compatible with the thunderbolt port is an external hard drive from LaCie.

That’s it.

So….. Where’s those thunderbolt devices?

I believe that thunderbolt was (and still is) a total failure. Nobody uses it – and because no body uses it, manufacturers won’t create devices for it. And because manufacturers won’t create devices for it, nobody uses it. It’s a total loop – a manufacturer would have to make a product for it, so people would use it, so other manufacturers would make more products for it.

Nowadays, the only other computer line with a thunderbolt port is the most recent line-up of iMacs, which few people have.

But there still is hope for Thunderbolt. If every single Mac gets a thunderbolt port, after a while every Mac that is in use will have a port – that’s when manufacturers will start making products for it.

But until then, don’t expect much from Thunderbolt.

Parrot AR.Drone

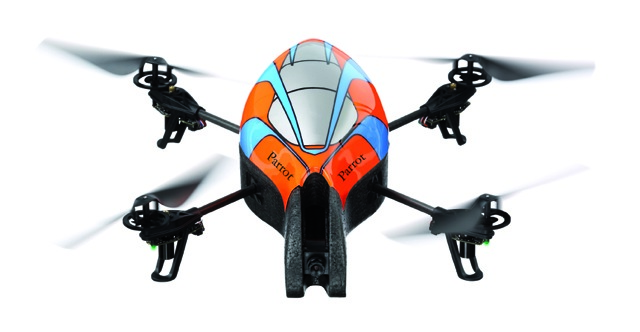
The AR.Drone is a french developed electronically advanced quatracopter. It’s a helicopter, but it has three blades. It is controlled via an iOS device through WiFi.

And It’s fun, but hard to fly.

I could go farther into depth with this, but I’m not going to.

Although it’s cool, it’s also ridiculously time consuming and expensive. Now, the AR.Drone itself is only $300. But over the course of three weeks it’s costed me over $500. Did I mentioned that I probably only got about two hours of time being able to fly it?

The real reason it’s so expensive is the repairs. You’re going to break every single piece of this thing, and the pieces aren’t too cheap when they all add up.

First, I broke a crosspiece. $30, plus two days shipping and an hour replacing it.

Then, I busted a gear. $30 later, I waited two days and spent about ten minutes replacing it.

Next, one of my batteries went bad. $40 and two days later, I fixed it.

And now, my main board is bad. But after all of those repairs, I’m not going to even order the replacement, as it’s $160 and would of course take another two days to come. Then I’d break something else and pay for another part.

This thing is fun when it works, but that’s a very small amount of time. That’s why I’m not going in to detail about it, as I’m going to save you the trouble to tell you this: Unless you have a college fund built up to repair it, don’t buy an AR.Drone.

Free WiFi Tethering with iPhone

You may have read my post on tethering with Android.

However, I did switch over to iPhone!

Now, you can tether using the iPhone by paying AT&T or Verizon, and you’ll get a portable hotspot.

But that’s extremely expensive!

Here’s an easier way: MiWi.

MiWi is an application available from Cydia (you need to be jailbroken, if you have a Verizon iPhone 4 click here) for $20. That may sound expensive, but it’s much cheaper than spending $20 each month! If you have read elsewhere about the Sinful repo, you can get it for free, but that’s cheating the developer out of what he has earned, so I don’t encourage it.

Installation

If you know how to get apps from Cydia, skip this paragraph. If you don’t, continue reading. To get MiWi, open the Cydia app from your homescreen, wait for all of the data to “reload,” and click search. Type in MiWi, and tap the result. Then, click “Install” in the top right corner, followed by “Confirm.” Let it install, and then click the big black button at the bottom. MiWi will now be on your homescreen.

Use

MiWi is an extremely simple app.

Upon opening it, you will be greeted with three tethering possibilities: USB, Bluetooth, and WiFi.

Bluetooth is advertised to use mainly with iDevices, however I don’t like bluetooth tethering as it is unreliable compared to USB and WiFi tethering.

USB Tethering only works with Laptops, and I had a terrible experience with it. Although it may boast a faster connection, you need to get it connected in the first place. That’s where I had my problems.

So that leaves WiFi. And let me just say, getting WiFi to work is painlessly easy.

You can easily setup a WiFi Password, change your SSID (network name), and even control which computers are on the network. Even better, you will get a notification bar at the top of your screen that tells you how much has been downloaded and uploaded. Handy!

The speed isn’t too shabby either! I was able to crank 1.0MB/s down, which isn’t too bad. It works great for email and basic web browsing, but I wouldn’t try to stream video over it.

Conclusion

MiWi works great for WiFi tethering. But I wouldn’t recommend it for USB or Bluetooth, as they are far less reliable.

Jailbreak iPhone 4 Verizon

Yes, I got an iPhone 4.

Do I support apple’s business ethics?

No.

Do I think the iPhone is pretty and shiny? Yes.

Now, don’t think that I’m immediately jumping on the Apple bandwagon.

The very first thing that I did with this was jailbreak it.

If you have one of these suckers and are looking to jailbreak, I’m about to make it WAY easier for you.

But JUST so you know how much easier I’m making it for you, here’s the traditional way of doing it.

Traditional

You’ll need a few things: PwnageTool 4.2, the original IPSW for the Verizon iPhone 4, and the Pwnage bundle for 4.2.8.

First, download everything mentioned above. Unfortunately, all of the links on every other website are all dead. That means you have to go on a search on the internet looking for all of the above.

Then, open the package contents for PwnageTool 4.2, go into Contents>FirmwareBundles and click and drag the Pwnage bundle for 4.2.8 in.

Next, open up PwnageTool and select advanced. Drop in the IPSW for the Verizon iPhone 4, And hit continue, continue, continue, wait for ten or so minutes. In the end you’ll have an IPSW that you need to use.

In PwnageTool, select Put phone into DFU Mode to put the iPhone 4 into DFU. It gives you step by step instructions on what buttons to press and for how long. Once you’ve put it into DFU, open up iTunes and it will tell you that it detects an iPhone in recovery mode. In iTunes, select your iPhone, then hold down the option key while clicking restore. It will give you a selection window, where you need to browse to find the custom IPSW that you made with pwnagetool. Then, let it work its magic. After the restore is complete, you will have a jailbroken iPhone!

Easier way.

Time to make this much easier!

I am going to give you the custom built IPSW and the download for PwnageTool. That means that all you have to do is the very last paragraph! 🙂

Download the files

Now that link right there will download a ZIP of the Custom built IPSW and a copy of PwnageTool.

Then, just follow these directions:

In PwnageTool, select Put phone into DFU Mode to put the iPhone 4 into DFU. It gives you step by step instructions on what buttons to press and for how long. Once you’ve put it into DFU, open up iTunes and it will tell you that it detects an iPhone in recovery mode. In iTunes, select your iPhone, then hold down the option key while clicking restore. It will give you a selection window, where you need to browse to find the custom IPSW that you made with pwnagetool. Then, let it work its magic. After the restore is complete, you will have a jailbroken

The NEX-5 Revisited

You may remember this review of the NEX-5 that I did.Well, it’s quite a while later and I just wanted to revisit this camera.I feel that the NEX-5 is proof that the size of your camera doesn’t mean that it’s more or less capable of taking great photos. The NEX has taken some amazing photos, and I never have to do any staging, fiddling with settings, or laboring by carrying a huge 10 pound SLR. Here’s a couple of the photos that I’ve taken with the NEX:

Long exposure shot from my backyard.

As you can tell, the NEX can take some dang good photos. It’s a small and compact camera, but it is still capable of taking amazing pictures without much effort. It’s a nice balance between the ease of use and size of a compact digital camera, but has near equivalent picture quality and advanced features as a full SLR. When you hold the camera in your hand it feels great, as it has some weight to it, but isn’t a huge SLR that’s a pain to carry. It’s nice to be able to have extremely great picture quality without having to go through the pain of carrying a bulky SLR.
And as you can tell from the pictures above, the NEX can take SLR photos without all of that bulkiness that advanced users may have gotten used to.
If you are interested in the NEX-5, please click here to read my full review and purchase it.

HTC Officially Announces Bootloader Unlock

Extreme android power-users often have to use different software that voids the warranty on the phone to unlock the bootloader. If you don’t know, the bootloader basically determines where to boot the phone: the main operating system, recovery, or sometimes to a restoration file.

Well now, HTC has announced from a very high-up place (their facebook page) that they are unlocking the bootloaders! Yay!

There has been overwhelmingly customer feedback that people want access to open bootloaders on HTC phones. I want you to know that we’ve listened. Today, I’m confirming we will no longer be locking the bootloaders on our devices. Thanks for your passion, support and patience.

Awesome!

I think it’s really nice that instead of fighting off developers and hackers, HTC is actually taking a side with the hackers to try and make them happy. HTC’s devices have always been favorites for porting android versions and hacking the bootloader, and the fact that HTC is embracing it instead of fighting it really makes me happy. It shows the real selling aspect of android,  open source, now being implemented in the OEM’s hardware. I wish more companies could follow in HTC’s footsteps.


Plantronics Gamecom 777

I am so confused.

I thought the Beats by Dr. Dre were the best headphones, and they’re $350.

But I’m liking these Gamecom 777s more – and they’re only $100.

Design


These things are RUGGED. When you use them, they feel more metal then plastic. There’s no squeaking, and I feel like they’re well build and well put together. All of these things I couldn’t feel with the Beats by Dre.

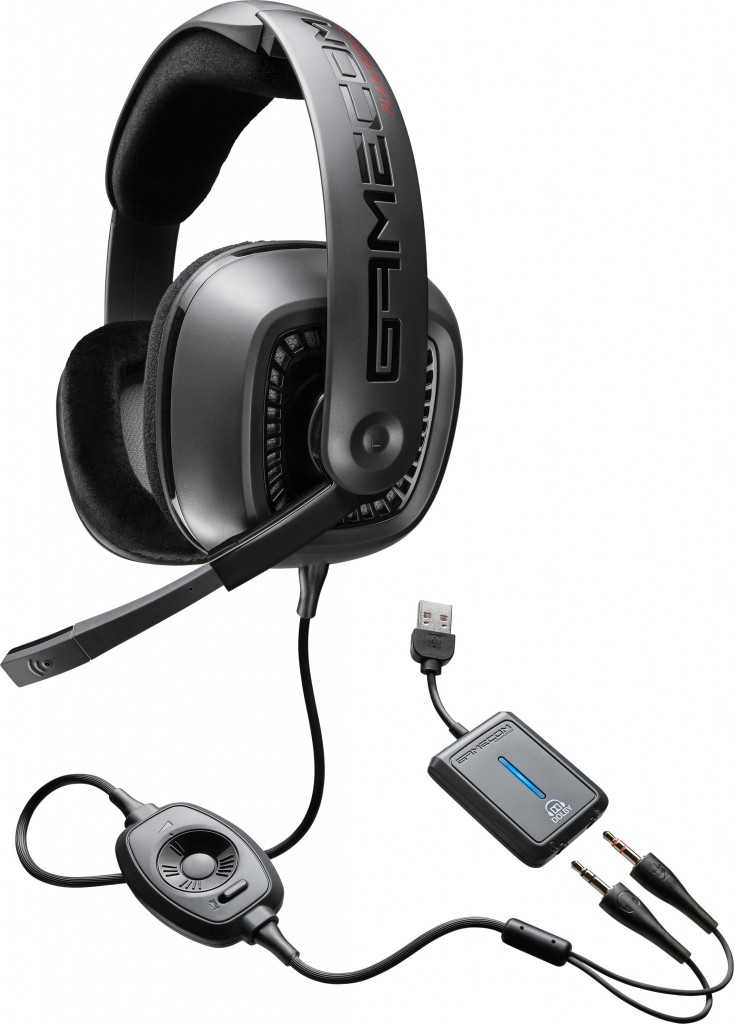
A microphone comes out from the headband of the headphones, which is a genius idea and the perfect way to conceal the microphone when not in use. The inline audio and mute control is very helpful, and can often come in handy.

There’s one thing I don’t like about these headphones – the open-ear design. All sound leaks through a TON, so don’t expect ANY privacy from these. It’s nice because when someone is trying to talk to you, you aren’t totally spaced out. But it’s also a bit annoying to the people around you who might want to listen to their own soundtrack.

Sound Quality

When it comes to headphones, this is really what it boils down to. And my god, I’d choose these any day over Beats. These have dolby surround sound technology, and through USB an included small box will convert standard stereo sound into full on dolby surround sound. If you remember my post about the new dolby technology and how it brings the music out of your ear and puts it around you? You can feel that in these speakers. Thanks to the 7.1 technology, stereo sound turns into extremely immersing rich sound. It’s amazing. Much better than the beats by dre.

Overall, the sound quality is just plain stunning and amazing.

Comfort

With these headphones, you are getting the luxury experience.

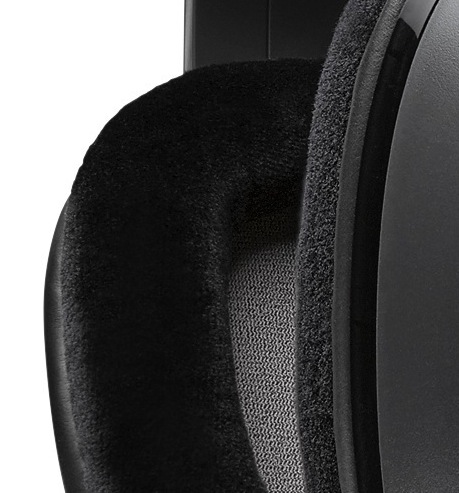
The pads are a soft, smooth fabric, as opposed to the plasticy rubbery earcups on the beats. The earcups distribute pressure really nicely, and you can keep these on without any discomfort for hours on end. The earcups are extremely spacious, which is also a nice addition. Overall, these things are extremely comfortable and don’t give you the same aches that the beats do.

Value

If you’re looking for a nice new pair of headphones, whether it’s for gaming or not, you should DEFINITELY consider the gamecoms. If you are thinking of getting beats, slap yourself and wake up out of the mainstream daze. The gamecom 777s are $250 cheaper than the beats, and give you more sound quality and a higher value of sound technology from Dolby. They also deliver a much better build quality and an extra feature such as a boom microphone extending out from the side. When you are buying beats, you are really paying $300 for fancy marketing a d nice big b on the side.

If you are looking for an extremely high-quality pair of ruggedized headphones, look no further than the Plantronics Gamecom 777s. You can get them here for $100.

Also, thank you Plantronics for sending me these for review!

Disappearing Disk Space?! 10 Step Fix

Today, I left my Mac alone for a few hours. When I come back, I am confronted with messages telling me that I don’t have enough disk space left.

A quick check of my available disk space using Finder reveals that I only have 200mb of free space left on my 115GB SDD.

Wait, WHAT?! I left my computer and it had 50 GB free. How can 49.5GB just magically appear on my hard drive?!

I couldn’t even DOWNLOAD that much during the time I was gone.

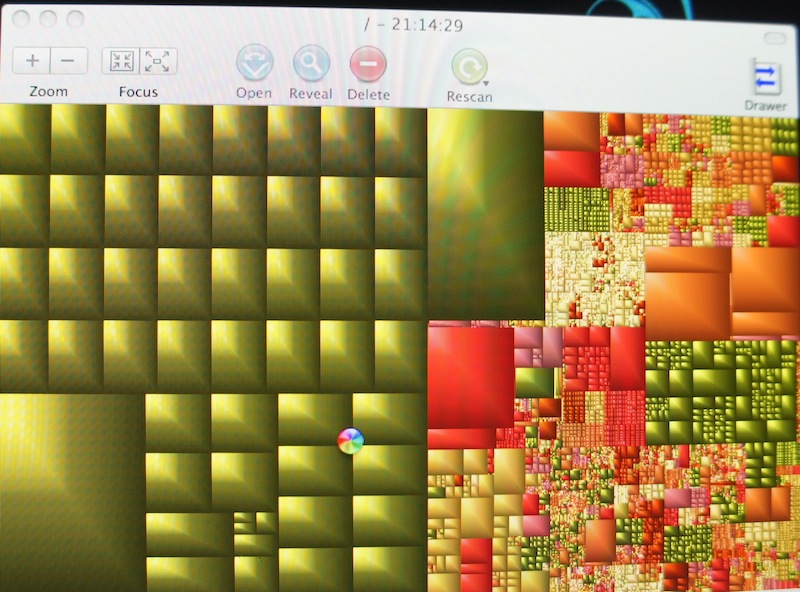
So I decided to find out what was taking up so much space using a wonderful free application called GrandPerspective (review here, what a wonderful app if I may say so myself) and decided to try and find out what was taking up so much space. Here’s what the result looked like:

WHOW THERE! What is all that green that’s taking up half of my hard drive?

A quick hover reveals that these are “swap” files that live in a hidden folder that’s reserved for system use.

Swap files are spaces where application memory/files is held. It’s like a less random access version of RAM. And somehow, my computer had 50GB of it.

Here’s the fix:

  1. Shut down your computer. If necessary, just hold down the power button and force shut it down.
  2. Hold down the shift key.
  3. Press the power button while still holding the shift key.
  4. When the apple logo appears on screen, lift your finger from the shift key.
  5. A loading bar will now appear. Wait a while and it will eventually show the login screen. It will let you know that you are booted into safe mode.
  6. Don’t log in!
  7. press the Back button on the login window, then press Shut Down.
  8. Press the power button without pressing any keys.
  9. Wait for the computer to boot.
  10. Enjoy your spacious computer!

There ya go! It’s a simple fix for a near catastrophic problem.

To prevent this from happening, restart your computer every couple of days. That was probably my problem, as I haven’t restarted in about a week. Oops!

When you restart, you don’t need to do the safe boot, as it will still clear a large amount of the swap files and cache. This is more proof that it’s a good idea to restart now and then, preferrably daily!

A reboot a day keeps the swap files away!

LED Cinema Display (27 inch)

Monitors are quite important when it comes to computer equipment. Besides speed, the only other thing that really matters is what you’re staring at all day. People often want to get a really nice, large monitor, so they have space for all of their windows and applications. Different things matter to different people – some people it may be about size, so they can fit as much as possible. Sometimes it may be color recreation, so you get the most precise experience for editing photos possible. For others it may be response time for gaming.

If you fall into any of these categories, I’d like to introduce you to the LED Cinema Display by Apple.

Wow.

27” of hi-definition, LED-Backlit glory. Sold yet?

How about a built in iSight camera, microphone, 2.1 speakers, and a 3-port powered USB hub?

That’s what I thought.

Lets take this thing a bit more in detail.

Design

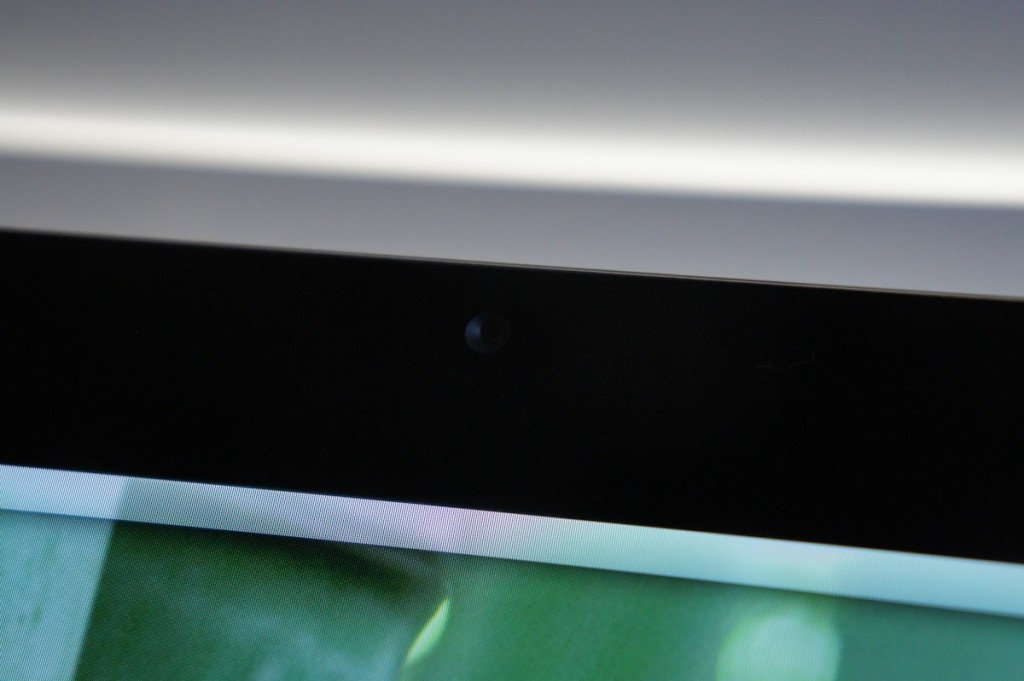
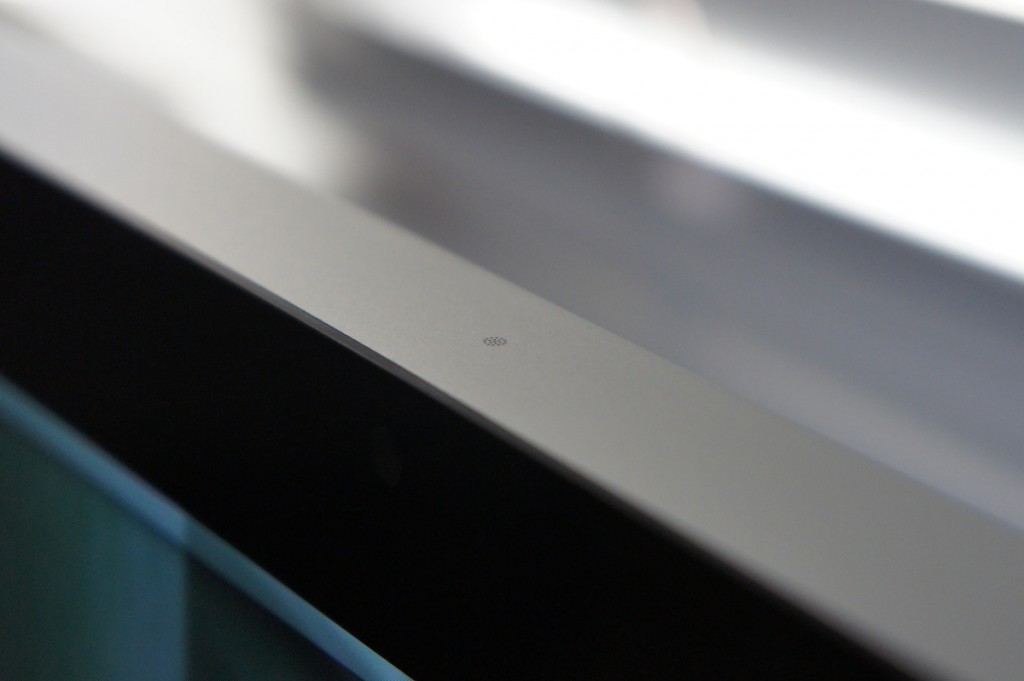
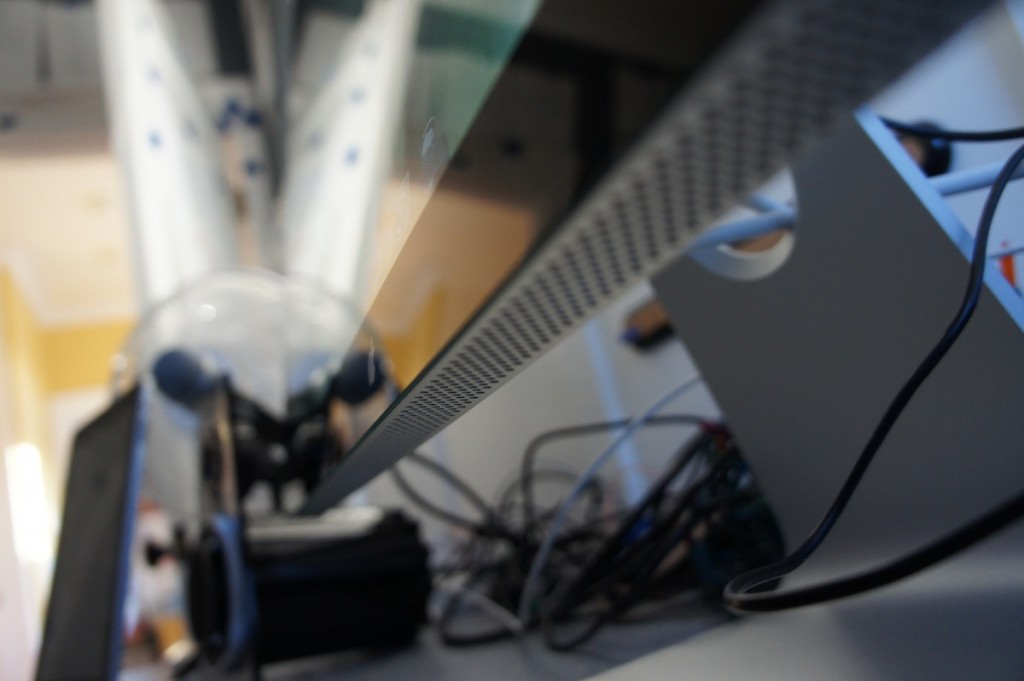
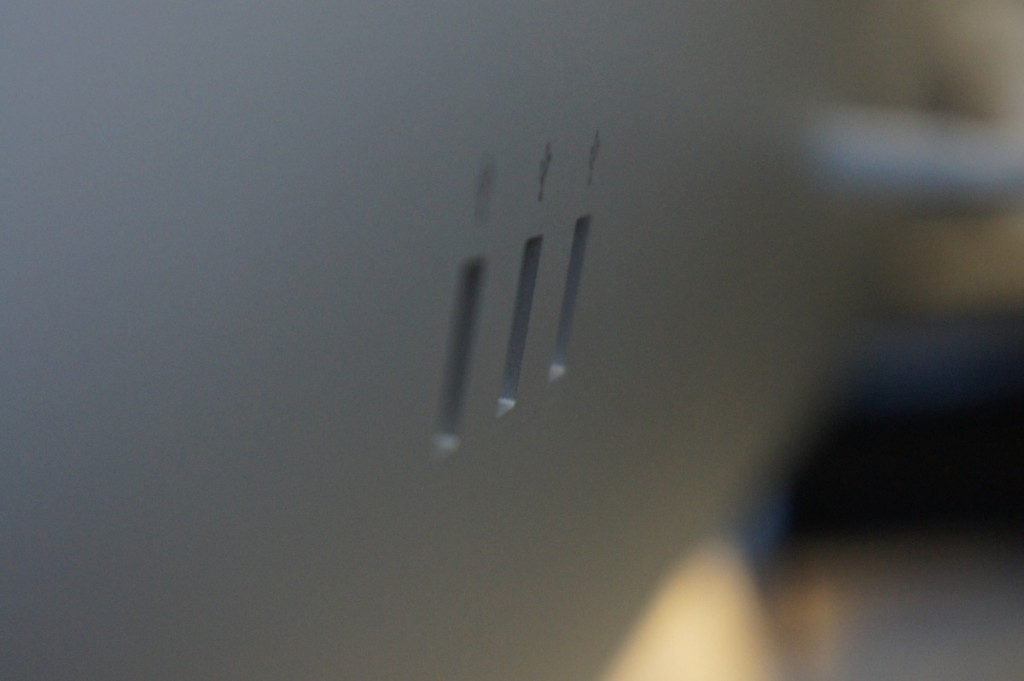
It’s an Apple product. What did you expect? The design of this beauty is simple and seamless (as usual). Looking at the monitor you are greeted with beautiful, edge-to-edge glass with a nice black bezel underneath. The iSight camera is embedded beneath this glass. Look down, and you see a thin, clean, pure aluminum stand. On the top, you find a very small grid where the microphone sits. On the back, you find two cables coming out, and 3 USB ports. The rest is all aluminum. Wow.
Display

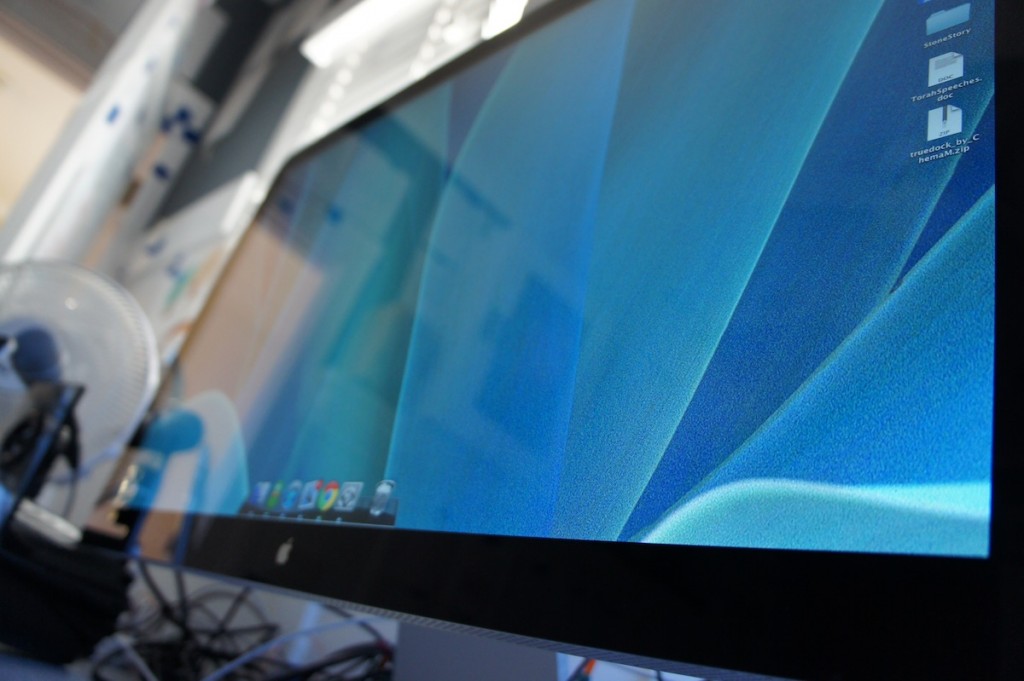
As I said, 27 inches of LED-backlit glory. Yes. The display is EXTREMELY bright, and at times hurts my eyes if turned up too high. The colors POP like nothing before, and the 2560×1440 pixels doesn’t do any harm either. The 12ms response time isn’t particularly impressive, but there was absolutely no ghosting in any of my tests. video play-back was clear, and the monitor boasted quite impressive, even blacks. Basically, this screen WOWS.
Extras

This monitor is a bit more than a monitor. The iSight camera works pretty well, and sends a pretty clear image. The microphone on top is a quite welcome addition, and definitely comes in handy when my laptop is closed. The quality is on par with the built in microphones in the MacBook lines. The speakers aren’t worthy of too much notice, but are definitely much better than built-in laptop speakers. They aren’t QUITE as nice as my 1300 watt surround sound system, but they will do the trick for those not so picky about their audio. The USB hub is powered, so your computer doesn’t need to be connected to charge all of your USB devices.
Setup

What kind of GMG review would this be without the setup instructions?

Unfortunately, if you don’t have a Mac built during or after Late 2008, you won’t be able to use this monitor. There are no hopes for PC users, so if you are I’m sorry for making you salivate so much just to disappoint you with the news of the incompatibility.

But if you do meet those requirements, then you’re definitely in luck!

As I said, on the back of the monitor there are two cables coming out. One of them is power, which plugs into a grounded AC outlet. The other sprouts off into three cables: MagSafe, USB, and Mini DisplayPort. The MagSafe is so that you can charge your MacBook, and you can leave your charger where it belongs: in your bag. The USB port allows the USB Hub on the back to function properly, and it also connects the iSight camera and Microphone. The Mini DisplayPort is how the video is transferred to the monitor.

Setup beyond this is pretty simple. Just plug everything in and you’re ready to go. The display automatically has the correct settings, the iSight camera and Microphone simply work, and your computer is charging. Great!

One thing I’d like to note about this display is that it has absolutely NO on screen controls. NONE. It doesn’t even give you any notification when the signal is lost, or anything along those lines. It’s either on, or it’s off. Everything else is software controlled, and you can change your preferences for the monitor in the Displays Preference Pane. The brightness of the display is controlled through the preference pane and can also be controlled using the function keys on the Apple Wireless Keyboard.

Conclusion

Overall, Wow. The monitor is beautiful with any setup, and the design of it is just plain breathtaking. Photos and videos look amazing. The brightness of the display can give me a headache. What’s not to like?

There are two main downsides to this monitor. The first would be the glossy screen. Some people may hate this screen, and if you’re using it in an area of direct sunlight, this is probably a pretty bad choice for you. The second would be the price. Very few people I know are willing to fork out $1000 for a monitor. But if you are, and you don’t have a problem with the glossy display, and you have a compatible Mac, you can stop your salivating and go take a lick (make sure you wipe your display after though).

 

Finally, a good use for an iPod Nano!


You may remember that I wrote this post hating on the new iPod nano because of it’s size and the idiotic idea of a clip. Also, the size of it! You’d lose it in an instant!

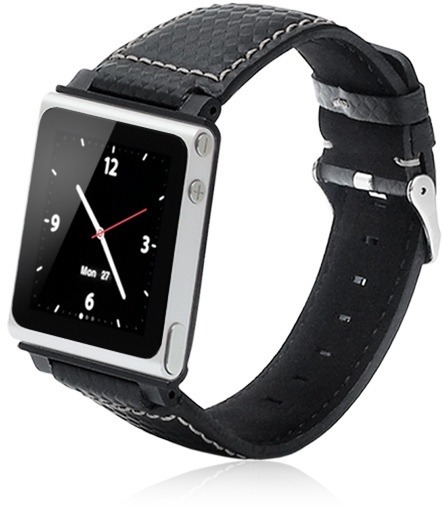
Well, I’m changing my views on this. And it’s all thanks to one accessory called the iWatchz.

Basically, this turns the iPod Nano into a wristband. I thought that sounded stupid, until I tried it. I realized that as a wristband, the iPod nano opens up to a whole other world of possibility. The Nano can act as a stylish watch, which will surely show off your geekyness. But in addition, to have your wristwatch actually be a music player, photo viewer, and FM radio can all come in handy. You don’t have to worry about bringing your iPod with you – you already have all of your music on your wrist. Ha!

Having a wristwatch is something you’re probably already used to. So being able to have all of the iPod features with you EVERYWHERE without having to remember it or lose it? Handy!

The reason I really didn’t like the nano was because they asked you to clip it on to your shirt and proudly display what you’re listening to. You could lose it, it could fall off, and you’d probably forget about it fairly frequently.

Having it as a wristband solves all of the above problems, and allows you to be sure about where your iPod is and not worry about it falling off or losing it.

You can get the iWatchz here, and you can get yourself an iPod nano here. Together, it’ll cost ya about $200. In my opinion, it’s quite a genius combination.