Create a spanning wallpaper

So I have expanded my setup recently to six screens, and one of the fun things about having a lot of screens is that you can make a wallpaper span across all of them. There are apps that do that, but they can’t span across different computers. Here’s to do it the manual way.

To do this we will take a single large wallpaper and split it up into individual pictures for wallpapers for each screen that you are spanning across.

1. Pick a picture

The wallpaper doesn’t have to be too large, but one that was made to fit a very large monitor always goes best. I’m using an image that is 1920 pixels wide.


2. Find screen resolutions

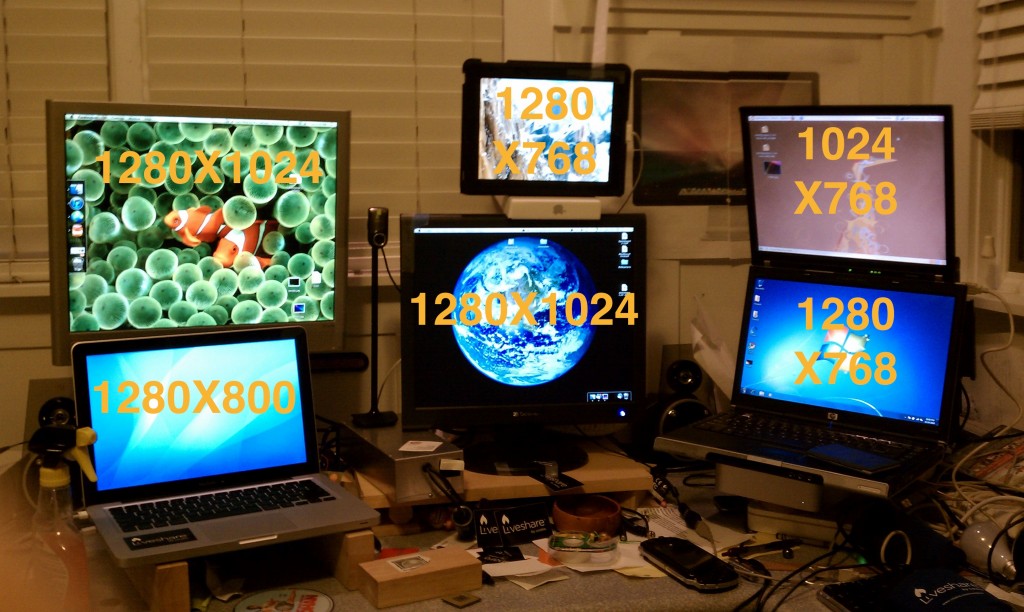
This is an extremely important step in the process so you know the proportional size of each chunk of your source image. The resolution can be found in the display preferences of every computer (or screen resolution preferences). Here’s the resolution of all of my screens:

Once you have that all worked out, time to break out photoshop.

3. Cut your pictures

Warning you: this step takes a little while.

Before you can start cutting your photos, you need to know the proportions of your screens. This can be done with a good old fraction simplifier.

Just visit this site and put in your width into the top of the fraction and the height into the bottom. Then select to have the result as an improper fraction. You may want to name each screen screen 1, screen 2, and so on. Find the result of each screen resolution.

Then, open your source picture in photoshop. Select the rectangular marquee tool and where it says style select fixed ratio. Where it says width and height put in the top and bottom of the fraction you got out of the simplifier.

I’m going to start with my first screen which is 1280X1024, which according to the magic simplifier comes down to 5/4. So I am going to put 5 and 4 into photoshop, then start to select what you would like to be for your first screen. Because my first screen is the top left, I want to select in the top left of the picture.

Once you have the selection, create a new document called wall1 and make it the size of your first monitor.

So now you need to go back to where you made your selection and hit copy, Then, take your paintbrush tool and color over it. This is so that when you make selections in the future you know where your screen will be.

Then, go into that new blank document you created and paste it. Use the free transform tool and move the edges of the pasted selection to the edges of the canvas. Save and repeat for every single one of your screens.

Done yet?

If so, you should have  a bunch of files named wallX.psd (which you should also convert to JPG) and a bunch of black squares on your source file.

Now you have to distribute those files to the appropriate computers. You may have to use a USB stick but I have FTP and a web server so that makes it easy.

Once you have all of the wallpapers set your result may vary depending on the spacing or irregularity of your monitors. With mine you can still see it but not that well.

iPod Nano

The iPod nano hasn’t felt much love from me so far. Lets get into the details.

Design

The iPod Nano features a very small and portable design. They tiny little screen has a black bezel that goes across the front of the screen. Apple decided not to totally flatten it out and give it edge to edge glass (which would have been a nice touch, would it have killed you to do that apple?). They turned the screen into one of touch, and makes it very difficult to use if you have sausage fingers. One of my main complaints would be the font size. I have pretty good vision and it hurts my eyes to look at the screen for too long. The iPod Nano has three buttons on it: Volume up, volume down, and lock (Apple is slowly doing away with the hold switch). The iPod Nano has a clip on the back which is an intersting addition. Ads show the nano being clipped onto shirts, bags, pockets, etc. The problem I have with this whole clippy intention is that the way they want you to wear it displays album artwork (or pedometer stats or whatever else for that matter) to everyone around you. I know it’s nice to show off what $1.29 music you were able to afford, but I really don’t need to know what music you are listening to. The nano comes in grey, black, blue, green, yellow, pink, and red.

Interface

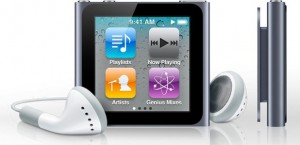
The iPod nano has it’s own software which isn’t iOS but has a very similar interface. As you can tell by the picture on the left is has icons and pages and a wallpaper, but it doesn’t have any apps. You can rearrange all of the icons around on the home screen. Instead of having an app for all music, there are different icons on the home screen for songs, artists, playlists, now playing, genres, etc. The interface inside of the apps is like a shrunken down version of that from iOS. One interesting feature would be that the screen is able to rotate to fit whichever way you have the iPod clipped, but to do this you have to put two fingers on the screen and spin them around whichever way you want to have the screen oriented. It’s a bit disappointing that they couldn’t have at least thrown in an accelerometer to take care of this.

Sound Quality

I was personally a little disappointed with the quality of sound on this device. I found it to lack some of the higher ends, and while it still delivers full sound doesn’t pack that higher punch that other iPods do.

Value

The iPod nano goes for $149 for the 8GB version or $17o for the 16GB version. Personally, I think it’s a little bit of a rip off as the iPod shuffle goes for $50, and the nano is a shuffle with an FM tuner and a touchscreen. Personally, I think that this was a bad decision by apple as a touch screen interface on such a small device is very difficult to navigate, and believe it or not there are still people who just want to listen to music but definitely like having a screen and really don’t need 16o GB of storage space.

iPod nano

Teleport

Many people I know have multiple Macs. The most standard multi-mac setup would be one desktop (usually a Mac Mini) and a laptop (Macbook, Pro, or Air). This is usually so that one can have power and still be mobile. But when it comes time to sit down and do some work, it might be useful to have two screens (studies show a dramatic increase in productivity with more screen real estate). But one problem faced is that with multiple computers comes multiple mice/keyboards. Well, if you’re all macs, then there’s a solution.

Teleport is a free and easy way so that you can use one keyboard/mouse and have it span across multiple computers (so you don’t have to move your hands to control a different computer). It’s extremely simple to use.

To get it all working, all you have to do is download teleport. Teleport is a Mac Preference pane (.prefpane) so to configure teleport you open system preferences and click on teleport (under other). Here you can configure settings and arrange the screens. NOTE: Make sure that both Enable Teleport and share this computer are both checked.

In the preference pane you can configure things like pasteboard sync and choose if you want to only switch to the other computer when you are holding a specific key down.

the rest is pretty simple. Just move your mouse across the edge of the screen and it should show up on the screen of the other computer. Whichever computer your mouse is on will be the computer that the keyboard affects. However, the volume keys don’t work across Teleport (neither does multitouch except for scrolling).

Teleport is a great free app that works and does what it should quite nicely. There are some problems when your mouse is on a client computer screen and the client computer loses internet connection. It takes quite a while for your mouse to reappear on your main computer. But the convenience of this application overcomes this setback.

Teleport main site

Teleport direct download

3as1ly Charg3 Cr3d1t Card5

You are a babysitter.

You are a bartender.

You are a photographer.

You made a bet with a friend over a football game.

All of these require payments. And while yes, you could take cash, sometimes it’s just easier with a credit card, as the money goes straight from their account to your account and you don’t have to deal with any of this green paper stuff.

Usually, you have to have one of those little thingies that they have at supermarkets with a single-purposed computer just for making a bill and accepting a credit card. But now, you can be on your way to accepting credit cards for a very small amount.

The key to this whole task is Square.

Square is completely free and consists of two parts: An app for your iPhone, android, or iPad, and the physical Square card reader.

Amazingly, the square card reader works with all of these. One model for android AND iPhone AND iPad. How you say? This picture should sum pretty much everything up.

So in case you didn’t figure it all out from that picture, basically the square is a little plastic thing that you plug into the headphone jack that has a slot that you can slide a credit card though. In the app, you can select how much you want to charge.

Now after you have put in an amount and swiped the card, you have to sign to authorize it. Of course that would usually be done with first a pen and paper, but now you can with a stylus on one of those thingamajigs in supermarkets. With square, you are supposed to use your finger on the touchscreen, but that can be hard as we are used to having pens. So that’s why in addition to your app and a reader, you need a pogo sketch to go along with it.

That should pretty much explain it.

Now after you are done with all of this swiping and signing and lolly-gagging, its time to print a receipt. I don’t think so. Instead, you can have the receipt emailed to a specified email address. cool, eh?

So wherever you are, at a wedding or the house of a small child, you can always accept credit cards and let people sign and get their receipts without ever seeing a piece of paper.

Square

Pogo Sketch

How to: Awesome mousepad, version 3!

Yes, I’ve already done two posts about creating your own amaing mousedpad that’s better (and cheaper) than the ones you can buy at a store. But here’s another one in case you don’t want to put together a whole thing with aprchment paper ducs tape and spend more than 2 minutes on.

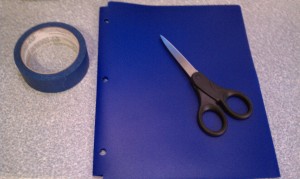
Here’s what you’ll need:

Plastic folder

SHARPIE

Blue/duct tape

Scissors

The folder can't be rubber, make sure it's plastic!

This is by far the easiest one to do, and works just as well. Here’s what you do:

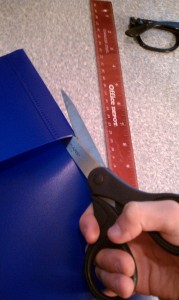
First, use the sharpie and maybe a ruler to mark on the front what size you want to have your mousepad. This is nice because you can have a custom sized mousepad.

Next, cut the flap off of the side of the folder you put the sharpie marks on.

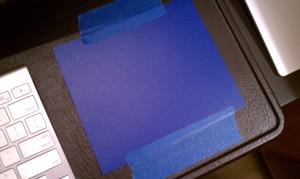
Then, cut out your sharpie marks. Once you have done that, take some tape and tape it do your writing surface. Done!

This one glides a bit more compared to the other ones and is a bit more crisp. The other ones feature a nice cusion, so choose whichever one you think would be best for you! Unfortunately, the images are all broken, but try to d your best with the text. 🙂

Ver. 1

Ver. 2

Failz to you Verizon, Failz to you.

How I feel. 🙂

So my Droid Incredible started to act up. Things weren’t quite working, and the phone kept rebooting itself. It also wouldn’t update to the 2.2 OTA. So we call Verizon and they tell us to go into the vrizon store because they had “More information.” So we schlep all the way over to a Verizon store and they say the EACT same things that they said over the phone. So we leave with absolutely no help. So the next day we call verizon AGAIN and we finally get a replacement phone shipped. But this hasn’t been the last of your problems. First of all, they tried to ship the phone to some invalid address in South Dakota, wherever THAT is. They were off only by half of a country. So then they send it to the correct address. Nope, it gets BETTER. I open it up and turn it on and activate it and sync it and everything, so it all looks good. Until I make the mistake of opening up the camera app. Low and behold, the camera wouldn’t focus properly. At all. It just didn’t focus. I changed every single setting possible. SD card in, SD card out, hard reset, soft reset, reprogramming. Nope. So I call verizon again and I tell them the problem and they say “Well, we can send you a replacement phone,” and I just say “That would be great. Thanks!”

So here I am with 2 faulty Droid Incredibles, and one of then happens to be a certified like-new replacement. That’s odd, because like new phones aren’t usually faulty like that.

So verizon, FAILz to you. I Hope this one works. It took 3 calls, a trip to the verizon store, and 2 weeks to get a phone that STILL doesn’t work properly. First time in 10 years. Yup, my WHOLE FAMILY have been verizon customers for 10 years. But from the way your customer service is, I’m not sure if it will last to much longer.This is your last chance Verizon, and I HIGHLY RECOMMEND you get it right.

Recent verizon support call: the good and the bad

So my Droid Incredible has been doing some odd things.

First of all, it didn’t update to 2.2 correctly. It tried and failed.

Second of all, it keeps rebooting itself randomly.

So we call up verizon support about both problems. Lets start with the bad:

The Bad:

We called and a nice lady answered who had us go through some simple procedures like a hard reset. We changed some settings to try and help the rebooting. As far as the update goes, she told us to go to our local verizon store because they had “more information”. So the next day we went and waited in line and everything and what does the guy say? There’s nothing we can do. You’ll just have to wait for the update. Now inferring logically, I argued that “The system has the phone marked as upgraded, even though it failed the install.” The guy says “WELL, it takes about a month to roll it out and everything.” He really didn’t get that we HAD gotten the update, it just didn’t install. Once again, “Well, you just have to wait about a month and see.” Thanks for the help. We schlepped all the way over to a verizon store, waited in line, and we get absolutely no valuable information. Great.

The good:

So after that, we call verizon again and someone knowledgeable picks up. We had to wait on hold for 8 minutes but let me say, it was well worth the wait. He asked about the water activation sticker and had us look at the firmware on the device. And he says (finally) “Well, the system has your device marked as upgraded, even though your phone says differently.” THANK YOU. I’M RIGHT. THE TWO OTHER PEOPLE WE TALKED TO WERE WRONG. So he asked if there was any physical damage and hallelujah, a replacement phone is on it’s way.

But the real question is, why did the two other people there have no idea what they were talking about? I mean, come on verizon. Why would you hire them if they aren’t knowledgeable? These are questions that may never be answered, but in the mean time, here comes a device with 2.2 pre-installed. Yay!

Beats by Dr. Dre studio

Well, the Solo HDs weren’t so hot. At all. But lets check out the original beats, the studios. Throughout this I will be comparing the headphones to their main competitor, bose.

Design

Like all beats products, these are nice. They feature smooth curves that give the bose style envy. Unlike bose, the exterior is reflective and streamlined. One of the biggest differences is how at the ear cups instead of having odd and obvious joints, you can’t see the joint one bit. This adds a much smoother aesthetic to it.

However, this cannot be defined as lightweight headphones (which luckily they aren’t). Unlike the Solo HDs, they are quite large and heavy and take up a lot of room. These headphones are great for thigns like airplane, car, or train rides, but I wouldn’t go on a run or hike or bicycling with these things. The Solo HDs were light and small, but that is one of the biggest trade-offs to headphones. Smaller size results in smaller sound, which results in degraded sound quality. And hence, the studios don’t have that same sound quality problems as the Solo HDs.

Features

Unlike the Solo HDs, I can actually include a section about features for these headphones!

A key feature would be the noise isolation. No, not active noise cancellation, just isolation. This is where the bose take the gold. The beats by dr. dre studio headphones do indeed have a form of noise cancellation, but it only blocks out the lower end of the sound spectrum. For example, I can still hear a car horn, unlike the Bose. But playing music also blocks out a large amount of sound on top of that.

Value

For $350 MSRP ($300 at an Apple store) it’s quite an expensive purchase. For so much money, you might as well get Bose. They are great headphones, as long as you can fork out the money.

Beats by Dr. Dre Solo HD

These are some of the highest quality headphones on the market, competing with Bose. Here’s a full review of the headphones.

Design

Attractive and minimalistic design

The Beats Solo HD are some stylin’ headphones. They boast a very well put-together minimalistic design that will make skullcandy jealous. It features a tri-fold design so that it can easily be stored into the soft case.

The headphones detach from the cable so that Monster didn’t have to mess around with cable management in their case.

The Beats by Dr. Dre Solo HDs are on-ear headphones so they rest on your ear instead of going over your ear. This does a good job of keeping the music from leaking out, so you won’t bother the others around you.

The ear cups of the headphones pivot to cover your ear more evenly and comfortably.

These headphones are very lightweight and feel light on your head. They are great for people on the go with a busy and on the move lifestyle.

Sound quality

Sound is the most important aspect of headphones. If there is no sound, then what’s the point? The Beats by Dr. Dre series is all focused on sound quality, but these headphones are a broken link in the chain of sound satisfaction (like what I did there?). Compared to many headphones on the market they are above average, but some of the bose headphones really come out on top with this one. The sound from the headphones has quite the emphasis on bass. The bass tends to drown out everything else, which tends to take away from the value of these headphones.

Value

These headphones sell for $220 MSRP which is a bit expensive for headphones of this quality. These headphones seem like $100, and $220 is a lot to ask for for the sound quality these headphones deliver. I’m afraid I’ll have to mark these as a DNB, or Do Not Buy unless you can find them for under $150.


The new iPod nano and why I don’t like it

So today apple announced a chutzpah of new stuff (as expected) including a new apple tv, a new iPod touch, a new iPod nano, and a new iPod shuffle. I’ll cover those in a later post, but for now I want to talk about the nano.

What apple did with this design really stood out to me, and not in a good way. First of all, they got rid of the buttons and replaced it with this extremely tiny excuse for a touchscreen, and got rid of the camera and curved edges and put a clip on it. So basically, it is an iPod shuffle with a touchscreen. But my big problem is the clip…

So lets say you have it clipped to your shirt like that picture. If you want to change the song you either have to bend your head over to see the screen and look like an idiot or you have to unclip it and attempt to hold the awkwardly shaped thing to change your music. So then why don’t you just put it in your pocket? Why include the clip? The only other function is to show EVERYBODY ELSE IN THE WORLD what music you are listening to at the moment. But to tell you the truth, nobody really cares what you listen to other than you. So that eliminates the clip. And what’s with the form factor of this thing?! It is a square that barely fills the palm of your hand, and it doesn’t look like it would be very fun to try to hold.
Oter than the clip, the other thing is how they tried to make it an iPod touch-like interface with homescreens. But instead of having apps, ou have things like albums, playlists, genres, etc. Why?! This interface might be cool if you wanted to use apps on it, and if you want apps go get yourself an iPod touch. it is 1/3 bigger (and is so much more confortable to hold) and boo hoo, you can’t tell the world what you are listening to. Oh, darn. That’s too bad.

I mean, nobody really cares about your music! It’s nice to know you are currently listening to the black eyed peas (I guess that explains why you, sir microsoft employee, are line dancing in the middle of your stores [traitor using iPods, don’t worry I won’t tell. ;-J ]) but nobody cares at all! It’s just an iPod shuffle with a screen. A smaller, less functional iPod touch. Something along those lines.

If you disagree or have anything more to add, comments are welcome. 🙂

How-to: Install Android 2.2 (Froyo) on Droid Incredible

NOTE: I DONT TAKE ANY RESPONSIBILITY FOR LOSS OF DATA ON YOUR PHONE!

Thank you droid life, you have a build of froyo for droid incredible. Cool!

The only problem is that you have to be rooted. And from what I hear that is a command line disaster. Here I’ll show you how to root and convert to android 2.2 simply and easily. You’ll have to have a USB cable and an SD card in your phone. Sadly I can’t give you screenshots for the whole process as this can’t be undone. But I’ll give all of the screenshots I can. So here goes!

WARNING: THIS PROCESS MAY OR MAY NOT BE REVERSIBLE. THE ONLY BUG I’VE FOUND IS THAT GPS NO LONGER WORKS. DO NOT PROCEED IF YOU USE THE GPS FREQUENTLY (HOWEVER AN OFFICIAL RELEASE WILL NOT HAVE THAT PROBLEM SO IT SHOULD BE RESOLVED IN A FEW MONTHS)!

Step 1:

Download this zip. Once it has started downloading proceed to step 2.

Step 2:Backup all of the photos and videos from your phone. This process will indeed wipe out your whole phone and make it brand new. I am not responsible for anything that happens to your data!

Step 3: Download THIS application for mac, and THIS application for windows. These are the unrevoked.com reflashers.

Step 3a: Open the reflash application on your Mac or PC. I will show the process for mac as I assume that it is similar for Windows.

Step 3b: Plug in your phone to your computer with the USB cable.

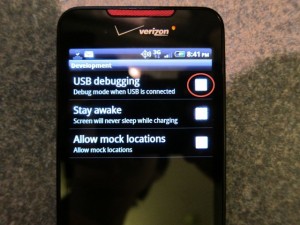
Step 3c: On your incredible go to settings>Applications>Development and enable USB debugging.

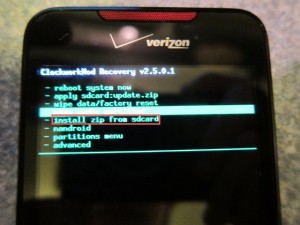
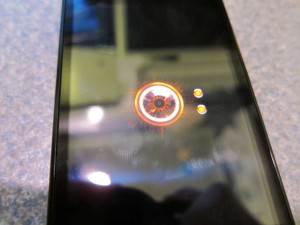
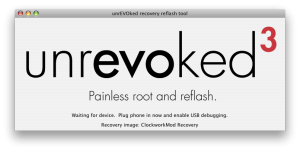
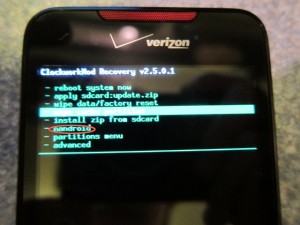
There’s no turning back now, as things will start to happen. Your screen will be flashing terminal commands and all this crazy stuff that I couldn’t explain. Once it is done you should be shown a screen like this (if not, you should be on a white page with skateboarding android logos and select recovery from that list, and if not that, boot up while holding the optical trackpad button and select recovery from that list, and if not that then select bootloader then recovery to get to this list):

Step 4: You are now rooted! At this screen scroll down and select nandroid. from here click backup and let it run. When it is over reboot. I’m *pretty sure* that it should just reboot into 2.1. using nandroid backs up all of your data just in case something goes wrong so you can restore.

Step 5: Your download of the zip should be complete by now. Plug in your incredible to the USB cable (if it isn’t already) and set the USB mode to disk drive. Then copy that zip over to the SD card (NOT THE PHONE STORAGE! to figure this out your phone storage will be 8GB, the other mounted drive is the SD card!). Copy it to the root not under any other subfolders.

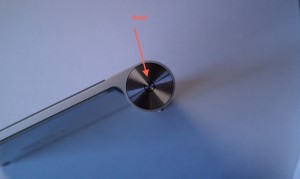
Step 6: Turn off your phone and reboot while holding the optical trackpad.Select bootloader from the list then select recovery. Then select Install zip from SD card.

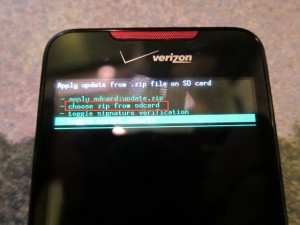
Next, select choose zip from sdcard.

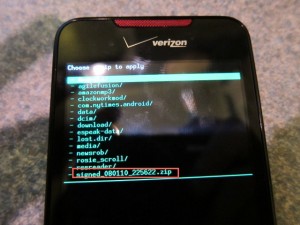
Then, scroll down the list and select the zip that you downloaded.

It will begin to install android 2.2, and this could take a few minutes.

After, reboot and you should see this new boot animation

followed by this red eye.

It may hang at the red eye for a few minutes, so don’t freak out (like I did)!

After it boots you will be introduced to android 2.2 with sense. Congratulations! To prove it, go into settings> About Phone> Software. It should say 2.2 under the firmware! Enjoy!

Le Trackpad de Mágico! (Magic Trackpad)

I have no idea why but this has been requested by numerous people.

Along with the launch of the new and improved iMac, Apple released the Magic Trackpad. It’s basically a larger bluetooth MacBook Pro trackpad. Their tagline is “why do notebooks have all the fun?”

I find it useful even tough I already have a MacBook Pro, because when I need gestures like exposé It is right there, not a reach across the desk to get to my MacBook.

Setup

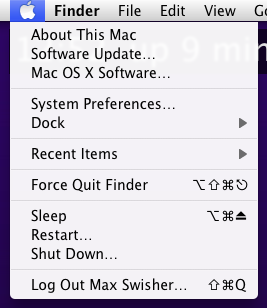
The setup is very simple. First step is to update your software. Do that by going to the apple menu and clicking Software Update. This will then download the drivers for the Magic Trackpad.

Once you have downloaded the update and restarted, press and hold the power button on your trackpad until the green light starts flashing.

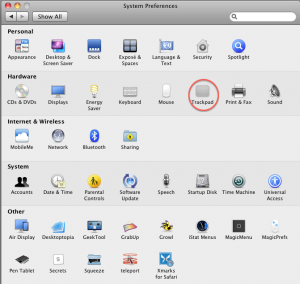
Once that is working, go into System Preferences and click on Trackpad.

Once in the pane, click on Set Up Bluetooth Trackpad in the bottom right corner.

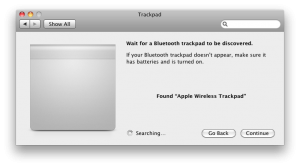
Make sure the light on the trackpad is still blinking (if it isn’t just press the power button once) and you should see a window appear. After a few seconds it should look like this.

Once it looks like that^^^ click continue and your wireless trackpad will be setup! In the pane that follows you can configure a bunch of cool options.

Review

The Magic Trackpad is a good addition or replacement for a mouse. The large surface is convenient because you will rarely have to pick up your finger, however having it so large does make it feel a little bit awkward.

I think that if you are getting (or have) an iMac or other Mac desktop then you may prefer this over the Magic Mouse for it’s multitouch gestures. For MacBook and PacBook Pro users I find this only useful if you are already using an external keyboard and mouse because you can get the gestures right where you need them without reaching out across your desk to get to your MacBook’s Trackpad. It’s aluminum design fits in perfectly with the Wireless Keyboard and is even the exact same height. I’m thinking that apple should create a Magic Keyboard that has a Magic Trackpad on the side of it.

The Magic Trackpad is currently available at your Local Apple store for $69.

[ad code=1]