About Max Swisher

14-year-old web developer and writer. Avid collector of vinyl, cameras, and typewriters.

Google+

You may remember Google Buzz, the Gmail integrated failure of a social network. From the get-go it was obvious that it would fail – mainly because it was so dependent on Gmail.

But Google is back – and this time they’ve got something new called Google+.

You probably expect google+ to fail like Buzz. But there are two things that might get people to switch over, which ultimately means facebook’s downfall.

Circles

So on Facebook, you have all these friends. Family, business, college buddies, and everything inbetween. When you share a post on facebook, it goes to everybody you’re friends with. 

But what if you only want to share some things with Family, somethings with College buddies, and absolutely nothing with your business friends?

Google circles solves that problem.

You can add people to different circles – a circle for friends, a circle for family, and you can have lots of circles with whatever names you want.

Then, you can view posts from one circle at a time. So if you want to view just the posts from your family, you can click the “Family” Circle and see just the posts from the people in that circle.

When it comes to sharing, it’s just as simple. Click the “Share” button and you will see an empty box, with selections to share a picture, a link, a place, etc. Once you’ve crafted your wonderful post, you can then select which circles you want it to be viewable to. This means that only the people in that circle will be able to see it, and nobody else. Of course, you can share with more than one circle, one person at a time, with all of your circles, and publicly. It also makes it easy to share absolutely nothing with your boss!


API

The other thing that may determine the success of Google+ is something that hasn’t been added yet – an API. An API is an interface that developers can put in their apps to integrate with different services. An API is what allows Twitter to have so many apps that post to it. And if there’s no way to post to Google+ other than the official website or app, nobody is going to want to switch. After all, we all want to boast our high scores from useless iPhone apps to all of our friends, right? Without an API Google+ isn’t going to get far.

A couple of other features…

Google+ is a great social network, and all it needs to become better than facebook is an API.

As far as features go, Sparks and Hangouts are two things I didn’t mention.

Sparks is a way to follow your interests. I can have a Technology spark, an Android spark, a Cooking spark, etc. I don’t find them very useful – all it does is aggregate posts that are relevant to whatever keyword you put in.

Then, there’s Hangouts. This is a multi-person video chat that is executed very well. (P.S. the below photo was taken of/by Greg Sterling)

Yes, it works as well as it looks.

But not everybody will find these features useful enough to want to switch over from facebook, which is why I think that Circles is the real big thing with Google+.

Google+ is only available by invite at the moment, but should be released to the public soon.


How-to: Clean iPhone 4 Bumper Case

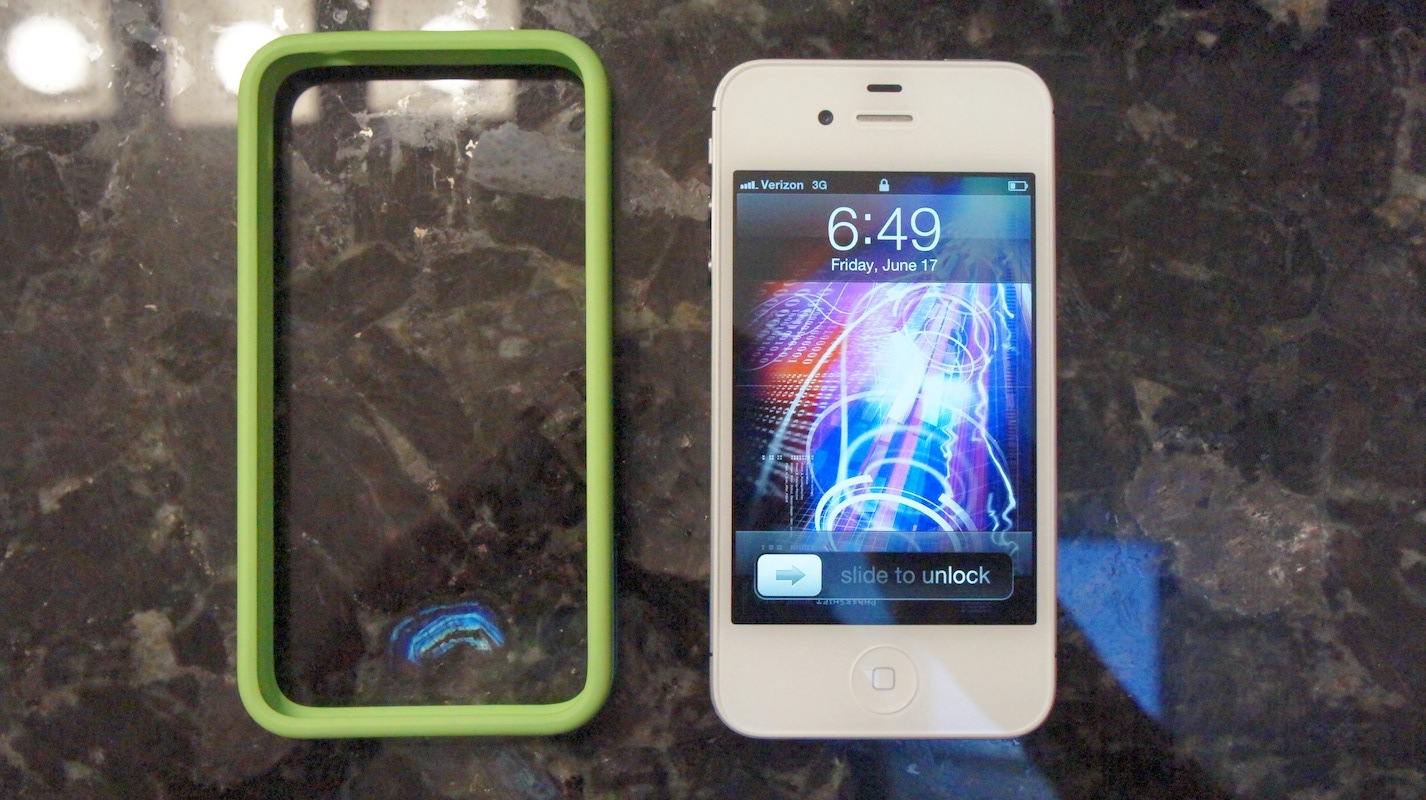
The Bumber is a sleek case made by Apple for your iPhone 4. It only goes around the edges, and is mainly made to protect your phone from scratches (not-so-drop-proof).

The edges of the case are made of hard plastic; the front and back edges, however, are made of a soft rubber – which tends to hold on to a fair amount of dirt.

On the web there’s lots of different suggestions that were said to fail. However, I found a solution that seems to work quite well.

Materials:

Sink

Warm, running water

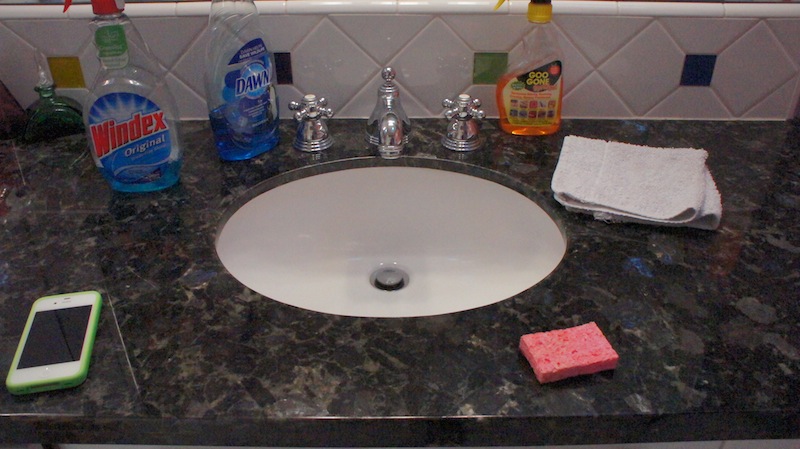
Windex

Dish soap

Goo-Gone/Goof-off/Orange based stain remover

Sponge

Towel/Rag

Instructions

First, remove the case from the phone. Please don’t skip this step – if you do, I can’t be held responsible for any damages that will inevitably result.

Next, start the hot water running. Add in a bit of all three ingredients – a few sprays of Windex, a squirt of Dish soap, and a few sprays/a pour of the goo-gone/goof-off/orange citrus based cleaner.

Stop the water when the sink is about half full.

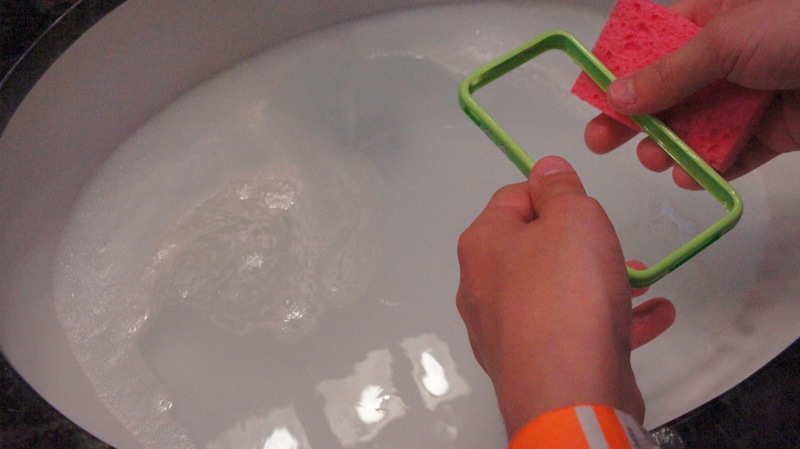
Next, let the sponge soak some of this up and then submerge the bumper in the sink. Scrub the edges clean with the sponge.

Once the bumper is clean to your liking, drain the water. Run cold water and rinse off the bumper well.

Then use the towel to dry it off.

Congratulations, your bumper should be clean as new!

Parrot AR.Drone

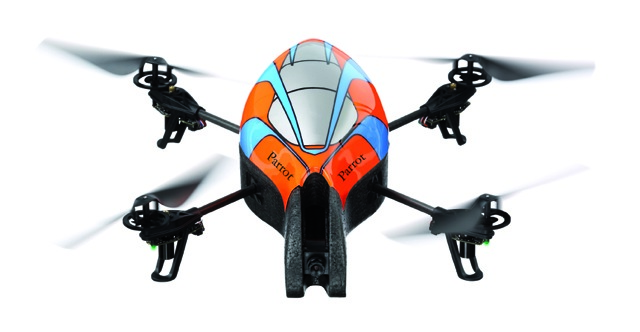
The AR.Drone is a french developed electronically advanced quatracopter. It’s a helicopter, but it has three blades. It is controlled via an iOS device through WiFi.

And It’s fun, but hard to fly.

I could go farther into depth with this, but I’m not going to.

Although it’s cool, it’s also ridiculously time consuming and expensive. Now, the AR.Drone itself is only $300. But over the course of three weeks it’s costed me over $500. Did I mentioned that I probably only got about two hours of time being able to fly it?

The real reason it’s so expensive is the repairs. You’re going to break every single piece of this thing, and the pieces aren’t too cheap when they all add up.

First, I broke a crosspiece. $30, plus two days shipping and an hour replacing it.

Then, I busted a gear. $30 later, I waited two days and spent about ten minutes replacing it.

Next, one of my batteries went bad. $40 and two days later, I fixed it.

And now, my main board is bad. But after all of those repairs, I’m not going to even order the replacement, as it’s $160 and would of course take another two days to come. Then I’d break something else and pay for another part.

This thing is fun when it works, but that’s a very small amount of time. That’s why I’m not going in to detail about it, as I’m going to save you the trouble to tell you this: Unless you have a college fund built up to repair it, don’t buy an AR.Drone.

Free WiFi Tethering with iPhone

You may have read my post on tethering with Android.

However, I did switch over to iPhone!

Now, you can tether using the iPhone by paying AT&T or Verizon, and you’ll get a portable hotspot.

But that’s extremely expensive!

Here’s an easier way: MiWi.

MiWi is an application available from Cydia (you need to be jailbroken, if you have a Verizon iPhone 4 click here) for $20. That may sound expensive, but it’s much cheaper than spending $20 each month! If you have read elsewhere about the Sinful repo, you can get it for free, but that’s cheating the developer out of what he has earned, so I don’t encourage it.

Installation

If you know how to get apps from Cydia, skip this paragraph. If you don’t, continue reading. To get MiWi, open the Cydia app from your homescreen, wait for all of the data to “reload,” and click search. Type in MiWi, and tap the result. Then, click “Install” in the top right corner, followed by “Confirm.” Let it install, and then click the big black button at the bottom. MiWi will now be on your homescreen.

Use

MiWi is an extremely simple app.

Upon opening it, you will be greeted with three tethering possibilities: USB, Bluetooth, and WiFi.

Bluetooth is advertised to use mainly with iDevices, however I don’t like bluetooth tethering as it is unreliable compared to USB and WiFi tethering.

USB Tethering only works with Laptops, and I had a terrible experience with it. Although it may boast a faster connection, you need to get it connected in the first place. That’s where I had my problems.

So that leaves WiFi. And let me just say, getting WiFi to work is painlessly easy.

You can easily setup a WiFi Password, change your SSID (network name), and even control which computers are on the network. Even better, you will get a notification bar at the top of your screen that tells you how much has been downloaded and uploaded. Handy!

The speed isn’t too shabby either! I was able to crank 1.0MB/s down, which isn’t too bad. It works great for email and basic web browsing, but I wouldn’t try to stream video over it.

Conclusion

MiWi works great for WiFi tethering. But I wouldn’t recommend it for USB or Bluetooth, as they are far less reliable.

Oh, How Far Computers Have Come

Computers have come a long way in the past half century. I’m going to compare two computers, one from 1946, the other from 2011.

Lets start out with one of the earliest computers, the ENIAC. ENIAC stands for Electronic Numerical Integrator and Calculator. It was able to do simple equations, like find the circumference of circles. It was able to process at 0.1 Mhz. To put this into perspective, the iPhone can run at 800Mhz, which is 8,000 times faster! The ENIAC weighed 30 tons, used more than 18,000 vacuum tubes, had 3000 switches, and produced the same amount of heat as 3,000 lightbulbs. Yet, it could only hold 20 numbers at a time!

Here’s a picture of this goliath dinosaur.

Now I’d like to introduce the new Habey SOM-6670 E6XX Tunnel Creek QSeven computer module (quite a name, right?).

Check out the size of this little thing:

The orange thing is post-it notes.


That little thing can pump out a bit more than 1GHz, which is 10,000 times faster than that ENIAC. And look at it’s size!

This tiny little computer is capable of decoding two 1080p HD video streams simultaneously to an external monitor. That ENIAC could barely contain 20 numbers!

If you don’t believe me, check out this video.

Pretty awesome, right?

As you can tell, computation has come extremely far in 65 years. Yes, the ENIAC was created in 1946!

And the speed of computer evolution only increases as time goes on. In only a few years, we will have some ridiculous technology. It was only a few years ago that laptops were big, bulky, and not so powerful. And now we have computers like the MacBook!

I’m quite excited for what the future of technology holds for all of us!

MobileNotifier

As Zach Orr mentioned in a post about iOS 5 Notifications, MobileNotifier is pretty nice until iOS 5 comes out. Here’s a more in depth review.

The Basics

MobileNotifier has three main features. In-app notifications, Lockscreen Notifications, and Switcher Notifications.

In-app Notifications

Nothing’s more annoying than having a big blue block-up when you’re trying to navigate an app. If it’s playing a game or replying to an email, having a big blue window that blocks everything else is quite obnoxious. Mobilenotifier solves that issue in an extremely elegant way.

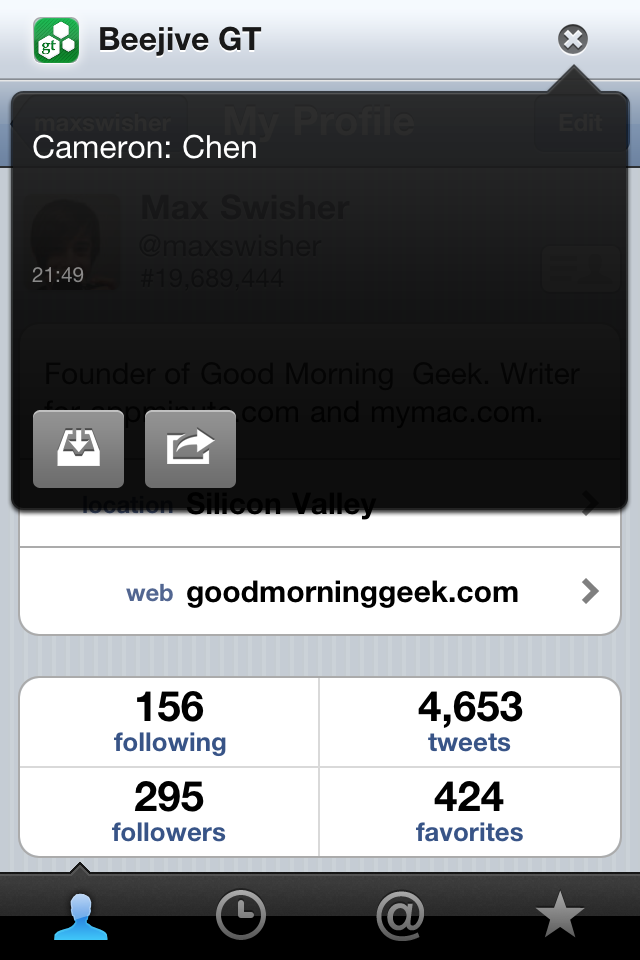
Instead of that annoying blue box, you’ll get a little notification at the top of your window with the icon and name of the app the notification is from.

Unobtrusive notifications

The left button saves it for later. The right opens the appropriate app.


When you tap on the notification, it will tell you the notification text then give you the option to go to the app right now or just ignore it. Or, you can not interact with it at all and the strip will disappear after a little while.

Lockscreen Notifications

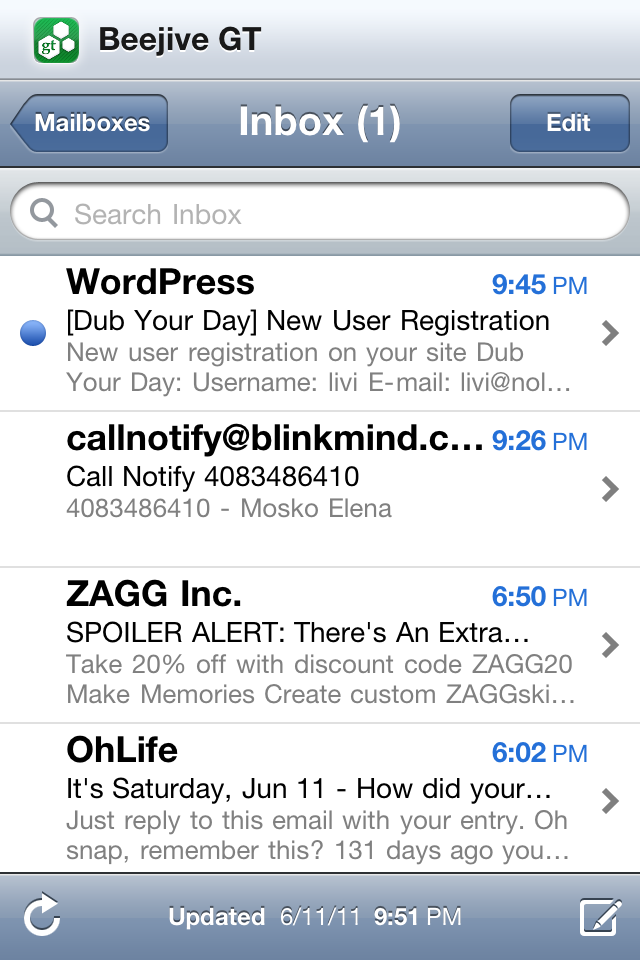
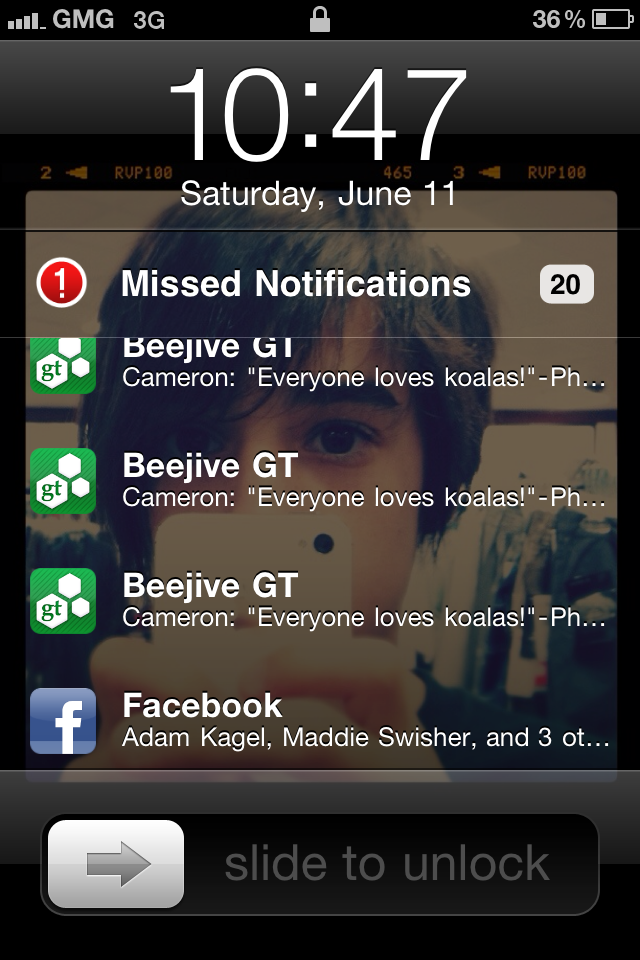
Normally in iOS the lockscreen notifications suck just as much as the in-app notifications. It gives you a blue window with a cute little list of notifications. MobileNofifier gives you a list that you can scroll through of all of your notifications. Much nicer than the normal iOS notifications! Unfortunately, you can’t select the notifications  to open the appropriate app. But it’s still much nicer than usual!

This list is scrollable!


Switcher Notifications

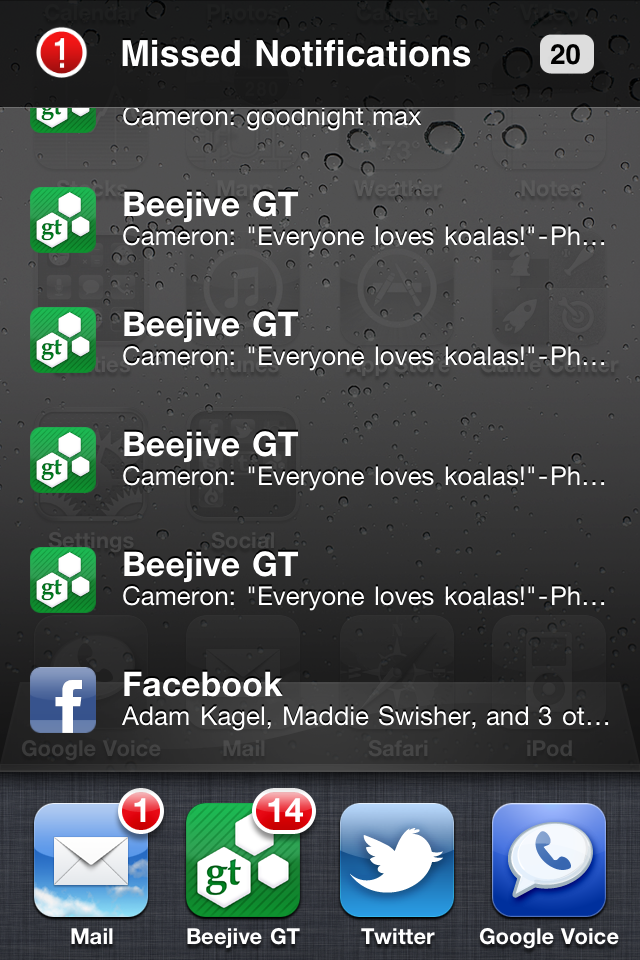
Notifications end up here in one of two ways: either they are ignored in app, or they came in when your screen was locked (that’s how you can get to the appropriate app of the lockscreen notifications). The interface is identical to the lockscreen interface, but you can touch the notifications to open their appropriate apps.

This list is scrollable and interactive!

Installation

As you can tell, this notification is pretty nice.

And luckily, the installation is pretty easy! 🙂

Go into Cydia, tap Manage, tap Sources, tap Edit, and tap Add. When it asks for the URL, enter http://phajas.xen.prgmr.com/repo. Once that’s added, click search. Enter MobileNotifier, and install the result.

That wasn’t too hard, was it?

Conclusion

Until iOS 5 is released, MobileNotifier is quite a nice notification system.

Now, if you aren’t jailbroken, click here to go to a post on how to jailbreak the Verizon iPhone 4.

Enjoy!


Jailbreak iPhone 4 Verizon

Yes, I got an iPhone 4.

Do I support apple’s business ethics?

No.

Do I think the iPhone is pretty and shiny? Yes.

Now, don’t think that I’m immediately jumping on the Apple bandwagon.

The very first thing that I did with this was jailbreak it.

If you have one of these suckers and are looking to jailbreak, I’m about to make it WAY easier for you.

But JUST so you know how much easier I’m making it for you, here’s the traditional way of doing it.

Traditional

You’ll need a few things: PwnageTool 4.2, the original IPSW for the Verizon iPhone 4, and the Pwnage bundle for 4.2.8.

First, download everything mentioned above. Unfortunately, all of the links on every other website are all dead. That means you have to go on a search on the internet looking for all of the above.

Then, open the package contents for PwnageTool 4.2, go into Contents>FirmwareBundles and click and drag the Pwnage bundle for 4.2.8 in.

Next, open up PwnageTool and select advanced. Drop in the IPSW for the Verizon iPhone 4, And hit continue, continue, continue, wait for ten or so minutes. In the end you’ll have an IPSW that you need to use.

In PwnageTool, select Put phone into DFU Mode to put the iPhone 4 into DFU. It gives you step by step instructions on what buttons to press and for how long. Once you’ve put it into DFU, open up iTunes and it will tell you that it detects an iPhone in recovery mode. In iTunes, select your iPhone, then hold down the option key while clicking restore. It will give you a selection window, where you need to browse to find the custom IPSW that you made with pwnagetool. Then, let it work its magic. After the restore is complete, you will have a jailbroken iPhone!

Easier way.

Time to make this much easier!

I am going to give you the custom built IPSW and the download for PwnageTool. That means that all you have to do is the very last paragraph! 🙂

Download the files

Now that link right there will download a ZIP of the Custom built IPSW and a copy of PwnageTool.

Then, just follow these directions:

In PwnageTool, select Put phone into DFU Mode to put the iPhone 4 into DFU. It gives you step by step instructions on what buttons to press and for how long. Once you’ve put it into DFU, open up iTunes and it will tell you that it detects an iPhone in recovery mode. In iTunes, select your iPhone, then hold down the option key while clicking restore. It will give you a selection window, where you need to browse to find the custom IPSW that you made with pwnagetool. Then, let it work its magic. After the restore is complete, you will have a jailbroken

The NEX-5 Revisited

You may remember this review of the NEX-5 that I did.Well, it’s quite a while later and I just wanted to revisit this camera.I feel that the NEX-5 is proof that the size of your camera doesn’t mean that it’s more or less capable of taking great photos. The NEX has taken some amazing photos, and I never have to do any staging, fiddling with settings, or laboring by carrying a huge 10 pound SLR. Here’s a couple of the photos that I’ve taken with the NEX:

Long exposure shot from my backyard.

As you can tell, the NEX can take some dang good photos. It’s a small and compact camera, but it is still capable of taking amazing pictures without much effort. It’s a nice balance between the ease of use and size of a compact digital camera, but has near equivalent picture quality and advanced features as a full SLR. When you hold the camera in your hand it feels great, as it has some weight to it, but isn’t a huge SLR that’s a pain to carry. It’s nice to be able to have extremely great picture quality without having to go through the pain of carrying a bulky SLR.
And as you can tell from the pictures above, the NEX can take SLR photos without all of that bulkiness that advanced users may have gotten used to.
If you are interested in the NEX-5, please click here to read my full review and purchase it.

HTC Officially Announces Bootloader Unlock

Extreme android power-users often have to use different software that voids the warranty on the phone to unlock the bootloader. If you don’t know, the bootloader basically determines where to boot the phone: the main operating system, recovery, or sometimes to a restoration file.

Well now, HTC has announced from a very high-up place (their facebook page) that they are unlocking the bootloaders! Yay!

There has been overwhelmingly customer feedback that people want access to open bootloaders on HTC phones. I want you to know that we’ve listened. Today, I’m confirming we will no longer be locking the bootloaders on our devices. Thanks for your passion, support and patience.

Awesome!

I think it’s really nice that instead of fighting off developers and hackers, HTC is actually taking a side with the hackers to try and make them happy. HTC’s devices have always been favorites for porting android versions and hacking the bootloader, and the fact that HTC is embracing it instead of fighting it really makes me happy. It shows the real selling aspect of android,  open source, now being implemented in the OEM’s hardware. I wish more companies could follow in HTC’s footsteps.


Looking for writers!

I’m looking to recruit some writers, as I would like to have this site posted to more often while I can handle all of the other stuff that I have to do.

Here’s the criteria:

a. You must be passionate and informed about tech.

I want the integrity of knowledge on this website to remain this good.

b. You must be under 16 years of age.

One of the whole things about this site is that it’s written from a younger yet still informed group of people. I’m not trying to be ageist, but I want to keep this blog unique as it is written from a younger point of view.

c. You must not expect payment.

I have been criticized for this, as people say that good writers deserve money for their time and efforts. But with the age group that I’m targeting, money is all that matters. If I offer money, every person that meets criteria b will jump onboard and write crap just for the money. I feel that if a teen is passionate about tech, they’d be happy to get their work out there and heard by the public, get credit for their posts, get writing experience, and get a nice addition to their resume saying that they wrote for a tech blog at the age of <16.

If you know anybody (or are someone) that meets the above criteria, please send me an email at writers@goodmorninggeek.com.

Thanks for your interest!

–Max

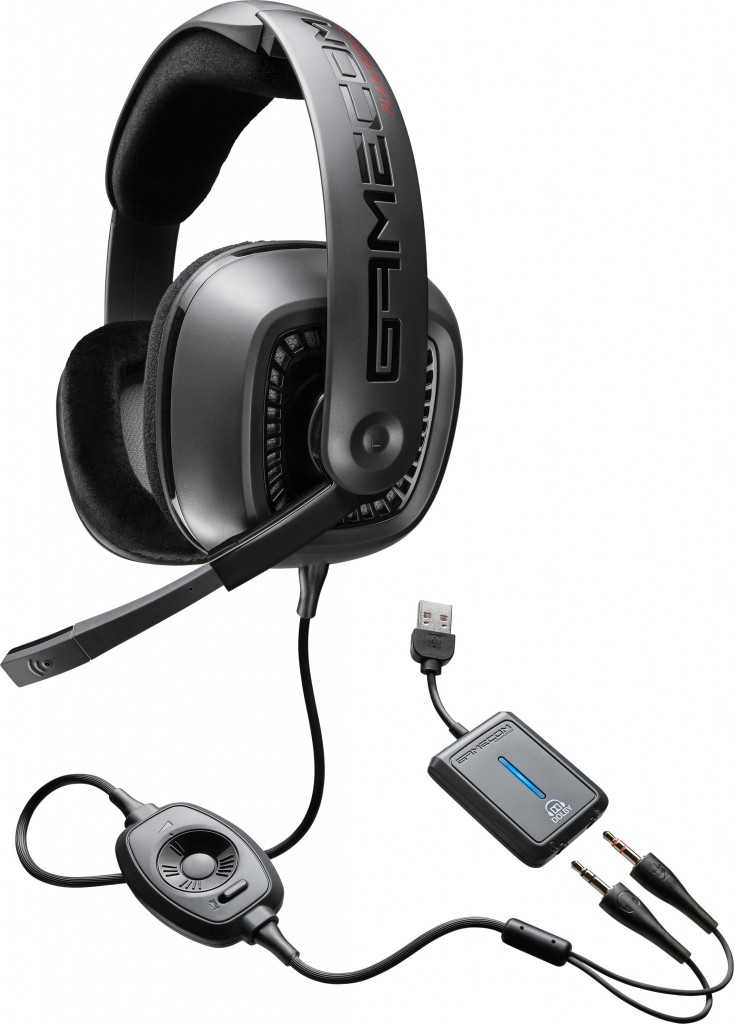
Plantronics Gamecom 777

I am so confused.

I thought the Beats by Dr. Dre were the best headphones, and they’re $350.

But I’m liking these Gamecom 777s more – and they’re only $100.

Design


These things are RUGGED. When you use them, they feel more metal then plastic. There’s no squeaking, and I feel like they’re well build and well put together. All of these things I couldn’t feel with the Beats by Dre.

A microphone comes out from the headband of the headphones, which is a genius idea and the perfect way to conceal the microphone when not in use. The inline audio and mute control is very helpful, and can often come in handy.

There’s one thing I don’t like about these headphones – the open-ear design. All sound leaks through a TON, so don’t expect ANY privacy from these. It’s nice because when someone is trying to talk to you, you aren’t totally spaced out. But it’s also a bit annoying to the people around you who might want to listen to their own soundtrack.

Sound Quality

When it comes to headphones, this is really what it boils down to. And my god, I’d choose these any day over Beats. These have dolby surround sound technology, and through USB an included small box will convert standard stereo sound into full on dolby surround sound. If you remember my post about the new dolby technology and how it brings the music out of your ear and puts it around you? You can feel that in these speakers. Thanks to the 7.1 technology, stereo sound turns into extremely immersing rich sound. It’s amazing. Much better than the beats by dre.

Overall, the sound quality is just plain stunning and amazing.

Comfort

With these headphones, you are getting the luxury experience.

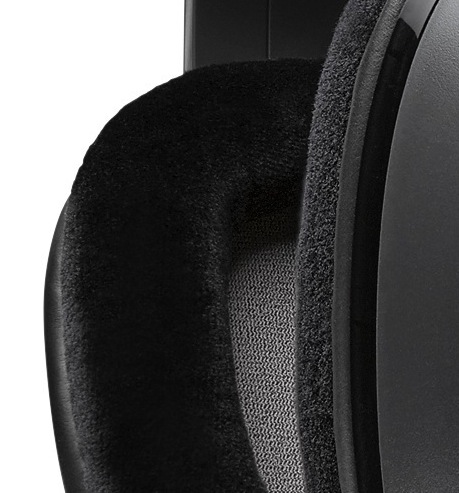
The pads are a soft, smooth fabric, as opposed to the plasticy rubbery earcups on the beats. The earcups distribute pressure really nicely, and you can keep these on without any discomfort for hours on end. The earcups are extremely spacious, which is also a nice addition. Overall, these things are extremely comfortable and don’t give you the same aches that the beats do.

Value

If you’re looking for a nice new pair of headphones, whether it’s for gaming or not, you should DEFINITELY consider the gamecoms. If you are thinking of getting beats, slap yourself and wake up out of the mainstream daze. The gamecom 777s are $250 cheaper than the beats, and give you more sound quality and a higher value of sound technology from Dolby. They also deliver a much better build quality and an extra feature such as a boom microphone extending out from the side. When you are buying beats, you are really paying $300 for fancy marketing a d nice big b on the side.

If you are looking for an extremely high-quality pair of ruggedized headphones, look no further than the Plantronics Gamecom 777s. You can get them here for $100.

Also, thank you Plantronics for sending me these for review!