About Max Swisher

14-year-old web developer and writer. Avid collector of vinyl, cameras, and typewriters.

Disappearing Disk Space?! 10 Step Fix

Today, I left my Mac alone for a few hours. When I come back, I am confronted with messages telling me that I don’t have enough disk space left.

A quick check of my available disk space using Finder reveals that I only have 200mb of free space left on my 115GB SDD.

Wait, WHAT?! I left my computer and it had 50 GB free. How can 49.5GB just magically appear on my hard drive?!

I couldn’t even DOWNLOAD that much during the time I was gone.

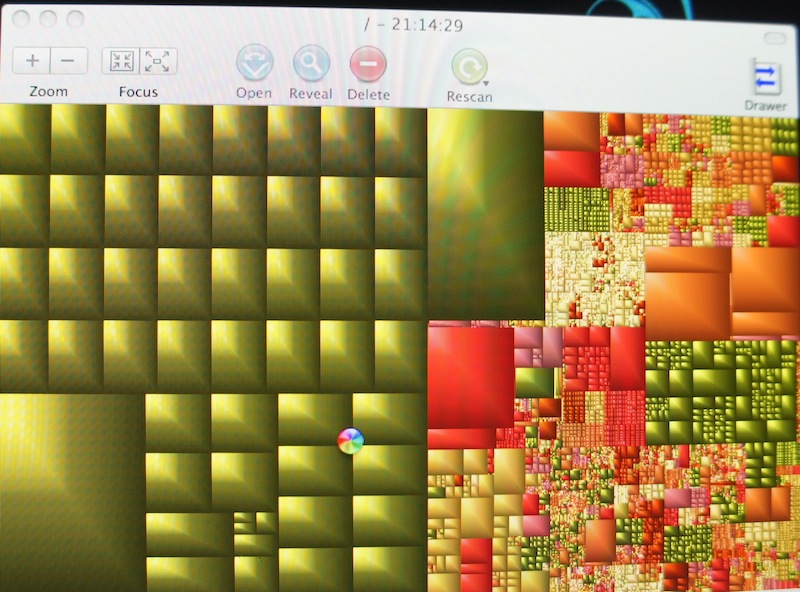
So I decided to find out what was taking up so much space using a wonderful free application called GrandPerspective (review here, what a wonderful app if I may say so myself) and decided to try and find out what was taking up so much space. Here’s what the result looked like:

WHOW THERE! What is all that green that’s taking up half of my hard drive?

A quick hover reveals that these are “swap” files that live in a hidden folder that’s reserved for system use.

Swap files are spaces where application memory/files is held. It’s like a less random access version of RAM. And somehow, my computer had 50GB of it.

Here’s the fix:

  1. Shut down your computer. If necessary, just hold down the power button and force shut it down.
  2. Hold down the shift key.
  3. Press the power button while still holding the shift key.
  4. When the apple logo appears on screen, lift your finger from the shift key.
  5. A loading bar will now appear. Wait a while and it will eventually show the login screen. It will let you know that you are booted into safe mode.
  6. Don’t log in!
  7. press the Back button on the login window, then press Shut Down.
  8. Press the power button without pressing any keys.
  9. Wait for the computer to boot.
  10. Enjoy your spacious computer!

There ya go! It’s a simple fix for a near catastrophic problem.

To prevent this from happening, restart your computer every couple of days. That was probably my problem, as I haven’t restarted in about a week. Oops!

When you restart, you don’t need to do the safe boot, as it will still clear a large amount of the swap files and cache. This is more proof that it’s a good idea to restart now and then, preferrably daily!

A reboot a day keeps the swap files away!

LED Cinema Display (27 inch)

Monitors are quite important when it comes to computer equipment. Besides speed, the only other thing that really matters is what you’re staring at all day. People often want to get a really nice, large monitor, so they have space for all of their windows and applications. Different things matter to different people – some people it may be about size, so they can fit as much as possible. Sometimes it may be color recreation, so you get the most precise experience for editing photos possible. For others it may be response time for gaming.

If you fall into any of these categories, I’d like to introduce you to the LED Cinema Display by Apple.

Wow.

27” of hi-definition, LED-Backlit glory. Sold yet?

How about a built in iSight camera, microphone, 2.1 speakers, and a 3-port powered USB hub?

That’s what I thought.

Lets take this thing a bit more in detail.

Design

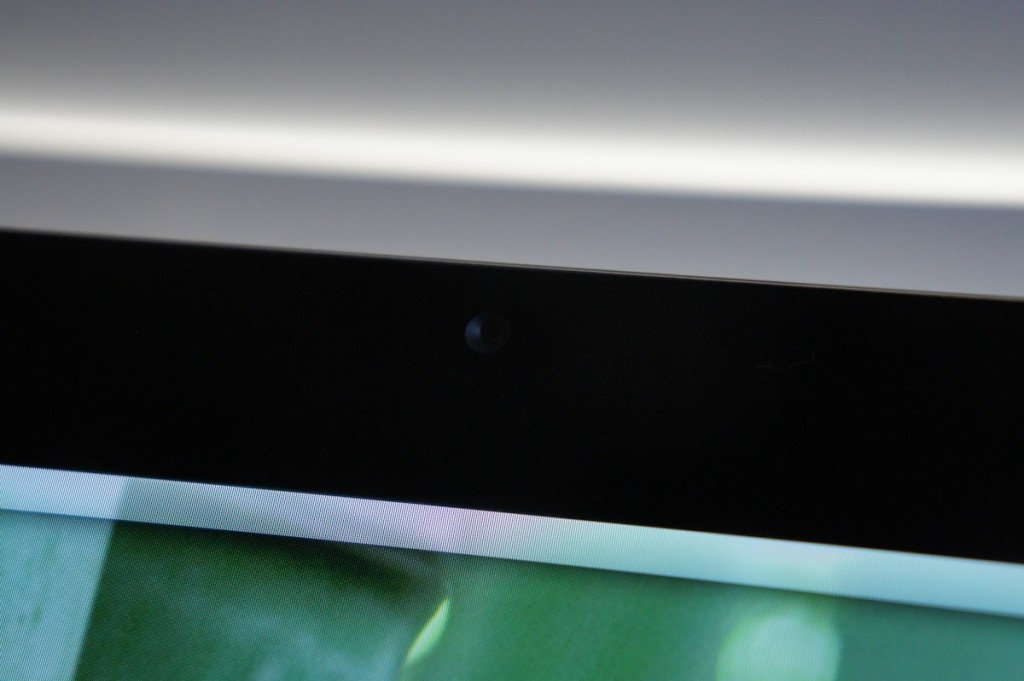
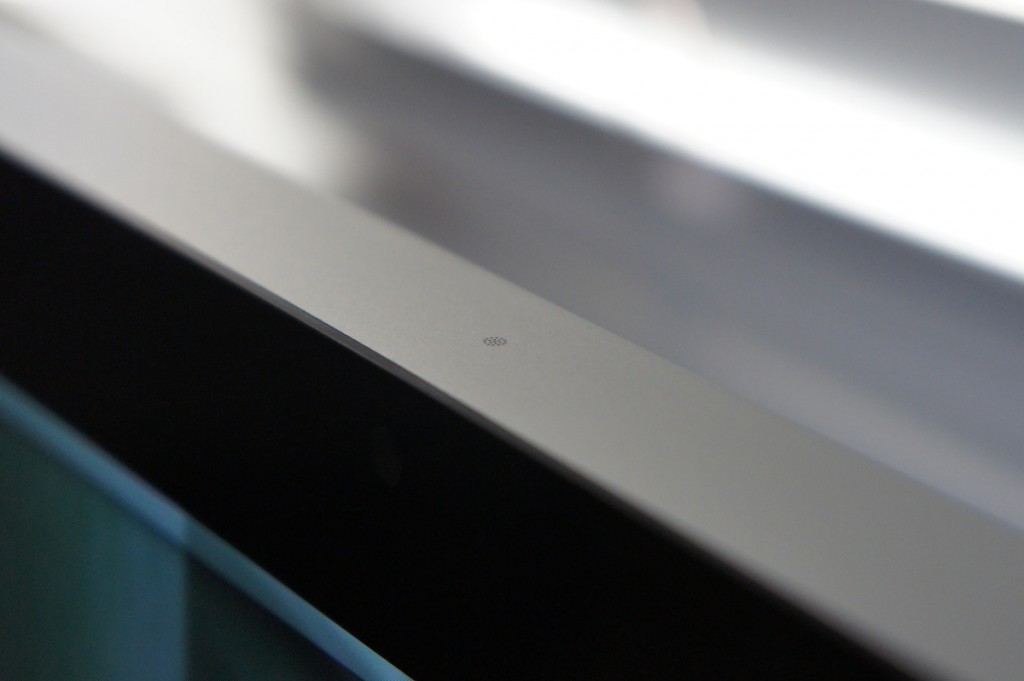
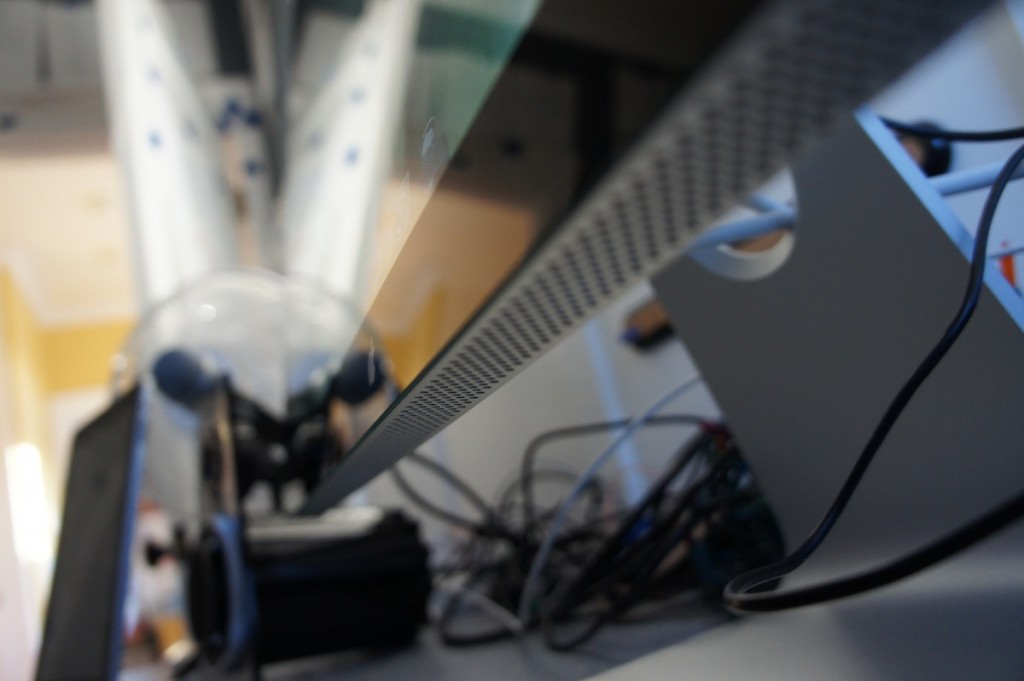
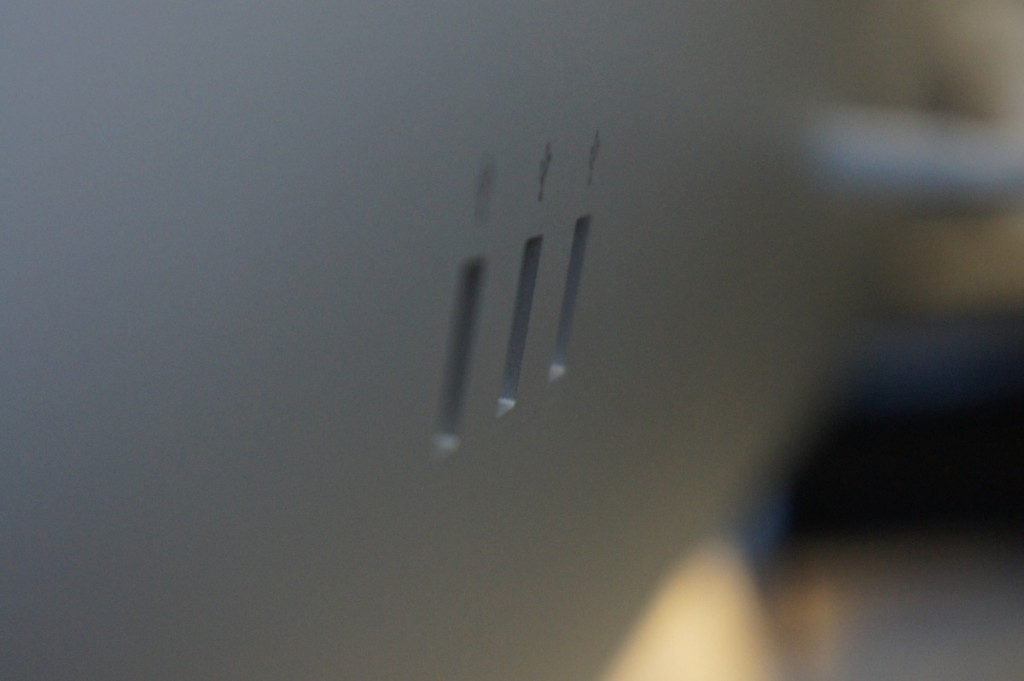
It’s an Apple product. What did you expect? The design of this beauty is simple and seamless (as usual). Looking at the monitor you are greeted with beautiful, edge-to-edge glass with a nice black bezel underneath. The iSight camera is embedded beneath this glass. Look down, and you see a thin, clean, pure aluminum stand. On the top, you find a very small grid where the microphone sits. On the back, you find two cables coming out, and 3 USB ports. The rest is all aluminum. Wow.
Display

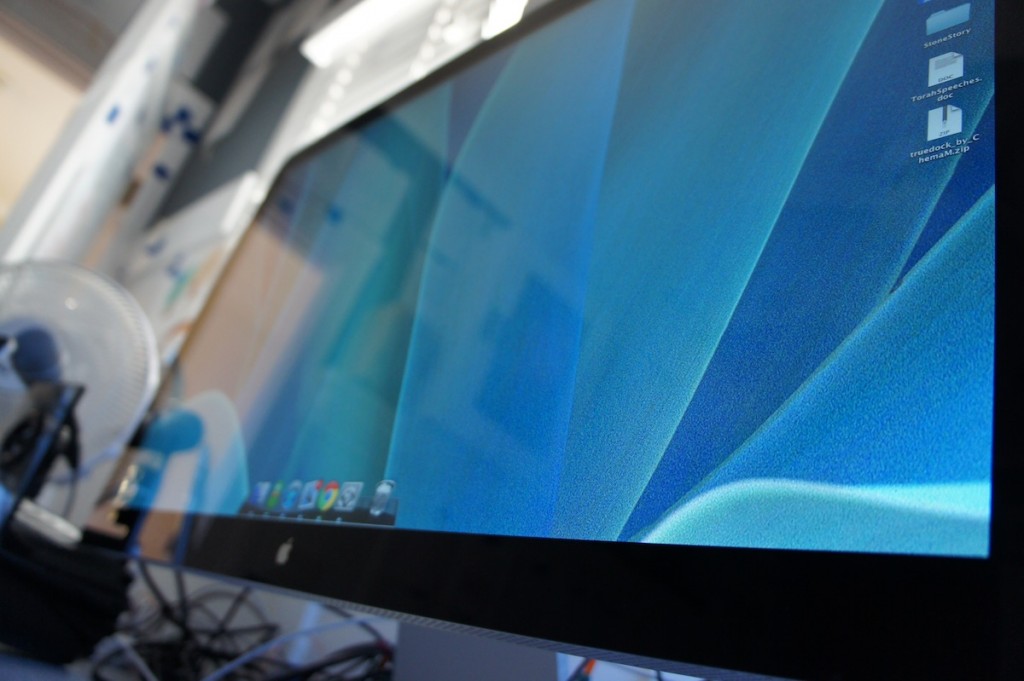
As I said, 27 inches of LED-backlit glory. Yes. The display is EXTREMELY bright, and at times hurts my eyes if turned up too high. The colors POP like nothing before, and the 2560×1440 pixels doesn’t do any harm either. The 12ms response time isn’t particularly impressive, but there was absolutely no ghosting in any of my tests. video play-back was clear, and the monitor boasted quite impressive, even blacks. Basically, this screen WOWS.
Extras

This monitor is a bit more than a monitor. The iSight camera works pretty well, and sends a pretty clear image. The microphone on top is a quite welcome addition, and definitely comes in handy when my laptop is closed. The quality is on par with the built in microphones in the MacBook lines. The speakers aren’t worthy of too much notice, but are definitely much better than built-in laptop speakers. They aren’t QUITE as nice as my 1300 watt surround sound system, but they will do the trick for those not so picky about their audio. The USB hub is powered, so your computer doesn’t need to be connected to charge all of your USB devices.
Setup

What kind of GMG review would this be without the setup instructions?

Unfortunately, if you don’t have a Mac built during or after Late 2008, you won’t be able to use this monitor. There are no hopes for PC users, so if you are I’m sorry for making you salivate so much just to disappoint you with the news of the incompatibility.

But if you do meet those requirements, then you’re definitely in luck!

As I said, on the back of the monitor there are two cables coming out. One of them is power, which plugs into a grounded AC outlet. The other sprouts off into three cables: MagSafe, USB, and Mini DisplayPort. The MagSafe is so that you can charge your MacBook, and you can leave your charger where it belongs: in your bag. The USB port allows the USB Hub on the back to function properly, and it also connects the iSight camera and Microphone. The Mini DisplayPort is how the video is transferred to the monitor.

Setup beyond this is pretty simple. Just plug everything in and you’re ready to go. The display automatically has the correct settings, the iSight camera and Microphone simply work, and your computer is charging. Great!

One thing I’d like to note about this display is that it has absolutely NO on screen controls. NONE. It doesn’t even give you any notification when the signal is lost, or anything along those lines. It’s either on, or it’s off. Everything else is software controlled, and you can change your preferences for the monitor in the Displays Preference Pane. The brightness of the display is controlled through the preference pane and can also be controlled using the function keys on the Apple Wireless Keyboard.

Conclusion

Overall, Wow. The monitor is beautiful with any setup, and the design of it is just plain breathtaking. Photos and videos look amazing. The brightness of the display can give me a headache. What’s not to like?

There are two main downsides to this monitor. The first would be the glossy screen. Some people may hate this screen, and if you’re using it in an area of direct sunlight, this is probably a pretty bad choice for you. The second would be the price. Very few people I know are willing to fork out $1000 for a monitor. But if you are, and you don’t have a problem with the glossy display, and you have a compatible Mac, you can stop your salivating and go take a lick (make sure you wipe your display after though).

 

Finally, a good use for an iPod Nano!


You may remember that I wrote this post hating on the new iPod nano because of it’s size and the idiotic idea of a clip. Also, the size of it! You’d lose it in an instant!

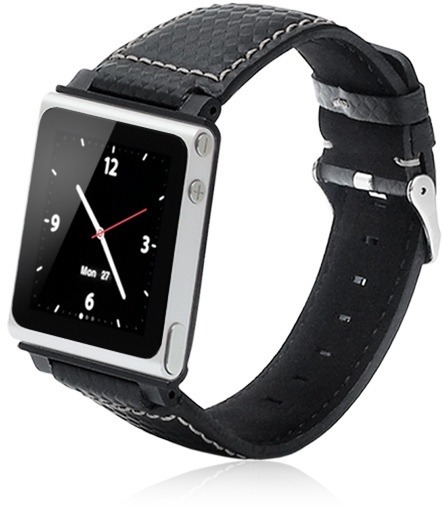
Well, I’m changing my views on this. And it’s all thanks to one accessory called the iWatchz.

Basically, this turns the iPod Nano into a wristband. I thought that sounded stupid, until I tried it. I realized that as a wristband, the iPod nano opens up to a whole other world of possibility. The Nano can act as a stylish watch, which will surely show off your geekyness. But in addition, to have your wristwatch actually be a music player, photo viewer, and FM radio can all come in handy. You don’t have to worry about bringing your iPod with you – you already have all of your music on your wrist. Ha!

Having a wristwatch is something you’re probably already used to. So being able to have all of the iPod features with you EVERYWHERE without having to remember it or lose it? Handy!

The reason I really didn’t like the nano was because they asked you to clip it on to your shirt and proudly display what you’re listening to. You could lose it, it could fall off, and you’d probably forget about it fairly frequently.

Having it as a wristband solves all of the above problems, and allows you to be sure about where your iPod is and not worry about it falling off or losing it.

You can get the iWatchz here, and you can get yourself an iPod nano here. Together, it’ll cost ya about $200. In my opinion, it’s quite a genius combination.

HTC Droid Incredible – RED COVER!

I was recently stalking around the HTC Incredible site, and I came across a page where you can order HTC-made battery covers – in different colors! You can order a red cover or a white cover.

From the images, I expected the surface to be like the stock cover – that soft platsticy rubber. However, the cover is actually glossy! It feels nice in the hand, and I like it a lot. It also makes the phone look quite awesome, as the volume buttons, USB port, and power switch are all still black. It gives the phone a very cool multi-colored look – and imagine the look on your friend’s face when one day you have a white phone, the next day a red one!

This is a great way to customize your phone, as you can change the color of it without breaking anything or adding a bulky case.

You can order either color for $16.99, which is EXTREMELY expensive for a little piece of plastic. It probably cost less than a cent to make that cover, so that’s QUITE the nice margin you got there, HTC! $16.98 in profit. Wow. That’s 99.95%!

Aside from the high price, there’s no shipping, which should make you feel a little better. You can order one for yourself here. Enjoy!

Otterbox Reflex Series for iPhone

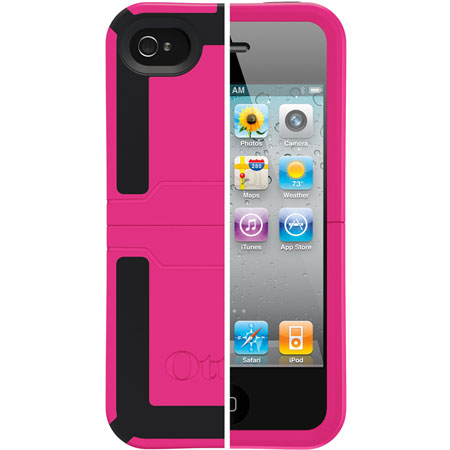
Otterbox is well known for their amazingly stylish yet rugged cases. The Reflex series is a new case from otterbox, and it boasts a whole new design.

Here’s how cases work: When there is a shock in one part of the case, it is absorbed by the rest of the case, usually by a form of flexibility that causes shock absorption. This is sometimes accomplished by rubber, the flexing of plastic, or other various materials.

What the Reflex series does is brings a hard plastic shell, but in places of the shell there is flexible rubber that crumples and flexes to absorb the shock. This design was inspired by the crumple zone of a car, and from the result of shock on the case it works very well.

The other feature that Otterbox is known for is style. The Reflex Series comes in a variety of colors, all of which have nice, even, black rubber highlights where the crumple zone is. Instead of hiding the crumple zone, otterbox has used it to enhance the style of the case. Genius!

A new feature of the case would be that the bottom half slides off for docking access. In the past, you had to completely remove the otterbox cases to accomplish this, but thanks to the innovation in this version full case removal is no longer necessary.

The Reflex Series is available only for the iPhone at the moment, but in the future will be available for the BlackBerry Curve and iPod Touch (4th Generation). You can purchase it by clicking here for about $45.

[Thanks to Otterbox for sending this to me for review! You guys make awesome cases! :D]

CyanogenMod 7

Of all of the ROMs floating around out there, Cyanogen is by far the most established custom after-market ROM available.

CyanogenMod 6 brought froyo features to 2.1, and was later updated to 2.2 It was then very similar to a basic 2.2 ROM, so it became outdated. But CyanogenMod 7 brought us a loaf of gingerbread this time around. This has put it much higher up.

In addition to the new faster and cleaner base operating system, CyanogenMod brought some new interesting features to the table.

Lockscreen Gestures

The name says it all. On the lockscreen, you are able to perform gestures that will do different actions, including enabling the flashlight, unlocking the phone, opening a shortcut, or opening an application.

DSPManager

I have really found no use for this quite yet, but others might. It allows you to modify your sound outputs. You can modify headset, speaker, and bluetooth separately, and in each pane you get options for a bass booster, and you also get a nice equalizer that is quite easy to modify. I don’t exactly know why you might need this, but I guess some audiophiles on a higher degree than me might appreciate it.

Themes Support

The operating system comes with a built in theme chooser and three themes. You can download new themes online on many different forum sites (such as xda-developers) and easily install them. One package includes the theming for the WHOLE operating system, including home screen, highlights, menubar tweaks, etc.

Incognito Mode

This feature is rarely used, but I guess could come in handy. Identical to the incognito mode in Google Chrome, this will prevent your phone from saving cookies, history, cache, or anything.

Installation

Installing this ROM was fairly simple, however it doesn’t come with Google Apps built in.

First, go to http://cyanogenmod.com and select your phone, then download the ZIP for your phone and put it on your SD card. Open up ROM Manager and select “Install zip from SD card.” Select the zip of CyanogenMod, then check the box that says “Wipe Data” and the box that says “Backup current ROM.” Continue with your installation and you will be greeted with CyanogenMod. You may notice, however, that there is no Market, YouTube, Gmail, etc. To install those, download the zip for your phone here and then flash it. To do this, transfer the Gapps zip onto your SD card and boot into recovery by booting while holding the down volume button. In the menu that comes up, select Recovery, and wait for it to boot. In the next menu, select “Install ROM from SD card,” select the Gapps ROM, and let it install. Then, reboot your phone, and you will be greeting with a Gapps enhanced CyanogenMod. Enjoy!

[For more info on installing ROMs and rooting, read my full guide here.]

GMGtv Episode 1: The new GMGtv!


As you may have noticed, I haven’t been posting much about GMGtv. This is because it’s a pain to have to setup equipment, practice a script, and edit it, at the same time as maintaining an internship, blogging, conferencing, and of course, going to school/doing homework. So that’s why I am deciding to make the new GMGtv audio only, totally unscripted. I am going to find something in the news, then just talk for a minute or two about it. It’s raw thoughts from my head, and is pretty much the same stuff I would write here on GMG. I am doing these episodes far more often, and because they’re audio only, they take up a LOT less file space.

Here’s the first episode of the new GMGtv!

Also, please subscribe to the podcast on iTunes!

SUBSCRIBE

Fix: ClockwordMod won’t boot after update

***UPDATE: Go into Android Market and update the ROM manager to the latest version. It will fix this problem so you can update straight from 3.0.0.5 to 3.0.0.8.

So I recently went to backup using the ROM Manager on my phone. It notified me that there was a new version of ClockworkMod, and I was currently on 3.0.0.5, and should update to 3.0.0.8. So I update, and when I reboot into recovery nothing happens. It stays frozen at the HTC Incredible boot screen.

Luckily, you can still boot into Android.

Here’s the fix.

Go into ROM Manager and flash 3.0.0.6, one version up.

After it flashes, boot into the recovery and select “Clear cache partition.”

Then, reboot into Android. Open ROM Manager, and flash 3.0.0.7.

Boot into recovery, clear cache, reboot, and continue doing this until you are finally at 3.0.0.8. It should boot into recovery just fine. Enjoy!

Worried about your server? Get warned if it goes down.

Are you worried about the state of your server?

Maybe you have a website, and you’re worried if it’s always up and running, especially when you’re asleep and can’t fix it.

Well, I’ve written an extremely simple script that will solve this issue for you. Just plug your mac into the sound system where you sleep and crank it up to full volume. Whenever there’s a problem, your system default error will start going off every three seconds. That should wake you up! Then, you can go over and check the state of things.

The underlying command here is ping. I am using what you type as a simple variable, $website, and using -A to make it audible and ring, and -i to time the ping out so you don’t accidentally crash your server. In the end, the command is

ping -A -i 3 $website

And when you type in the website, $website is replaced with whatever that is.

It’s not a complicated or amazing script, but it helps to get things done easier and faster.

Download

To use it, download the script and navigate to it’s enclosing folder using Terminal. Then, type:

chmod+x

This will make the script executable. Next, type:

./makesure.sh

You will be greeted and asked to enter the URL (or IP address) of the site you want to keep track of. Type in the URL and press enter. You will see the ping output across your screen updating every three seconds. If ping stops responding, your computer will begin to make the system default error sound every time there is a request timeout. If you have the volume loud enough, that should be able to wake you up.

Enjoy!


How-to: the Ultimate Laptop Upgrade (RAM and SSD)

Your laptop has a few mainly functioning parts. The hard drive, the RAM, and the CPU. The CPU, unfortunately, cannot be replaced, as in Macs they are soldered on to the logic board. however, you can upgrade  the other two things. Lets start with the hard drive.

Ultimate Hard Drive Upgrade: OWC Mercury Extreme Pro SSD

When you write and read data from a computer, you write/read from a hard drive. This is a small metal box with a few spinning disks inside and a needly thing that writes the data across.

An SSD looks (on the outside) just like a hard drive. It has the same connections and the same dimensions. But a peek inside reveals lots of chips, and a lack of moving parts.

That’s because SSD stands for Solid State Drive, because they are just that: Solid state.

But one of the biggest advantages to that would be the speed. I can write/read from this thing at a blazing 3GBps. Also, it holds a world record for fastest internal SATA II Drive. What does this mean for the user?

Lets look at some in-house tests.

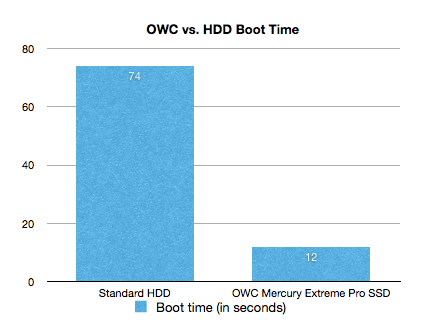
With a standard hard drive: 1:14 to boot.

With this OWC Mercury Extreme Pro SSD: 00:12.

That’s enough proof for me.

And as far as apps go, they launch FAST. I can launch 6 applications and have them all open and running in less than 4 seconds.

This means that when you open things, they take less time to open. Enough said.

If you’re looking to upgrade your computer, this is probably one of the first things you should upgrade. Even though you might want a faster processor, it won’t speed up how long it takes for something to go from your hard drive to your screen.

The OWC Mercury Extreme Pro SSD comes in many sizes. I purchased the 115GB drive for approximately $230, and you can find this series here.

The ultimate RAM upgrade: Crucial 4GBx2 Kit

When you’re interacting with applications, a buffer of everything is stored in RAM. This is Random Access Memory, and it is made so that you can randomly access it. It’s extremely fast, which is what allows things like pop-up menus to instantly drop down. It’s also what keeps the base operating system going, and if you have so many applications running that your RAM is full, everything becomes hard drive base. Translation: things freeze, slow down, and crash. The easiest solution to this is to get some more RAM.

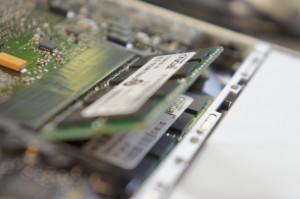
I ordered crucial’s 8GB RAM kit, as it wasn’t too expensive and seemed like it would work well. Most laptops have two RAM slots, so my 8GB kit came with 2 4GB chips. The amount of RAM that your computer supports varies. If you have an older Aluminum MacBook, then you can fit 8GB in there. However, the current MacBook Pros only support up to 6. Search for your model on crucial.com to find exactly what RAM you need.

Installation is fairly simple. Just take off the bottom of the laptop with a screwdriver, and move out the tabs next to those flashy green RAM chips. Then, smoothly slide out the chips, and replace them with the new and bigger RAM you got. Seal up that wound on the bottom of your computer, and voila, you have more RAM! No drivers necessary. If you have the MacBook 5,1, click here to get 8GB of RAM. If not, click here to go to the crucial site and find what RAM will work in your model of computer.

The result

Your compter will boot faster. Things will open faster. Things will run faster. Things won’t freeze. Things will crash less. In general, things will be faster and more stable. Enjoy!

Using AirPort express for AirPlay alongside a Time Capsule

You may remember that a long time ago I reviewed the Time Capsule. It’s a wonderful wireless AP, and all of my data is totally safe.

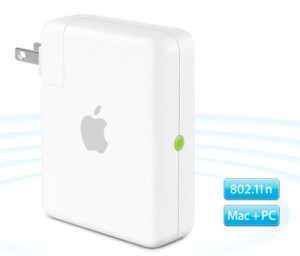
But the Time Capsule doesn’t have AirPlay. On AirPort extremes and expresses, there is a headphone jack, and when connected, you can wirelessly stream your music to your speakers from your iDevice.

I’ve had an airport express for a long time, but I stopped using it when I got my time capsule. After hearing about the AirPlay improvements, I decided to break the thing out.

The AirPort Express creates its own WiFi network, and if I’m connected to that then I won’t be able to backup to my time capsule. Luckily, it is now possible to plug the AirPort Express directly into the Time Capsule, and have them both work as the same wireless network. This means that I can stream music AND backup at the same time!

With this all settled, you will now see the AirPlay icon appear on all of your devices. From this point on, it’s all extremely easy. Just tap the icon and up pops a menu of all AirPlay devices on the network. Tap the speaker system you wish to stream to Voila, we have wireless music!

If you’re on a computer, however, you can only stream your music from iTunes. That is, of course, unless you have an app called AirFoil.

This allows any application on your computer to output sound to your AirPlay speakers.

However, there’s a small issue.

There is a two second delay between when you cause the sound to happen and when it actually comes out of your speakers. On the iDevices, the movies are in sync because they are decoupled 2 seconds back. When you change the volume on your computer, you will see the small notification popup, yet you won’t hear anything for two seconds. Quite annoying.

For videos, AirFoil has included the “AirFoil Video Player.” I don’t know if it’s very good, as I can’t even get it to work without freezing and crashing.

In general, this system is simple and functional. But if you’re trying to stream content from your computer, you will notice an extremely distinct delay. It’s not like that audio quality isn’t good, so all audio (including pandora and other streaming services) work fine.

AirPort Express

AirFoil