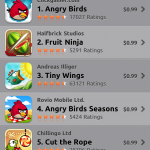
Spotify Answers our Prayers: the Spotify iPad app!

Look at the beautiful artwork!

It’s about time.

I have been craving this exact item on the menu for the longest time, and finally Spotify has granted our wishes.

Previously, it was necessary to use the iPhone application on the iPad, which was disappointing as spotify could have done so much more with the large screen real estate.

The new iPad Spotify app is really the new Android Spotify app‘s older brother. It features a similar interface with  all of your standard Search, New, Inbox, and other menu functions in a left menu. It is also similar to the Facebook and Twitter iPad apps thanks to it’s clean, sliding panels.

Spotify integrates a lot of album artwork, with their signature two-by-two paneling of playlist album art.

If you want Spotify on your iPad, it is a free update for those who had the iPhone app installed previously, or you can go to this iTunes store link.

Thank you Spotify!

Spotify for Android gets Overhauled

Pretty new artist page

Spotify is by far the best music service I have ever come across. For $10 a month, I get all of the new songs streamed to my computer and phone. For the price of one album a month, I can have as many songs and listen to all of them as many times as I want without any ads or issues. It’s magical!

The only problem is the the android app. It really lacks – the interface is a little bit hard to use, it doesn’t offer as much functionality as the desktop app, and the graphics are quite low resolution.

Well, not anymore. Spotify has released a preview of their new app, which features facebook- and twitter-like slide-out menus, cleaner, easier graphics, and a nicer, more refined playing menu. The interface is also a lot faster in general.

A nice new player interface

The application isn’t available on Google Play quite yet, as they’re working on adding a few more features like Last.fm scrobbling, folders, and more. However, if you’d like to update now, you can still download the preview of the new app.

First, you’ll need to open Settings > Applications and check the box that allows you to install applications from unknown sources. Next, open this post on your phone and tap here. The apk file should download. Next, pull down the notifications and tap the downloaded file. Follow the steps and in a few taps you’ll be enjoying the new spotify interface!

I’m excited that spotify is finally cleaning up their Android app – it was getting a bit, well, old.

Instagram Bought by Facebook for $1 BILLION

Remember Instagram, the fun little quirky photo sharing service that just released an Android application?

As you may know, they’ve been growing in size since their launch and Instagram has become an extremely large and popular service.

Because of this, it was inevitable that they would eventually be purchased by an extremely large company… and who better than facebook?

First of all, $1,000,000,000 is a lot of money. A LOT. I didn’t really think that Instagram could be worth that much.

Second, a little note to Zuck and the whole facebook crew: Please, please, please, please don’t screw this up. Please don’t force it to be built in to the facebook interface. Don’t try to stick instagram into facebook, you’d be doing everybody a disservice. Also, don’t just get rid of the entire thing to eliminate competition.

We will have to see what Facebook is hoping to do with this photo-sharing giant, and I honestly hope that they don’t screw it up.

Instagram for Android

Finally. At long, long, long, long, long, long, long last. Instagram has released their official Android Application.

In case you don’t know, Instagram is a photo-sharing platform which incorporates different fun-style effects and third party sharing into the mix. It’s been available for the iPhone since late 2010 and has collected over 30 million users. Yeah. Whow.

There were many speculations of an Android App over the past while, but no confirmed release date.

Now that Instagram has released their Android version, they are well on their way to a giant user base. After all, Android does have more of a market share than the iPhone.

As far as the application goes, it’s the exact same as the iPhone with one important exception: The android application does not have the tilt-shift function, a popular option among Instagrammers. (Tilt-shift is where a selected part of the photo is in focus and the rest is not.)

If you are an android user longing for some instagrammal love, click here to download the free app for android. Enjoy!

Google Chrome for Android Beta Released

Android has always had a great browser built into it, but that browser was never Chrome.

Well, that’s about to change.

Kind of.

Today, Google has released a beta version of Chrome onto the Android Market… for Android 4.0 ICS phones. Luckily, thanks to my Galaxy Nexus, I get to try it out and give you this review.

First off after opening this app you’ll notice a pretty little googlicious introduction to the app.
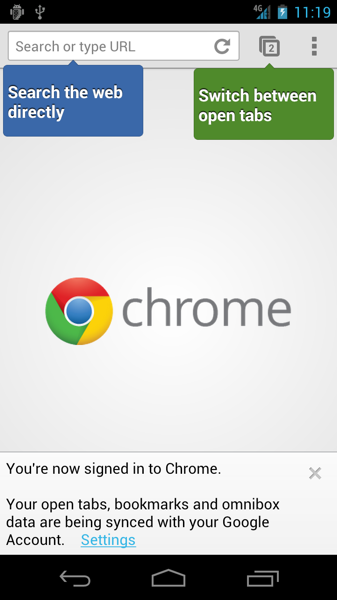
Firstopen

Quite simple, quite clean, quite google.

I’m going to warn you in advance – many of the features in the Chrome for Android application are identical to those that are available on the desktop version of the browser.

Tabbing

In my opinion, the tabbing interface has been improved from the tabbing of other mobile browsers. Instead of just a list of tiles, Chrome gives you a very pretty sorting-through-a-card-deck like interface.
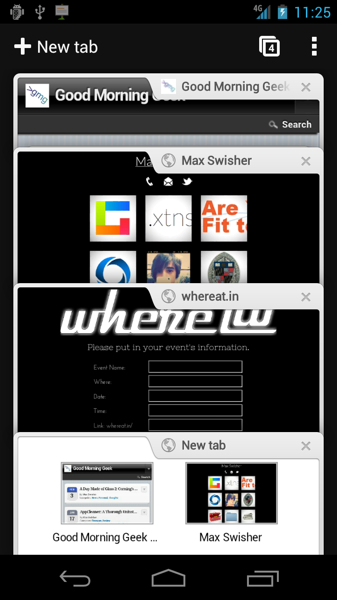
Tabbing

Don’t want a tab? Just slide it off to either side and it will make a spin-like motion into nothingness. These little effects add some very nice feel to the app.
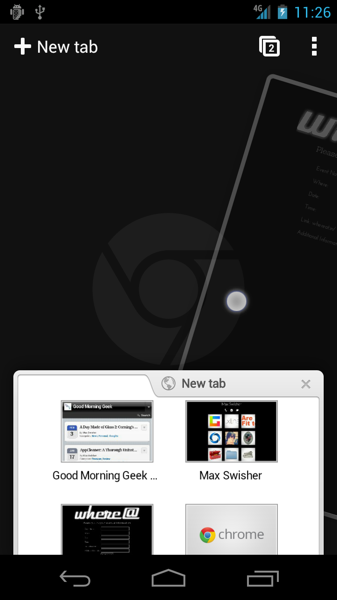
Slideoff

Sync

The other coolest feature of the Chrome for Android application would be its ability to sync with Google Chrome for Mac and Windows. If you’ve signed in to Chrome on your desktop (Wrench thing > Sign in to chrome…), then all of your bookmarks, history, and tabs are already synced up.

This means that you can easily retrieve them on the new tab page in Chrome for Android. This grants access to one, extremely awesome thing: live tabs.

Basically, if you have a set of tabs open on your computer and need to go somewhere, you can just leave your computer and all of your tabs will show up on Chrome for Android.
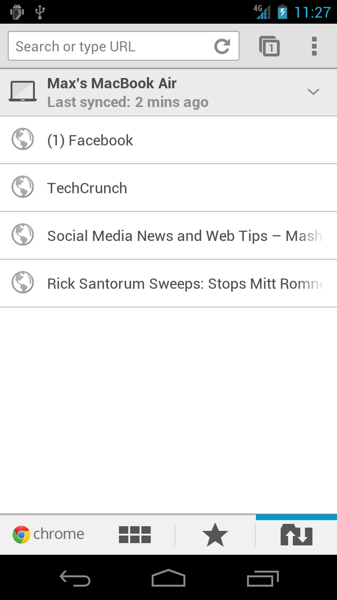
Gettabs

Pretty awesome, right? I must say, it’s not perfect – It takes a while for the tabs to get synced, and there isn’t an easy button to tell your computer and/or phone to sync. Remember though, this app is only in beta.

It’s the same deal with bookmarks – they will all get synced across your phone and computer(s).

Feel/Speed

If you use Chrome for Desktop on a daily basis, you already know the feel of the app. Google’s minimalistic style and code makes the app very light and quick to the touch. Pinch to zoom works fine, things render great, and the only thing missing is (of course) flash. But hey, who needs that anyways? We have HTML5!

In fact, lets compare. First, here is the html5test.com result for the built-in browser.
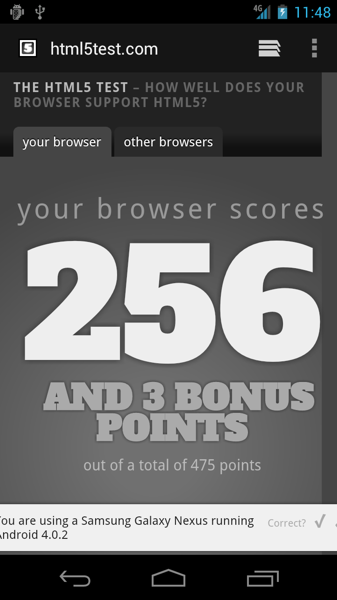
Html5def

Not bad, actually – Firefox Mobile’s score is down the drain.

Now, lets test out chrome:
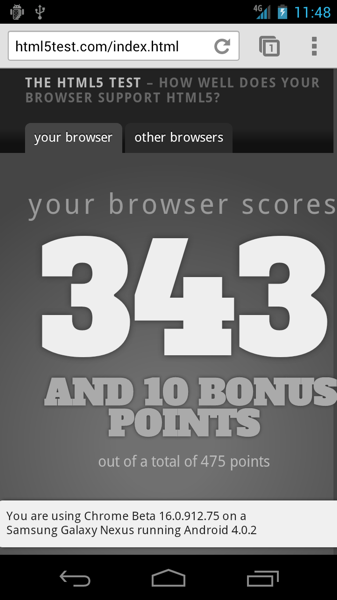
Html5ch

Sweet!

As I said, who needs flash anyways?!

Conclusion

Chrome Beta for Android is definitely a nice browser – if you have a device running Android 4.0 in the US, UK, Canada, France, Germany, Spain, Australia, Japan, Korea, Mexico, Argentina, or Brazil, it’s definitely something you should try out.

Otherwise, I don’t know when Chrome for Android will be released to the masses.

Enjoy!

Link to Chrome Beta in the Android Market

AppCleaner: A Thorough Uninstallation

One of the conveniences of Mac is that applications come in packaged files ending in .app. For this reason, they are usually said to be easy to uninstall – just delete the .app file from your applications folder and it’s gone.

True, this will get rid of most of the files, but often there’s still some application metadata gunk left laying around in hidden folders.

That’s why AppCleaner is so handy.

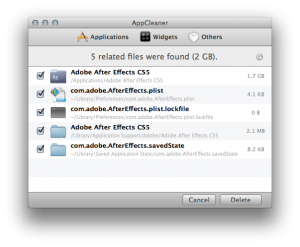
Drag in a .app file, and it will find all of the supporting files and allow you to delete them. This allows you to get a completely clean uninstall of an application on your mac.


Did I mention it’s free? Pick it up from FreeMacSoft using this link. Enjoy!

Android Wifi Tether Now Working on Galaxy Nexus

The only real reason I ever root my phone is to use the Wifi Tether app. Wifi Tether is a free application that allows you to get the internet from your rooted android phone onto your computer, without having to pay for Verizon’s ridiculous tethering plans.

Right after I rooted, I installed Wifi Tether and was disappointed when it gave me an error and didn’t work. I went to their Google Code page and there was already a very popular thread about it’s dysfunctionality on the Galaxy Nexus.

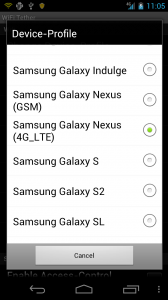
Well, rooters unite – Wifi Tether has just released an experimental pre-beta version that has support for the Nexus. Although it’s considered “experimental,” I’ve had absolutely no problems with it and I’m loving the 4G speeds. It’s like having a 4G Mifi with no data limits and a much cheaper data plan ($30 a month!).

Click Here to download the app. I recommend browsing to this page on your phone (here’s a shortlink to save you a little bit of time: http://wp.me/p1GtXy-vW) and hitting that download link.

Once it’s downloaded, go into Settings > Security and check the box that says “Install Apps from Unknown Sources.” This will allow you to install the apk file you just downloaded.

Now open your downloads and tap the apk file I told you to download up there, and you will go through a quick install process.

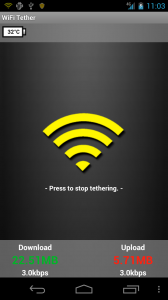
Open up the app and you’re ready to tether over 4G speeds!

If you’re not rooted yet and would like to be, click here for my post on how to root the Galaxy Nexus.

Enjoy your 4G Tethering!

How-To: Root the Galaxy Nexus LTE

I just got my hands on this beautiful Galaxy Nexus. I love it so far, and a full review is in the making.

But in the meantime, I figured I might as well show you how to root it.

So here you go.

(FYI: This how-to only applies to mac)

1. Download the files

First, download this file: Android root tools


Unzip it and put the folder on your desktop.

Now we can get started!

1. Unlock your Bootloader

Unfortunately, this is necessary with the LTE version of the galaxy nexus. It can be a little bit risky at times and is said to void your warrantee, but you can always undo this part.

First, plug in your Galaxy Nexus to your Mac and hold down the power button to turn the phone off.

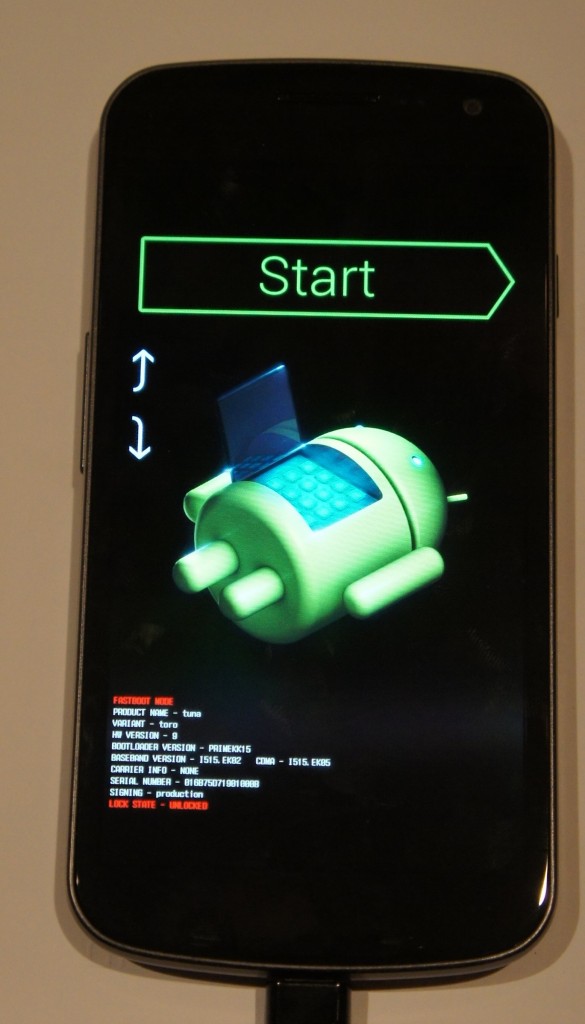
Now, hold down both the up and down volume buttons at the same time and hold down the power button. You should be greeted with a screen that looks like this (if not, shutdown and try again):

If you’re having a lot of trouble with this, here’s a video that I made showing you how:

Open up Terminal.app and type the following:

./~/Desktop/androidsdk/platform-tools/fastboot-mac oem unlock

You should see a prompt on your Nexus’ screen asking if you want to unlock the bootloader. Press the volume up key followed by the power key. You’re done!

Once you’re back at the android-open-thing screen, hit the power button to start the phone.

Now, it should boot up and start cycling through the boot animation. It may do this for a good ten minutes – whatever you do, DO NOT PULL THE BATTERY! (I learned this the hard way).

Eventually your Nexus will boot up, and you’ll be safe and sound in your little Ice Cream Igloo.

2. Root

Now it’s time to ROOT!

Put your phone back into fastboot mode plugged into your computer.

Open up Terminal and type this:

chmod +x ~/Desktop/androidsdk/r2-galaxynexus-superboot/install-superboot-mac.sh (hit enter)

./~/Desktop/androidsdk/r2-galaxynexus-superboot/install-superboot-mac.sh (hit enter)

That should be it! Your phone should start up.

It may hang on the Google logo for a while – If this happens, wait about 10 minutes and pull and replace the battery. Turn it on and it should cycle through the boot animation for a few minutes.

Once your phone boots up, you’ll be completely rooted! Enjoy!


KillBackground: Kill All iOS Background Apps at Once

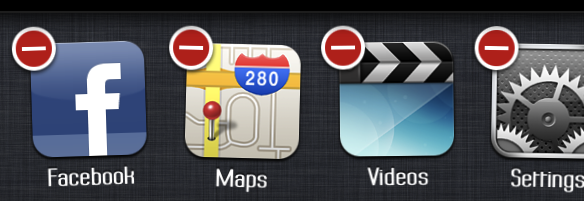
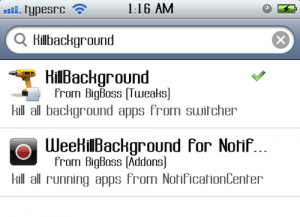
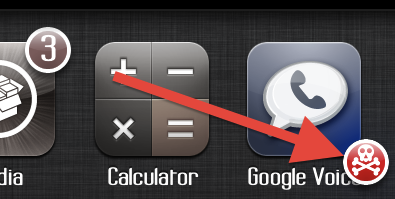
One of the most prized new features of iOS 4 and on was the ability to run many apps at the same time and switch between them easily. One of the little issues with this is that when you close an application, it stays running in the background. Normally this wouldn’t be a problem. But contrary to popular belief, background apps take up a ton of battery life! By the end of the day, you could have every single one of your apps running in the background of your iPhone! Of course you can double-click the home button, tap and hold one of the app icons for a second, then hit the red circle in the top left. Then hit it again for the next app. And again. And again. And again. You’ll have to tap once for every single app that’s open. Done yet? Well, if you happen to be jailbroken, here’s a little tweak from Cydia that will help you. Open Cydia and search for KillBackground. Install the free package by Mathieu Bdard and respring your device. When your phone comes back, you won’t immediately be able to tell that anything is different. But open up a few apps, then double-tap the home button. Tap and hold one of the apps for 1 second, and voilà! You’ll see a little red crossbones icon in the bottom left. One tap and all of your apps are killed! You can also open up your settings app and select KillBackground to configure some different options. Enjoy!

How-To: Create Instagram Photo Booth Strips in 3 Easy Steps

You’ve been using Instagram, the social network of quirky and cool pictures.

So now you have a profile with all these awesome pictures with comments, and all this other techy stuff.

But sometimes it’s nice to convert all that cool digital stuff into something analog.

And that’s why today, I’m going to show you how to make photo booth reminiscent photo strips.

You will need:

  • An instagram account with pictures
  • Photo paper
  • Photo printer
  • Rotary cutter, paper cutter, or at least scissors
Step 1: Get your photos

The first part of this project is to make strips of all of your photos.

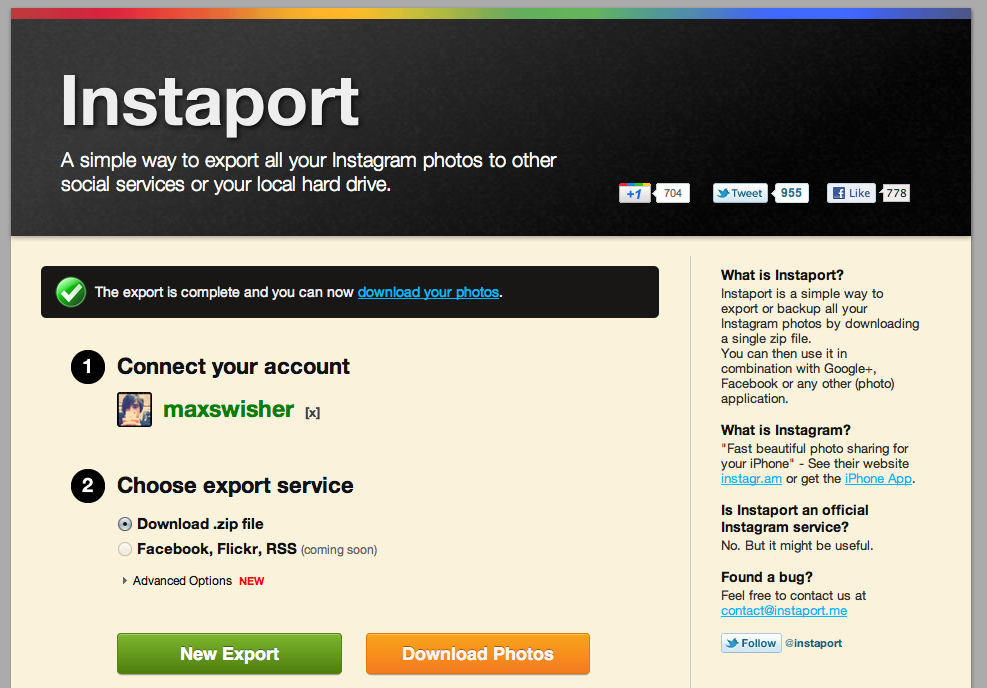
Start out by going to http://instaport.me and downloading all of your pictures to your computer as a zip. Instaport is a simple service that allows you to download all of your instagram photos as JPGs for free.

Once you have a zip saved and you can view your instagram images, you might want to go through deleting the ones that you don’t want to be included in your photo strips.

Step 2: Print your Photos

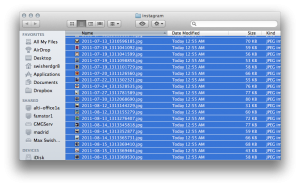
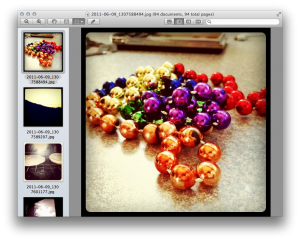
The next step is to open all of them up in preview. Go into the instagram folder (the folder containing all of the JPG images from instaport) and press Command A. This will select all of your instagram photos. Then just double click anywhere in the window and you will eventually get a preview window with all of your images open.

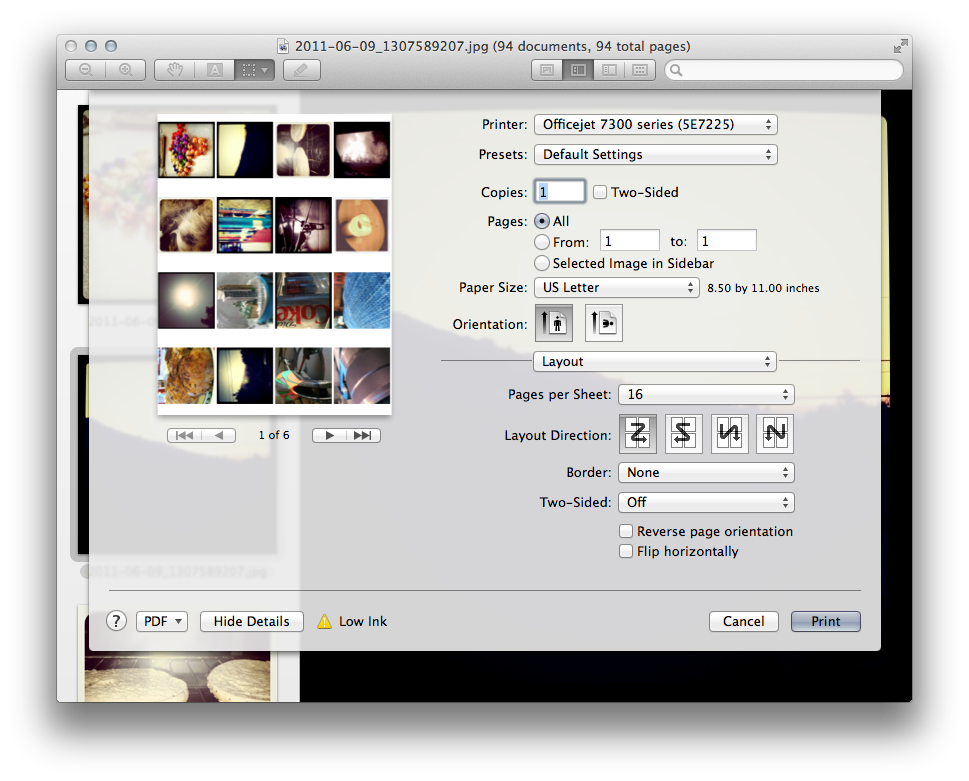
Next, press File>Print and configure the settings to look like so:

If possible, try to print borderless – your printer may or may not support this feature.

Next, hit the big Print button and let the magic happen. In a few minutes, you should have a few pages of instagram photos.

Step 3: Cut your Photos

Get out your rotary cutter / paper cutter / scissors and cut them into even strips horizontally (so that you have strips of four). Here I’m using a rotary cutter to to cut the strips evenly and cleanly.

Step 3: You’re done!

Once you’ve done that, you’ll have a ton of cool instagram photo strips.


Step 3.5: Do stuff with them

Well, now you have these cool strips! There’s tons of things you can do with them. Use them as bookmarks, give them to friends, collect them, hang them, use them as business cards, or my favorite: start an instant photo wall!

Also, feel free to follow me in instagram! My username is maxswisher.

NetBeans

I code HTML, PHP, and CSS quite often.

Usually, I use an application like VIM. VIM is a command-line based application that shows you syntax and if your quotes are in the right places. Helpful, compared to Notepad/TextEdit.

If you’ve ever coded Java then you know about Eclipse. If not, Eclipse is a free java development environment that includes auto-fill, error highlighting, manual libraries, and more.

It’s the same thing with Objective C in Xcode; there are manuals, auto-correct, and error highlighting.

Finally, we have PHP in NetBeans. Netbeans brings all of the features of Eclipse/Xcode to PHP, HTML, and CSS coding. It provides auto-fill, error highlighting, manual libraries, and more.

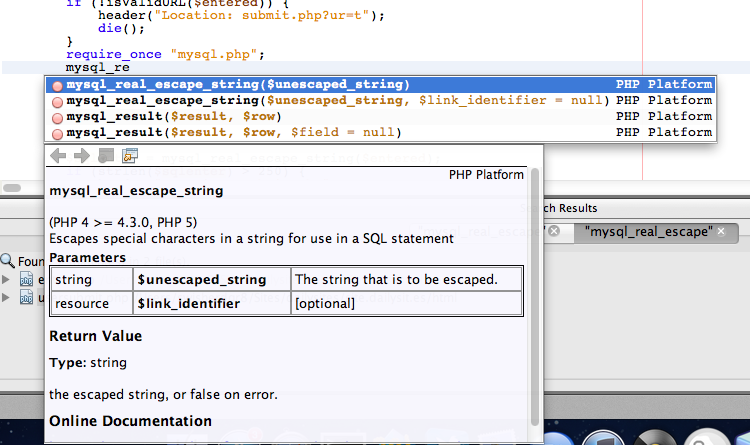
I was recently working on a fairly large project that includes PHP, HTML, CSS, and MySQL. Watch what happens when I have a partially typed PHP function:

There you have it. As I type, it gives me live suggestions and the manual for the top most relevant function right there.

I can hit enter and it will automatically fill it in and put my cursor in the parenthesis. It’s like having the familiar Eclipse shortcuts – but for PHP.

HTML and CSS are the same way. Type an opening ” and it will automatically fill in the second for you. It also has all of the CSS/HTML documentation and auto-fill.

The other main feature with NetBeans would be error detection.

Lets say I forget to put a semicolon at the end of a PHP line.

There you have it. You immediately get the error underlined, a notification in number bar, and when hovered over you get what the syntax error is.

Now, what does all this mean for a developer?

1. You can type a lot less and no longer need to look up functions in google so much

2. You don’t need to upload your files to see if they have errors

3. You can save a lot of time between error detection and auto-completion

This is the magic of NetBeans – but it doesn’t end there.

It’s free.

Yeah. Free. Completely.

It’s open-source, cross-platform, and available to anyone who wishes to download it’s magical amazingness.

The truly sad part about this is that few developers know about NetBeans. It’s sad how they end up wasting so much time and effort due to things that NetBeans could easily fix. If you’re a web developer, this application is a MUST HAVE. And it’s free – you really have nothing to lose.

If you’re interested, click here to go to the NetBeans main site and experience the magic of da beanz.


How-to: Change fonts in iOS

Almost everyone is very used to the default iPhone font – Helvetica. It’s plain, simple, and easy to read.

People are usually just fine with Helvetica – but if you’re jailbroken, it might be a nice unique touch to change your font. And because text shows up EVERYWHERE in iOS, you’ll always get to enjoy your font change.

To change the font(s) on your iPhone, you’ll need an app called BytaFont from Cydia. Just open up Cydia, go to search, and type BytaFont and install it – no additional repos needed ;). If you have a Verizon iPhone 4, click here to read my post about 2 step jailbreaking.

After you’ve downloaded BytaFont, you can tap “Browse Fonts” to get a few options for browsing: Staff picks, most recent, most downloaded, most appreciated, alphabetical, and by category. Unfortunately it’s as hard to navigate as it sounds. The fonts under most appreciated are nearly impossible to read, and looking through a huge list of fonts (where all you see is the title of the font in Helvetica) doesn’t help me determine which font I’m looking for.

There are tons of fonts that are available for you to use (all for free, of course) from BytaFont. Some of them are basic, like Tin Birdhouse. Some of them are complex, like Halo 3 (which I simply just can’t read).

I decided that I liked the Ubuntu font. It’s clear and still easy to read, but it’s still different from boring helvetica. Here’s how it looks in a few situations on iOS.