swackett

Sometimes weather is just too damn complicated.

There’s the temperature, clouds, chance of precipitation, humidity, pressure, dew point, wind chill, and feels like.

But what’s the main reason you look at the weather? Usually it’s because you’re going somewhere. And why do you need to care about the weather at that somewhere? Because you need to know how to dress to suit the weather conditions.

Swackett is an app that gives weather to you straight. It tells you exactly what you need to wear, and even labels it for your convenience.

As you can tell, it does give you some of the weather information so you know what to expect, but the main feature of it all is how it tells you what to wear and labels it all for you.

In addition to todays forecast, you can also see that it has the current conditions, tonight’s forecast, and tomorrow’s forecast, all of which tell you what you should wear.

Long are the days of trying to relate temperature, humidity, and chance of precipitation to what you should wear.

This app is available for FREEE on the Mac App Store. You can also purchase different styles of clothing that the weather models wear, but I don’t find that very necessary if all you need is to know what you should wear that day.

App Store direct link

Create a spanning wallpaper

So I have expanded my setup recently to six screens, and one of the fun things about having a lot of screens is that you can make a wallpaper span across all of them. There are apps that do that, but they can’t span across different computers. Here’s to do it the manual way.

To do this we will take a single large wallpaper and split it up into individual pictures for wallpapers for each screen that you are spanning across.

1. Pick a picture

The wallpaper doesn’t have to be too large, but one that was made to fit a very large monitor always goes best. I’m using an image that is 1920 pixels wide.


2. Find screen resolutions

This is an extremely important step in the process so you know the proportional size of each chunk of your source image. The resolution can be found in the display preferences of every computer (or screen resolution preferences). Here’s the resolution of all of my screens:

Once you have that all worked out, time to break out photoshop.

3. Cut your pictures

Warning you: this step takes a little while.

Before you can start cutting your photos, you need to know the proportions of your screens. This can be done with a good old fraction simplifier.

Just visit this site and put in your width into the top of the fraction and the height into the bottom. Then select to have the result as an improper fraction. You may want to name each screen screen 1, screen 2, and so on. Find the result of each screen resolution.

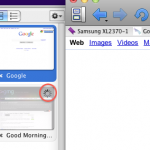
Then, open your source picture in photoshop. Select the rectangular marquee tool and where it says style select fixed ratio. Where it says width and height put in the top and bottom of the fraction you got out of the simplifier.

I’m going to start with my first screen which is 1280X1024, which according to the magic simplifier comes down to 5/4. So I am going to put 5 and 4 into photoshop, then start to select what you would like to be for your first screen. Because my first screen is the top left, I want to select in the top left of the picture.

Once you have the selection, create a new document called wall1 and make it the size of your first monitor.

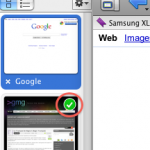
So now you need to go back to where you made your selection and hit copy, Then, take your paintbrush tool and color over it. This is so that when you make selections in the future you know where your screen will be.

Then, go into that new blank document you created and paste it. Use the free transform tool and move the edges of the pasted selection to the edges of the canvas. Save and repeat for every single one of your screens.

Done yet?

If so, you should have  a bunch of files named wallX.psd (which you should also convert to JPG) and a bunch of black squares on your source file.

Now you have to distribute those files to the appropriate computers. You may have to use a USB stick but I have FTP and a web server so that makes it easy.

Once you have all of the wallpapers set your result may vary depending on the spacing or irregularity of your monitors. With mine you can still see it but not that well.

Teleport

Many people I know have multiple Macs. The most standard multi-mac setup would be one desktop (usually a Mac Mini) and a laptop (Macbook, Pro, or Air). This is usually so that one can have power and still be mobile. But when it comes time to sit down and do some work, it might be useful to have two screens (studies show a dramatic increase in productivity with more screen real estate). But one problem faced is that with multiple computers comes multiple mice/keyboards. Well, if you’re all macs, then there’s a solution.

Teleport is a free and easy way so that you can use one keyboard/mouse and have it span across multiple computers (so you don’t have to move your hands to control a different computer). It’s extremely simple to use.

To get it all working, all you have to do is download teleport. Teleport is a Mac Preference pane (.prefpane) so to configure teleport you open system preferences and click on teleport (under other). Here you can configure settings and arrange the screens. NOTE: Make sure that both Enable Teleport and share this computer are both checked.

In the preference pane you can configure things like pasteboard sync and choose if you want to only switch to the other computer when you are holding a specific key down.

the rest is pretty simple. Just move your mouse across the edge of the screen and it should show up on the screen of the other computer. Whichever computer your mouse is on will be the computer that the keyboard affects. However, the volume keys don’t work across Teleport (neither does multitouch except for scrolling).

Teleport is a great free app that works and does what it should quite nicely. There are some problems when your mouse is on a client computer screen and the client computer loses internet connection. It takes quite a while for your mouse to reappear on your main computer. But the convenience of this application overcomes this setback.

Teleport main site

Teleport direct download

BOINC

BOINC stands for Berkely Open Infrastructure for Network Computing. And I want to appreciate what they are doing with their Distributed Computing platform.

Basically, you download an app to your computer. And when your computer is not in use, all of it’s power (or as much as possible) goes over the internet to berkely so essentially they have a supercomputer of all of these other computers (hence distributed) to go to cure diseases, detect pulsars, and other scientific stuff. It’s an easy way to donate something that could be extremely useful to the cure. The help of the world. So many other scientific things that will get us farther along and allow us to make discoveries of all sorts.

I think that other than being really cool, the BOINC distributed computing platform is an amazing idea. So many people are away from their computers and they leave the potential of power just sitting there. It’s like donating your computer to UC Berkeley for scientific research, but only for the time when you aren’t there.

This is great if you have a LOT of extra computers around you can join this and put those lazy things to work. I read the idea and I just thought to myself. Genius.

Now what’s really cool is that you can actually select which cause you want your power to go to. There are so many categories (all of which support various operating systems) for you to benefit to.

Unfortunately to get it all working it’s pretty simple but can get kinda complicated.

First, click here to download boinc.

Then click here to go see which things you can benefit to. Then find one that has a cause you would like to benefit too. Then, in boinc, click add project. On the page where you found the cause, look at the name in the left-most column.  Find that name in the window of boinc and select it. It will connect to the project then ask you to setup an account and stuff like that. Once you are done with that, boinc will start to download work from the server. One thing you may want to do is open the preferences and select some limits on how much power of your computer it is allowed to use. I made it so that it would only do work after the computer was idle for 1 minute, because I want all of the power of my computer when I’m using it but when I’m not I don’t find a point in letting it sit there useless. I also only allowed it to use 2GB of space on my disk, as I don’t want too much disk space being sucked up by this cause. I also told it to use only 70% of my computer’s processor as I don’t want my computer to overheat either.

I think that this is a great and free way for people to contribute to causes without having to use money. Enjoy 🙂

Alfred

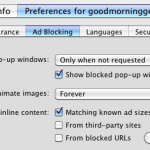
A wonderful little app with the worst name they could come up with.

Alfred is a Spotlight Alternative. It is similar to quicksilver, but is quite a bit simpler.

Basically, it is a plain text box that opens on a key command. you can type to search through your hard drive, but if there are no files then you can choose to search through google, wikipedia, or even amazon.

In addition to searching your hard drive alfred can search numerous things.

For example, you can type “lucky doorknob” an it will open the first google result for a search of doorknob.

You can also do things like type in a URL and it will open in your web browser. In the screenshots is a list of some of the functions included with the app. You can also create your own which comes in handy if your favorite search engine doesn’t come with Alfred by default.

Now although those functions are useful, it prevails over spotlight mostly because if it’s speed. Everything happens faster for some reason, but let me just say, I like it.

Alfred is free and highly customizable when it comes to interface. Download it from alfredapp.com.

Screenshots:

Wireless Tether with Droid Incredible

So let’s just say that you are driving somewhere and you have your computer (or iPad or iPod touch for that matter) along with your droid incredible. Well now for free (actually, the expense of battery life) you can use your Droid Incredible as a wifi tether, so you can have an iPad on verizon.

Sadly, the speeds are dramatically reduced to a groping 70 kb/s. But I think it’s better than nothing. Can load pages, not so great for downloads and video/audio streaming such as youtube or pandora.

Step 1. Make sure your phone is rooted. Just do steps 1-4 of the tutorial HERE (continue the steps to install android 2.2, if desired!).

Step 2. On your incredible go to THIS LINK (try using chrometophone, review on that soon!)

Step 3. Once the link is downloaded open it and install the application.

Step 4. Open the application on your phone.

Step 5: Press menu and go into the settings and change around your preferences. change the SSID, and add a passphrase. Enable access control if desired.

Step 6: Press the big tether button.

Step 7: On your wifi enabled device go to the network selection and select the nework name that you had entered in the SSID preferences. Enter your asscode and Voila, you can connect to the internet!

One of the cool benefits of this is that you can be on the internet while in a car. Cool, eh?

OmniWeb

I’m sorry. I really am. This is, indeed, yet another web browser.

I was recently at a technology summer camp (I’m taking a class about photoshop) and the same instructor that ended up switching me over to macs kept telling me about how mazing omniweb was. I wasn’t convinced until I finally decided to download it.

The first thing you notice is speed. I know that people call chrome fast, and, well, it is. But from tests on Good Morning Geek, it seems as though graphics render either faster or from top to bottom. I’m pretty sure omniweb prioritizes the top of the page for rendering, as the header seems to appear almost instantly, followed by widgets in the sidebar. In chrome, it takes a couple of seconds for the header to appear.

Other than that the big thing is tabbed browsing. So lets say I have a lot of tabs open in Safari. I mean a LOT. In the menubar it shows the tabs as txt, the name of the webpage. But when it gets crowded things get a little harder to make out.

(click to expand) As you can tell, it’s kind of hard to tell which news article that CNN page is about. What if I have ten CNN tabs open but all I see at the top is CNN:…

OmniWeb takes a new approach. Thumbnails.

I don’t even need to figure out what the text is trying to refer to, I can just take a glance at the tabs and click the one I want to look at. And even if I have 20 tabs open, the thumbnails don’t get smaller because you can scroll through all of your thumbnails.

Another cool thing is the ability to load tabs in the background. I know this isn’t new to the field of browsers but I find that the system it uses to tell you that a tab in the background is loading (and when it is finished loading) very unique.

When a tab is loading it is greyed out and has a spinny thing in the top right.

When a tab in the background has finished loading, OmniWeb does a nice job of letting you know.

If you open the tab the check mark wil go away.

Other than that there is one more key feature to this: site-specific browsing options.

On any website you can click a button in the top right and select your options for ads, appearance, security– let’s just show a screenshot.

The button to toggle the pane is shown in the top right.

As you can see there is also a page info pane where it shows you all of the images, scripts, stylesheets, and frames on a webpage. Here’s a gallery with pictures of each and every pane, plus all of the other screenshots from this post:

OmniWeb Homepage

OmniWeb Download Page

MindNode

We all have thoughts to organize. Mind maps are a great way of doing so, but a lot of software can be clunky, expensive, or hard to figure out. MindNode is a free, functional, and simple way of creating mind maps.

Upon opening the app, you will be greeted with what is called the “supernode”. Every different branch coming off of the supernode is called a node.  Click and drag the plus off of the supernode to create a node, and then you can type to name the node. When hovering over a node there will be a plus so you can create nodes off of other nodes.

So you can organiza thoughts and ideas for things like to-do lists, projects, and more. Here’s an example for a to-do list:

You can also configure the color of the nodes using the inspector (the i in the top right), which makes it easier to visualize.

As you can tell, the inspector only applies to items that are highlighted. And to highlight an item, you guessed itL you CLICK on it. :O

If you look closely, there are white squares to the left and right of every highlighted node (when you highlight a node that has nodes coming off of it, all of the “sub-nodes” are also highlighted). Click and drag one of the squares to resize the node to change text wrapping.

It can also be used to separate sub-nodes from other nodes so you don’t get them confused. If you use both this and the ability to change the color, you can easily distinguish the sub-nodes.

In addition to being simple, powerful, and free, MindNode can export a document to

Click Here to download an example of the PDF.

Here is what the text outline looks like:

Thanks to it’s simplicity and flexibility, MindNode can be used for many different purposes.

MindNode Homepage

MindNode Download

Remember The Milk

We all have things to do.

And that’s why there’s an app called Things, which won an apple design award, etc, etc. But that costs $50! Yah, umm… NO. so that’s why I love Remember The Milk.

Remember the milk doesn’t have all of the features of Things (I’m pretty sure Things comes with a manual…), but for a great free online to-do list service, Remember The Milk is perfect.

Remember The Milk gives you features like multiple lists, tagging, due dates, priorities, the ability to postpone, the ability to share tasks, and more. It also includes smart lists (similar to Smart Mailboxes or Smart folders), which can filter multiple lists.

RTM (R.emember T.he M.ilk) will automatically sort items in order that they need to be done which depends on priority and due date. This is great becasue you just add in the things you need to do, and instead of spending 5 minutes thinking of which to do first the answer is right there in RTM.

Also, I turn to RTM when I have nothing to do because I probably have something I need to do somewhere. I also use RTM to organize ideas for blog posts, and that’s how this postapalooza has been occurring (One post every day from Jun. 9 until an unspecified date). It has boosted my productivity by 7x (I used to have on post per week).

When you add a task, you can add things like ![number] to set the priority after you enter the task name. So If somethig is really important, I ust go to the list and in the box I enter:

Really Important Thing !1

And hit return, and it will be added to the list and sorted. You can also do similar things to ad due dates and more.

Another cool feature is that you can have friends and share tasks with them. I haven’t yet been able to test out this feature, but at least the idea is a great one.

For heavy users of RTM, you can get a pro plan which is $25/yr. This allows some extra features like access from the mobile app (If you don’t have pro, you can always just go to m.rememberthemilk.com on your mobile phone for a much liter interface) and some other goodies.

Thanks to RTM and one other application (review coming… tomorrow probably), I am able to keep this postapalooza alive and I don’t know when it will stop… I guess when I run out of ideas.

http://rememberthemilk.com

picplz

We all have twitter accounts.

What is twitter for? It’s for sharing what you are doing right then in less than 140 characters.

picplz is similar, but it uses pictures with tags and captions instead of just text.

Sorry guys, but the app is only available on android. 🙁

So here’s how it works:

Open up the app and you are instantly greeted with the view of your phone’s camera. Tap the camera button to take a picture. If you have foursquare configured, tap the venue that you are at. You can then tap someone/something to tag them in the photo. Then you can click edit details and enter a caption and decide which services you want to post it to (twitter and foursquare). Then click post and your picture will be posted! This is great because you can see which pictures you’ve taken at different foursquare venues. Your profile will be located at picplz.com/user/username. Check mine out here!

Tether your android device

As you know, I got my beautiful new HTC incredilble.

It comes with built in support for tethering, but another $30/ mo.??!! NO. Luckily, there’s an easier way: PDAnet.

It’s a free download from the android market and works without any extra charge.

Sadly, I can’t give you any screenshots due to android. 🙁

But it is simple enough.

First, open the app. You will be introduced with the option to turn on USB or Bluetooth tethering. The USB tethering requires an extra plugin to be installed, and my mac supports bluetooth DUN built in, so I just used that. Here’s a video on how I set it all up.

There you go! Sadly this does not work with the iPad, as DUN isn’t available quite yet.

Offline Pages for iPad

Over 1,000,000 iPads have been sold, and I just got the WiFi version. But I know many went for the 3G version because they could browse the internet anywhere (that is, if you’re in Texas of course). But what if you don’t want to pay the $30 for unlimited, or just have the WiFi version? Offline Pages is a free app that allows you to download pages and view them on your iPad even when you don’t have an internet connection.

And It’s actually quite easy. First, open the app on your iPad. The interface is simple. At the top there is a URL bar where you can browse to the page you want to save. Once you’ve found it, you can tap the button directly to the right of the URL bar (the down arrow into the box thing) to save it for viewing later. A small red badge will appear over the button to the left of the URL bar indicating that it is being saved. After the badge has disappeared, you can safely close the app and go anywhere knowing that you still have the webpage.

To view the webpage, just tap the button directly to the left of the URL bar (the box with the papers in it) and your saved pages will be listed. Tap on one to see it.

But there is one problem with this method: What if you are browsing pages in Safari with an internet connection and you find a page you want to save for when you are on the road? You’d have to copy and paste the URL, then go into Offline Pages, open the page in offline pages, and save it. Oy Vay!

But these people are amazingly smart. They know that, so they created a bookmarklet to do it for you. To install the bookmarklet, just go into the options and under general there is a selection to install the bookmarklet.

This will bring you into a webpage in safari, and amazingly you can install the bookmarklet to another iPad or computer!

Tap which ever one you want to do and it will give you step-by-step instructions to install the bookmarklet.

After you’ve done so, just browse to a page in safari, tap the bookmarklet, click save to iPad, and Voila! Just open Offline Pages and the page will be saved for offline viewing. Great if you are going on an airplane without WiFi!

Even better, the app is free and for iPod, iPhone AND iPad! Bravo! [Applaud]

Click here to be redirected to iTunes.