Otterbox Defender Series for Galaxy Nexus

Over my years of reviewing and testing, no other case company has ever been able to  replicate the protective properties of Otterbox’s cases. When I plan on dropping my phone off of a two story building, they’re the only ones with a case I can trust.

That’s why when I got my Galaxy Nexus, I knew that the case I would be getting would be from otterbox. Here’s my scoop.

Design
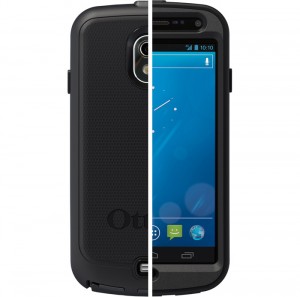
The case consists of two main parts: an outer silicone skin, and an inner hard plastic shell (with a screen protector built in).

The outer silicone skin has a nice grip and absorbs a majority of the initial shock if you happen to drop the device. It has openings for all ports, so you can attach everything you need without having to ever remove the case. This is a nice feature, although it does add more parts and complexity to the overall design of the case.

The Flaw

The inner shell is the hard layer of protection for the device. It has two parts: a bottom and a top section, which snap around the phone. This is where the only problem with the case is.

A "practically indestructible" case?

The top section is a frame around the screen (with openings for speakers, cameras, lights, etc.) which also has a screen protecter glued in. This means that you need to clean off the screen protector of the case in addition to your phone’s screen and try to get them together before any other dust settles. The only issue with this is that if any dust settles after you’ve snapped it on, good luck getting it off – without breaking it, that is. After my first attempt at putting it together, I noticed a bunch of dust particles under the protector. So I take the case off, but the tiny snaps on the edges that hold the case together aren’t willing to let go. In the end, I need to pry them apart to even get to my phone. This bent the frame a bit. On my second attempt at taking the case off, I tried to use a key in the tiny slots next to the snaps. I ended up cracking the frame, and it still took a good ten minutes for me to get the case off of the device.

Conclusion

Otterbox was always (and most likely will always be) known for it’s super-protective lines of cases. At $50, the materials are not very well-built and are extremely prone to cracking and bending. Although it may protect your device, the case is oddly fragile for its super-hefty title. I can’t say I don’t recommend this case, as the protection it offers is above-par, but I can’t highly recommend it as it is fragile and the plastic materials are prone to breaking and bending.

If you want to pick one up for yourself, click here to be redirected to the Otterbox page.

P.S. Thank you otterbox for sending me this awesome (but fragile) case!

The Galaxy Nexus Problem: Battery Life

I’ve always been wondering what the big problem with the Galaxy nexus is. It has an amazing dual core processor, a glorious screen, flawless software, and LTE speeds. The camera is less than impressive, but it’s really not that bad.

But now, I’ve found the issue. Battery Life.

The Galaxy Nexus lasts for about 3 hours and 40 minutes. That’s a new record for the shortest battery life of a smartphone. Ouch.

Apparently the issue is actually related to software, where android 4.0 is keeping the CPU from sleeping. While verizon is busy trying to work out those kinks, they’re selling an extended battery for 50% off (not $25 from $50). I’ve ordered one and am awaiting it in the mail.

The only fear of mine is that Verizon releases an OTA (over the air) update for the phone that fixes the issue, then I’m not able to download the update because I’m rooted. This was the case on my Droid Incredible, but from what I’ve read it shouldn’t happen with the Nexus. I’ve also read that I’ll need to re-root, which shouldn’t be a problem.

Of course I’ll keep everybody in the loop about rooting and OTA updates, but until then be careful when buying a Nexus – you should probably get an extended battery as well.

Android Wifi Tether Now Working on Galaxy Nexus

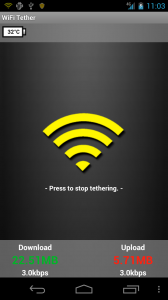
The only real reason I ever root my phone is to use the Wifi Tether app. Wifi Tether is a free application that allows you to get the internet from your rooted android phone onto your computer, without having to pay for Verizon’s ridiculous tethering plans.

Right after I rooted, I installed Wifi Tether and was disappointed when it gave me an error and didn’t work. I went to their Google Code page and there was already a very popular thread about it’s dysfunctionality on the Galaxy Nexus.

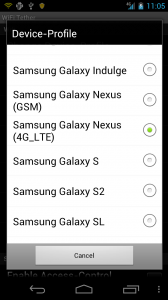
Well, rooters unite – Wifi Tether has just released an experimental pre-beta version that has support for the Nexus. Although it’s considered “experimental,” I’ve had absolutely no problems with it and I’m loving the 4G speeds. It’s like having a 4G Mifi with no data limits and a much cheaper data plan ($30 a month!).

Click Here to download the app. I recommend browsing to this page on your phone (here’s a shortlink to save you a little bit of time: http://wp.me/p1GtXy-vW) and hitting that download link.

Once it’s downloaded, go into Settings > Security and check the box that says “Install Apps from Unknown Sources.” This will allow you to install the apk file you just downloaded.

Now open your downloads and tap the apk file I told you to download up there, and you will go through a quick install process.

Open up the app and you’re ready to tether over 4G speeds!

If you’re not rooted yet and would like to be, click here for my post on how to root the Galaxy Nexus.

Enjoy your 4G Tethering!

How-To: Root the Galaxy Nexus LTE

I just got my hands on this beautiful Galaxy Nexus. I love it so far, and a full review is in the making.

But in the meantime, I figured I might as well show you how to root it.

So here you go.

(FYI: This how-to only applies to mac)

1. Download the files

First, download this file: Android root tools


Unzip it and put the folder on your desktop.

Now we can get started!

1. Unlock your Bootloader

Unfortunately, this is necessary with the LTE version of the galaxy nexus. It can be a little bit risky at times and is said to void your warrantee, but you can always undo this part.

First, plug in your Galaxy Nexus to your Mac and hold down the power button to turn the phone off.

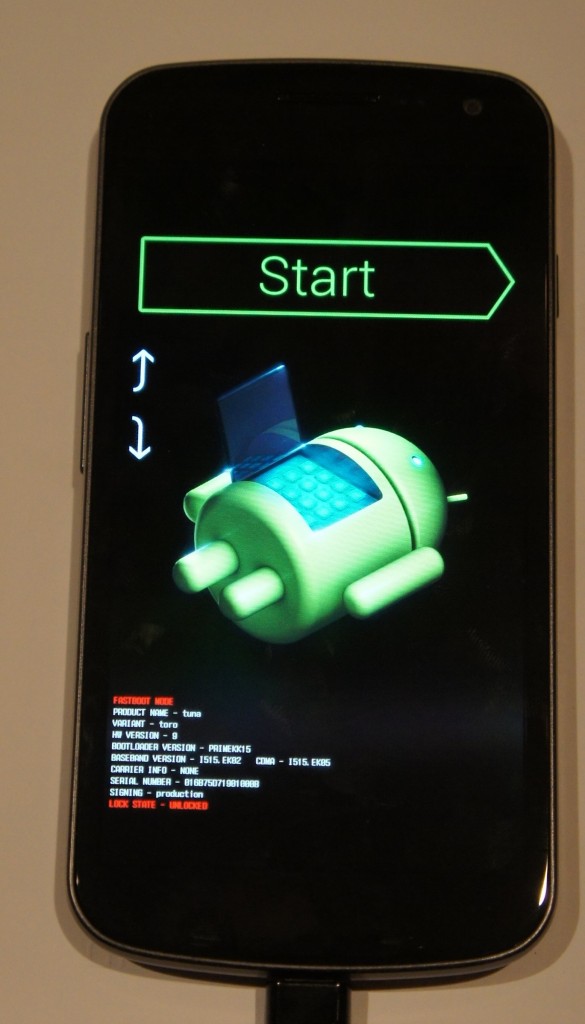
Now, hold down both the up and down volume buttons at the same time and hold down the power button. You should be greeted with a screen that looks like this (if not, shutdown and try again):

If you’re having a lot of trouble with this, here’s a video that I made showing you how:

Open up Terminal.app and type the following:

./~/Desktop/androidsdk/platform-tools/fastboot-mac oem unlock

You should see a prompt on your Nexus’ screen asking if you want to unlock the bootloader. Press the volume up key followed by the power key. You’re done!

Once you’re back at the android-open-thing screen, hit the power button to start the phone.

Now, it should boot up and start cycling through the boot animation. It may do this for a good ten minutes – whatever you do, DO NOT PULL THE BATTERY! (I learned this the hard way).

Eventually your Nexus will boot up, and you’ll be safe and sound in your little Ice Cream Igloo.

2. Root

Now it’s time to ROOT!

Put your phone back into fastboot mode plugged into your computer.

Open up Terminal and type this:

chmod +x ~/Desktop/androidsdk/r2-galaxynexus-superboot/install-superboot-mac.sh (hit enter)

./~/Desktop/androidsdk/r2-galaxynexus-superboot/install-superboot-mac.sh (hit enter)

That should be it! Your phone should start up.

It may hang on the Google logo for a while – If this happens, wait about 10 minutes and pull and replace the battery. Turn it on and it should cycle through the boot animation for a few minutes.

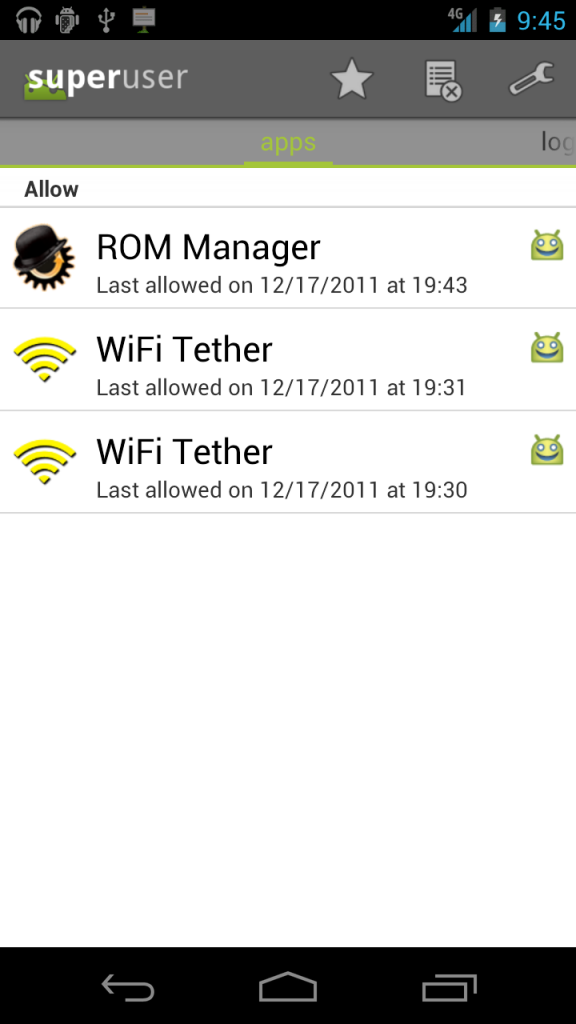
Once your phone boots up, you’ll be completely rooted! Enjoy!


Verizon Can’t Get it Right

One of the most anticipated phones if the year is the Galaxy Nexus. It boasts a ton of new features, courtesy of Andoid 4.0.

One of Apple’s strongest points is how they release their phones. They send out an invite to an event, then at the event make a clear availability date. This causes people to get excited for the product and even line up for it.

Verizon took a different approach. They added a release date of Dec. 9 to the stores’ databases, and never made an official announcement. Everyone gets excited for that day, but Verizon has decided to stamp that down as well. Verizon took down the date from the databases and replaced it with “Launch Date Coming Soon.”

I don’t understand what Verizon is going for. Are they trying to get hype? Are they attempting to draw more in with their deadline extension? Or are the marketing people really just that clueless?

Many people have their two year upgrades coming up and would like to upgrade to the Nexus, but with so much waiting and games people are beginning to lose patience with Verizon. It’s not sure whether the phone isn’t actually going to be released on the 9th, and other sources are saying that it could be on the 13th. Who knows?

Verizon either needs to stick to the leaked dates to encourage more hype assurance or just give us a solid, set release date.

Why Google+ Is Failing

When I was at the Teens In Tech conference, a speaker told me this:

For your product to succeed, it either must be a new idea or be better than a previous one.

It makes sense – why would anyone switch to your product if there’s already one that does the same thing? Your product needs to have more to offer so people would actually have a reason to “convert.”

Unfortunately, there are few tech companies that succeed with new ideas – so a lot take old ideas and refresh them to make ’em better. For example, every Apple product ever created; The iPhone wasn’t the first phone in the world – it was just better than the rest; The iPod wasn’t the first small music player ever created – it was just better because it could hold so many more songs and didn’t need CDs or Cassettes.

Okay, so lets take a look at Google+. It’s a great social network that has tons of new features that are definitely in demand. Who would wan’t multi-person video chat, along with a slew of easier to manage privacy features?

“Okay, so Google+ “better” than facebook – but why isn’t it succeeding?”. This is a question I’ve been asked many times.

Lets think about it in terms of a lamp (yes, the one on your desk). First, we have our facebook: A standard lamp with a normal switch that emits very bright light. Then, lets look at our Google+: A large, fancy lamp with pretty designs on it, a bendable neck, and voice activated controls – but we forgot to add in a socket for a lightbulb.

In this analogy, our Google+ Lamp is “better” than our facebook lamp – but it doesn’t do what people want to use it for (illumination).

Lets take that analogy back to Facebook and Google+. What is the real reason people ever go on facebook?

The real reason is their user base. There are very very few people who aren’t on facebook, and there are very very few people on Google+. Google+ has all the new doohickeys and thingamajigs, but it’s forgetting the light bulb (user base).

And because nobody is on Google+, nobody wants to join – they’re satisfied with Facebook and their 1500+ “friends.” What’s the use of having a ten person video chat if there’s not even ten people on Google+?

Google+ is a good idea, with a perfect execution – but the social networking field has been completely dominated by Facebook and Twitter. It’s unfortunately like this for many social internet startups: many of them rely on a user-base to be the least bit useful, and without a user base you won’t be able to expand your user base. You can get a user base by having a user base, because if you have a small user base people want to join to be part of that user base, which makes more people want to join etc.

Hence the reason most social startups fail. Gaining a user-base is a domino effect, with the first domino being a giant brick wall. You need to hope that something will come and knock it over, as getting the domino train started is definitely the hardest aspect of the whole process.

Galaxy Nexus? Lolwut?

You may know about the long lasting line of Google’s special Google Phone called the Nexus. There was originally the Nexus One, then the Nexus S recently. Both of these were manufactured by Samsung, but Samsung’s name wasn’t really placed on it – just on the very bottom of the product pages.

But Samsung has taken a different approach this time – They’ve released a new Nexus phone that they are calling the Galaxy Nexus, following their popular like of Galaxy S phones.

Other than the new name, the Galaxy Nexus follows Google’s standard path of some great upgrades.

As far as hardware goes, it’s just like the Nexus S – but better. The Galaxy Nexus features a slimmer body, more vibrant screen, and a very nice camera – although specific megapixels are not supplied.

But the real upgrades are in the software. The Galaxy Nexus features the purest of pure Android 4.0 – which is a nice relief considering all other phones in the Galaxy S line are skinned by Samsung, causing them to be painfully slow and unresponsive.

Among Android 4.0’s new features (other than the painfully idiotic name of “Ice Cream Sandwich”) are Face Unlock, which allows you to unlock your phone with face recognition; Android Beam, which uses NFC to send websites, photos, contacts, and more to other phones; and your usual fixing of extra eye candy.

The Galaxy Nexus doesn’t have any pricing or supported networks, however a bit is given away with the following line:

Galaxy Nexus runs at 4G (LTE or HSPA+) speeds

Verizon is the only provider that currently has an LTE network, which means that the Galaxy Nexus will be on Verizon for the first time.

I’m definitely excited for this phone, and anyone in the Android market should definitely look at this phone.

Google+ for iOS released, Welcome to Crash Central

Google+ is Google’s stab at facebook that has some great new features that really puts it in the competition (read more here). The Android app was available immediately; the iOS app was supposed to come a few weeks after.

Well, it’s here. Unfortunately, it’s not worth getting.

You are greeted with a front page where you can view your stream, profile, huddles, circles, etc. Everything works until you hit stream; that’s where it crashes. It will give you a spinner saying that it’s loading… then it will keep spinning… and spinning… and spinning… and when you’re sick and tired of it, you just hit the grid to go back to the home screen. But it doesn’t go. So you hit it again. Same result. So you start frantically hitting buttons, but it’s not going to respond. Then, there’s the crash.

For now, this is all you’ll get. Jailbroken or not, iOS 5 or 4. The app is just a crasher.

HTC Officially Announces Bootloader Unlock

Extreme android power-users often have to use different software that voids the warranty on the phone to unlock the bootloader. If you don’t know, the bootloader basically determines where to boot the phone: the main operating system, recovery, or sometimes to a restoration file.

Well now, HTC has announced from a very high-up place (their facebook page) that they are unlocking the bootloaders! Yay!

There has been overwhelmingly customer feedback that people want access to open bootloaders on HTC phones. I want you to know that we’ve listened. Today, I’m confirming we will no longer be locking the bootloaders on our devices. Thanks for your passion, support and patience.

Awesome!

I think it’s really nice that instead of fighting off developers and hackers, HTC is actually taking a side with the hackers to try and make them happy. HTC’s devices have always been favorites for porting android versions and hacking the bootloader, and the fact that HTC is embracing it instead of fighting it really makes me happy. It shows the real selling aspect of android,  open source, now being implemented in the OEM’s hardware. I wish more companies could follow in HTC’s footsteps.


Plantronics Gamecom 777

I am so confused.

I thought the Beats by Dr. Dre were the best headphones, and they’re $350.

But I’m liking these Gamecom 777s more – and they’re only $100.

Design


These things are RUGGED. When you use them, they feel more metal then plastic. There’s no squeaking, and I feel like they’re well build and well put together. All of these things I couldn’t feel with the Beats by Dre.

A microphone comes out from the headband of the headphones, which is a genius idea and the perfect way to conceal the microphone when not in use. The inline audio and mute control is very helpful, and can often come in handy.

There’s one thing I don’t like about these headphones – the open-ear design. All sound leaks through a TON, so don’t expect ANY privacy from these. It’s nice because when someone is trying to talk to you, you aren’t totally spaced out. But it’s also a bit annoying to the people around you who might want to listen to their own soundtrack.

Sound Quality

When it comes to headphones, this is really what it boils down to. And my god, I’d choose these any day over Beats. These have dolby surround sound technology, and through USB an included small box will convert standard stereo sound into full on dolby surround sound. If you remember my post about the new dolby technology and how it brings the music out of your ear and puts it around you? You can feel that in these speakers. Thanks to the 7.1 technology, stereo sound turns into extremely immersing rich sound. It’s amazing. Much better than the beats by dre.

Overall, the sound quality is just plain stunning and amazing.

Comfort

With these headphones, you are getting the luxury experience.

The pads are a soft, smooth fabric, as opposed to the plasticy rubbery earcups on the beats. The earcups distribute pressure really nicely, and you can keep these on without any discomfort for hours on end. The earcups are extremely spacious, which is also a nice addition. Overall, these things are extremely comfortable and don’t give you the same aches that the beats do.

Value

If you’re looking for a nice new pair of headphones, whether it’s for gaming or not, you should DEFINITELY consider the gamecoms. If you are thinking of getting beats, slap yourself and wake up out of the mainstream daze. The gamecom 777s are $250 cheaper than the beats, and give you more sound quality and a higher value of sound technology from Dolby. They also deliver a much better build quality and an extra feature such as a boom microphone extending out from the side. When you are buying beats, you are really paying $300 for fancy marketing a d nice big b on the side.

If you are looking for an extremely high-quality pair of ruggedized headphones, look no further than the Plantronics Gamecom 777s. You can get them here for $100.

Also, thank you Plantronics for sending me these for review!

HTC Droid Incredible – RED COVER!

I was recently stalking around the HTC Incredible site, and I came across a page where you can order HTC-made battery covers – in different colors! You can order a red cover or a white cover.

From the images, I expected the surface to be like the stock cover – that soft platsticy rubber. However, the cover is actually glossy! It feels nice in the hand, and I like it a lot. It also makes the phone look quite awesome, as the volume buttons, USB port, and power switch are all still black. It gives the phone a very cool multi-colored look – and imagine the look on your friend’s face when one day you have a white phone, the next day a red one!

This is a great way to customize your phone, as you can change the color of it without breaking anything or adding a bulky case.

You can order either color for $16.99, which is EXTREMELY expensive for a little piece of plastic. It probably cost less than a cent to make that cover, so that’s QUITE the nice margin you got there, HTC! $16.98 in profit. Wow. That’s 99.95%!

Aside from the high price, there’s no shipping, which should make you feel a little better. You can order one for yourself here. Enjoy!

CyanogenMod 7

Of all of the ROMs floating around out there, Cyanogen is by far the most established custom after-market ROM available.

CyanogenMod 6 brought froyo features to 2.1, and was later updated to 2.2 It was then very similar to a basic 2.2 ROM, so it became outdated. But CyanogenMod 7 brought us a loaf of gingerbread this time around. This has put it much higher up.

In addition to the new faster and cleaner base operating system, CyanogenMod brought some new interesting features to the table.

Lockscreen Gestures

The name says it all. On the lockscreen, you are able to perform gestures that will do different actions, including enabling the flashlight, unlocking the phone, opening a shortcut, or opening an application.

DSPManager

I have really found no use for this quite yet, but others might. It allows you to modify your sound outputs. You can modify headset, speaker, and bluetooth separately, and in each pane you get options for a bass booster, and you also get a nice equalizer that is quite easy to modify. I don’t exactly know why you might need this, but I guess some audiophiles on a higher degree than me might appreciate it.

Themes Support

The operating system comes with a built in theme chooser and three themes. You can download new themes online on many different forum sites (such as xda-developers) and easily install them. One package includes the theming for the WHOLE operating system, including home screen, highlights, menubar tweaks, etc.

Incognito Mode

This feature is rarely used, but I guess could come in handy. Identical to the incognito mode in Google Chrome, this will prevent your phone from saving cookies, history, cache, or anything.

Installation

Installing this ROM was fairly simple, however it doesn’t come with Google Apps built in.

First, go to http://cyanogenmod.com and select your phone, then download the ZIP for your phone and put it on your SD card. Open up ROM Manager and select “Install zip from SD card.” Select the zip of CyanogenMod, then check the box that says “Wipe Data” and the box that says “Backup current ROM.” Continue with your installation and you will be greeted with CyanogenMod. You may notice, however, that there is no Market, YouTube, Gmail, etc. To install those, download the zip for your phone here and then flash it. To do this, transfer the Gapps zip onto your SD card and boot into recovery by booting while holding the down volume button. In the menu that comes up, select Recovery, and wait for it to boot. In the next menu, select “Install ROM from SD card,” select the Gapps ROM, and let it install. Then, reboot your phone, and you will be greeting with a Gapps enhanced CyanogenMod. Enjoy!

[For more info on installing ROMs and rooting, read my full guide here.]