Google Ditches Android Market for Google Play

Play logo

Android Market, the typical android counterpart to iOS. Widely used, known, and enjoyed.

Recently, Google added Movies, Music, and Books to the Market. Thanks to the general nature of the word Market, no name change was necessary.

All of your music showed up in the separate Google Music app. Your movies in the Google Movies app. Simple enough, right?

Google disagrees.

Google has completely ditched that entire scheme around a new name: “Google Play”. Google Play is the new name for the Android Market, while the Google Music app has changed to “Google Play Music” and movies changed accordingly to “Google Play Movies.”

Honestly, it’s nice that they’re congregating all of their purchases under one name, however “Google Play Movies” sounds like someone with awful grammar trying to say Google Plays Movies. I think they just need a semicolon – Google Play: Movies… actually, no. They just should have gone with something other than Play.

The new logo and name are all that has changed – the general interfaces are still identical, so nobody needs to freak over yet another interface change. However, it’s still a bit annoying that Google decided to mix everything up – all at once – and will probably manage to confuse a lot of people in the process.

Otterbox Defender Series for Galaxy Nexus

Over my years of reviewing and testing, no other case company has ever been able to  replicate the protective properties of Otterbox’s cases. When I plan on dropping my phone off of a two story building, they’re the only ones with a case I can trust.

That’s why when I got my Galaxy Nexus, I knew that the case I would be getting would be from otterbox. Here’s my scoop.

Design

The case consists of two main parts: an outer silicone skin, and an inner hard plastic shell (with a screen protector built in).

The outer silicone skin has a nice grip and absorbs a majority of the initial shock if you happen to drop the device. It has openings for all ports, so you can attach everything you need without having to ever remove the case. This is a nice feature, although it does add more parts and complexity to the overall design of the case.

The Flaw

The inner shell is the hard layer of protection for the device. It has two parts: a bottom and a top section, which snap around the phone. This is where the only problem with the case is.

A "practically indestructible" case?

The top section is a frame around the screen (with openings for speakers, cameras, lights, etc.) which also has a screen protecter glued in. This means that you need to clean off the screen protector of the case in addition to your phone’s screen and try to get them together before any other dust settles. The only issue with this is that if any dust settles after you’ve snapped it on, good luck getting it off – without breaking it, that is. After my first attempt at putting it together, I noticed a bunch of dust particles under the protector. So I take the case off, but the tiny snaps on the edges that hold the case together aren’t willing to let go. In the end, I need to pry them apart to even get to my phone. This bent the frame a bit. On my second attempt at taking the case off, I tried to use a key in the tiny slots next to the snaps. I ended up cracking the frame, and it still took a good ten minutes for me to get the case off of the device.

Conclusion

Otterbox was always (and most likely will always be) known for it’s super-protective lines of cases. At $50, the materials are not very well-built and are extremely prone to cracking and bending. Although it may protect your device, the case is oddly fragile for its super-hefty title. I can’t say I don’t recommend this case, as the protection it offers is above-par, but I can’t highly recommend it as it is fragile and the plastic materials are prone to breaking and bending.

If you want to pick one up for yourself, click here to be redirected to the Otterbox page.

P.S. Thank you otterbox for sending me this awesome (but fragile) case!

The Galaxy Nexus Problem: Battery Life

I’ve always been wondering what the big problem with the Galaxy nexus is. It has an amazing dual core processor, a glorious screen, flawless software, and LTE speeds. The camera is less than impressive, but it’s really not that bad.

But now, I’ve found the issue. Battery Life.

The Galaxy Nexus lasts for about 3 hours and 40 minutes. That’s a new record for the shortest battery life of a smartphone. Ouch.

Apparently the issue is actually related to software, where android 4.0 is keeping the CPU from sleeping. While verizon is busy trying to work out those kinks, they’re selling an extended battery for 50% off (not $25 from $50). I’ve ordered one and am awaiting it in the mail.

The only fear of mine is that Verizon releases an OTA (over the air) update for the phone that fixes the issue, then I’m not able to download the update because I’m rooted. This was the case on my Droid Incredible, but from what I’ve read it shouldn’t happen with the Nexus. I’ve also read that I’ll need to re-root, which shouldn’t be a problem.

Of course I’ll keep everybody in the loop about rooting and OTA updates, but until then be careful when buying a Nexus – you should probably get an extended battery as well.

Android Wifi Tether Now Working on Galaxy Nexus

The only real reason I ever root my phone is to use the Wifi Tether app. Wifi Tether is a free application that allows you to get the internet from your rooted android phone onto your computer, without having to pay for Verizon’s ridiculous tethering plans.

Right after I rooted, I installed Wifi Tether and was disappointed when it gave me an error and didn’t work. I went to their Google Code page and there was already a very popular thread about it’s dysfunctionality on the Galaxy Nexus.

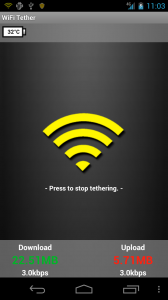
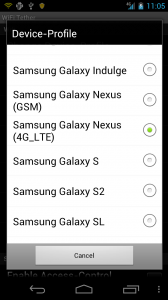
Well, rooters unite – Wifi Tether has just released an experimental pre-beta version that has support for the Nexus. Although it’s considered “experimental,” I’ve had absolutely no problems with it and I’m loving the 4G speeds. It’s like having a 4G Mifi with no data limits and a much cheaper data plan ($30 a month!).

Click Here to download the app. I recommend browsing to this page on your phone (here’s a shortlink to save you a little bit of time: http://wp.me/p1GtXy-vW) and hitting that download link.

Once it’s downloaded, go into Settings > Security and check the box that says “Install Apps from Unknown Sources.” This will allow you to install the apk file you just downloaded.

Now open your downloads and tap the apk file I told you to download up there, and you will go through a quick install process.

Open up the app and you’re ready to tether over 4G speeds!

If you’re not rooted yet and would like to be, click here for my post on how to root the Galaxy Nexus.

Enjoy your 4G Tethering!

How-To: Root the Galaxy Nexus LTE

I just got my hands on this beautiful Galaxy Nexus. I love it so far, and a full review is in the making.

But in the meantime, I figured I might as well show you how to root it.

So here you go.

(FYI: This how-to only applies to mac)

1. Download the files

First, download this file: Android root tools


Unzip it and put the folder on your desktop.

Now we can get started!

1. Unlock your Bootloader

Unfortunately, this is necessary with the LTE version of the galaxy nexus. It can be a little bit risky at times and is said to void your warrantee, but you can always undo this part.

First, plug in your Galaxy Nexus to your Mac and hold down the power button to turn the phone off.

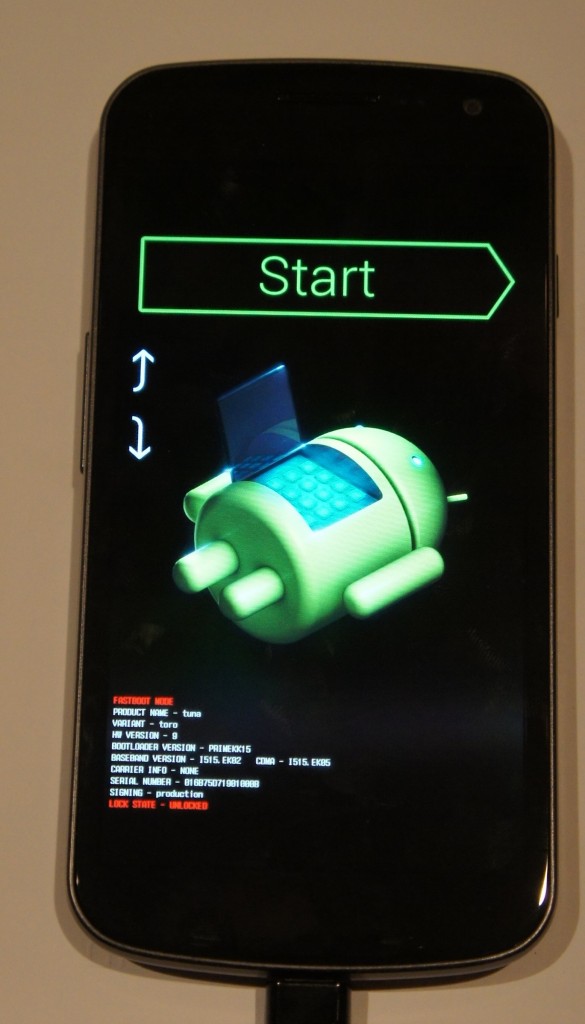
Now, hold down both the up and down volume buttons at the same time and hold down the power button. You should be greeted with a screen that looks like this (if not, shutdown and try again):

If you’re having a lot of trouble with this, here’s a video that I made showing you how:

Open up Terminal.app and type the following:

./~/Desktop/androidsdk/platform-tools/fastboot-mac oem unlock

You should see a prompt on your Nexus’ screen asking if you want to unlock the bootloader. Press the volume up key followed by the power key. You’re done!

Once you’re back at the android-open-thing screen, hit the power button to start the phone.

Now, it should boot up and start cycling through the boot animation. It may do this for a good ten minutes – whatever you do, DO NOT PULL THE BATTERY! (I learned this the hard way).

Eventually your Nexus will boot up, and you’ll be safe and sound in your little Ice Cream Igloo.

2. Root

Now it’s time to ROOT!

Put your phone back into fastboot mode plugged into your computer.

Open up Terminal and type this:

chmod +x ~/Desktop/androidsdk/r2-galaxynexus-superboot/install-superboot-mac.sh (hit enter)

./~/Desktop/androidsdk/r2-galaxynexus-superboot/install-superboot-mac.sh (hit enter)

That should be it! Your phone should start up.

It may hang on the Google logo for a while – If this happens, wait about 10 minutes and pull and replace the battery. Turn it on and it should cycle through the boot animation for a few minutes.

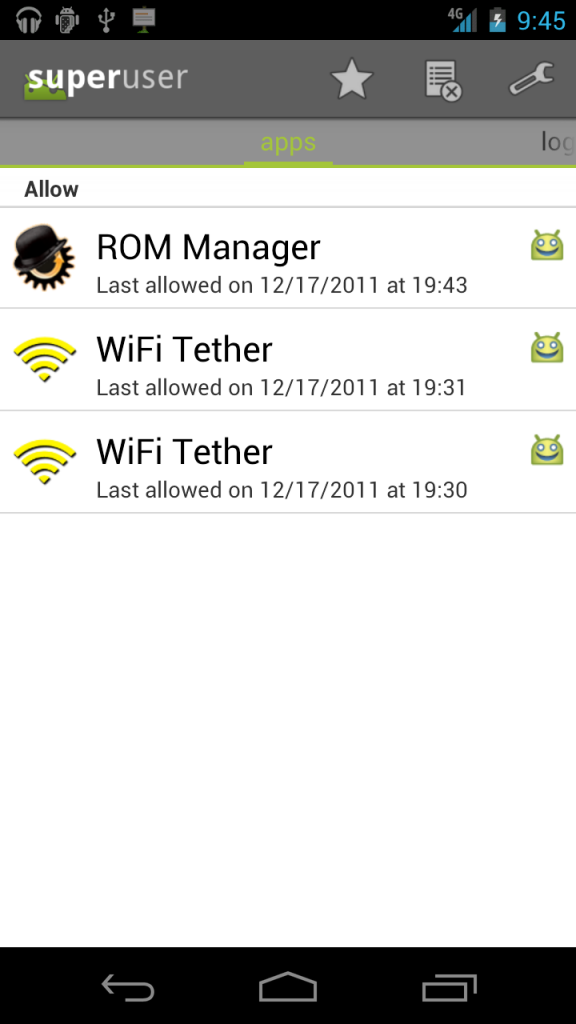
Once your phone boots up, you’ll be completely rooted! Enjoy!


Verizon Can’t Get it Right

One of the most anticipated phones if the year is the Galaxy Nexus. It boasts a ton of new features, courtesy of Andoid 4.0.

One of Apple’s strongest points is how they release their phones. They send out an invite to an event, then at the event make a clear availability date. This causes people to get excited for the product and even line up for it.

Verizon took a different approach. They added a release date of Dec. 9 to the stores’ databases, and never made an official announcement. Everyone gets excited for that day, but Verizon has decided to stamp that down as well. Verizon took down the date from the databases and replaced it with “Launch Date Coming Soon.”

I don’t understand what Verizon is going for. Are they trying to get hype? Are they attempting to draw more in with their deadline extension? Or are the marketing people really just that clueless?

Many people have their two year upgrades coming up and would like to upgrade to the Nexus, but with so much waiting and games people are beginning to lose patience with Verizon. It’s not sure whether the phone isn’t actually going to be released on the 9th, and other sources are saying that it could be on the 13th. Who knows?

Verizon either needs to stick to the leaked dates to encourage more hype assurance or just give us a solid, set release date.

Galaxy Nexus? Lolwut?

You may know about the long lasting line of Google’s special Google Phone called the Nexus. There was originally the Nexus One, then the Nexus S recently. Both of these were manufactured by Samsung, but Samsung’s name wasn’t really placed on it – just on the very bottom of the product pages.

But Samsung has taken a different approach this time – They’ve released a new Nexus phone that they are calling the Galaxy Nexus, following their popular like of Galaxy S phones.

Other than the new name, the Galaxy Nexus follows Google’s standard path of some great upgrades.

As far as hardware goes, it’s just like the Nexus S – but better. The Galaxy Nexus features a slimmer body, more vibrant screen, and a very nice camera – although specific megapixels are not supplied.

But the real upgrades are in the software. The Galaxy Nexus features the purest of pure Android 4.0 – which is a nice relief considering all other phones in the Galaxy S line are skinned by Samsung, causing them to be painfully slow and unresponsive.

Among Android 4.0’s new features (other than the painfully idiotic name of “Ice Cream Sandwich”) are Face Unlock, which allows you to unlock your phone with face recognition; Android Beam, which uses NFC to send websites, photos, contacts, and more to other phones; and your usual fixing of extra eye candy.

The Galaxy Nexus doesn’t have any pricing or supported networks, however a bit is given away with the following line:

Galaxy Nexus runs at 4G (LTE or HSPA+) speeds

Verizon is the only provider that currently has an LTE network, which means that the Galaxy Nexus will be on Verizon for the first time.

I’m definitely excited for this phone, and anyone in the Android market should definitely look at this phone.

Google+ for iOS released, Welcome to Crash Central

Google+ is Google’s stab at facebook that has some great new features that really puts it in the competition (read more here). The Android app was available immediately; the iOS app was supposed to come a few weeks after.

Well, it’s here. Unfortunately, it’s not worth getting.

You are greeted with a front page where you can view your stream, profile, huddles, circles, etc. Everything works until you hit stream; that’s where it crashes. It will give you a spinner saying that it’s loading… then it will keep spinning… and spinning… and spinning… and when you’re sick and tired of it, you just hit the grid to go back to the home screen. But it doesn’t go. So you hit it again. Same result. So you start frantically hitting buttons, but it’s not going to respond. Then, there’s the crash.

For now, this is all you’ll get. Jailbroken or not, iOS 5 or 4. The app is just a crasher.

Search Google – now with your Voice

Google's Voice Search integrated into the web

Since its debut in 1997, Google Search in general has grown in size and strength.

Since then, the keyboard and mouse have always been a primary tool in searches.

In 2008, the Google Mobile App was released to the Android and iOS operating systems, allowing native and mobile searching of the web.

A few months later, they integrated a new feature that they had been working on into the mobile apps called Voice Search. Voice search was a new idea on how to revolutionize searching. But most Google searches were done on the computer, so even if everyone used voice search on their phones, more requests would be made from a keyboard.

Google took a surprising 2½ years to make their next move. Then about a month ago, they released Voice Search online, using the same microphone input as Gmail chat. However, they confined it the Chrome as an experimental search feature.

I think that Google really has enough “innovations” that they’ve given to us and that using a keyboard is just fine for searches. Personally, I talk faster than I type, but I am so used to typing that a switch to talking instead is actually harder, at least for a while. I see where they are going with the user-friendly ideas, but this is one of their kind of unnecessary ones. The recognition accuracy is ok, but as I expected it doesn’t work well with names, even of well-known people.

If you want to try it out, head on over here in Google Chrome and hit Try It Out.

CyanogenMod 7

Of all of the ROMs floating around out there, Cyanogen is by far the most established custom after-market ROM available.

CyanogenMod 6 brought froyo features to 2.1, and was later updated to 2.2 It was then very similar to a basic 2.2 ROM, so it became outdated. But CyanogenMod 7 brought us a loaf of gingerbread this time around. This has put it much higher up.

In addition to the new faster and cleaner base operating system, CyanogenMod brought some new interesting features to the table.

Lockscreen Gestures

The name says it all. On the lockscreen, you are able to perform gestures that will do different actions, including enabling the flashlight, unlocking the phone, opening a shortcut, or opening an application.

DSPManager

I have really found no use for this quite yet, but others might. It allows you to modify your sound outputs. You can modify headset, speaker, and bluetooth separately, and in each pane you get options for a bass booster, and you also get a nice equalizer that is quite easy to modify. I don’t exactly know why you might need this, but I guess some audiophiles on a higher degree than me might appreciate it.

Themes Support

The operating system comes with a built in theme chooser and three themes. You can download new themes online on many different forum sites (such as xda-developers) and easily install them. One package includes the theming for the WHOLE operating system, including home screen, highlights, menubar tweaks, etc.

Incognito Mode

This feature is rarely used, but I guess could come in handy. Identical to the incognito mode in Google Chrome, this will prevent your phone from saving cookies, history, cache, or anything.

Installation

Installing this ROM was fairly simple, however it doesn’t come with Google Apps built in.

First, go to http://cyanogenmod.com and select your phone, then download the ZIP for your phone and put it on your SD card. Open up ROM Manager and select “Install zip from SD card.” Select the zip of CyanogenMod, then check the box that says “Wipe Data” and the box that says “Backup current ROM.” Continue with your installation and you will be greeted with CyanogenMod. You may notice, however, that there is no Market, YouTube, Gmail, etc. To install those, download the zip for your phone here and then flash it. To do this, transfer the Gapps zip onto your SD card and boot into recovery by booting while holding the down volume button. In the menu that comes up, select Recovery, and wait for it to boot. In the next menu, select “Install ROM from SD card,” select the Gapps ROM, and let it install. Then, reboot your phone, and you will be greeting with a Gapps enhanced CyanogenMod. Enjoy!

[For more info on installing ROMs and rooting, read my full guide here.]

INSTALLING ROMS ON YOUR DROID INCREDIBLE: FULL GUIDE

1. Background check and root

If you haven’t yet, click here to read the guide on rooting your droid incredible.

2. Find some ROMs

The first thing you need to install a ROM would be the ROM itself (go figure).

If you have a droid incredible, I highly recommend downloading the fusion ROM from this post. Fusion is an extremely well-done and compatible ROM based off of CyanogenMod7 (another ROM), so you’ll get the dimension-opening power of 2.3.2 gingerbread.

If you don’t want this ROM, you can always do a google search. Not too hard, eh?

2. Download the ROMs

With the example I’m using (fusion), there are two ROMs. It includes first the base gingerbread ROM, but on top of that it also has a ROM for the Android Market, Gmail, YouTube, and Maps applications, as they do not come by default on the Android base operating system.

For now, I am only going to discuss installing the base, but for other ROMs it is sometimes the same situation with the two seperate ROMs. So later on I’ll discuss installing the gapps (dev talk for Google Apps).

There are two ways you can get the ROM to your device.

The first one involves your computer. Download the ZIP file(s) onto your desktop, then plug in your phone and move the zip(s) onto the root of your SD card.

The second way requires an app called Root Explorer (I discussed it in the guide to rooting). On the phone itself, use the web browser to download the ZIP file(s). Then, open up root explorer and navigate to the downloads folder (probably on your sdcard). Then, tap and hold the zip and select move. Navigate to the root of the sd card and tap paste. (Do this with the second ROM if you have one).

3. BACK UP!

This is an extremely important step to this, because if you forget to backup then you will never be able to restore your phone to the condition it was in when you rooted. That means that the HTC sense operating system that came on your phone will be GONE.

So, you’ll need to boot into recovery and backup.

Turn off your phone and turn it back on while holding the down volume button. It will boot into HBOOT, a diagnostics screen. Once it is done checking for update images on the SDcard, use the volume and power buttons to navigate to and select RECOVERY in the menu that you see.

It will show the HTC booting screen, but then boot into recovery (with very small fonts, I might add).

In this screen, scroll down and select backups (you can now use the optical trackball to do this). Then, select create a backup (or something like that).

It might take a while, but eventually a backup should be made of all of your stuff on your phone. So we shall now proceed to the next step.

Install the ROMS

Now is the fun part.

Boot back into the recovery screen by holding the down key and the power button at the same time.

Then, hit Wipe Data/Factory Reset.

This will wipe all of the data off of the phone.

WAIT WAIT WAIT! I STILL WANT MY BACKUPS!

Calm your caps lock keys, wiping the data from the phone doesn’t wipe out the sd card, which is where the backups are.

Now, select install zip from SD card.

Select choose zip from SD card

then, select the zip that you either downloaded or transferred over.

Then, select the yes, and magically, the ROM will install.

Wait a while, and it should be installed and working!

Upon first boot it will take a very long time to load. It has to configure everything and get it working. But every time you reboot the device the reboot time should be less and less until it is less than 30 seconds.

Anything else?

You might have downloaded 2 zip files to your SD card which you downloaded from the site that gives out the ROMs. This is probably because one of them is a Google Apps zip.

Make sure that before you move the two zips on to the sd card, you name them so you can tell which one is the base OS and which is the Gapps. (if you have no idea what I’m talking about, you need to click here and read up on your background info.) Make sure that first you install the Base OS zip, then, after it’s done, select Install zip from sdcard once again and select the gapps zip. Make sure that you don’t hit wipe data/factory reset, because what that will do is wipe out the base OS so you only have gapps and nothing to run it on. Not too functional if I may say so myself.

Where to find these ROMs?

As I said, the best ROM for the Droid Incredible at the moment is the Fusion ROM.

But there’s other ROMS too.

One of the most popular is CyanogenMod. They’ve been releasing ROMs with upgraded features since the dawn of time (or android).

However, after a little mixup with google, they are no longer allowed to have Gapps on their OS. So you’ll have an android phone with…. no android market. Or gmail. Or youtube. Have fun!

One of the easiest ways to find ROMS for your droid incredible is to just google it.

If you google Droid Incredible ROMs, a large amount of different websites will show up. If you are too lazy, here’s a direct link to that google search for ya. You’re welcome.

ROOTING YOUR DROID INCREDIBLE: FULL GUIDE

1. Background Check

Please click here and read up all about what it means to root and install ROMs, then do step 2.

2. YOU NEED AN SD CARD!

Make sure you have an SD card in your phone. If you don’t then all hell will break loose and the universe will be sucked into an unknown dimension beyond the horizon of scientific knowledge. Or something along those lines.

3. Enable USB Debugging

On your Droid Incredible’s home screen, tap menu, select Applications, tap developer, and check the box that says USB Debugging.

4. Download unrEVOked

unrEVOked is the limera1n for all HTC android phones (hence the capital EVO in the middle).

Click here and select which operating system you own. The download will begin.

5. Plug in your device and root

The time has now come.

Plug in your Incredible to your computer over USB. You should see a notification that says USB Debugging is enabled.

Also, pull down the notification bar and select the USB connection (not the debugging, the other one). Then, select to have your phone as a Mass Storage Device or something like that (My phone has been screwed over so much that I no longer have the stock htc operating system installed, so I can only be so specific to my knowledge).

You should see TWO drives mounted on your computer, one for the internal phone storage and one for your SDcard.

Then, hit the reflash button and take cover.

Time will pass into another dimension beyond the human eye’s comprehension of life itself. Portals will contradict all possibilities of universal independence. Our very existence will tremble at the rip in the fabric of space and time.

Oh, and you’re device will be rooted. 🙂

6. Did it work?

After you’re device is rooted it *should* be able to boot into ANOTHER DIMENSION IN SPACE AND TIME…. wait…. into the standard 2.2 htc sense froyo you had before you rooted.

However, if you look in your applications drawer, you should see a new app called Superuser.

Congratulations, you’re rooted!

7. Get root apps

Now, you can run applications that require root access.

A few of my favorites:

Wireless Tether

If you’re on the road and want internet on your computer or iPad, then you’ll have to fork an extra $20 a month to verizon and suffer a 2GB limit.

But not if you have Wireless tether!

With Wireless Tether, you can create an encrypted wireless network with access control and everything, and the bandwidth limit is only that of your phone’s data plan.

You can find Wireless Tether by searching in the android market.

Root Explorer

If you keep getting warnings telling you that your SD card is full, then you’ll love Root Explorer. You can browse your android’s files, and even delete, rename, or move things around from both the SD card and the internal storage. You can delete those huge downloaded zip files, or all of the pictures you don’t want from the DCIM folder. Handy! This is available in the Android Market as well.

screenshot

If you ever do any kind of posting to a blog about android stuff, this application is a MUST. You can easily take a full resolution screenshot by just shaking the device. Then, you can plug it into your computer and transfer the screenshots off of your SD card.

8. Got ROMs?

One of the most amazing parts of having a rooted android phone is that you can install other operating systems. Want gingerbread? HTC hasn’t even released the update. But now that you’re rooted, you can install other operating systems without htc’s permission.

Here’s a full guide on how to install ROMs.