About This Mac in Lion

For the longest time, if you wanted to get to your information about your computer, you used System Profiler. The interface was clunky and confusing, obviously aimed at more advanced users.

Although it’s not advertised much, there is a new app replacing System Profiler called About This Mac, introduced in Lion.

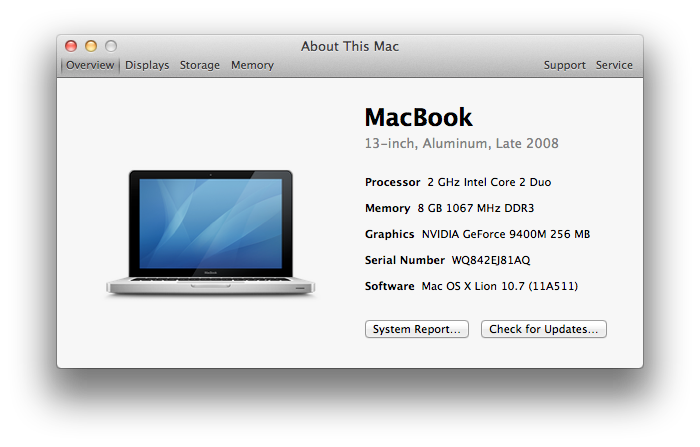
Unlike system profiler, About This Mac is easy to use, and makes the more important things stand out. It also uses graphics to make explanations easier to understand.

As you can tell by the above picture, it’s a very easy to understand and streamlined interface.

Displays

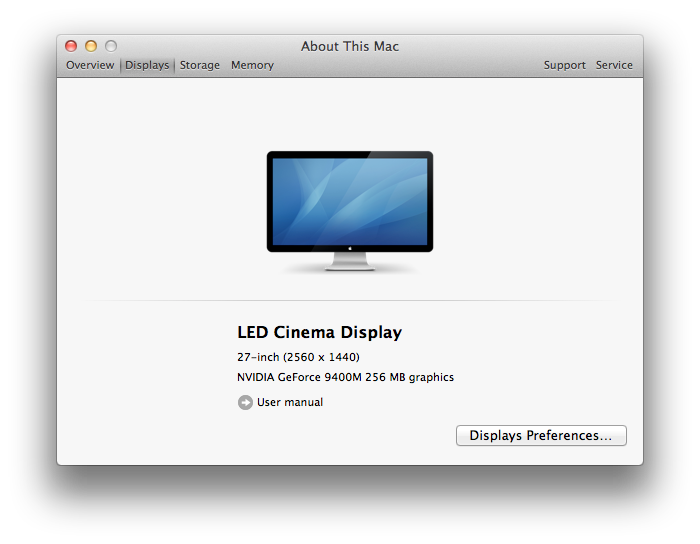
The Displays Pane is simple and easy to understand.

As you can tell, it’s quite easy to understand.

It gives you a graphic of the display, and the name of the display. Then, in smaller text (indicating that it’s probably less important to you) it tells you the dimensions, size, and graphics card.

If it’s an Apple monitor, it will even give you a link to the user manual – handy!

Storage

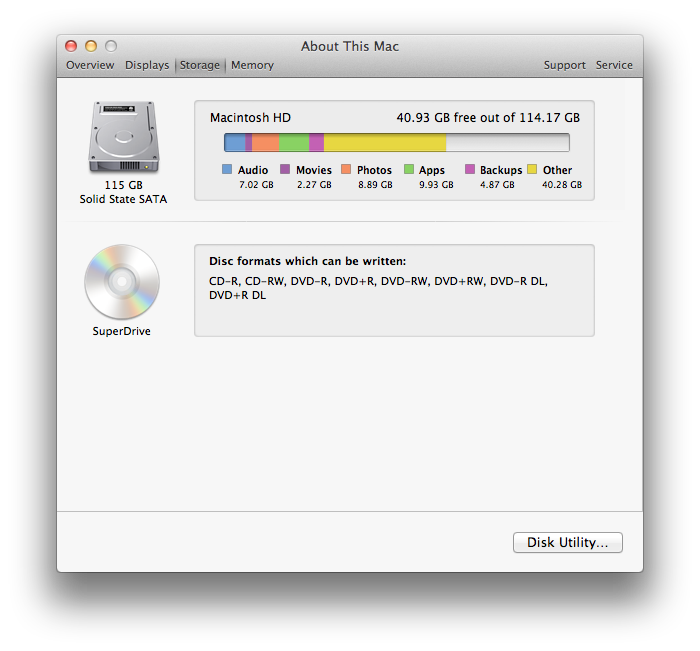
The storage pane gives you some quite-welcome insight into what’s taking up your disk space. It may seem similar to something you’ve seen in iTunes.

It’s definitely handy that it gives you this info.

It also lists other volumes that you have mounted/installed, such as your CD/DVD Drive and any USB drives.

Memory

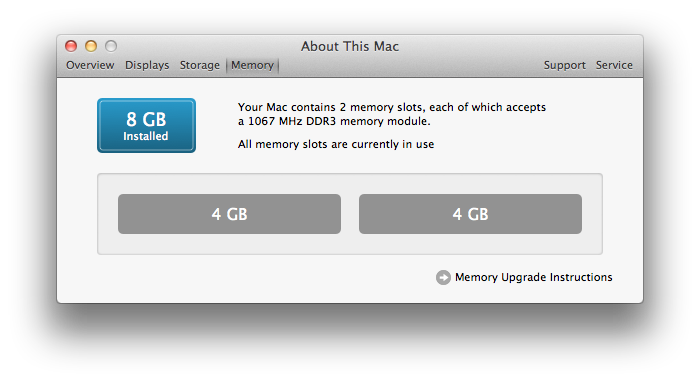
Memory, the easier term for RAM, is crucial to your computer. If you didn’t have any Memory installed, you would have an EXTREMELY slow computer.  The Memory Pane gives you an easy explanation using graphics and easy to understand english.

It gives you a simple box telling you how much total memory you’ve installed in your computer. It then tells you how many slots your computer has, and tells you the specifications for what Memory modules can go in .

Then it gives you an easy to comprehend graphic telling you how much Memory is in each slot. So easy to understand, even your grandpa can understand it.

In case it needed to get even more useful, they added a link to the Memory Upgrade Instructions – just in case you want to add some more, and don’t want to go around fishing online. Handy!

Support

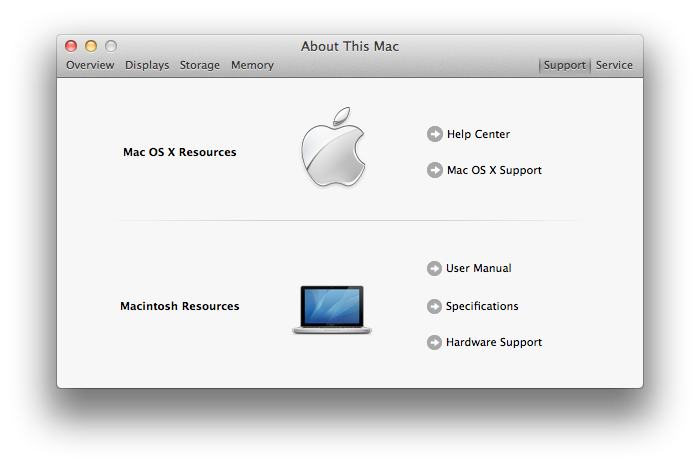
The support pane just gives you links to different online Apple support resources.


Service

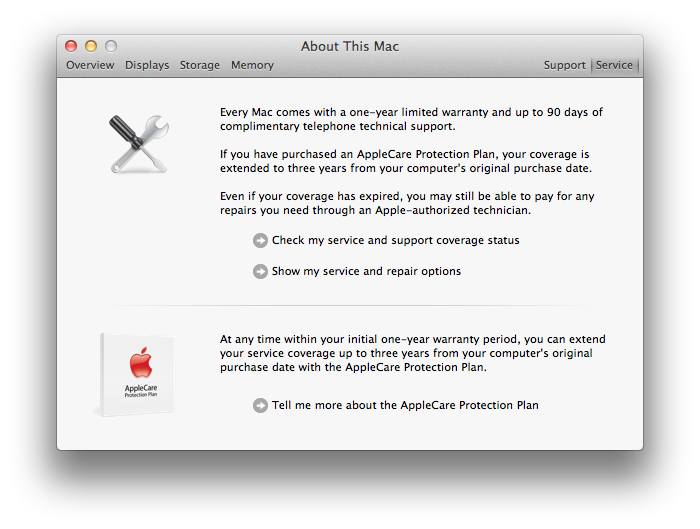
This is definitely an extremely useful pane. Use this pane to clearly understand your warranty information, and get more information about the AppleCare support plan.

In addition to giving easy to understand repair descriptions, it also gives you links that you can use to check the status of your current warranty. It will send your serial number to Apple, then you will get a page telling you about the warranty status of your computer.


About This Mac is definitely a welcome replacement to system profiler, especially because it brings easier to understand graphics and descriptions, all in basic english. This will definitely be a big help for Mac users who need to learn more about their computers, but aren’t rocket scientists.

About This Mac can be found under the Utilities folder in the Applications Folder.

Mac OS X Lion

Two days ago, I wrote a post saying that Lion was coming the next day.

Right again.

We’ve been waiting to hear the mighty roar for quite a while, and it’s finally audible to all who desire to hear its beautiful outpour (too far?).

Mission Control

Mission Control

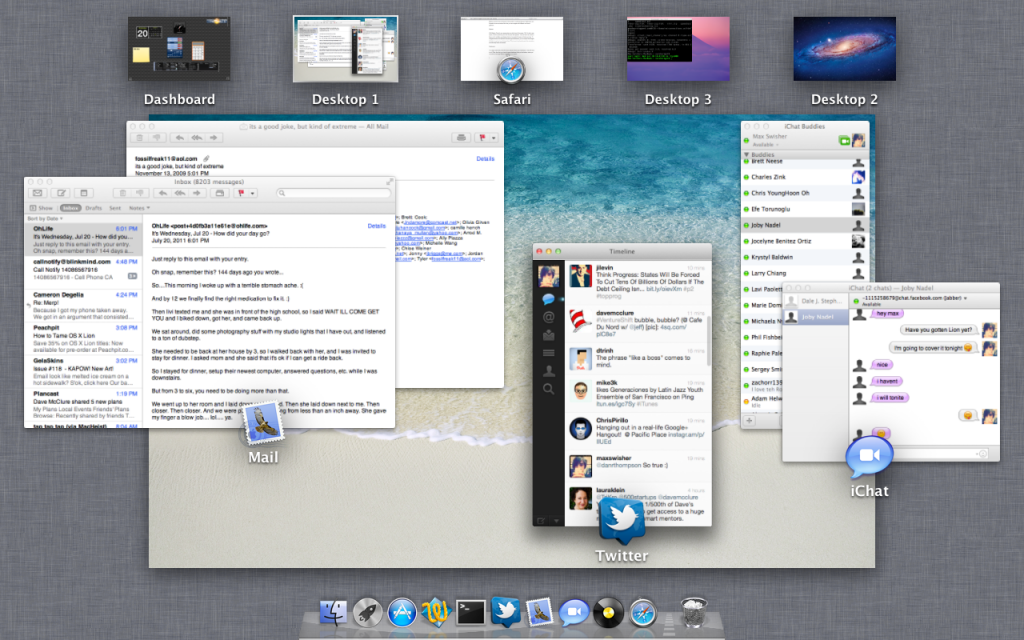
Mission control is the real big part of this update. It combines Spaces, Dashboard, and Exposé into one convenient view that you can navigate with different multi-touch gestures.

To access Mission Control, just swipe up with three fingers.

Spaces:

With Mission Control, your spaces show up at the top of the screen. (Tip: To add a new space, hold the option key and click the plus that appears – this one took me a while to figure out.) In addition, applications that you’ve made full screen will show up here. To navigate between the Spaces/Fullscreen apps/Dashboard, you can swipe three fingers left/right at any time to go between them. This is one of my favorite parts; the animations are extremely fluent and smooth.

Dashboard:

You might notice that on the left of your spaces, there’s your dashboard – that’s all there is to it! Other than that, you have the same dashboard that you had before, where you can add and arrange different widgets for your needs.

Exposé:

As you can tell by the picture above, all of your running applications in your current space will group and display with an icon and a label. It’s just like the previous exposé, with a couple of little visual upgrades.


As I mentioned, there is now support for full-screen apps. I could make a completely separate section for this, but what is there to say? You can click a little icon in the top right and the app will take up the whole screen. Whoopdidoo!

Launchpad

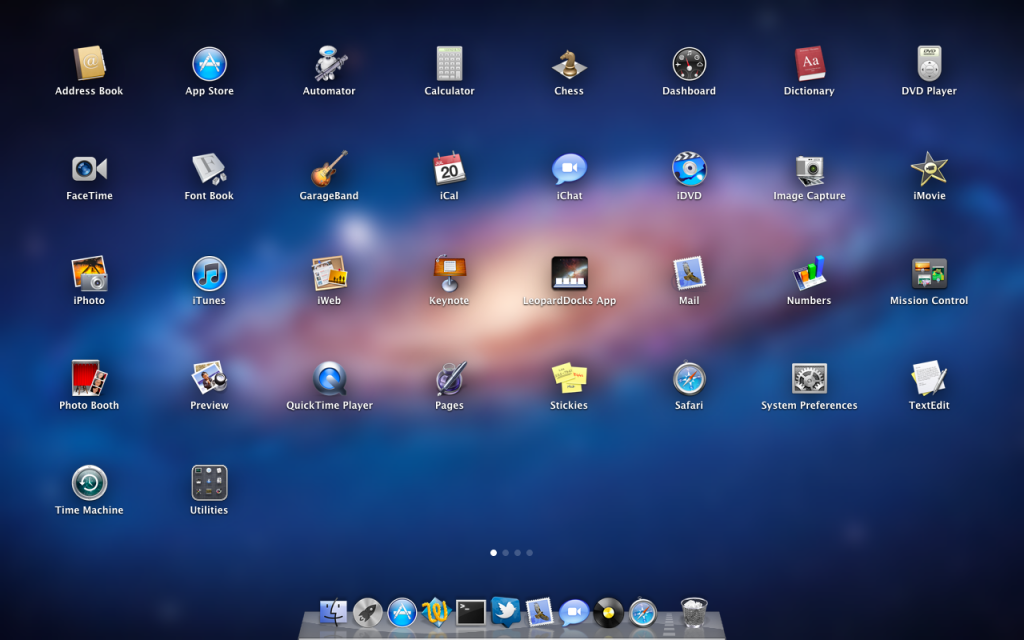
Launchpad is basically the iOS home screen for mac. You’ll get a little rocket icon in your dock, and clicking it brings up Launchpad which looks a bit like this:

Launchpad


You can swipe between the screens with two fingers. If you’ve ever used an iOS device, you know how this works: click and hold to rearrange the icons, or even move them into folders. You can even remove an app by clicking the X. Looks like iOS to me.

Versions, auto-save

I’m not going to cover this in too much detail.

Versions will keep track of all of your changes in your documents, and if you want to revert to an older version or get older elements, you can scroll through different “versions” of your document. Unfortunately, this isn’t available in many applications yet – mostly just the iWork suite – but should become more available as apps are updated to be compatible with Lion.

Auto-save is fairly self-explanatory: Your documents will be automatically saved.

Conclusion

There’s TONS of other features in Lion, and I’ll be posting different tips/tricks as I find them. There’s TONS of other new things in Lion, like a new prettier Mail app and more effects in Photo Booth – however these are small improvements. You can read more about all 250+ little new features over here.

Where can I get it?!

Unlike previous versions of OS X, this update won’t come on a disc. Instead, just go to the Mac App Store and Lion will be in there for $30. You can download and install instantly (time may vary, depending on your internet speed of course). Click here to open Lion in the Mac App Store.

Enjoy the roar of the lion.

RAWR!


Mac OS X Lion: Coming Tomorrow!

During an earnings call with Apple, the CFO nonchalantly announced that Lion is being released tomorrow.

Lion is the “big cat” name for Mac OS X 10.7, the next operating system for Mac Computers. It was announced a little while ago, and was said to be announced in “July.” Lion brings some new features in Exposé and Spaces, fullscreen apps, and an iOS-like homescreen called Launchpad.

The update will be available in the Mac App Store for $30, and there’s no more discs available.

If you have a Mac, I recommend that you read this post to make sure your mac is ready for Lion.

After using Lion for a little while, I will write a post describing the good and bad of the new features.

Mac OS X Lion is Right Around the Corner!

Mac OS X Lion was announced a while ago and brings new features like Launchpad, an iOS like App Launcher; Mission Control, which combines Spaces and Exposé into one, easy to view panel; and plenty of other new features.

The announcement stated that the update would be released in July 2011, and would be downloaded directly from the Mac App Store for $30.

Well would you like at the time, it’s July!

The Mac OS X Lion update is estimated to be released to the public in the next couple of weeks, according to my reliable sources.

There’s a few things you should probably do to make sure your computer is ready

  1.  Make sure you have some disk space available!

If you don’t, you’ll download the Lion update and your computer won’t be able to easily boot. Make sure you have at least 6 gigs of disk space free. If you don’t, you’re in trouble whether you’re installing Lion or not! Try an app called GrandPerspective (reviewed here) and delete the biggest files.

2. Say goodbye to PowerPC

Over the years, Intel machines have been compatible with PowerPC Apps through a bridge called Rosetta. Now, with Lion, Rosetta is no longer compatible. If you have any apps that run on Rosetta, it’s time to find Intel compatible alternatives.

3. Install all available updates

Go to the Apple Menu > Software Update… and install any available updates. After you’ve installed the updates, re-check for updates in case there are updates for the other updates.

As I said, OS X Lion should be available from the Mac App Store in the next couple of weeks for only $30.

Where’s those thunderbolt devices?

Fourth months ago, a new MacBook Pro line was released. And as I said here, it was a total disappointment. The biggest thing on it was probably the new “Thunderbolt” port, which is a port with the same form-factor as the Mini DisplayPort, however it allows for transfer up to 10 GBPS. Yah, that’s fast.

Everyone I talked to said that it was awesome; it would be so good to use.

My argument was that it was too proprietary – Only three models of computers have that port, so why would a manufacturer go after making products for it?

The usual argument was that “It will standardize and products will be released for it eventually.”

Okay…

So here we are four months later, and the only product I’ve ever seen compatible with the thunderbolt port is an external hard drive from LaCie.

That’s it.

So….. Where’s those thunderbolt devices?

I believe that thunderbolt was (and still is) a total failure. Nobody uses it – and because no body uses it, manufacturers won’t create devices for it. And because manufacturers won’t create devices for it, nobody uses it. It’s a total loop – a manufacturer would have to make a product for it, so people would use it, so other manufacturers would make more products for it.

Nowadays, the only other computer line with a thunderbolt port is the most recent line-up of iMacs, which few people have.

But there still is hope for Thunderbolt. If every single Mac gets a thunderbolt port, after a while every Mac that is in use will have a port – that’s when manufacturers will start making products for it.

But until then, don’t expect much from Thunderbolt.

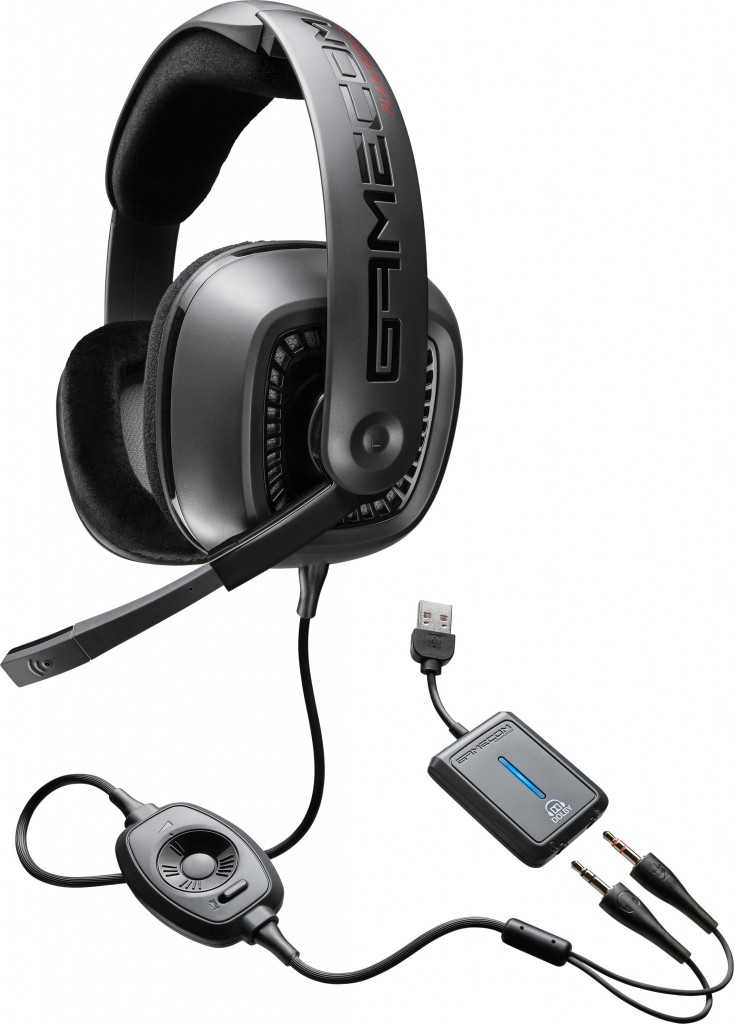
Plantronics Gamecom 777

I am so confused.

I thought the Beats by Dr. Dre were the best headphones, and they’re $350.

But I’m liking these Gamecom 777s more – and they’re only $100.

Design


These things are RUGGED. When you use them, they feel more metal then plastic. There’s no squeaking, and I feel like they’re well build and well put together. All of these things I couldn’t feel with the Beats by Dre.

A microphone comes out from the headband of the headphones, which is a genius idea and the perfect way to conceal the microphone when not in use. The inline audio and mute control is very helpful, and can often come in handy.

There’s one thing I don’t like about these headphones – the open-ear design. All sound leaks through a TON, so don’t expect ANY privacy from these. It’s nice because when someone is trying to talk to you, you aren’t totally spaced out. But it’s also a bit annoying to the people around you who might want to listen to their own soundtrack.

Sound Quality

When it comes to headphones, this is really what it boils down to. And my god, I’d choose these any day over Beats. These have dolby surround sound technology, and through USB an included small box will convert standard stereo sound into full on dolby surround sound. If you remember my post about the new dolby technology and how it brings the music out of your ear and puts it around you? You can feel that in these speakers. Thanks to the 7.1 technology, stereo sound turns into extremely immersing rich sound. It’s amazing. Much better than the beats by dre.

Overall, the sound quality is just plain stunning and amazing.

Comfort

With these headphones, you are getting the luxury experience.

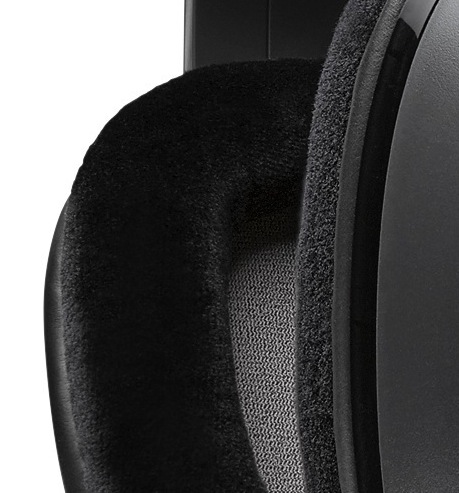
The pads are a soft, smooth fabric, as opposed to the plasticy rubbery earcups on the beats. The earcups distribute pressure really nicely, and you can keep these on without any discomfort for hours on end. The earcups are extremely spacious, which is also a nice addition. Overall, these things are extremely comfortable and don’t give you the same aches that the beats do.

Value

If you’re looking for a nice new pair of headphones, whether it’s for gaming or not, you should DEFINITELY consider the gamecoms. If you are thinking of getting beats, slap yourself and wake up out of the mainstream daze. The gamecom 777s are $250 cheaper than the beats, and give you more sound quality and a higher value of sound technology from Dolby. They also deliver a much better build quality and an extra feature such as a boom microphone extending out from the side. When you are buying beats, you are really paying $300 for fancy marketing a d nice big b on the side.

If you are looking for an extremely high-quality pair of ruggedized headphones, look no further than the Plantronics Gamecom 777s. You can get them here for $100.

Also, thank you Plantronics for sending me these for review!

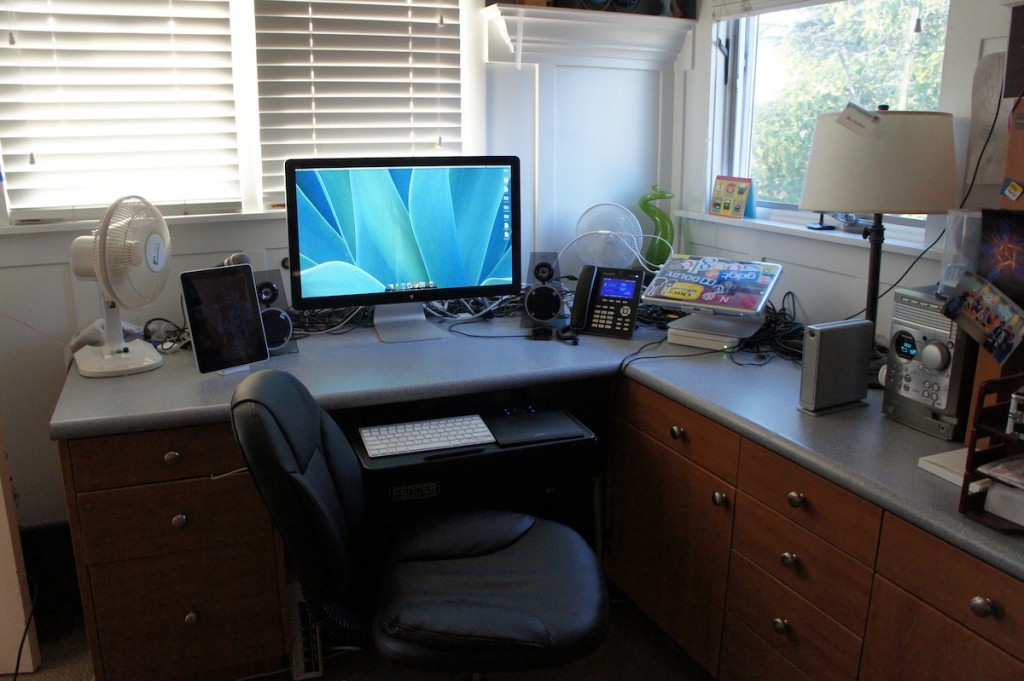
LED Cinema Display (27 inch)

Monitors are quite important when it comes to computer equipment. Besides speed, the only other thing that really matters is what you’re staring at all day. People often want to get a really nice, large monitor, so they have space for all of their windows and applications. Different things matter to different people – some people it may be about size, so they can fit as much as possible. Sometimes it may be color recreation, so you get the most precise experience for editing photos possible. For others it may be response time for gaming.

If you fall into any of these categories, I’d like to introduce you to the LED Cinema Display by Apple.

Wow.

27” of hi-definition, LED-Backlit glory. Sold yet?

How about a built in iSight camera, microphone, 2.1 speakers, and a 3-port powered USB hub?

That’s what I thought.

Lets take this thing a bit more in detail.

Design

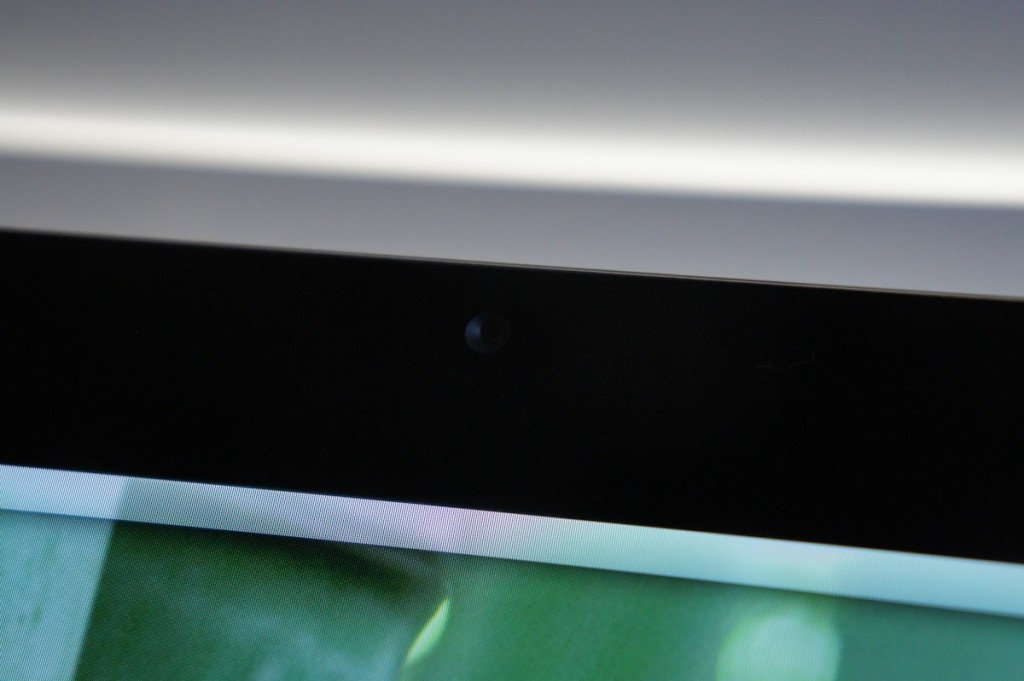
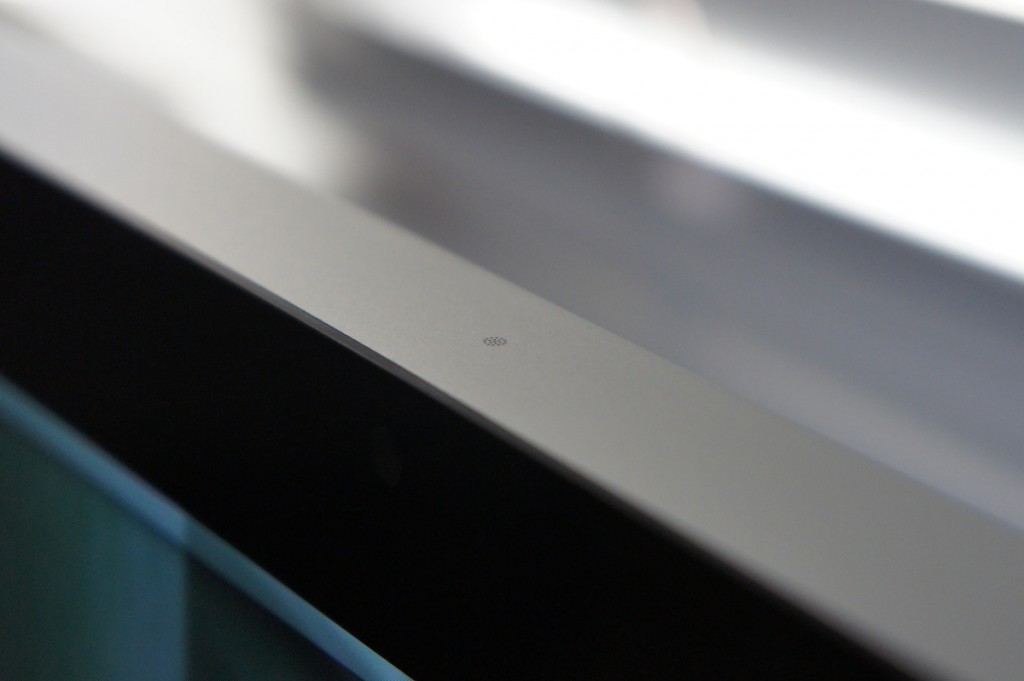
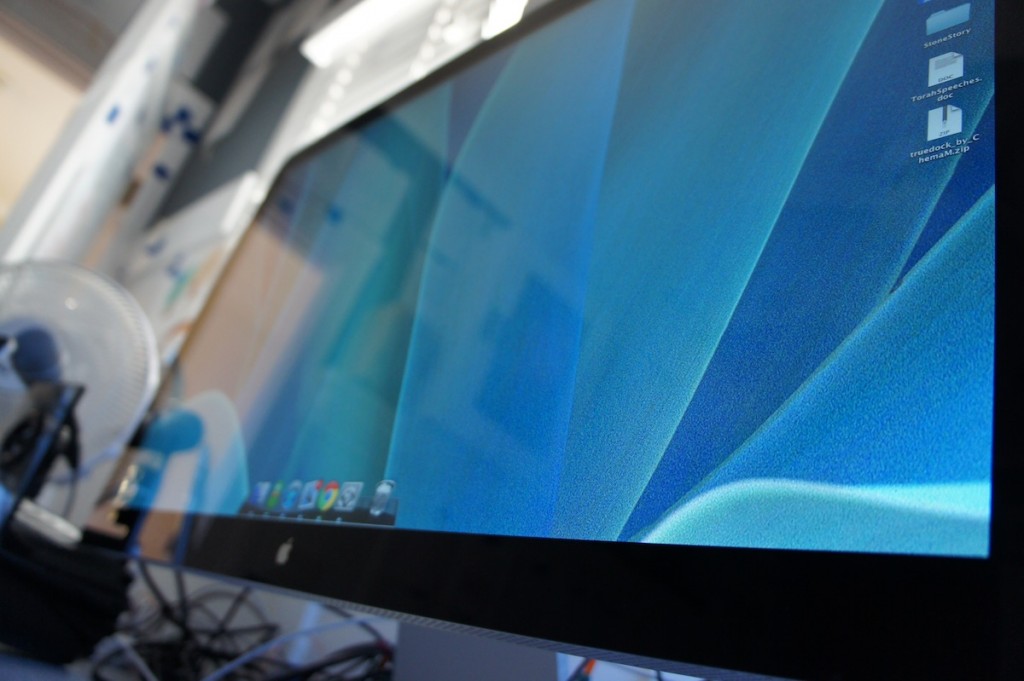
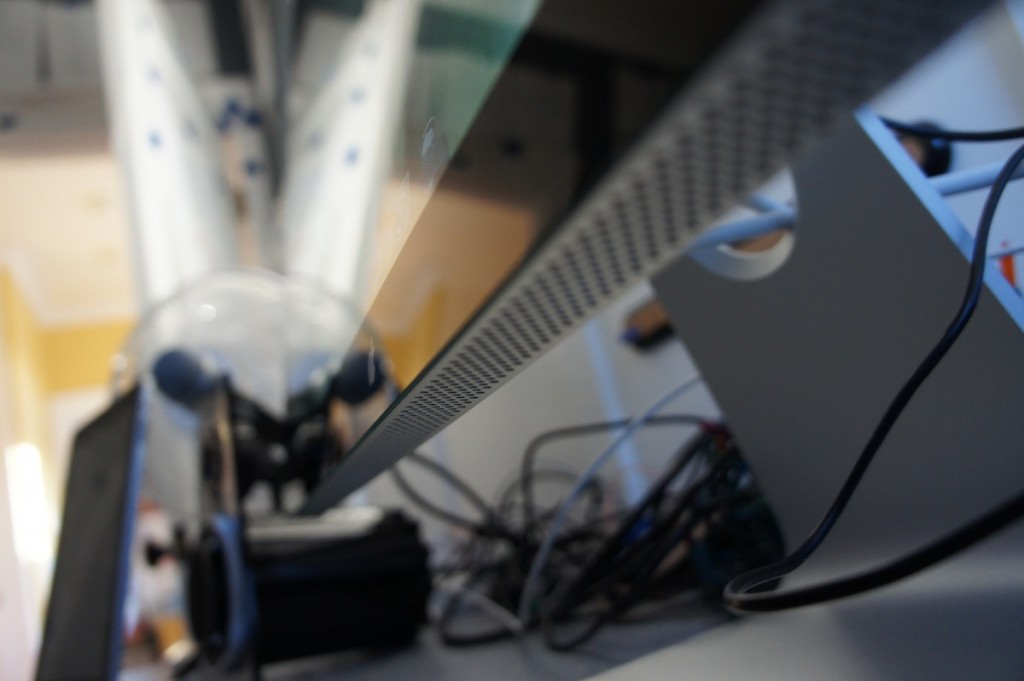
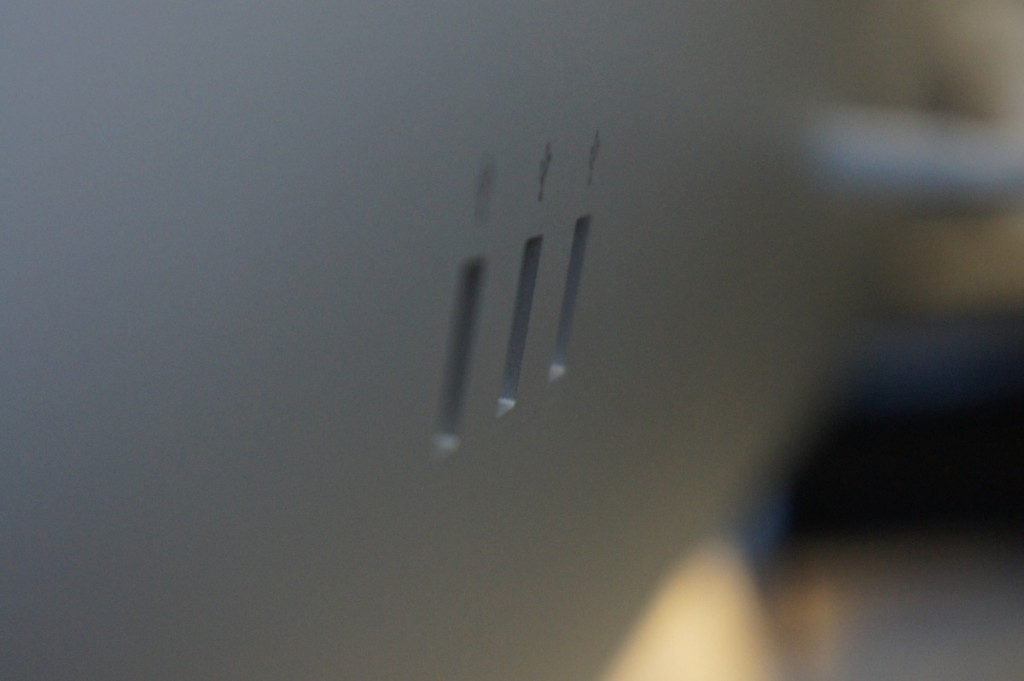
It’s an Apple product. What did you expect? The design of this beauty is simple and seamless (as usual). Looking at the monitor you are greeted with beautiful, edge-to-edge glass with a nice black bezel underneath. The iSight camera is embedded beneath this glass. Look down, and you see a thin, clean, pure aluminum stand. On the top, you find a very small grid where the microphone sits. On the back, you find two cables coming out, and 3 USB ports. The rest is all aluminum. Wow.

Display

As I said, 27 inches of LED-backlit glory. Yes. The display is EXTREMELY bright, and at times hurts my eyes if turned up too high. The colors POP like nothing before, and the 2560×1440 pixels doesn’t do any harm either. The 12ms response time isn’t particularly impressive, but there was absolutely no ghosting in any of my tests. video play-back was clear, and the monitor boasted quite impressive, even blacks. Basically, this screen WOWS.

Extras

This monitor is a bit more than a monitor. The iSight camera works pretty well, and sends a pretty clear image. The microphone on top is a quite welcome addition, and definitely comes in handy when my laptop is closed. The quality is on par with the built in microphones in the MacBook lines. The speakers aren’t worthy of too much notice, but are definitely much better than built-in laptop speakers. They aren’t QUITE as nice as my 1300 watt surround sound system, but they will do the trick for those not so picky about their audio. The USB hub is powered, so your computer doesn’t need to be connected to charge all of your USB devices.

Setup

What kind of GMG review would this be without the setup instructions?

Unfortunately, if you don’t have a Mac built during or after Late 2008, you won’t be able to use this monitor. There are no hopes for PC users, so if you are I’m sorry for making you salivate so much just to disappoint you with the news of the incompatibility.

But if you do meet those requirements, then you’re definitely in luck!

As I said, on the back of the monitor there are two cables coming out. One of them is power, which plugs into a grounded AC outlet. The other sprouts off into three cables: MagSafe, USB, and Mini DisplayPort. The MagSafe is so that you can charge your MacBook, and you can leave your charger where it belongs: in your bag. The USB port allows the USB Hub on the back to function properly, and it also connects the iSight camera and Microphone. The Mini DisplayPort is how the video is transferred to the monitor.

Setup beyond this is pretty simple. Just plug everything in and you’re ready to go. The display automatically has the correct settings, the iSight camera and Microphone simply work, and your computer is charging. Great!

One thing I’d like to note about this display is that it has absolutely NO on screen controls. NONE. It doesn’t even give you any notification when the signal is lost, or anything along those lines. It’s either on, or it’s off. Everything else is software controlled, and you can change your preferences for the monitor in the Displays Preference Pane. The brightness of the display is controlled through the preference pane and can also be controlled using the function keys on the Apple Wireless Keyboard.

Conclusion

Overall, Wow. The monitor is beautiful with any setup, and the design of it is just plain breathtaking. Photos and videos look amazing. The brightness of the display can give me a headache. What’s not to like?

There are two main downsides to this monitor. The first would be the glossy screen. Some people may hate this screen, and if you’re using it in an area of direct sunlight, this is probably a pretty bad choice for you. The second would be the price. Very few people I know are willing to fork out $1000 for a monitor. But if you are, and you don’t have a problem with the glossy display, and you have a compatible Mac, you can stop your salivating and go take a lick (make sure you wipe your display after though).


The New MacBook Pros Released: What a disappointment.

The rumors of a new MacBook Pro are true. But that’s about as far as the truth goes.

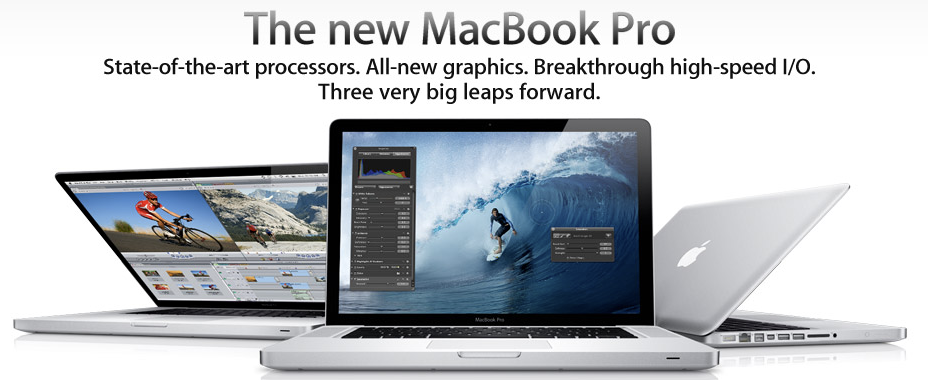
When I went to Apple’s website and they had a huge ad for the new MacBook Pro, I thought it was the old one. Why? Does this seem familiar:

I think I’ve seen this somewhere… Oh yah, every time I’ve gone to apple’s website for the past THREE YEARS.

The “REVOLUTIONARY CHANGES” consist of the tiniest things, and I’m trying to convince myself it’s because Apple’s AMAZING REVOLUTIONARY MacBook Pro just isn’t ready for prime time…. I hope…

Here’s what’s new.

The 13 incher now has a dual core i5. Better than a core 2 duo.

The built-in iSight I MEAN FACETIME camera is now widescreen. Yay… That’s been a popular request……?????

There’s the new Thunderbolt port.

Basically, it’s their new way of creating yet ANOTHER FireWire port.

Luckily, the current display adapters are supported, so it’s still a Mini DisplayPort adapter. But when I see the “Thunderbolt to VGA Adapter” in Apple Stores nationwide, I am going to tip a cow.

And the one other improvement: Battery life. It boasts 7 hours of wireless browsing on a single charge. Nice, but I’d rather see big leaps forward in innovation instead of three performance enhancements.

I’d consider this launch a total failure. The whole line is

Incase Neoprene Sleeve Plus

Do you have a laptop? Chances are you do. And because you are reading this, chances are, it’s a Mac. Probably a MacBook or MacBook Pro. And I’m guessing you travel with it (after all, it’s a laptop). Instead of just throwing it into your suitcase, protect it. And now with just any case, protect it with a custom-fitted incase neoprene sleeve.

These cases don’t fit with any laptop. They are custom-fitted for particular computers. The 13-inch version works with the new 13″ MacBook and MacBook Pro. If you have a 13″ MacBook (late 2008, aluminum unibody) it works as well (that’s what I have).

The computer snugly fits it, so it doesn’t bump around in the sleeve. It is lined with a faux-fur interior, which will not scratch that precious laptop in a million years (as long as you don’t get sand in it for some reason). It even has a cool protective border around the edges, so in case something bumps in to it your MacBook will be just fine.

And last but DEFINITELY not last, you are rushing through airport security. Avoid everybody in the line behind you yelling at you for taking too much time, because this sleeve is airport safe. Just slip the whole thing out of your backpack and safely through security it goes. Another benefit of this is you don’t have to expose your MacBook to where all sorts of things go (in the bins, I mean). If there is sand in one of those bins and you put your precious but bare MacBNook in there, SCRRRRRATCH! Not good, and that will NOT put a smile on my face. Also, if any of you consult support from me (feel free to by emailing support@goodmorninggeek.com), I highly recommend use thus case. It is available in multiple colors and also for 15″ MaxBook Pro, among many other diferent computers.

Let me warn you, it’s $40 (er, $39.95), but definitely worth it. Get yours below!

13″ MacBook and MacBook Pro

15″ MacBook Pro

17″ MacBook Pro

MacBook Air