
 At Mobile World Congress, a bunch of people with ties huddled into a room in Barcelona, Spain to hear what Firefox had to say.
Firefox announced Firefox OS, a new mobile operating system that will inevitably compete against Apple, Android, and the other big names. I’m not going to go into super specific details, but here’s the important stuff:
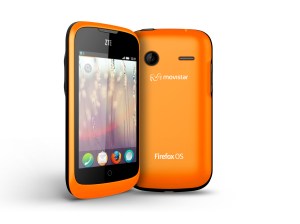
Firefox OS has secured shipments on many different devices (many of them very cheap) from LG Electronics, Alcatel One Touch, and some other unheard of companies. It won’t be coming to any devices in the US until 2014.
The big headline of Firefox OS is that they’re ditching a typical app store and instead hoping to have an “open market” of HTML5 based apps. In essence, the OS is basically a web browser. “Apps” are actually just links to websites.
Essentially, I think this is a good idea that will succeed in foreign markets but not in the US.
I’ve covered the quality+userbase=userbase++ concept in my post about Google+. In case you didn’t read that, basically, any social networking site’s best feature is more users for people to socialize with. When you have users, other users want to join, and your user base will exponentially grow. This same system can be applied to app stores. For your phone to be successful, you need apps. For developers to make apps for your phone, there need to be users. For there to be users, there need to be apps. The more users you have, the more apps you have, the more users you have, the more apps you have, and so on.
Firefox OS has the edge here because the “apps” are all HTML based (websites). This means that anyone who has ever created a website has the knowledge to create an app for Firefox OS – so there are already 8 million developers for this OS. Removing the learning curve of a new language and new library for a mobile OS will make it much more compelling to developers and, in turn, more compelling to users.
Phones running Firefox OS are going to be released mainly in China and developing cell areas for a fairly cheap price. As a result, I think it will succeed in those markets where iPhones and Androids are often too expensive. I don’t think it’s going to succeed in America as the competition from Microsoft, RIM, Android, and iOS is very hot.
Overall, I think that Firefox OS is a controversial approach to the Mobile OS – websites as apps – and will thrive in less modernized countries, but fail in others.


