Tinyletter

Tinyletter is so simple that this post wont end up being too long.

Newsletters are a good way to directly tell people about whatever you want to.

In the past newsletters required something big and complicated, the most common MailChimp.
But Tinyletter is making things a lot easier.

It’s really really really really simple.

Go to tinyletter.com and create an account. Then name your newsletter and make a description and youre done. You will have a page for your newsletter and you can send that to friends who can subscribe with their email address.

Then when you want to write a newsletter, just log in and click write newsletter. Type up your newsletter and hit send. Done.

You can also get embed code for your website, which looks something like this:

Enter your email address:

Delivered by TinyLetter

Let me just say: If you really don’t have anything interesting to say, don’t spam people with useless words. If you are some random person with no life, then I don’t think that this would be useful for you and many people would just end up filtering you to spam. Thanks!

Tinyletter homepage

OMGB-6 WeDoDroid HTC GINGERBREAD UPDATE

You may have read my post on how to install gingerbread on a droid incredible. Well that was with version OMGB-4. OMGB-5 was released and now, OMGB-6 as well.

OMGB-5 brought a lot of needed updates.

EMMC Access For All Apps
MMS on 3g and WIFI
Microbe LWP
Nexus S LWP
Available on Rom Manager *Hopefully, need my pull request to go through Rom Manager OTA Update Capable
Slightly Modified Boot Animation (by Ocelot13)
Nano Added *Here You Go N_I_X 😛
USB Mounting Fixed! No More Gscripts!
Reverted to Kernel #18 to Fix Touchscreen Issues on Some Phones.

OMGB-6 brought a few nice updates as well.

Actual Nexus S LWP
GPS
Right Launcher Button Remapped to SMS
Moved Bootanimation to /system/media

Yes, GPS. Finally, GPS. That includes working navigation and third-party GPS support and the whole shabang. Yay!! It used to be that whenever i really needed GPS Id revert back to the stock froyo.

Now there are still some bugs:
Video Recording
Led Lights

Also, you may notice that some apps don’t work. This isn’t because of gingerbread or your phone, it’s because many apps just aren’t compatible with the brand new operating system.

Thanks xda-developers and tem WeDoDroid for developing this up so quickly and perfectly!!

XDA Incredible Gingerbread Page

OMGB-6 Direct Download

How to install the ZIP on your incredible

Swishar

The Swishar is a newsletter that I am going to try to send weekly ish.

It will include my new posts, older posts that I would like to make new again, and different articles on the web that I have found useful.

Put in your email address below to subscribe. 🙂

Enter your email address:

Thanks!

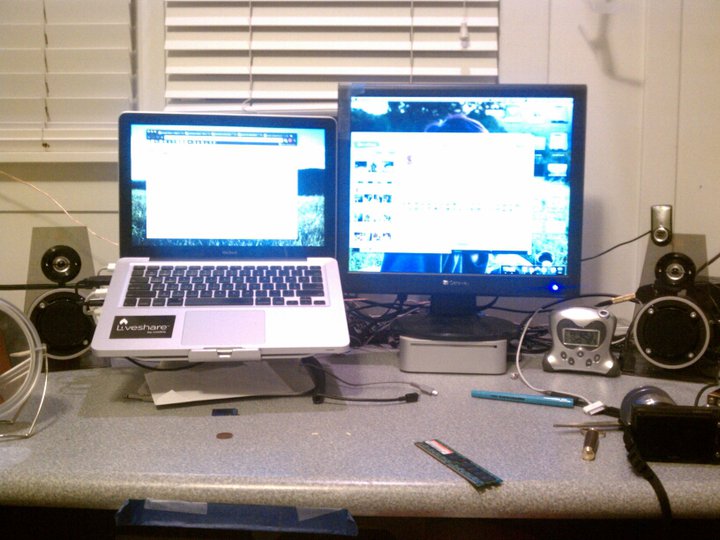
Rain Design mStand

I finally got fed up with having to have my laptop sitting on a couple of pieces of wood. I wanted something sturdier that also freed up some desk space. So I got the best laptop stand I have ever heard of, the rain design mStand.

The mStand was designed to go with the series of aluminum MacBook pros, so it went great with mine.

This thing is simple. Look at the design.
Simple. It’s just a single piece of aluminum!

The whole thing is a hunk of fairly thick aluminum, but to avoid scratching the whole thing is nicely padded with rubber.\

It has a small hole in the back that you can put your cables through to try and keep things a tad more organized.

It works with all laptops, and will work with even the full sized 17 inch MacBook Pro.

Unlike some other stands, this one doesn’t have arms, so it ends up being much sturdier.

Luckily, this thing both keeps the MacBook in place and doesn’t let it slide off, but doesn’t block you from opening the computer, the IR sensor, the CD slot, or anything.

So now I’m trying to think of what else to say. That’s pretty much it. Aluminum, nice design, simple, matching, that’s it!

I love how the simplest things are the best and don’t require me to type a long review 😉

You can go and get yourself one of these things for just $50, right here.

I love mine. It makes my desk look so much cleaner and brings my MacBook to the same eye level as my monitor.

Sony NEX-5

Over the past few months I have seen so many great photo oppurtunities that I have had to miss out on because I don’t have a high enough quality camera. Yes, an 8 megapixel camera on my phone is nice, but you can still tell that it’s a phone picture. The features just aren’t advanced enough for you to get the perfect shot.

So I decided to invest all of the money I had into this camera (so don’t expect many paid reviews for a little while) and let me say, I’m happy with the results.

When you take a look at this thing, you do a double take. If you have half of the picture you see a compact digital body. The other half looks like a DSLR lens. And take a look at the whole thing and holy crap, they’re just stuck together.

Now let me note that this does provide one big problem: It doesn’t fit in any standard case. The lens will NEVER fit in a compact digital case, but the camera is flying loose in a DSLR case. Luckily it does come with a shoulder strap, but that still leaves the body exposed.

Lets get into the details.

Design

The design of the NEX-5 is an interesting concept that bridges the compact digital and DSLR worlds. It features a standard compact digital body but with a few twists.

DSLR like features:

It features a full APSC sized sensor that is found in DSLRs and also has a mirorless design. They kicked the image stabalization out of the camera body and are packing that into the lens.

Speaking of the lens, it’s interchangeable.

Now having interchangeable lenses is what really puts this camera farther towards the DSLR type cameras. The lenses are a bit smaller than full size DSLR lenses but they are still pretty large for the size of body.

Compact digital like features:

The NEX-5 is very much so also like a compact digital camera. It features a very tiny little body that without a huge lens looks very much like a compact digital. Another thing would be the lack of viewfinder and the inclusion of a gorgeous large and vibrant LCD panel.

It doesn’t feature many physical buttons, so all of the features must be accessed through contextual menus.

Overall the design of this camera has advantages and disadvantages. The camera is nice and small and light and features the flexibility of interchangeable lenses, but you lose an optical viewfinder and many physical controls.

Interface

As I mentioned the camera settings mostly have to be set using contextual menus on the screen.

One of the big catches that sony puts you through is having two menu items: one for camera and one for brightness/color.

If I want HDR, which one do I go into?? If I want to change the autofocus which one do I go into?? You have to answer these questions mostly by just playing around with the camera. Unfortunately this also means that every time you want to change around a feature you have to sort through these menus which can become a real pain if you just want to quickly change something to get that perfect shot.

But there’s another HUGE pain. This one will REALLY annoy you.

NO FLASH!!

Actually, that’s a lie. It does come with a flash but you have to attach it using the proprietary “accessory port” on the camera. So you have to plan ahad that if you’re doing night shooting to bring that little flash with you in your pocket.

Another huge pain with the interface is that sometimes a function is “disabled” but it wont tell you why. For example, if you go to the settings to change the flash but it says “this function is disabled” you know that it’s because you don’t have the flash plugged in.

But it’s not always that simple. One example would be that it wouldn’t let me enable Auto-HDR (where it takes three pictures of different exposures and combines them) and I couldn’t figure out why. All it would tell me is that “this function is disabled”. After an hour of research I finally found out that it was because I was shooting in raw not jpeg. Life would be so much easier with this camera if it could just tell you why something is “disabled.”

Features

The NEX-5 has many features that you would find on a full size DSLR.

Of course one of the big parts of that would be the interchangeable lenses. This adds a huge amount of dslrness to this camera.

It also features the usual stuff you would find on a dslr like HDR, image stabilization, raw, etc.

But a couple of things really stand out.

Set to shoot at JPEG, this camera can do a burst of 7fps. That’s pretty damn fast.

Now the amount of time that it can do a burst like this depends on the class of SD card you have in the camera and after a little while it will start slowing down.

Something that makes this camera different from the others is that it’s mirrorless. This means that there is no mirror that flips to expose the light to the CCD sensor, instead the CCD is smack in front without a mirror or anything. This was mostly done to keep the body of the camera even smaller. But instead of having a mirror it has a shade like thing that comes down and back up, which is what makes a distinct clicking noise.

And last but not least on my features list would be the screen. It’s more than just a standard screen it can do more.

In addition to being a ridiculously hi res screen (900,000 or so dots), it can also adjust. So you can tilt the screen up (80º) to take pictures from lower, and you can tilt the screen down (20º or so) to take pictures from higher. This has proven REALLY helpful, as I can hold the camera at my waist and look at the camera screen and take pictures with it without too many people noticing (creepy, but good).

Picture Quality

This is perhaps the most important thing when it comes to a camera. And let me say, I’m pretty impressed with this thing.

I took my best shot ever with this camera on auto. I didn’t stage it. I was just there taking hundreds of photos with joy. Check out this photo.

Best picture ive ever taken.

As you can tell the lens flare adds a nice effect.

Look at the quality of that picture. the colors are great, the focus is great, everything about that photo is great.

The pictures you can get out of this thing are amazing. The auto setting works perfectly for taking lots of photos without much notice. This is the kind of camera that you can bring with you everywhere you go and still take great pictures.

For more samples, check out the photoset of mine on flickr that has all of the pictures I took at a place behind my house called the NOLG.
Created with Admarket’s flickrSLiDR.
Those are some pretty cool shots. All of those were taken in auto mode.

Value

Now theres a brother to the NEX-5, which is the NEX-3. It has a less pronounced grip and is made of plastic and can’t do full HD recording, but other than that, it is the exact same.

Now the NEX-5 seem pretty overpriced. You can get the NEX with a 16mm fixed lens or the 18-55mm lens.
Here’s a pricing diagram:

NEX-3 NEX-5
16mm $500 $650
18-55mm $550 $700

As you can tell they can be a tad pricey.

One thing that sony doesn’t make clear is that if you go for the cheapest model, you won’t have any zoom!! So make sure you are careful when choosing which model you want 🙂

Go get yours at Sony

GUI Install Gingerbread (Android 2.3) on HTC Droid Incredible

GINGERBREAD!!! AAAAHHH!!!

Gingerbread brings some incredible but simple interface and speed improvements. Here’s a step by step guide on how to get it.

1. Root your phone

This process was described in the post about how to install froyo (Which you should have now gotten the update for) but I’ll go over the basics again.

Go to unrevoked.com and click on the droid incredible. Then, download the application and run it on your computer. Plug in your phone with the USB cable and choose to mount the phone as a disk drive. Then, go into settings>Applications>Developer and check the box for USB debugging (if it isn’t checked already). Then, click flash clockworkmod recovery (or something like that) button and let your phone and the computer do the rest.

Rooting allows for a LOT more than just reflashing operating systems (like free wi-fi tethering and other cool apps like that) but I’ll go over those in different post.

2. Download the ROM from xda-developers

A ROM is basically the operating system for an android phone.

Go to THIS SITE and at the bottom click on the OMGB-*** with the HIGHEST NUMBER for the ***. This will ENSURE that you get the LATEST VERSION from xda-developers.

3. Put the ROM on your SD Card

Once again, plug in your phone and select Disk Drive. You should see both your internal storage and your SD card mounted on your computer (to find out right click on the drive and click get info. The internal storage on your phone is about 8GB). Click and drag the zip that you downloaded from xda-developers onto the root of your SD card. Then eject the SD card and phone storage and unplug your phone.

4. BACKUP BACKUP BACKUP!

Open ROM manager and tap backup current rom. It will reboot and create a backup of your phone’s current state. Don’t get scared if it takes a long time on some things or if the progress bar doesn’t move, and NEVER  take out the battery (no matter how worried you are) while it’s in the middle of this process. If you if you skip this step you will never be able to return your phone back to normal.

5. Flash the ROM with ROM Manager

Open ROM manager on your phone and tap Install ROM from SD Card.

Then in the next menu tap on the ZIP file that you moved onto the SD card.

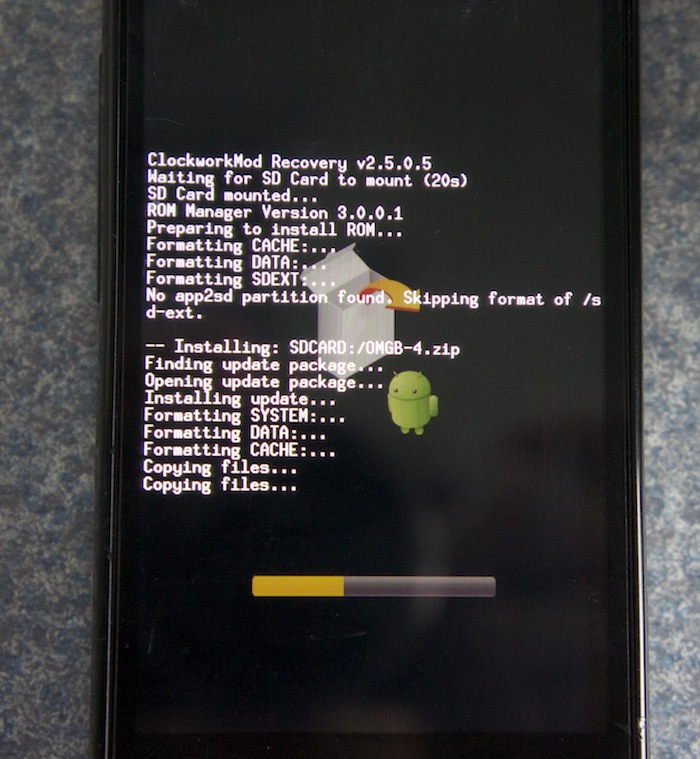
In the screen that appears check Wipe Data and Cache and click OK. The phone will reboot into a screen that looks identical to the one where you did your backup.

6. Wait while it installs

The process should only take a minute or two.

7. Congratulations!

You should see a gingerbread followed by the interface of gingerbread. Congratulations, you have installed Gingerbread on your Droid Incredible!

Monitor Configurations

If you are a multiple monitor maniac, you would know that sometimes it’s hard to decide to put your monitors. Placement can depend on use, ergonomics, functionality, placement of speakers, space, and available equipment.

I’ve gone through many different monitor configurations.

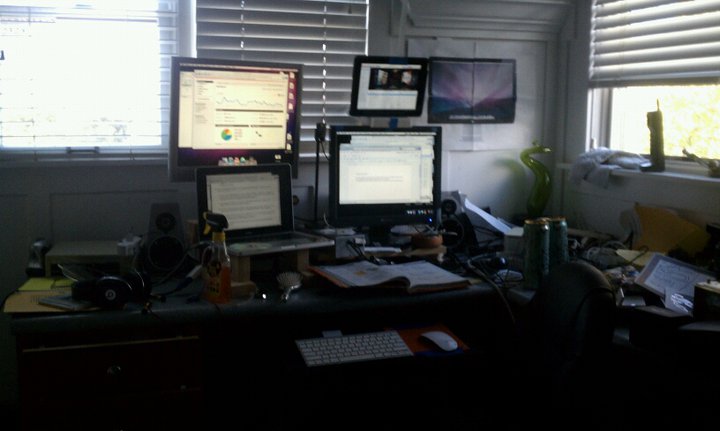
My first ever multiple monitor configuration looked like this:

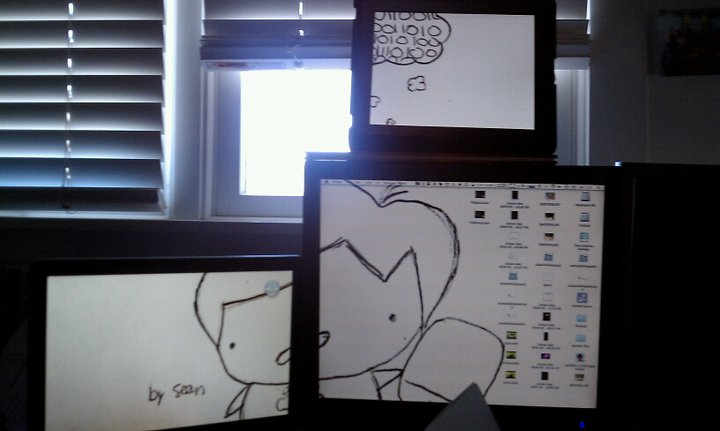
Then I decided to kick out the PC and attach my Mac to that monitor.  I also found out that I could use my iPad as an external display.

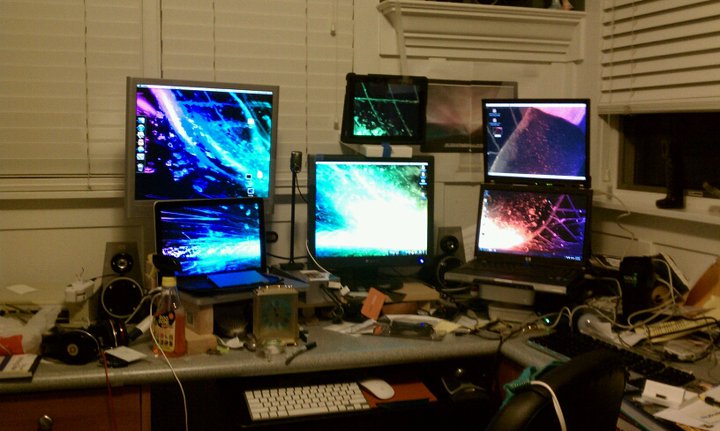
TAfter this configuration I got another Mac that I decided to use for all of my media. So I added that to the mix and for the first time I rose up the monitor over the others, and it created a four monitor grid.

Then I decided to take the two laptops i had and make it two rows of three.

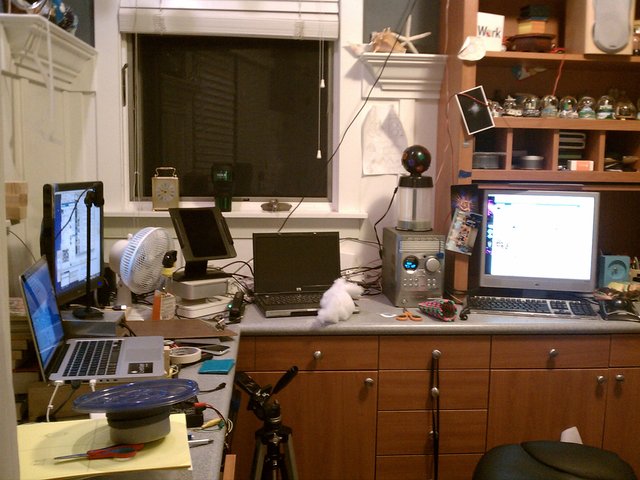
And then I did something crazy. I put the monitor from the top left on the opposite side of my desk and got rid of those two laptop screens.

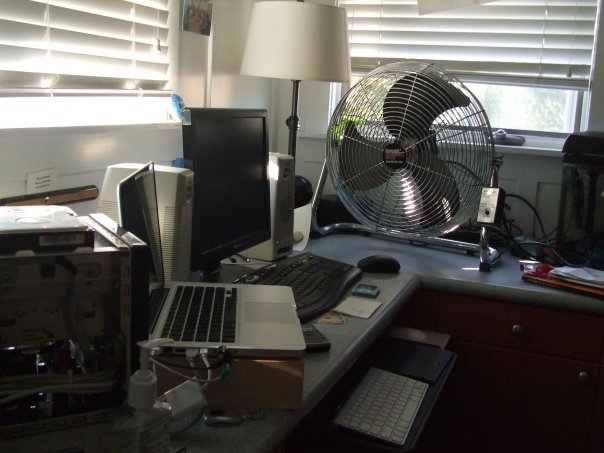
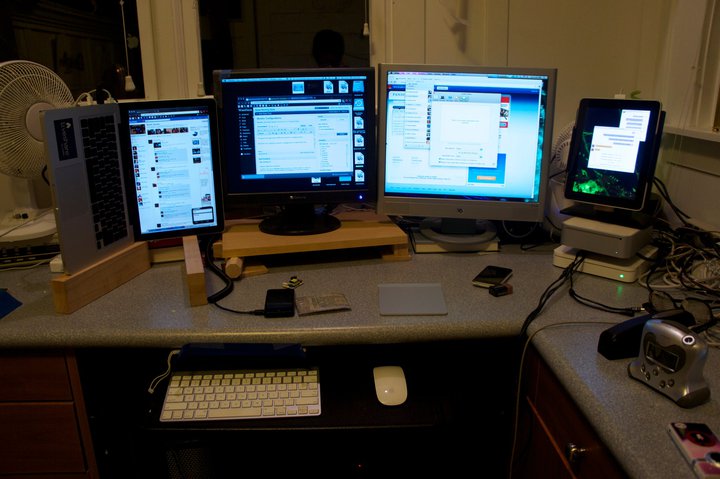
But tonight I decided to pull it all back together. And I ended up with:

As you can tell my MacBook is sideways. But the screen is rotated so i can actually use it properly.

This was not easy to do. In the system preferences pane they don’t give an option to rotate an internal screen, so you have to download a third party app called Display Rotation Menu and change the rotation from the menubar of your computer.

So that’s the story of monitor configurations. Different ones have been cleaner than others, but I just wanted to post about the emphasis that monitor configurations have. My current one has proven to be the most productive so far because I don’t have to move around to work on all of my monitors.

The art of continuous shooting

Continuous shooting is great.

For those who don’t know exactly what it means, it is when you use a camera to take shots as fast as possible. Because the shots are so high resolution it can’t be as fast as video, but if you are trying to take a picture of something moving it can help you to increase your chances of getting the right shot.

In general, most cameras can do around 5 frames per second.

My new nNEX-5 can do a burts for a second or two of 7 frames per second, and it also depends on the class and write speed of SD card you have in the camera.

But if you want to take a lot more pictures in a row it does about 5 per second.

Now a cool thing about this is that you can walk around or through a town taking pictures like this and then ut all of the pictures. You obviously can’t tell it’s a video, but it gives it a creative aspect (especially with the right soundtrack).

I was at my friend Gustaf Soderstrom’s house and of course he took my camera and decided to walk around with it. The pictures were kinda uneven, but he inspired me to use the continuous shooting to make a tour  of his house.

Now a tour of a house with standard 30fps video without sound would seem really boring. But if it’s a stop motion video with a cool soundtrack then it ends up looking kinda cool.

Feel free to comment with a link to a video that YOU did with continuous shooting. 🙂

Forgot your password on your computer?

Here’s how to fix it.

NOTE: THIS IS NOT INTENDED FOR MALICIOUS PURPOSES AND I CANNOT BE HELD LIABLE FOR ANY DAMAGE DONE TO YOUR COMPUTER IF THIS IS DONE INCORRECTLY.

What this does is creates a new admin account where you can change the old admin accounts password.


Turn off your computer and turn it back on. Right at the startup chime, hold down command S. This will boot the computer into a command line interface.

Once it is done settling itself type in:

mount -uw / (<–there is a space between -uw and /)

RETURN KEY

rm var/db/.AppleSetupDone

RETURN KEY

shutdown -h now

When you turn your computer back on, it will take you through setup like you just turned on your computer for the first time. It will play the intro, ask you for a language and keyboard layout, and ask you to register.

It will also ask you for a password, so put in a password that this time you will remember!

Now even though you might get worried that you have accidentally wiped your drive and reinstalled an operating system, don’t fret. Once you get into the account go to system preferences and click on accounts. Here, you should see your other admin account listed. Click on that account and click reset password. Here, you can type in your new password. Click OK and log out. You should see both your new admin account and your old one listed. then click on your old one and type in the password you reset it to, then you should be able to log in and access your files.

Once you have done this, open system preferences, click on accounts, and click on the new admin account you had just created. Then, click the -.

Tada! You just reset your admin password without knowing the old one.

Computer crashed, forgot to backup? Here’s a solution.

Recently, I totally killed Gustaf Soderstrom’s computer.

It’s a mac mini, and on starup it was totally stuck at the apple  loading screen .

He doesn’t backup his data on the Mac Mini, and he had some homework that he needed off of his hard drive.

I have a USB external enclosure so we could take the hard drive out of his computer and get the data off on another computer, but I didn’t have the correct screwdriver to take out the hard drive.

So here’s how I ended up getting the data off.

You will need:

1. No hardware problems! The reason that your computer is dead MUST BE ONLY SOFTWARE RELATED!

2. The original install disk that came with the computer

3. An external hard drive bigger than the estimated amount of data you have on your dead computer.

Lets get to this.


Step 1. boot from the original install CD

Put in the CD and boot up holding the C key. It will take a while to boot but it will boot from the install CD.

Step 2. Plug in the USB hard drive.

Simple enough. USB, Usb. Congratulations.

Step 3. Open Disk utility

At the screen where it asks you to install, go to Utilities>Disk utility.

Wait for it to load, and trust me, it eventually will. 🙂

Step 4. Copy the data.

You should see both your USB drive and your internal hard drive in the list on the left of disk utility. Select the internal hard drive (the one that actually has a name and is grouped under the physical hard drive) and select from the top “Create new disk image.”

Select for it to be read/write and make sure the encryption is set to none. Above where to select that it probably says root with a little home next to it. Click that dropdown and select your usb hard drive. Then, save the disk image.

Step 5. WAIT

This will take forever. for 65 GB, it took about an hour and a half.

Step 6. Eventually the window will close and you will have no idea that you ever started the disk image copy (it doesn’t even tell you that it’s done or anything).

Step 6. 5: Make sure it worked (optional)

If you have another computer, plug in your USB hard drive and open the disk image. Skip the verification process as it’s wasted time. It should open a window and you should see a Users, Library, Applications, etc. folders. If you see these then congratulations, you’re successful!

If you don’t have another computer, you have to skip this step and hope for the best!

Step 7. Install!

Quit disk utility and the installer will reopen. Go through the simple steps (click continue, click install) and it will install a fresh version of your operating system.

Step 8. Put your data back

Plug in your USB drive and mount that disk image. Replace the applications folder already on the fresh installation with the one from your computer and do the same with your whole home folder (especially the library folder as that contains crucial application support).


Congratulations! You just got your stuck computer reformatted and saved your data!

Thanks gustaf for letting me kill your computer and find out how to fix it again! 🙂

Cortex+tumblr+organ=beauty

There’s always that random thing you want to share with your friends.

Pictures, text, a conversation you had, you’ll always come across something.

Now usually for this we use facebook.

But if you want to share with the public, you usually use twitter.

But twitter is only text. I mean, it’s only 140 characters of it. If you want a picture in it, you have to add in a link that people have to click.

That’s why people have blogs.

But blogs can be a pain to post to. You have to login, create a new post, add in the stuff, then post it. It’s really not worth the time.

And blogs tend to look kinda standard. I mean, they can look nice, but they all look the same.

I have a solution for this.


Part 1: The blog

tumblr.

Tumblr is a customizable and free blogging platform that is easy to use.

Unlike others, you can post text, but it gives you separate things for text, links, conversations, audio, quotes, and video. And they all show up in their nice ways (quotes have “s around them to make them look quoty). It’s flexible and postable by mobile, and you can have it post to your twitter, facebook, etc.

tumblr.com

2. Time

Cortex.

I did a review of cortex a little while back and let me just say that it is still beautiful.

Cortex is a chrome extension for sharing things really fast. Here’s a demo video that I made (and that was used in the review of cortex on mashable, let me have you know):

As you can see, there is that magical t for you to post to tumblr, so you could use that to publish things quickly to your blog.

One cool thing about it is that you can use it to yes, share just the link to the webpage, but if you click and hold over an image it will share the image (and it will post it to tumblr like an image too). Select text and click and hold over that it will share the quote from the webpage (and yes, it will post it to tumblr like a quote). Click and hold over a youtube video and it will share the video, not a link (and YES, it will ALSO post it to tumblr like a video). It’s nice to see the cortex is so well integrated.

As I said, cortex is a chrome extension, so if you are desperate for sharing you may have to switch to chrome (which really isn’t such a bad thing let me have you kn0w).

Cortex homepage

Cortex on Chrome Extensions

3. Blog appearance

While it’s nice to have a blog in reverse chronological order with one thing on top of the other, you can spice it up a little but with an amazing theme called organ.

What it does it makes everything in to skinny rounded columns (reverse chronological order from right to left) and does different things depending on what they are.

Every different type of post has differently colored columns.

Pictures it will take a strip of the picture and show it in the column.

Everything text (text quotes links) it will adapt the text to go with the theme and then mumble jumble it in big letters down/across the column.

Now you may say “what the hell, I can’t see any of the text!”. Well, there’s an answer. Hover over a column and it will expand to show you a little bit more.

Hovering over the text will make the beginning of it drop down sideways in a single line. Then, you can click on the arrow that shows up at the top of the column and see the full posting.

It’s nice because at first it shows you a lot of posts in a very small space, then when one looks interesting you can hover over it, and if it’s a dud you can hover over another (without having the page have to reload) and if it’s a good one then you can click on the arrow to expand it (and wait for the page to load but it’s probably worth it).

To get this theme on your tumblr, choose to customize your site, click on theme on the top bar, and scroll WAY DOWN to the free themes and find the one called organ. It will be near fluid. 🙂


Personally I use this system to share EVERYTHING, so my site ends up looking like brain vomit. Because it’s so easy, I post to it ALL THE TIME. It’s nice because it’s constantly updated and there’s no thought put in to it. Oh, I think this looks cool. SHARED.

To check out my site done this way head on over to tumblr.maxswisher.com!

Dolby Ok, go event

I recently attended an event at dolby labs with Ok, go there. If you don’t know who Ok, go is, look at this video. I bet you’ve seen it somewhere sometime…. Now why is ok, go at dolby? Well, lets think. Ok, go=music. Dolby=sound. Music, sound, see the connection? The real reason the band was there is because dolby took their latest music video “this too shall pass” and converted it into 7.1 surround sound. They didn’t just expand the two tracks of stereo over all 8 speakers, but they actually got the individual microphone clips and used those to create a quality surround sound experience. The video was played back in full surround sound and quite high volume in the dolby labs theatre, which features some of the best in dolby surround sound technology. If you watch the video and say “I could totally imagine this on dolby surround sound!, ” then you’re wrong. You can’t imagine it. You have to hear it to believe it. It is scary how music can literally invade you if you have the right quality and the right system. If I had this theatre in my house and I played this at the same volume level, the neighbors would call the police who would come to my door for sound violations. The event was fun, as we crowded into the theatre and watched the video without the left and right channels (they had a server error, welcome to a PC dependent company). Then, Ok, go came on stage and did some Q&A with the audience. They emphasized how they are welcoming open source music and how they think that everybody should be able to take songs and remix them to their likings. They also talked about how they really aren’t too crazy about illegal downloads of their songs and it’s really the music labels that go crazy, as ok, go is more on the music side of things than the business (which will really come in handy for creating some great songs). What happened was we crowded into the theatre, they played the video without the left and right channels (server error) and then Ok, go did some Q&A. Every couple of questions they would play a song then get back to the Q&A. And when we were almost out of time they played the video this time with all channels included. Dolby said that they were interested in taking music and upping it into dolby surround sound as it gets publicity for everyone. Dolby gets publicity for converting artists’ music, and the artists get publicity because dolby wants to show off their amazing surround sound technology using their music. Now in addition to Ok, go there was something else extremely great there. Dolby Home theater four is not available to the public yet and who will be vending it is not known either. All of this information will be announced at CES2011. But I was lucky enough to get a preview of the software anyways. Dolby Home Theater v4 can do two exceptionally amazing things: it is able to take computer speakers and extreeeeeeeemely amplify them and it is also able to take standard stereo headphones and make them sound surround soundy. First of all would be computer speaker amplification. He played us a video without dolby on, then he turned it on.  It is amazing the difference. My mother is hard of hearing and without dolby on couldn’t hear the video at all. With it on she could. I think that this is great especially if you are on a train or on a bus. You can’t hear the video/music at all, but with dolby on you can. In addition to amplifying it can make it feel like the sound is coming from a wider range than tiny speakers inside of your computer. It can also boost dialoge in particular, so you can hear voices extremely clearly. The speakers have to be tuned to work best with the speakers which is why the software must be shipped with computers instead of a download. Each computer will have the software a tiny bit different to match the speakers. In addition to this amazing internal speaker improvement, they have added capability that you can use standard stereo headphones to make them like surround sound headphones. I was with my family and a family friend (Same one that did the ergonomics video of the magic mouse) and Kevin (a sound engineer) played for us a channel check. What it does is says “front left. front right. center. back left. back right.” through the corresponding channels. Without dolby turned on, you could barely hear a difference between each one. but with dolby turned on you wanted to look behind you to see who was saying that. The scary part about this is how it actually works. Here is a picture of vivienne’s reaction:

wait...What? Huh? How?!

As you can tell this is extremely perplexing. We have six channels going in through two speakers. I must make note that these aren’t special headphones at all. These headphones aren’t even made by dolby. These are just normal headphones. Now another thing in addition to this is that it can take the sound out of your ear and put the sound around your ear. Dolby makes it sound more like you are in a room, less like sound is being shoved into your ear. Usually using headphones if fatiguing, but dolby solved that problem. Having surround sound in your own personal speakers allows movies to have much more character and much more impact. It sounds more…. real. It’s amazing how people are cramming in 6 speakers into headphones, when really all you need is dolby. 🙂 If you are at CES 2011, I highly suggest you head over to the dolby booth and try this stuff out. Dolby has some great stuff planned and they really know what their doing when it comes to their sound. Here’s a couple of pictures from the event.