Apple Board Member Confirms new iPhone in October – That’s plural

Everyone has been waiting for the new iPhone for quite a while now. But at the Discovery Invest Leadership Summit today, Apple board member Al Gore said that the new iPhones come out in a month.

Oddly, this all makes sense. Would Apple really skip their usual Summer update to bring us just a performance bump?

This is what I think – there is going to be a model of iPhone with a performance bump, however there will also be a new iPhone 5 that is a complete do-over. 

The performance bumped iPhone 4 would most likely be called the iPhone 4S, and would sell for cheap – $99-$150 ish. Then, there would be the long-anticipated iPhone 5 for the usual price of $199-$299 with the complete reinvention thing going on.

That’s the interpretive, bright side of this quote.

However, we don’t really know Al Gore’s actual perspective. It’s possible that he could have accidentally added an S to the end of iPhone, and/or it was just amplified by the sound system. It’s also possible that he meant next iPhones as there will be one model of new iPhone, but MANY will be sold.

The one thing that couldn’t have been a mistake is the fact that he said “next month.” That means October – So for those of you who have been waiting months and months for the next iPhone, it will be coming next month – whether it has an extra model or not.

Instagram – with a DSLR

Instagram is an amazing iPhone application that can transform your normal iPhone photos into interesting, old-ish photos. Unfortunately, your iPhone doesn’t have the best camera that you could put your hands on.

Here’s two applications that will give you Instagram-like photo effects and filters, but you can supply your DSLR’s pictures!

Focus

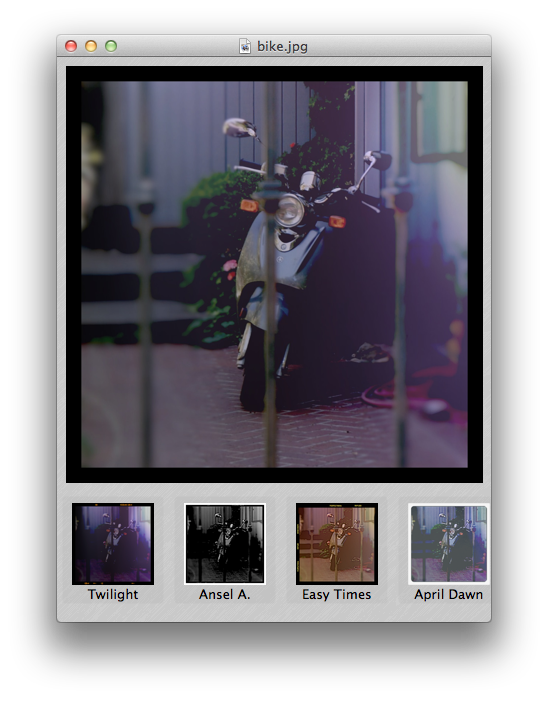
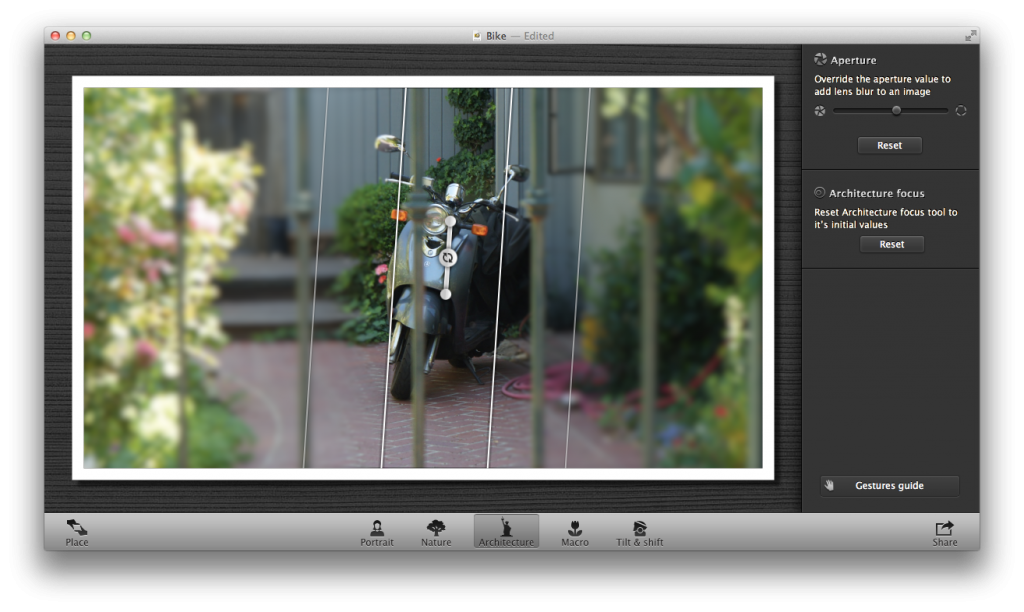
Focus is an application available from the Mac App Store for $5. The app basically allows you to add tilt-shift effects to your photo. It’s a very straightforward application, and I think I can basically sum up the controls in this screenshot.

First, open a picture in the app. Then, click “Place” in the bottom left corner. This will allow you to rotate, crop, and align your photo to your liking. Then, click on one of the options that are shown. I personally don’t understand why they had to add a bunch of options – I mean, why couldn’t they have just added a button for circular, a button for linear, and a slider for Vividness? The world may never know.

After you’ve selected one of those options, you can click and drag the focused area around and rotate it to your liking. Once you have it in a place you like, hit File > Export and save it as a JPEG. Now you have a tilt-shifty photo!

Lomo Express

Now that we have the tilt-shifty part of your photo complete, we need to add some filters. This will be done with another app from the Mac App Store that is available for a painful $13 – worth it I think so.

This is as bare-bones as you can make this application, as you open up your photo then choose what effect you want – then save it. Here’s what the app looks like:

There are 12 awesome filters to choose from, and it’s as easy as clicking on the one you’d like and bam, there’s your new photo.

When you’re done and you like the results, go to File > Save As and save it as a JPEG.

That’s it!

Conclusion

Your final picture will look like an instagram shot, but higher quality and resolution!

To go even farther, you can print them out on nice paper and post them around, like I did with instagram photos in this post.

Even though this will cost you $19, if you’re really into editing photos with tilt-shift and Lomo effects, this is the way to do it!

Click here to download Focus

Click here to download Lomo Express


Here’s a couple of photos that I have gotten out of this system.

Photojojo Mini Lenses


The iPhone can take some pretty dang good pictures. In fact, many different phones can take mind-blowing shots. But your little phone can do even more if you treat it to these mini-lenses from Photojojo!


Contents/Installation

There are three lenses available from Photojojo: 2X telephoto, 180 Fisheye, and a 0.68x wide/macro lens. I won’t go over individual pricing, but the whole pack is $50.

Installing the lenses is painless. In your package you’ll get a few tiny, metal magnetic rings. Undo the plastic on the adhesive side and stick it around the lens of your device. If you have an iPhone, however, you should probably put the ring on a case; the sleek glass doesn’t play well with their adhesive.

Now to use the lenses, you just attach the lens to the metal ring and it magnetically locks on. Neat!

2x Telephoto

For those times when you want to get closer to your subject, the 2x telephoto lens will do exactly what you’d expect. Unfortunately it will cause a tiny bit of distortion, but not enough to make a big difference.

Without, With

As you can tell by that comparison, the lens does a nice job of zooming in, but has a bit of distortion (visible near the door handle).

Fisheye

This lens I believe is my favorite. It can capture just about everything you can see without turning your head. If you want to really capture an entire scene, this is exactly what you need.

Without, With

Pretty cool, right? Unfortunately, this lens causes a particularly noticeable amount of vignetting, but I think that it adds a nice effect. If you want to get rid of it, you can always crop it with whatever application you desire, however you’ll end up losing a bit of the image.

Wide Angle / Macro

This lens confuses a lot of people. Is it wide angle or is it macro?!

Alone, the magnetic part of the lens is just Macro. However, there’s an adaptor that screws in to the macro lens to convert it to a wide angle lens.

The macro lens doesn’t zoom in at all. It just allows you to focus WAY closer to objects. Here’s a comparison – remember, I took the first picture as close as I could while staying in focus, then I took the second as close as I could while staying in focus. This lens does NOT zoom.

Without, With


Pretty cool, right? You can get ridiculously close to capture textures that previously went unnoticed. On the second picture, I’m holding my iPhone a tiny bit less than an inch away from the keyboard.

The wide angle addition to this lens isn’t very fancy, it just makes the picture a tiny bit wider. It will cause some straight lines to bend in odd ways, but it still comes in handy when wanting to capture wide shots without going crazy with the fisheye.
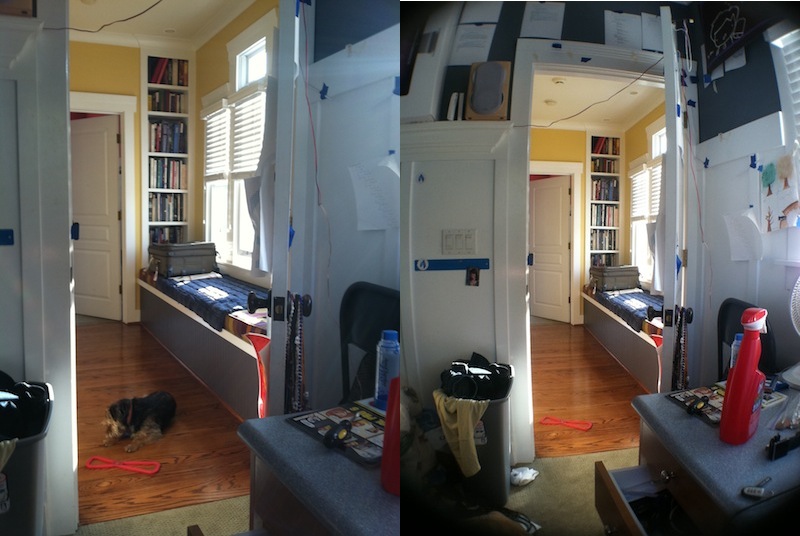
Without, With

Doesn’t that doorway look kind of round? As you can tell, it makes the picture a bit wider but can’t capture the amount (and distortion) of the wide angle lens.

Cool uses

Yup, these work great with a phone camera. But there’s one use that I recently found – your webcam! It’s a small camera, just about as small as the one in an iPhone. Take a metal ring and stick it around, and you can use these lenses while video chatting! I personally have an LED cinema display, and although it makes my screen look a little funny, the results are totally worth it.

Here’s the display:

Ha! By the way, those things on top of my monitor are dinosaurs; you’ll get one with every photojojo order! I’ve ordered two things from Photojojo, so that’s why I have two dinosaurs.

Here’s what it looks like straight on:
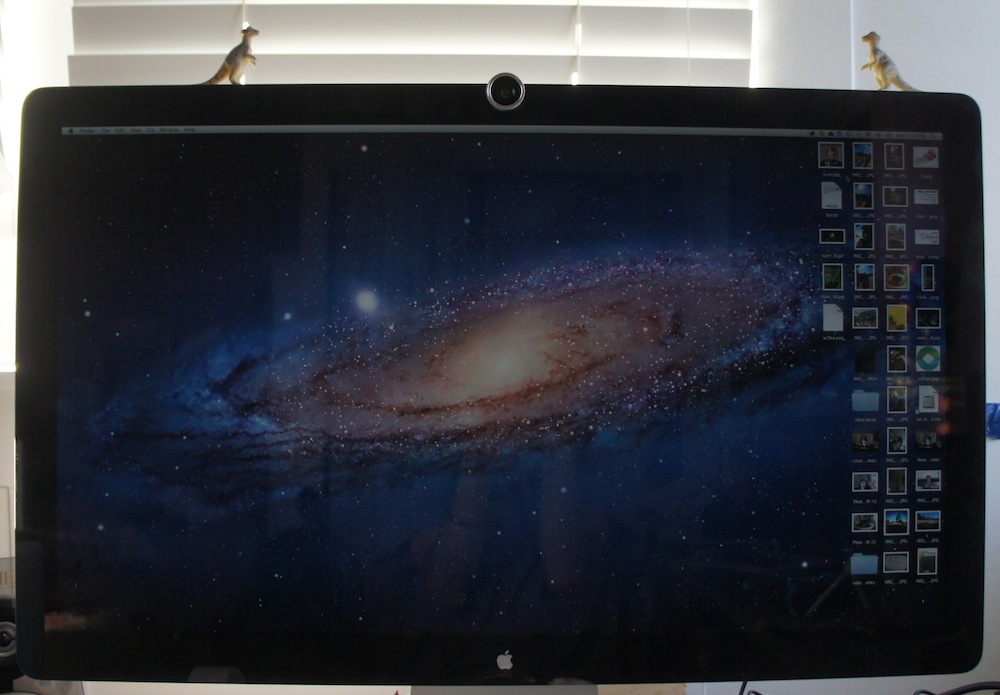
Pretty cool, right?

Here’s the results:

Sweet! You can even see my keyboard!

Conclusion

These lenses are quite handy, and because they work with anything you don’t have to worry about compatibility. The whole set of lenses is $50, and if you’re interested click here to be redirected to the photojojo store!

How-to: Create a Lion Recovery Disk


OS X Lion removes the need for any kind of media for the installation. That’s nice, because there’s no disk for you to lose!

However, if something terrible happens to your computer, you’ll end up installing Snow Leopard, then upgrading to Lion once again. Thankfully, Apple has made a utility that allows us to easily and painlessly create a bootable USB Lion Recovery Disk. Unfortunately, you must have either the MacBook Air or Mac Mini Mid 2011 for this to work. This is because those are (currently) the only computers with the Lion Recovery Partition.

1. Download

Click here to download the Recovery Disk Assistant from Apple. Once downloaded, open the Disk Image and launch the Application.

2. Create

Now would be a good time to plug in a USB disk. Plug it in and continue through the installation. There’s nothing for you to configure, so this is extremely straightforward.

3. Use

If your computer stops booting, or you get a new hard drive, it’s time to use this disk. Plug it in to a slot on your computer, then boot holding the alt/option key. In the menu that appears, select the recovery disk. Now you can download and install Lion right back on to your computer!

BookArc for MacBook Air

The MacBook Air is a great computer. However, sometimes it’s nice to have a bigger display. That’s an easy task if you have an external monitor.

Okay, so now you have two displays. Cool! The only problem with this is that it can sometimes be confusing and/or distracting to deal with two displays at a time. Okay, simple enough, just close the lid to the MacBook Air and use an external keyboard and mouse. That was easy.

This would be the answer to all of our problems, however a closed computer does take up quite an amount of valuable desk real-estate. That’s why the BookArc is here to save us.

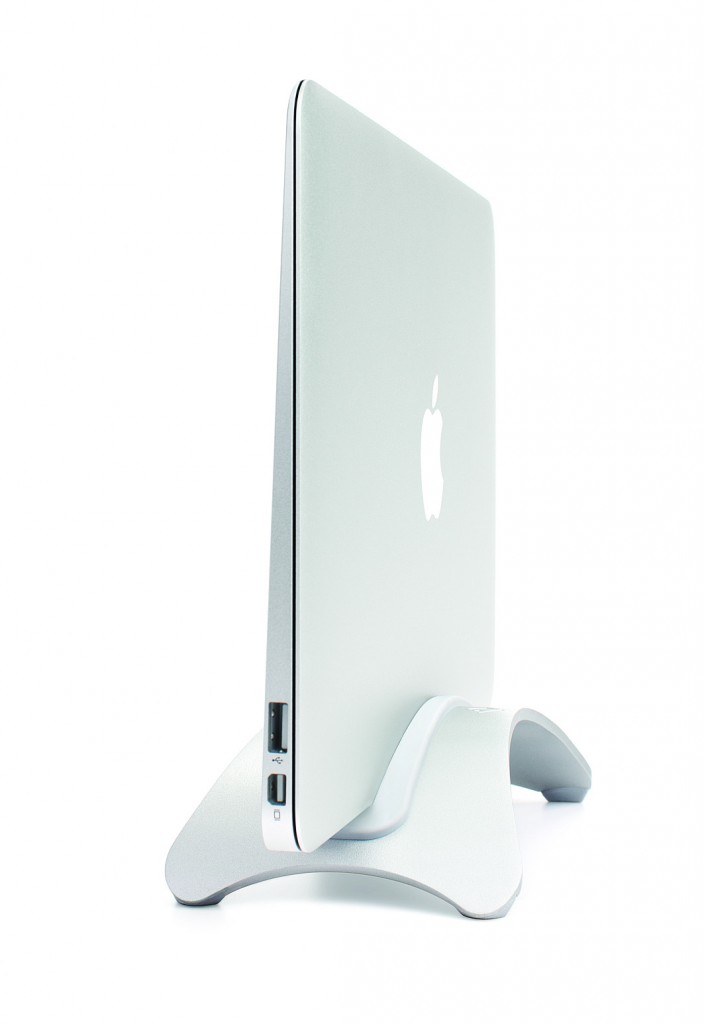
As you can tell, it is really just a stand for the Air that holds it up sideways. The stand is made of solid aluminum, and has rubber inside so that you don’t scratch or in any way damage your beloved MacBook Air. It also has a small indent in the side to manage any cables you might have, and was designed to fit the cable from an LED Cinema/Thunderbolt Display quite well.

This saves a ton of desk real estate, and can really come in handy. But the fun doesn’t stop there!

Usually laptop cooling requires some fancy advanced stand that usually doesn’t even work well. Well, here’s my personal cooling system.

Yeah, that’s it. I have the MacBook Air and a desk fan pointed at the bottom. This will keep your Mac nice and cool, so you won’t have to worry about heating issues ever again. Nifty!

The BookArc is a simple, elegant stand that serves its purpose quite nicely. If this stand were any more, it would be too complicated and much less attractive. It saves you a ton of desk real estate, and at the same time you can cool down your computer!

The BookArc is available for all MacBooks, and the pricing is respective of that. The BookArc for MacBook Air is available for $40, and you can even pick one up right at your local Apple Store! Click here to go to the Twelve South site and get one for yourself.