Fotoclips

Ah, photography. The practice of capturing moments in a still representation of the world, then bringing them back to life with just a glance.

Photographs are awesome. We take cameras and photos for granted, as we can capture a moment of our lives at anytime and anywhere thanks to phone cameras. Really, photos are something that our lives wouldn’t be complete without. What if you never had that picture of your boss wearing a party had upside down (didn’t think that was possible, did ya!)? Or of your cat standing up?! Or of that lizard licking your friend’s nose?!

There are some things that we just can’t keep in our mind in full detail. We can’t remember moments exactly as they happened (unless, of course, you have photographic memory), so we have photos to help us. They’re captures of our world that can be stored and recalled to bring back memories that we may always treasure.

Once we take these magical photographs, we can do one of a few things with them.

One option is to leave them on our phone to be scrolled back to when showing something to someone.

Or you could upload them to facebook to share that magical moment with all 1,500 of your closest friends.

I like to do something else with my photos – something that is unfortunately hard to find these days, but it’s still a practice that we will never be able to replace:

PRINTING.

Yes, like with paper. And ink. (gasp)

Printing is this amazing practice where you get a physical copy of your photo which will exist without electricity and without the internet. It’s a magical thing that people really aren’t wont to doing anymore.

And there’s another benefit to printing your photos: You get to display them wherever you desire. With a printed photo (and maybe a little bit of tape), you can put that memory wherever you please and you’ll always be reminded.

This is often done with a picture frame. Honestly, I have nothing against the picture frame. You get your photo with a border of sorts behind a piece of glass standing up wherever you want it, or nailed to a wall. It’s a great idea, the picture frame, that will always be prominent (at least around people who actually print some of their photos). But I think that we could be a little more creative. We are the world’s artists, the world’s craftsmen – so we should build something for our photos that really makes the world – and our walls – a better place.

Ladies and gentlemen, I introduce fotoclips.

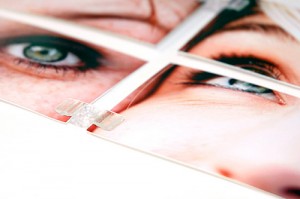
Yup. That’s it. That tiny little plastic clip.

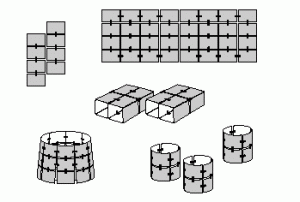
But with simplicity comes possibility. With this clip, two photos can be joined together.

With two clips, you could conjoin three photos.

Imagine what you could do with 100 of them, hmm?

Fotoclips are the super simple way to make awesome things out o

f your photos. These turn your photos into building blocks, and the rest is up to your imagination.

One pack of Fotoclips comes with 100 of those 2D clips, and 10 orange clips. These magical clips transport your photos into a new dimension – THE THIRD ONE!

These orange clips let you make corners – meaning that your photos can turn into amazing things like boxes and rectangles!

Fotoclips take your memories and make them even more creative than they were in the first place.

Imagine the possibilities!

In the past, fotoclips have been used to make wall murals, hats, lamp shades, and even dresses. A photo dress – now that’s what I call creativity!


Fotoclips are also awesome because they involve no glue and don’t damage your beautiful snapshots at all. If you ever get bored of your creation, just take it all apart and build something new. It’s that simple.

One of the most popular things to do with fotoclips is to make wall murals.

That’s a mural that I made out of the first prints off of my Lomo LC-A+. Each fotoclip has a little hole drilled out in the middle where you can stick a nail, or a thumbtack, or anything else you desire – but due to the condition of the wall, I just put some painter’s tape on the back of each photo to hold it up.

Want to make your own photographical compositions? It’ll only cost you about ten buckaroos over at the Lomography shop. The possibilities are only your lunch money away!

Fotoclips at the Lomography Online Shop

Instagram Bought by Facebook for $1 BILLION

Remember Instagram, the fun little quirky photo sharing service that just released an Android application?

As you may know, they’ve been growing in size since their launch and Instagram has become an extremely large and popular service.

Because of this, it was inevitable that they would eventually be purchased by an extremely large company… and who better than facebook?

First of all, $1,000,000,000 is a lot of money. A LOT. I didn’t really think that Instagram could be worth that much.

Second, a little note to Zuck and the whole facebook crew: Please, please, please, please don’t screw this up. Please don’t force it to be built in to the facebook interface. Don’t try to stick instagram into facebook, you’d be doing everybody a disservice. Also, don’t just get rid of the entire thing to eliminate competition.

We will have to see what Facebook is hoping to do with this photo-sharing giant, and I honestly hope that they don’t screw it up.

Instagram for Android

Finally. At long, long, long, long, long, long, long last. Instagram has released their official Android Application.

In case you don’t know, Instagram is a photo-sharing platform which incorporates different fun-style effects and third party sharing into the mix. It’s been available for the iPhone since late 2010 and has collected over 30 million users. Yeah. Whow.

There were many speculations of an Android App over the past while, but no confirmed release date.

Now that Instagram has released their Android version, they are well on their way to a giant user base. After all, Android does have more of a market share than the iPhone.

As far as the application goes, it’s the exact same as the iPhone with one important exception: The android application does not have the tilt-shift function, a popular option among Instagrammers. (Tilt-shift is where a selected part of the photo is in focus and the rest is not.)

If you are an android user longing for some instagrammal love, click here to download the free app for android. Enjoy!

The Impact of Customer Service

Customer service makes a big impact on how people look at your company. Here’s two examples of personal experiences with customer service – one bad, one great.

The Bad

Recently, my sister’s MacBook had a little breakdown. The trackpad stopped working.

I knew how to fix it, I just take it apart and switch out the trackpad. So now, I just needed to get the trackpad.

I found a site on like called Mac Parts Online. I clicked on my sister’s model of MacBook, then clicked on the trackpad. It redirected me to a shopping page, where I then ordered the trackpad.

Upon arrival, I found that it wasn’t the correct model of trackpad. This trackpad was for an aluminum MacBook!

I went back to the site and looked for an email address or phone number. I found a contact page and over the course of a week sent them messages three times. I never got any response.

Eventually, they started responding. After some arguing, they regretfully accepted it for a return. On top of that, I had to pay a 25% restocking fee.

So first, your site misinforms me about what product to get, then you don’t reply to my messages, then you finally accept it for return, and charge me 25%?!

I know I won’t be shopping here again. Ever.

  • Website was misleading
  • Slow response
  • Unfriendly Customer Service
The Great

I was recently looking around for some photography gear. I found a site called Photojojo, full of a ton of different nicknacks and photo related toys and supplies.

I found a lens called the Diana+ that I was really interested in. Upon reading the description, I could tell this was going to be fun.

Simply attach the plastic lens and its adapter directly onto your SLR’s body (Nikon or Canon) and shoot away. With one part Diana camera (old school lo-fi plastic) and one part modern DSLR you’ve got yourself one mighty fine recipe for unconventionally amazing photographs.Finally! A way to re-invent your style while kicking it digital with the hip kids and their plastic cams. (And for future reference, Thomas Kinkade = not hip).

Instead of a machine writing this, there’s a real person writing and not just filling out a form description made by some manufacturer in china.

As you may have read, it works on Canon and Nikon SLRs. But what about my NEX-5? I have a nice NEX-5, but it doesn’t take Canon or Nikon Lenses.

So, I thought, I could just get a Nikon to Sony adaptor and I’ll be set! I’ll put the Diana+ Lens in the nikon adaptor, then the Nikon adaptor onto my NEX adaptor.

But there was one potential problem with this – would there be a problem because the lens would be two adaptors away from the CCD in my camera?

To answer this, I turned to Photojojo. I found their contact page quite easily, sent them a message, and within a day they responded.

Hey there Max!

I can’t say for sure since I don’t have your camera or that snazzy Sony to Nikon adapter to test it out, but best I can tell I think that setup would work great!

I don’t think the extra distance will make much of a difference and that combo of adapters is your best chance of using Diana lenses on your camera so I’d say give it a shot!

If I’m totally wrong and it doesn’t work for ya we’ll take the Diana Lens and Nikon adapter back easy peasy!  (Just be careful to keep all the packaging together and don’t rip the boxes when you open them if you can help it).

Hope this helps!  If you have any questions, I’m just a keyboard away.  And once you get it all set up please let me know how it works for ya (and feel free to send me some pictures too! – I love seeing what folks come up with!)

 —

Julieanne

Silly Putty Enthusiast and

Photojojo Customer Support

Upon reading this email, I just wanted to hug the person who responded. They talked to me like I was their best friend in the world. They were nice, personal, helpful, and still professional. They also said that I can refund it, and the way they used very personal language like “snazzy” and “easy peasy” just made me know that I was an appreciated customer. This is customer service.

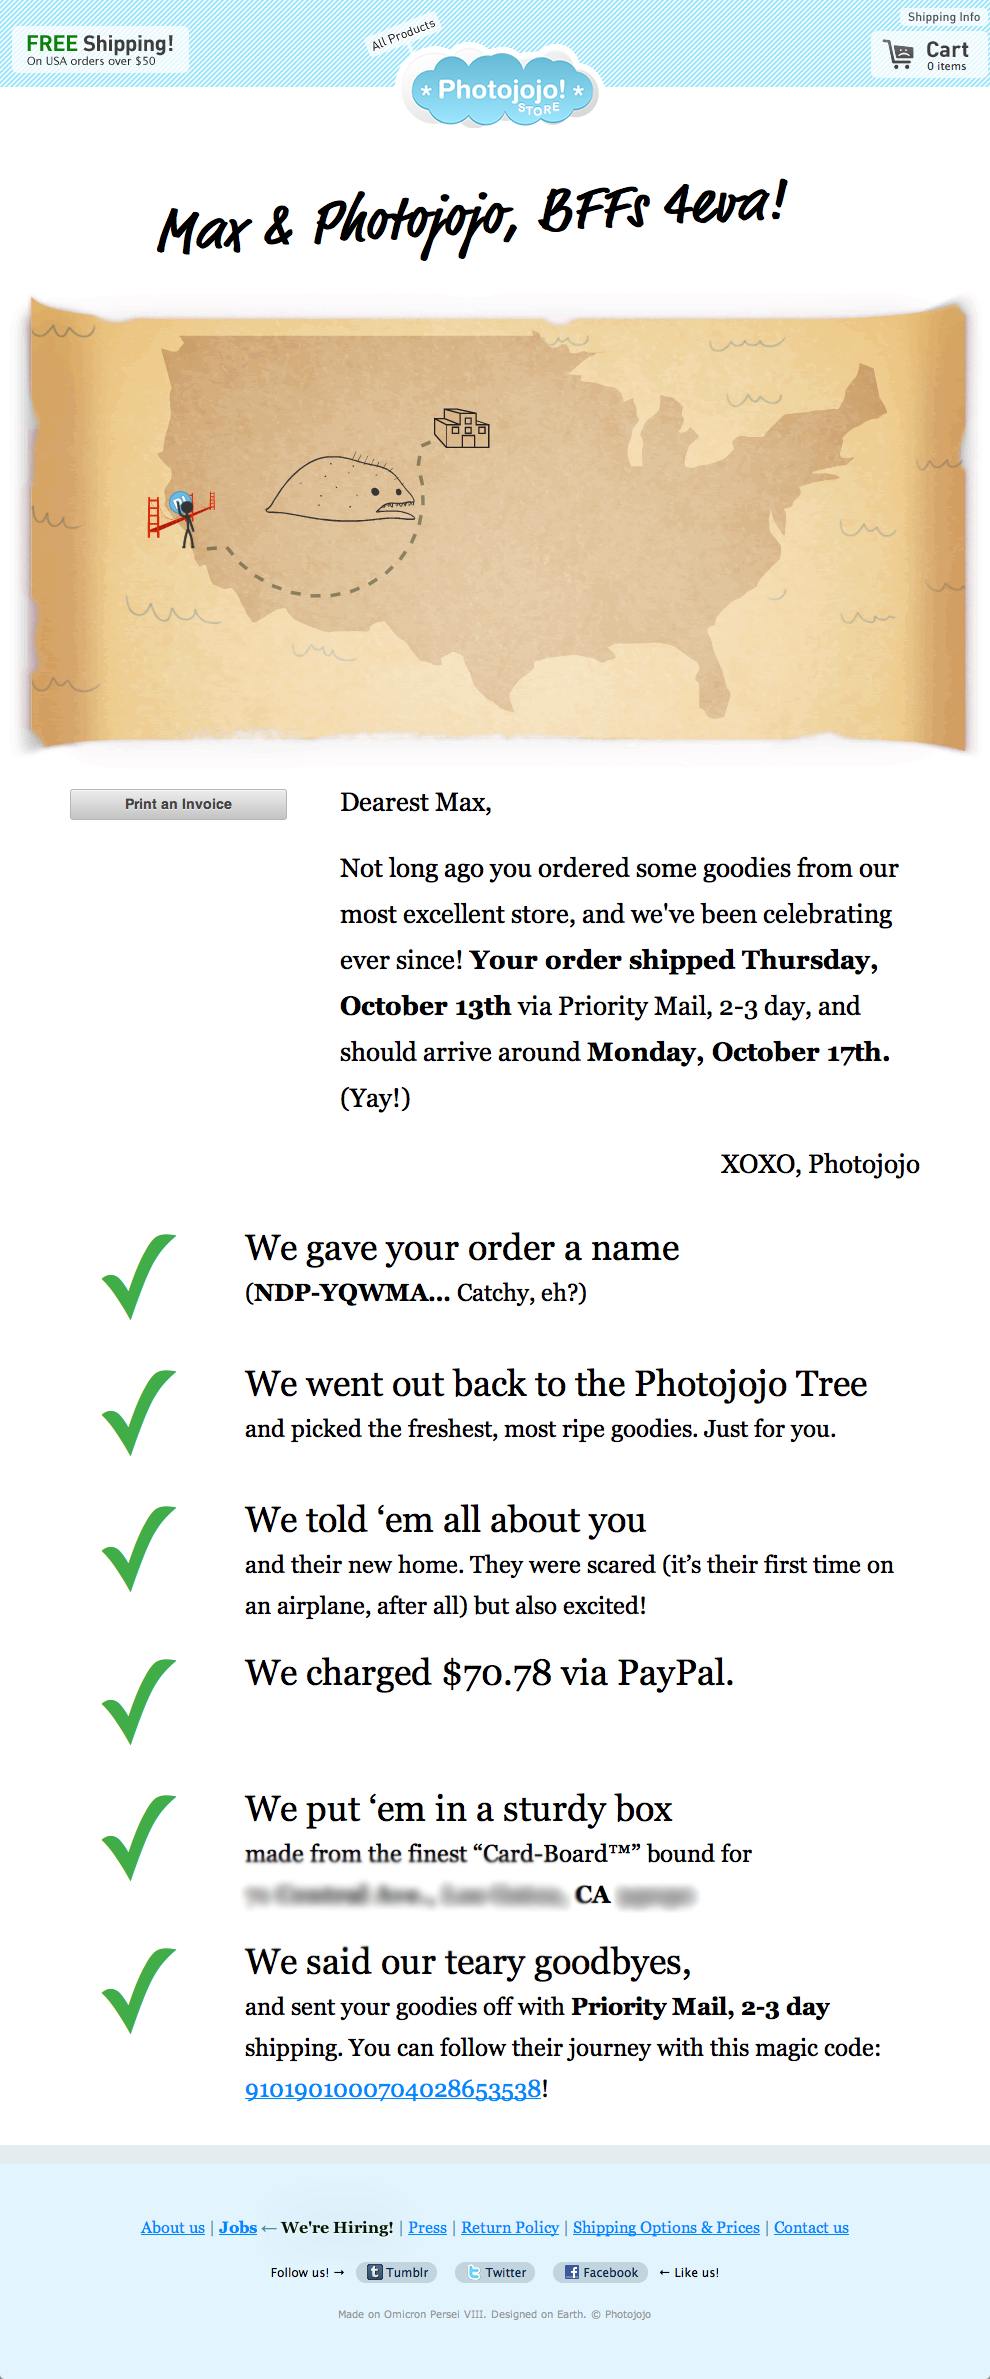
I then proceeded to order the lens, and I then got a shipping notification. It said that I could watch my order come on this “Shiny new page.” I clicked on the link, and here’s the page I got:


Look at that. It even gives me a little picture showing the package on it’s way to California. They used really cute language, like saying the went out to the “photojojo tree”. Every little word of this is spiced up and makes me feel warm and fuzzy inside.

  • Easy to use site
  • Personal yet still professional language
  • Quick, helpful, nice, personal response
  • Easy return policy
Who wouldn’t want to shop here?!
Why
We all buy things online. But whenever you buy something that you can’t use/try out immediately, there’s always a risk – it might not work, it could be broken, it could be the wrong model.

If we can trust the site, then we are far more comfortable with taking that risk, as if it were to ever happen that there was a problem we know that the site will be helpful. Machines can’t really manage returns, and when the person on the other end is mean and nasty you don’t even want to bother trying to talk to them.

That’s why with Photojojo, I want to order from them a ton of times just so I can get their snazzy emails that make me feel so nice and fuzzy and warm and happy and unicornaliscious. (See what I did there? Seems like something Photojojo might say.)

If you own a company, Customer Service should be your first priority, followed by quality of the product. After all, what’s the good of a great quality product – with the wrong part number that can’t be returned due to your awful customer service? You’ll end up like Mac Parts Online – with dissatisfied customers who will definitely not return.

Do your best to be a Photojojo – Be professional, personal, and make people want to talk to you, not just need to talk to you.

Instagram – with a DSLR

Instagram is an amazing iPhone application that can transform your normal iPhone photos into interesting, old-ish photos. Unfortunately, your iPhone doesn’t have the best camera that you could put your hands on.

Here’s two applications that will give you Instagram-like photo effects and filters, but you can supply your DSLR’s pictures!

Focus

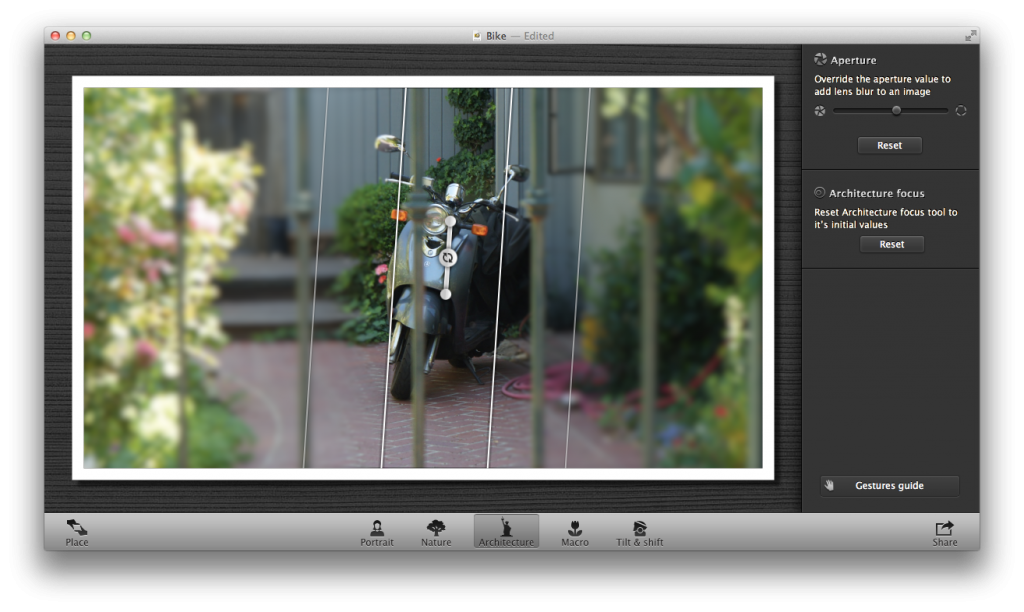
Focus is an application available from the Mac App Store for $5. The app basically allows you to add tilt-shift effects to your photo. It’s a very straightforward application, and I think I can basically sum up the controls in this screenshot.

First, open a picture in the app. Then, click “Place” in the bottom left corner. This will allow you to rotate, crop, and align your photo to your liking. Then, click on one of the options that are shown. I personally don’t understand why they had to add a bunch of options – I mean, why couldn’t they have just added a button for circular, a button for linear, and a slider for Vividness? The world may never know.

After you’ve selected one of those options, you can click and drag the focused area around and rotate it to your liking. Once you have it in a place you like, hit File > Export and save it as a JPEG. Now you have a tilt-shifty photo!

Lomo Express

Now that we have the tilt-shifty part of your photo complete, we need to add some filters. This will be done with another app from the Mac App Store that is available for a painful $13 – worth it I think so.

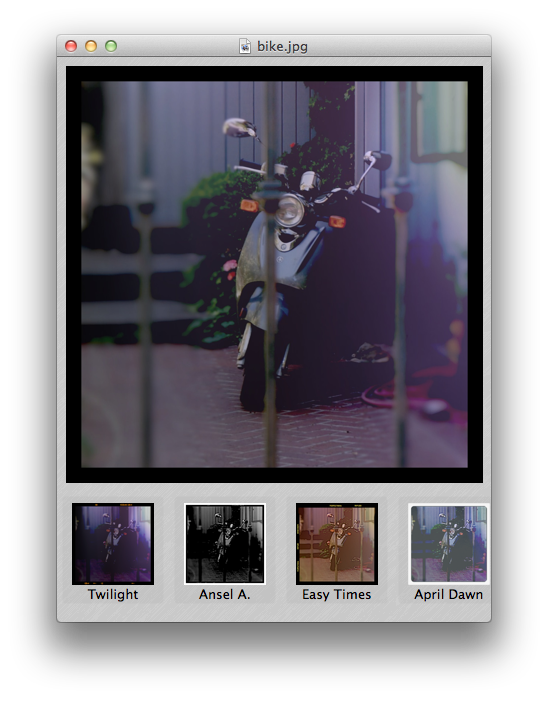
This is as bare-bones as you can make this application, as you open up your photo then choose what effect you want – then save it. Here’s what the app looks like:

There are 12 awesome filters to choose from, and it’s as easy as clicking on the one you’d like and bam, there’s your new photo.

When you’re done and you like the results, go to File > Save As and save it as a JPEG.

That’s it!

Conclusion

Your final picture will look like an instagram shot, but higher quality and resolution!

To go even farther, you can print them out on nice paper and post them around, like I did with instagram photos in this post.

Even though this will cost you $19, if you’re really into editing photos with tilt-shift and Lomo effects, this is the way to do it!

Click here to download Focus

Click here to download Lomo Express


Here’s a couple of photos that I have gotten out of this system.

Photojojo Mini Lenses


The iPhone can take some pretty dang good pictures. In fact, many different phones can take mind-blowing shots. But your little phone can do even more if you treat it to these mini-lenses from Photojojo!


Contents/Installation

There are three lenses available from Photojojo: 2X telephoto, 180 Fisheye, and a 0.68x wide/macro lens. I won’t go over individual pricing, but the whole pack is $50.

Installing the lenses is painless. In your package you’ll get a few tiny, metal magnetic rings. Undo the plastic on the adhesive side and stick it around the lens of your device. If you have an iPhone, however, you should probably put the ring on a case; the sleek glass doesn’t play well with their adhesive.

Now to use the lenses, you just attach the lens to the metal ring and it magnetically locks on. Neat!

2x Telephoto

For those times when you want to get closer to your subject, the 2x telephoto lens will do exactly what you’d expect. Unfortunately it will cause a tiny bit of distortion, but not enough to make a big difference.

Without, With

As you can tell by that comparison, the lens does a nice job of zooming in, but has a bit of distortion (visible near the door handle).

Fisheye

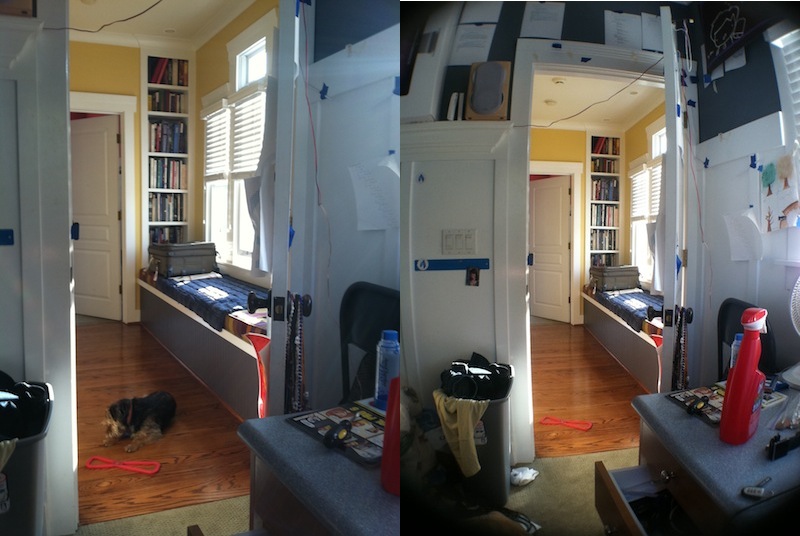
This lens I believe is my favorite. It can capture just about everything you can see without turning your head. If you want to really capture an entire scene, this is exactly what you need.

Without, With

Pretty cool, right? Unfortunately, this lens causes a particularly noticeable amount of vignetting, but I think that it adds a nice effect. If you want to get rid of it, you can always crop it with whatever application you desire, however you’ll end up losing a bit of the image.

Wide Angle / Macro

This lens confuses a lot of people. Is it wide angle or is it macro?!

Alone, the magnetic part of the lens is just Macro. However, there’s an adaptor that screws in to the macro lens to convert it to a wide angle lens.

The macro lens doesn’t zoom in at all. It just allows you to focus WAY closer to objects. Here’s a comparison – remember, I took the first picture as close as I could while staying in focus, then I took the second as close as I could while staying in focus. This lens does NOT zoom.

Without, With


Pretty cool, right? You can get ridiculously close to capture textures that previously went unnoticed. On the second picture, I’m holding my iPhone a tiny bit less than an inch away from the keyboard.

The wide angle addition to this lens isn’t very fancy, it just makes the picture a tiny bit wider. It will cause some straight lines to bend in odd ways, but it still comes in handy when wanting to capture wide shots without going crazy with the fisheye.

Without, With

Doesn’t that doorway look kind of round? As you can tell, it makes the picture a bit wider but can’t capture the amount (and distortion) of the wide angle lens.

Cool uses

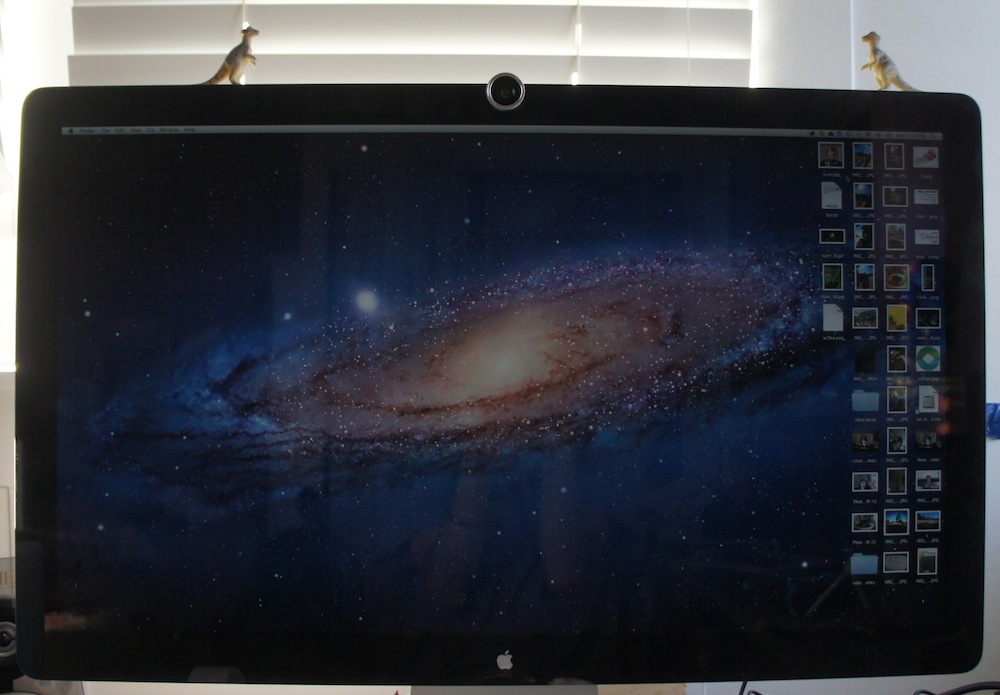
Yup, these work great with a phone camera. But there’s one use that I recently found – your webcam! It’s a small camera, just about as small as the one in an iPhone. Take a metal ring and stick it around, and you can use these lenses while video chatting! I personally have an LED cinema display, and although it makes my screen look a little funny, the results are totally worth it.

Here’s the display:

Ha! By the way, those things on top of my monitor are dinosaurs; you’ll get one with every photojojo order! I’ve ordered two things from Photojojo, so that’s why I have two dinosaurs.

Here’s what it looks like straight on:

Pretty cool, right?

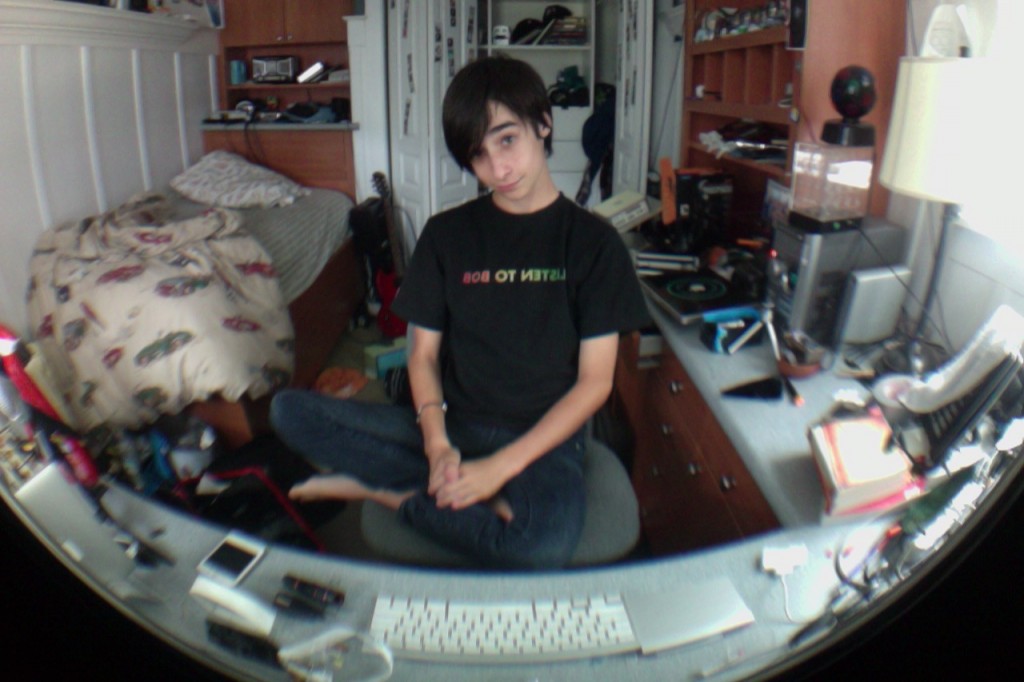
Here’s the results:

Sweet! You can even see my keyboard!

Conclusion

These lenses are quite handy, and because they work with anything you don’t have to worry about compatibility. The whole set of lenses is $50, and if you’re interested click here to be redirected to the photojojo store!

How-To: Create Instagram Photo Booth Strips in 3 Easy Steps

You’ve been using Instagram, the social network of quirky and cool pictures.

So now you have a profile with all these awesome pictures with comments, and all this other techy stuff.

But sometimes it’s nice to convert all that cool digital stuff into something analog.

And that’s why today, I’m going to show you how to make photo booth reminiscent photo strips.

You will need:

  • An instagram account with pictures
  • Photo paper
  • Photo printer
  • Rotary cutter, paper cutter, or at least scissors
Step 1: Get your photos

The first part of this project is to make strips of all of your photos.

Start out by going to http://instaport.me and downloading all of your pictures to your computer as a zip. Instaport is a simple service that allows you to download all of your instagram photos as JPGs for free.

Once you have a zip saved and you can view your instagram images, you might want to go through deleting the ones that you don’t want to be included in your photo strips.

Step 2: Print your Photos

The next step is to open all of them up in preview. Go into the instagram folder (the folder containing all of the JPG images from instaport) and press Command A. This will select all of your instagram photos. Then just double click anywhere in the window and you will eventually get a preview window with all of your images open.

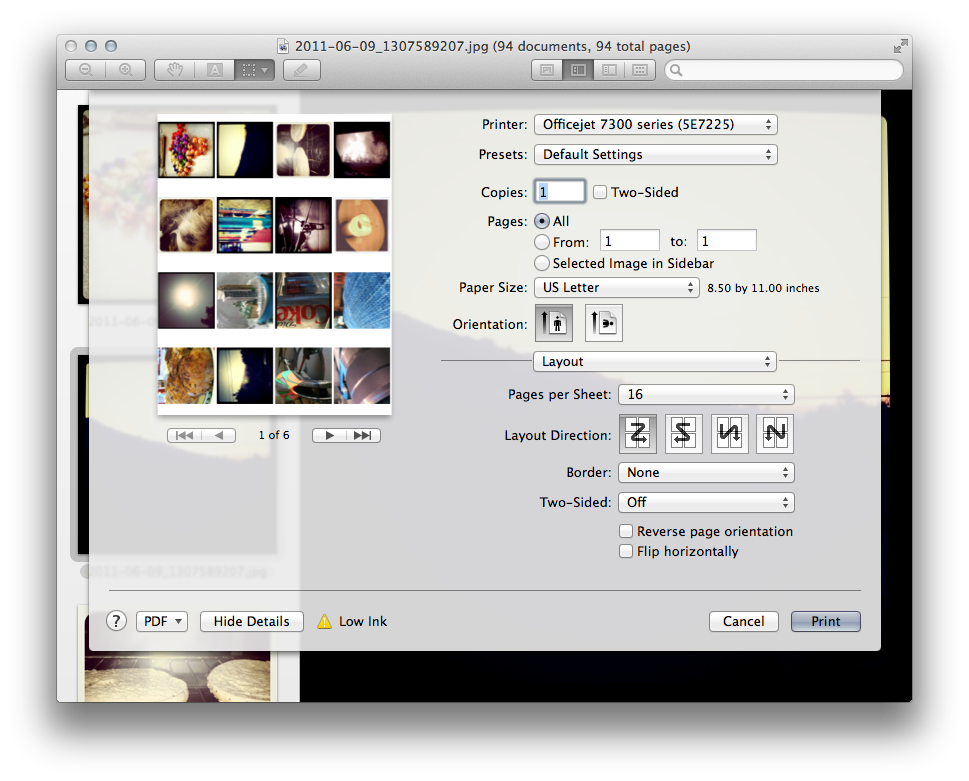
Next, press File>Print and configure the settings to look like so:

If possible, try to print borderless – your printer may or may not support this feature.

Next, hit the big Print button and let the magic happen. In a few minutes, you should have a few pages of instagram photos.

Step 3: Cut your Photos

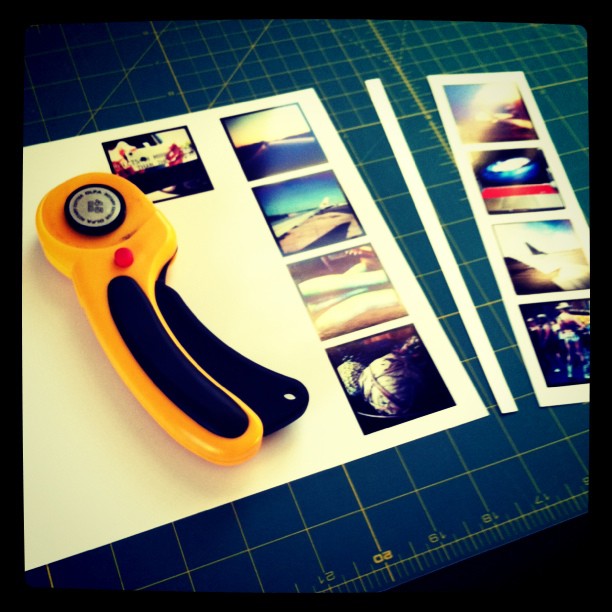
Get out your rotary cutter / paper cutter / scissors and cut them into even strips horizontally (so that you have strips of four). Here I’m using a rotary cutter to to cut the strips evenly and cleanly.

Step 3: You’re done!

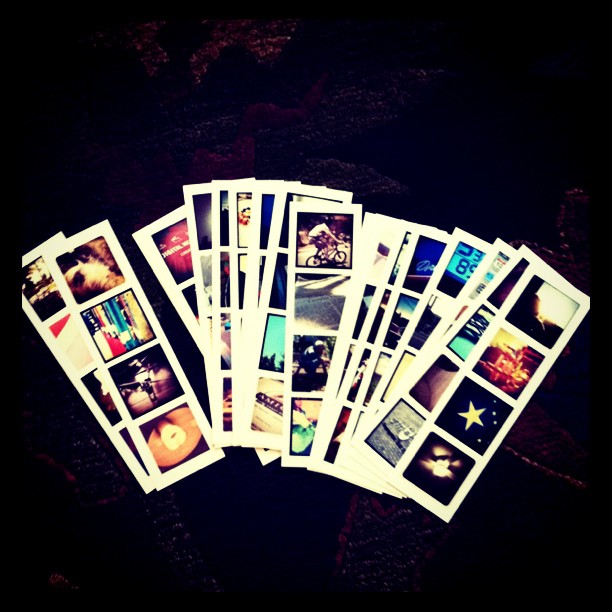
Once you’ve done that, you’ll have a ton of cool instagram photo strips.


Step 3.5: Do stuff with them

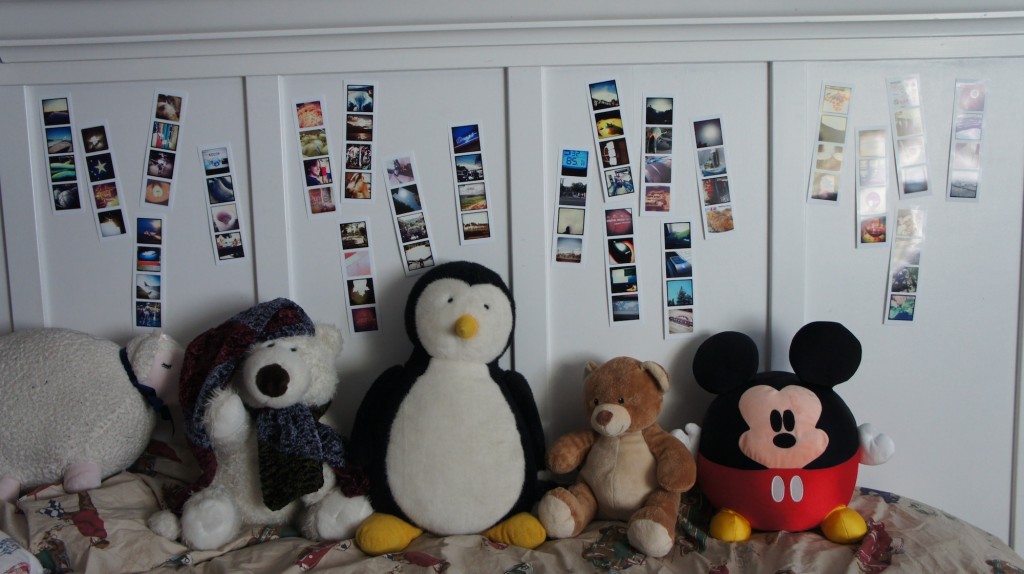
Well, now you have these cool strips! There’s tons of things you can do with them. Use them as bookmarks, give them to friends, collect them, hang them, use them as business cards, or my favorite: start an instant photo wall!

Also, feel free to follow me in instagram! My username is maxswisher.

Cooliris

We all have media we want to look at. These days, video and images are quite the hubbub. Cooliris is a way to “immerse yourself” into your content using a 3D wall.

Using it is very simple. Go to a google image or youtube search and click the cooliris wall button in the top right (in Safari). Your google image search will be displayed on a 3d wall. To go across the wall, you can

  • Click and dragx
  • Click the arrows at the bottom of the screen
  • Click and drag the blue doohickey to the left of right
  • Horizontally scroll with your mouse

If you find an image you like, you can click on it to view it and get more information about it.

This process works on many different media sites including flickr, YouTube, and more.

When you are in the cooliris wall you can search these sites instantly with the search bar on the top. You can also use the sidebar on the left to navigate through different sources like news, entertainment, featured, etc. You can even view pictures on your computer!

Here’s a video showing cooliris in action:

Sorry, the video isn’t in good quality.

Currently, I am an intern at Cooliris doing bug testing a brainstorming. I did in fact do a review of Cooliris a long time ago, but many new features have been added (and more are on the way).

Cooliris homepage

Cooliris download page

Change your Google background

If you’ve been sing bing instead of google (I sure hope not, google overpowers all), you may have noticed that there is a beautiful background picture that changes daily on the hmepage. Google is finally allowing some more customization, and you can add your own picture to the google background! Here’s how:

1. Sign in to google

Go to google.com and click sign in on the top right. Enter your google username and password and you will be signed in and redirected to the main Google page.

2. Select a photo

If you want to upload a photo from your computer, it needs to be more than 800X600. In the bottom left, click change background image. You will be given the options to get the photo from your computer, picasa albums, or public feed stuff.

You can click browse to select a file on your computer’s hard drive. Then click Upload and your photo will be added to a picasa album and applied behind your Google logo. But if you don’t find a background you think is fitting, you can select a picture from the picasa public gallery and picasa editor’s choice.  Now beware that the Google Logo will be white, so if you want it to stand out make sure you select a picture that is not white or yellow. Now beware that the picture will only appear if you are logged into your account.