The Sphero

When I arrived at my first CES, one of the first things that I saw and experienced in depth was the Sphero. They had a medium sized booth, with a little track and some ramps. There were all of these tiny little white balls rolling around on it, and I must say – it looked pretty cool. A chat and a demo later, I saw what it was. It was a little ball that rolled around and was controlled by your iPhone or iPad. That was about it. The people at the booth told me that they would be evolving it and making it into an API for any developer to use, and that the product would be sold eventually for under $100. The prototypes at the stand were functional, but barely. A small drop and they would fall apart. Upon pressing the “boost” button, they would go crazy and lose their bearings. Not to mention that those were all they had with them, so when one broke down beyond repair they were simply down one. It looked promising. The concept was cool, it seemed flexible, it could definitely be something cool. After all, it was just a ball – which left plenty of room for the imagination of customers and developers.

It’s one year later. I’m back at CES. Upon walking into the convention center, I can see a giant rotating sphere that seems to be a giant model of the sphero. Upon arriving under said banner, I saw something big – much bigger than the year before. The booth was much larger, there were tons of spheros everywhere, and there were video presentations on TV monitors and banners and everything. Much, much, MUCH bigger than last year. It looked like they had really grown. Here they had these balls that were made out of a very solid plastic, had inductive chargers, sphero logos embedded on each one, and none of them were out of control. Heck, they were rolling them down concrete stairs! I checked over and they had really gotten somewhere.

The Concept

As I said before, this thing is a ball. It now has open APIs that any iOS or Android developer can use to integrate the sphero with their apps. The range of applications has grown, and there are apps available that can make the sphero a fake golf ball or even take advantage of the sphero’s accelerometer and gyroscope to use it as a game controller. The range of applications is constantly growing, so buying a sphero isn’t just buying a ball – it’s like buying a phone, who’s functionality will keep growing with more applications and updates.

The Ball

The Sphero itself doesn’t take up much space. It’s white, hard plastic that has no spaces or anywhere that the plastic snaps together or comes apart. In fact, it doesn’t have a charging port. If one were to look inside of a sphero (which would be very difficult considering that they would need to saw or melt open the outer shell), he would find an array of devices. There’s some motors as well as a main motherboard which contains a compass, accelerometer, gyroscope, bluetooth card, and a bunch of other robotic computing stuff. They would also find the multicolor LED that lights up the ball in any color you want. The sphero contains a standard lithium-ion rechargeable battery, which is charged through an inductive charger. For those of you who don’t know what an inductive charger is, it’s basically a charger that charges a battery through a material without having any physical contacts. These are sometimes found in electric toothbrush chargers, emergency flashlight chargers, and more recently on electronic devices such as the Palm Pre or the duracell powermat. To charge the sphero, just set it in its dock with the heavier part of the sphero on the bottom. Like magic, the sphero will start charging. Cool! To wake the ball up, just shake it. Yup. No switches here, just shake it as if it were a two week old container of orange juice and it will light up and be ready to play. Set it down on the ground, open up your iOS or android device, and start rolling. The sphero connects to your device through bluetooth. A user will notice a tail-like figure on the top of it. This shows the orientation of the sphero relative to the control mechanism in the application. If one picks up the sphero and spins it, she would notice that the mechanism inside would constantly adjust to maintain the set orientation. That’s part of the robotics at work. Overall, the sphero is one intelligent, intuitive ball.

The Interface

Sphero provides a few apps to demonstrate the basic functionalities of the sphero. The main app, Sphero Drive, simply allows the user to drive the sphero around. Here you won’t find any steering wheels or throttle nonsense – just a circle with a little sphero-shaped control in it. This eliminates the confusion that often comes when you’re driving a device towards you. With a steering wheel, it ends up becoming reversed, but with this interface, it’s not a problem. Put two fingers on the screen and rotate them, and you’ll see a blue dot on the sphero. Point it right towards yourself, then pushing the sphero in the app forward will cause the sphero to roll forward. Pushing it right will make it roll right. It’s as simple as that.

Apps

At the moment, Sphero has been releasing many different apps. One of them is the standard “Sphero Drive” application that I was mentioning up there. Others like Chromo use the sphero as a controller, and one app allows the user to play golf with it. At the moment, there are many different applications being developed and there’s always new ones available. Conclusion The Sphero is available from both Sphero’s website and now many brookstone stores for $130. I will say, that it is not a cheap toy – but think of it as a console, where there’s always new games out that you can buy. If you’re a developer, you can use Sphero’s open API to integrate it into your applications for free. Check out the sphero website for available apps, purchasing the Sphero, and using their free API. http://gosphero.com

P.S. Thank you Sphero for sending me the finished product!

Spotify Answers our Prayers: the Spotify iPad app!

Look at the beautiful artwork!

It’s about time.

I have been craving this exact item on the menu for the longest time, and finally Spotify has granted our wishes.

Previously, it was necessary to use the iPhone application on the iPad, which was disappointing as spotify could have done so much more with the large screen real estate.

The new iPad Spotify app is really the new Android Spotify app‘s older brother. It features a similar interface with  all of your standard Search, New, Inbox, and other menu functions in a left menu. It is also similar to the Facebook and Twitter iPad apps thanks to it’s clean, sliding panels.

Spotify integrates a lot of album artwork, with their signature two-by-two paneling of playlist album art.

If you want Spotify on your iPad, it is a free update for those who had the iPhone app installed previously, or you can go to this iTunes store link.

Thank you Spotify!

Instagram – with a DSLR

Instagram is an amazing iPhone application that can transform your normal iPhone photos into interesting, old-ish photos. Unfortunately, your iPhone doesn’t have the best camera that you could put your hands on.

Here’s two applications that will give you Instagram-like photo effects and filters, but you can supply your DSLR’s pictures!

Focus

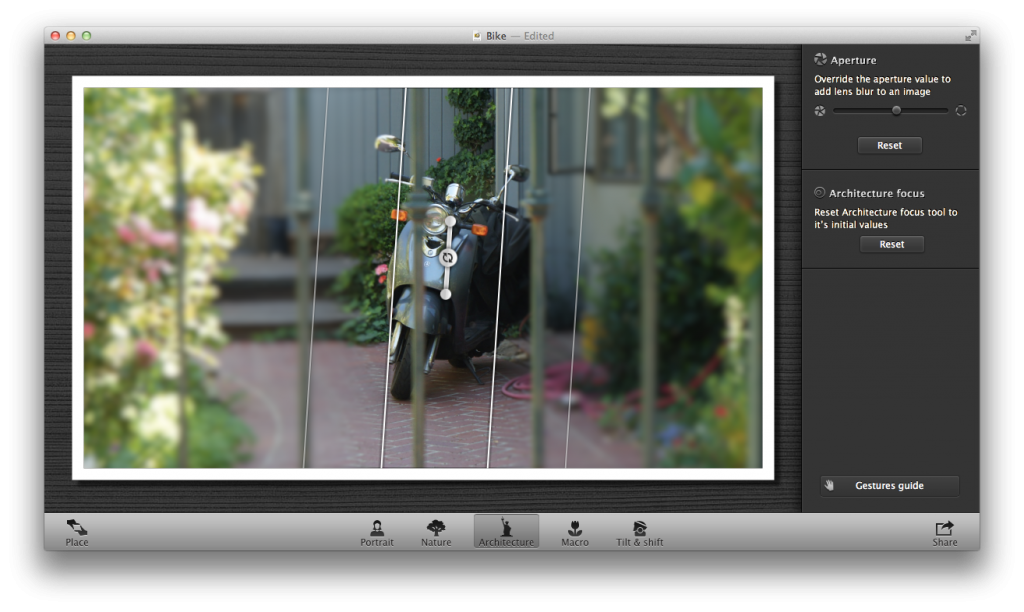
Focus is an application available from the Mac App Store for $5. The app basically allows you to add tilt-shift effects to your photo. It’s a very straightforward application, and I think I can basically sum up the controls in this screenshot.

First, open a picture in the app. Then, click “Place” in the bottom left corner. This will allow you to rotate, crop, and align your photo to your liking. Then, click on one of the options that are shown. I personally don’t understand why they had to add a bunch of options – I mean, why couldn’t they have just added a button for circular, a button for linear, and a slider for Vividness? The world may never know.

After you’ve selected one of those options, you can click and drag the focused area around and rotate it to your liking. Once you have it in a place you like, hit File > Export and save it as a JPEG. Now you have a tilt-shifty photo!

Lomo Express

Now that we have the tilt-shifty part of your photo complete, we need to add some filters. This will be done with another app from the Mac App Store that is available for a painful $13 – worth it I think so.

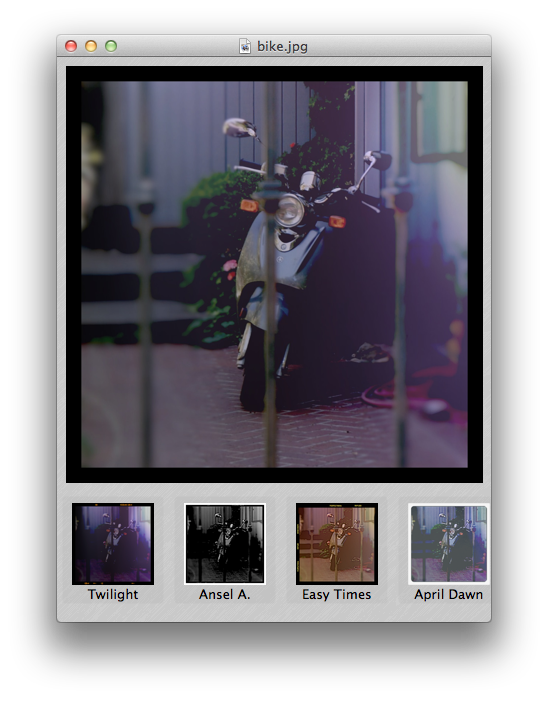
This is as bare-bones as you can make this application, as you open up your photo then choose what effect you want – then save it. Here’s what the app looks like:

There are 12 awesome filters to choose from, and it’s as easy as clicking on the one you’d like and bam, there’s your new photo.

When you’re done and you like the results, go to File > Save As and save it as a JPEG.

That’s it!

Conclusion

Your final picture will look like an instagram shot, but higher quality and resolution!

To go even farther, you can print them out on nice paper and post them around, like I did with instagram photos in this post.

Even though this will cost you $19, if you’re really into editing photos with tilt-shift and Lomo effects, this is the way to do it!

Click here to download Focus

Click here to download Lomo Express


Here’s a couple of photos that I have gotten out of this system.

Mac OS X Lion

Two days ago, I wrote a post saying that Lion was coming the next day.

Right again.

We’ve been waiting to hear the mighty roar for quite a while, and it’s finally audible to all who desire to hear its beautiful outpour (too far?).

Mission Control

Mission Control

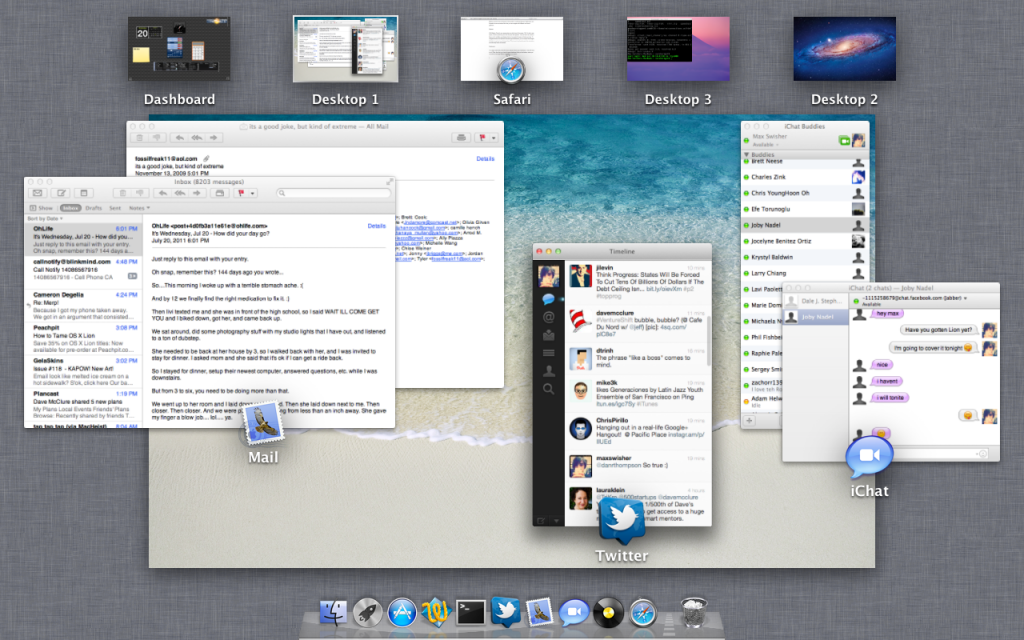
Mission control is the real big part of this update. It combines Spaces, Dashboard, and Exposé into one convenient view that you can navigate with different multi-touch gestures.

To access Mission Control, just swipe up with three fingers.

Spaces:

With Mission Control, your spaces show up at the top of the screen. (Tip: To add a new space, hold the option key and click the plus that appears – this one took me a while to figure out.) In addition, applications that you’ve made full screen will show up here. To navigate between the Spaces/Fullscreen apps/Dashboard, you can swipe three fingers left/right at any time to go between them. This is one of my favorite parts; the animations are extremely fluent and smooth.

Dashboard:

You might notice that on the left of your spaces, there’s your dashboard – that’s all there is to it! Other than that, you have the same dashboard that you had before, where you can add and arrange different widgets for your needs.

Exposé:

As you can tell by the picture above, all of your running applications in your current space will group and display with an icon and a label. It’s just like the previous exposé, with a couple of little visual upgrades.


As I mentioned, there is now support for full-screen apps. I could make a completely separate section for this, but what is there to say? You can click a little icon in the top right and the app will take up the whole screen. Whoopdidoo!

Launchpad

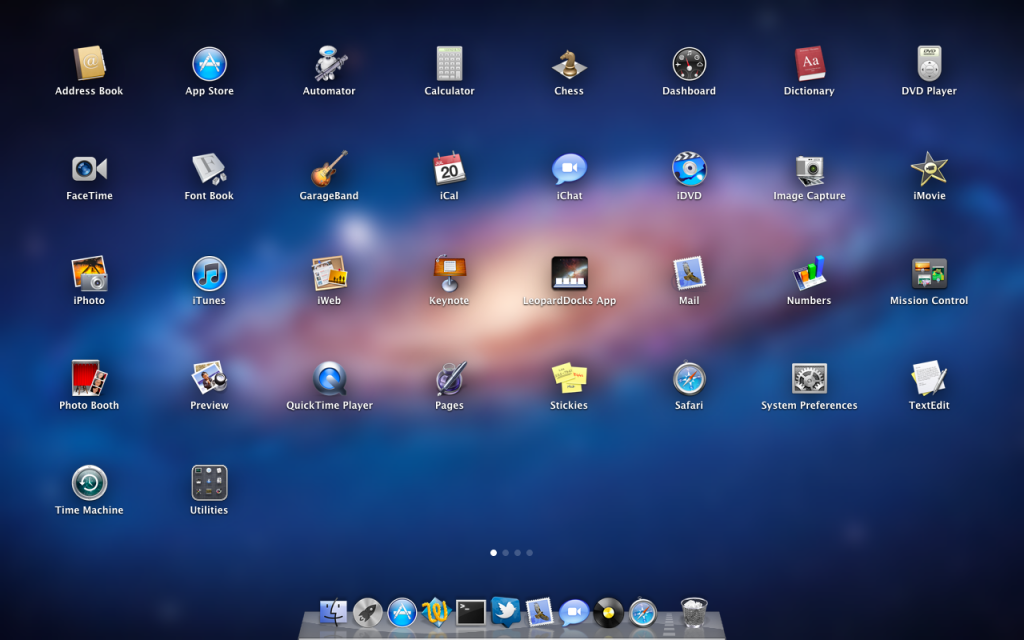
Launchpad is basically the iOS home screen for mac. You’ll get a little rocket icon in your dock, and clicking it brings up Launchpad which looks a bit like this:

Launchpad


You can swipe between the screens with two fingers. If you’ve ever used an iOS device, you know how this works: click and hold to rearrange the icons, or even move them into folders. You can even remove an app by clicking the X. Looks like iOS to me.

Versions, auto-save

I’m not going to cover this in too much detail.

Versions will keep track of all of your changes in your documents, and if you want to revert to an older version or get older elements, you can scroll through different “versions” of your document. Unfortunately, this isn’t available in many applications yet – mostly just the iWork suite – but should become more available as apps are updated to be compatible with Lion.

Auto-save is fairly self-explanatory: Your documents will be automatically saved.

Conclusion

There’s TONS of other features in Lion, and I’ll be posting different tips/tricks as I find them. There’s TONS of other new things in Lion, like a new prettier Mail app and more effects in Photo Booth – however these are small improvements. You can read more about all 250+ little new features over here.

Where can I get it?!

Unlike previous versions of OS X, this update won’t come on a disc. Instead, just go to the Mac App Store and Lion will be in there for $30. You can download and install instantly (time may vary, depending on your internet speed of course). Click here to open Lion in the Mac App Store.

Enjoy the roar of the lion.

RAWR!


Integrate Google Voice into Built-in Apps

So, you’ve been using Google Voice for a while now. Everyone is switched to your new number, and everything works fine. But there’s one drawback: to send messages, you need to open the Google Voice app. Unfortunately, that google voice app is kinda buggy. Then, you have to hide the messages app so you don’t accidentally send messages with it instead of Google Voice.

However, if you’ve jailbroken, there’s a plugin that will allow you to integrate Google Voice into the Messages app.

To download it, Open cydia and search for SMS GV Extension. Install the first result.

You’ll get a trial, but it’s a good idea to get a license as a couple of times a day it will remind you asking you to buy a license. Purchase isn’t as simple as it should be, but you can read the detailed purchase method by clicking here.

Aside from the purchase of a license, setup is unfortunately not as simple as it should be.

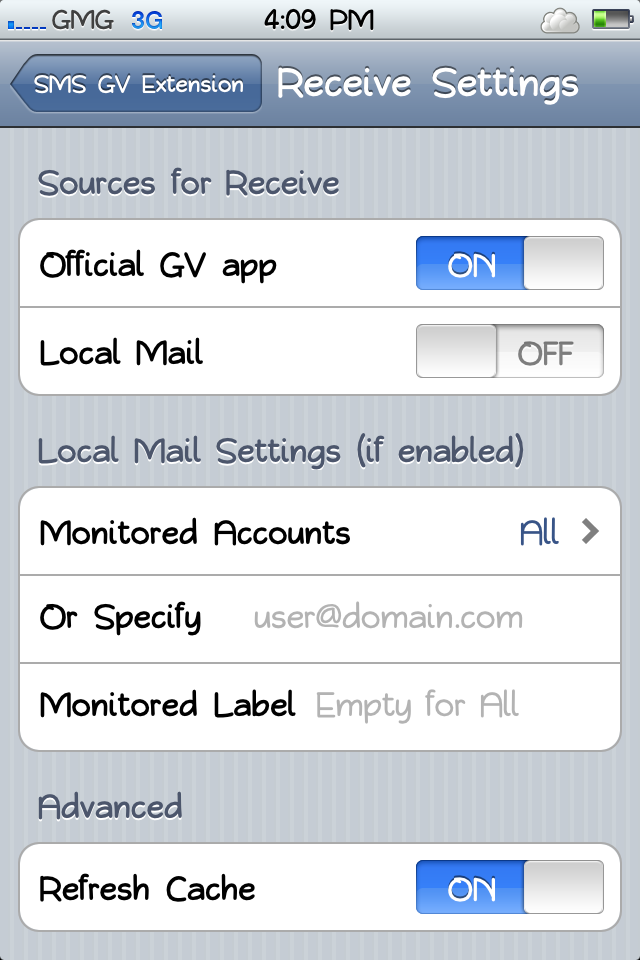
Open Settings>SMS GV Extension. Here, put in your Google credentials and turn the send box to on.

That was easy.

For receiving, you’ll actually have to have the official app installed and working – so don’t go uninstalling just yet!

Go into Receive settings and turn on Official GV App.

You should now be able to send and receive texts through the Messages app. Functionality wasn’t too reliable, but after a little while it started working 99% of the time.

Okay, now you have Messages working. But you still want to get rid of the darned Google Voice app!

Instead of moving it to a folder somewhere secret, you can actually use a free app from Cydia to hide it.

The app is called SBsettings. It’s primary use is that you can swipe across the status bar (the bar with the time and battery at the top) and toggle WiFi, 3G, and more. But it can also hide apps.

To download it, just search SBsettings in Cydia and install the first result.

Once that’s installed, swipe across your menubar and click “more.” Here, scroll down and find “Hidden Apps.” Scroll down in the list and turn off Google Voice. You’ll never know it was there!

So now you’ve gotten messages done. But what about phone?

It’s actually much easier to get the phone to work.

Search in Cydia for GV Phone Extension. It’s made by the same creator as the Messages integrator, and it’s also the same registration and price.

Go into Settings>GV Phone Extension and enter your credentials.

That’s all the setup that’s needed!

That’s how to get Google Voice totally integrated into your phone. Your original phone number will still work, but you won’t be able to tell what the difference is between them!

If you have the Verizon iPhone 4, I would usually direct you to my post on easy jailbreaking. However, JailbreakMe.com is back! To jailbreak, just go to jailbreakme.com and you’re set from there. Easy!

The Google voice app is a bit buggy, but you no longer have to suffer. Enjoy! 🙂

Using AirPort express for AirPlay alongside a Time Capsule

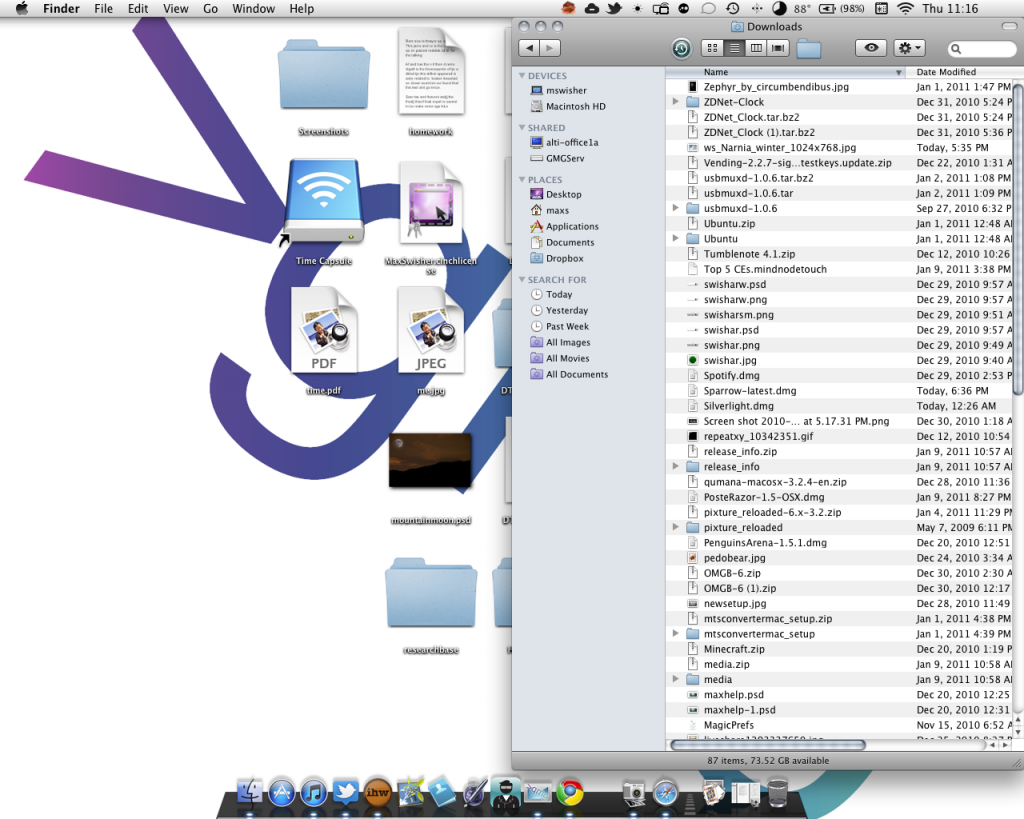
You may remember that a long time ago I reviewed the Time Capsule. It’s a wonderful wireless AP, and all of my data is totally safe.

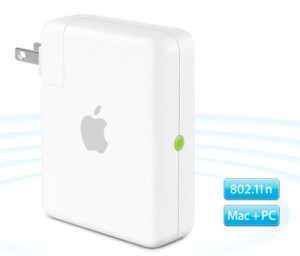
But the Time Capsule doesn’t have AirPlay. On AirPort extremes and expresses, there is a headphone jack, and when connected, you can wirelessly stream your music to your speakers from your iDevice.

I’ve had an airport express for a long time, but I stopped using it when I got my time capsule. After hearing about the AirPlay improvements, I decided to break the thing out.

The AirPort Express creates its own WiFi network, and if I’m connected to that then I won’t be able to backup to my time capsule. Luckily, it is now possible to plug the AirPort Express directly into the Time Capsule, and have them both work as the same wireless network. This means that I can stream music AND backup at the same time!

With this all settled, you will now see the AirPlay icon appear on all of your devices. From this point on, it’s all extremely easy. Just tap the icon and up pops a menu of all AirPlay devices on the network. Tap the speaker system you wish to stream to Voila, we have wireless music!

If you’re on a computer, however, you can only stream your music from iTunes. That is, of course, unless you have an app called AirFoil.

This allows any application on your computer to output sound to your AirPlay speakers.

However, there’s a small issue.

There is a two second delay between when you cause the sound to happen and when it actually comes out of your speakers. On the iDevices, the movies are in sync because they are decoupled 2 seconds back. When you change the volume on your computer, you will see the small notification popup, yet you won’t hear anything for two seconds. Quite annoying.

For videos, AirFoil has included the “AirFoil Video Player.” I don’t know if it’s very good, as I can’t even get it to work without freezing and crashing.

In general, this system is simple and functional. But if you’re trying to stream content from your computer, you will notice an extremely distinct delay. It’s not like that audio quality isn’t good, so all audio (including pandora and other streaming services) work fine.

AirPort Express

AirFoil

Printopia

With the release of iOS 4.2 came AirPrint. AirPrint is a plugin that app developers can use to print directly from an iPad to a wireless/LAN printer. It’s a great idea, and when I have an email on my iPad I’d love to print I won’t have to open up my computer.
One problem though: barely any printers are supported. So this leaves most of us in the dust for printing from an iPad.
But here comes Printopia. Printopia is a system preference pane that turns your Mac into an AirPrint server. This allows you to print from your iPad to any printer connected to your computer, including USB printers.

Here’s a video that I made showing how it works.

If you look closely on the screen where I choose the printer, you’ll probably notice that it says “Send to Mac.” Select this printer, and your document will instantly show up in PDF format on your screen, and you will find a PDF file under Documents/Printopia of what you printed. This can be extremely convenient if you have written a notebook on your iPad when at a conference/event, then you can quickly offload all of the pages in a single PDF document onto your computer. If you print to “Send to Dropbox,” the same thing will happen but the PDF will end up in your dropbox. (You need to have Dropbox installed on your Mac first.)
Printopia is only available for Mac and will cost you $10. There’s a full featured 7 day free trial, but for this quality and simplicity for something so functional, I think it’s work it.

ecamm.com/printopia

Cinch for Mac

People who use Windows 7 have become very fond of the “snap” feature. What it allows you to do is drag a window to the right edge of the screen and when you let go, it will fill exactly the right half. Drag it to the left side and it will fill the left half. Drag it to the top and if will take up the whole screen.

This is an extremely useful tool, that has finally bridged to Mac.

The app that does this is called Cinch. Now everything I described up there, it does.

Simple, right? All you have to do is drag and let go.

What would you use this for? Here are a couple of ideas.

When doing research, you could have a web browser on the left side and an open document editor on the right. that way you can se the research information and type it up in your document all at the same time.

Another use is moving files. Drag one browser to one side and one browser to the other, and move your files inbetween.

Move one terminal window to one side, one terminal to the other.

Now this doesn’t work for windows that aren’t resizable, but it does work for pretty much every other app.

You can get a demo of this for free here (which will show a pop-up every once in a while) or you can buy the full version for a mere $7. Enjoy!

Cockpit

I got Cockpit for free at macbuzzer, and how about I get straight to the point: I don’t know why anyone would pay for this app.

I’m mobile, so i can’t put in any screenshots. 🙁

Basically, cockpit is an app controller. For example, you can click buttons for forwards, backwards, volume, play, pause, etc. To get to this, you just click the icon in the menubar and the little window pops up. You can drag the window anywhere on your screen.

Sadly, the applications it can control is limited. It comes with built-in support for keynote, mail, iTunes, and a couple of other things. You can create your own controls and submit them for download on cockpit’s site, but there are only two available right now.

The app costs $15, being the money saver I am, it’s not worth it. You could pay 15 to access iTunes controls through your menubar, or you could just click the dock icon in the same amount of time for free. If I see you using this, I just might have to kick you for wasting your money. However’ you’ve pretty much kicked yourself for wasting the money anyway. 😉

Overall, the idea isn’t too bad. But being so new and unheard-of, it’s not going to become a hit anytime soon.

As someone at the teens in tech conference said, your idea needs to be new and useful, or do something else better, or else it will fail.

The idea has been heard of for long: I mean, since the history of iTunes right? Those play buttons? And it’s not very useful especially for fifteen buckaroos.

I’m sorry, but this is one of the few bad app reviews ill do. 😉

You can check it out (I don’t recommend getting it) at cockpitapp.com.

TinyGrab

[youtube=http://www.youtube.com/watch?v=GMzqEykTO-8]

This isn’t a free application, but it is definitely convenient.

I got this application fron MacHeist which is a service that gives away free software and donates a tonto charity. Plus, it’s completely legal.

So, you want to share something on your screen with your friends.

You would do -Shift-4, selectwhat part of the screen you want, release, and put the file automatically saved to your desktop in the email or IM application. Then you have to wait for it to transfer, which is alwys slower than FTP or HTTP connections.

In fact, my skype transfers usuallly run 20kbps. SLOW.

TinyGrab solves the problem. Launch TinyGrab, and it will show up as a little cloud in the menubar.

Now, just take a screenshot as you usually would.

You can also use -Shift-3 to take a picture of your whole screen, or -Shift-4 and then when you get the cross-hair press space to select a whole window to take a screenshot of.

Next thing you know, the icon in the dock will change and have a blue arrow on it, and will have an orange arrow on the menubar icon.

The dock icon will look like this:

TinyGrab Uploading

And momentarily, it will make a “Boodeep!” sound, and the icon will look like this for a short moment before returning to normal.

TinyGrab is done uploading

So, it’s on the internet. Where is it now?

The answer is in your clipboard… literally.

After the icon has a chckmark, than go into any application and press -V.

The link will be http:/grab.by/*.

Th HTTP connection is much faster than the connection through skye transfer or IM.

TinyGrab is about 12 dollars, or exactly £10.

TinyGrab Homepage

TinyGrab Free Trial Download