The Sphero

When I arrived at my first CES, one of the first things that I saw and experienced in depth was the Sphero. They had a medium sized booth, with a little track and some ramps. There were all of these tiny little white balls rolling around on it, and I must say – it looked pretty cool. A chat and a demo later, I saw what it was. It was a little ball that rolled around and was controlled by your iPhone or iPad. That was about it. The people at the booth told me that they would be evolving it and making it into an API for any developer to use, and that the product would be sold eventually for under $100. The prototypes at the stand were functional, but barely. A small drop and they would fall apart. Upon pressing the “boost” button, they would go crazy and lose their bearings. Not to mention that those were all they had with them, so when one broke down beyond repair they were simply down one. It looked promising. The concept was cool, it seemed flexible, it could definitely be something cool. After all, it was just a ball – which left plenty of room for the imagination of customers and developers.

It’s one year later. I’m back at CES. Upon walking into the convention center, I can see a giant rotating sphere that seems to be a giant model of the sphero. Upon arriving under said banner, I saw something big – much bigger than the year before. The booth was much larger, there were tons of spheros everywhere, and there were video presentations on TV monitors and banners and everything. Much, much, MUCH bigger than last year. It looked like they had really grown. Here they had these balls that were made out of a very solid plastic, had inductive chargers, sphero logos embedded on each one, and none of them were out of control. Heck, they were rolling them down concrete stairs! I checked over and they had really gotten somewhere.

The Concept

As I said before, this thing is a ball. It now has open APIs that any iOS or Android developer can use to integrate the sphero with their apps. The range of applications has grown, and there are apps available that can make the sphero a fake golf ball or even take advantage of the sphero’s accelerometer and gyroscope to use it as a game controller. The range of applications is constantly growing, so buying a sphero isn’t just buying a ball – it’s like buying a phone, who’s functionality will keep growing with more applications and updates.

The Ball

The Sphero itself doesn’t take up much space. It’s white, hard plastic that has no spaces or anywhere that the plastic snaps together or comes apart. In fact, it doesn’t have a charging port. If one were to look inside of a sphero (which would be very difficult considering that they would need to saw or melt open the outer shell), he would find an array of devices. There’s some motors as well as a main motherboard which contains a compass, accelerometer, gyroscope, bluetooth card, and a bunch of other robotic computing stuff. They would also find the multicolor LED that lights up the ball in any color you want. The sphero contains a standard lithium-ion rechargeable battery, which is charged through an inductive charger. For those of you who don’t know what an inductive charger is, it’s basically a charger that charges a battery through a material without having any physical contacts. These are sometimes found in electric toothbrush chargers, emergency flashlight chargers, and more recently on electronic devices such as the Palm Pre or the duracell powermat. To charge the sphero, just set it in its dock with the heavier part of the sphero on the bottom. Like magic, the sphero will start charging. Cool! To wake the ball up, just shake it. Yup. No switches here, just shake it as if it were a two week old container of orange juice and it will light up and be ready to play. Set it down on the ground, open up your iOS or android device, and start rolling. The sphero connects to your device through bluetooth. A user will notice a tail-like figure on the top of it. This shows the orientation of the sphero relative to the control mechanism in the application. If one picks up the sphero and spins it, she would notice that the mechanism inside would constantly adjust to maintain the set orientation. That’s part of the robotics at work. Overall, the sphero is one intelligent, intuitive ball.

The Interface
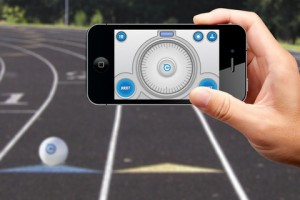
Sphero provides a few apps to demonstrate the basic functionalities of the sphero. The main app, Sphero Drive, simply allows the user to drive the sphero around. Here you won’t find any steering wheels or throttle nonsense – just a circle with a little sphero-shaped control in it. This eliminates the confusion that often comes when you’re driving a device towards you. With a steering wheel, it ends up becoming reversed, but with this interface, it’s not a problem. Put two fingers on the screen and rotate them, and you’ll see a blue dot on the sphero. Point it right towards yourself, then pushing the sphero in the app forward will cause the sphero to roll forward. Pushing it right will make it roll right. It’s as simple as that.

Apps

At the moment, Sphero has been releasing many different apps. One of them is the standard “Sphero Drive” application that I was mentioning up there. Others like Chromo use the sphero as a controller, and one app allows the user to play golf with it. At the moment, there are many different applications being developed and there’s always new ones available. Conclusion The Sphero is available from both Sphero’s website and now many brookstone stores for $130. I will say, that it is not a cheap toy – but think of it as a console, where there’s always new games out that you can buy. If you’re a developer, you can use Sphero’s open API to integrate it into your applications for free. Check out the sphero website for available apps, purchasing the Sphero, and using their free API. http://gosphero.com

P.S. Thank you Sphero for sending me the finished product!

Apple Says Things at WWDC

So Apple had some fun at the WWDC Keynote this year.

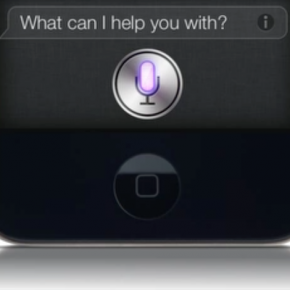
Siri did stand-up comedy to open.

No really, I’m excited about the new Samsung. Not the phone, the refrigerator.

I must admit, that was pretty funny.

First of all, Apple updated its notebooks. The MacBook Air finally got a speed boost, the MacBook Pro got a speed boost, and the 17″ MacBook Pro bid farewell.

Apple also announced their next generation MagBook Pro, which is almost as thin as an Air, has a retina display, and a new Magsafe Port. Great.

All of these computers have gotten upgrades to USB 3, which is nice for those people who actually have devices that can take advantage of that.

Then, our friend iOS got an update.

Finally, iOS has turn by turn navigation. Siri is available on the new iPad, and has supposedly gotten a bit better. Facebook is now integrated as much as twitter. FaceTime is available on cellular networks. Photo streams can be shared. A new app called Passbook allows you to store tickets for planes, movies, and stores. There’s also a few other things that aren’t worth mentioning.

Mac OS X Mountain Lion didn’t get anything new from what we knew already, except thatdictation will be available in any text field. For many people, this will definitely come in handy.

Some people were unhappy with the absence of an iPhone 5. But I think we should be content with iOS 6, and expect the new iPhone this fall – along with the public release of iOS 6.

I’ve been playing around with iOS 6, and so far it works well. Siri works just as expected, and the Facebook and twitter integration is also very handy.

The MacBooks that were updated are available now, but iOS will be available in fall. Mountain Lion will be available this July.

MacBook Pro

Macbook Air

iOS 6

Mountain Lion

The iPad Dilemma

A lot of people are saying that the iPad can easily replace a laptop. When you’re sitting on your couch, just woke up in the morning, or traveling around, can’t the iPad do everything a laptop can? I mean, why take a laptop with me when I’m just going around town, when I can take an iPad instead?

I’ve thought about this a lot. In a post I wrote a year or two ago (wow, that long ago?), I said that the iPad could easily replace a MacBook. The one thing that it really didn’t do was flash.

But recently, I got a new MacBook Air, and it seems that I prefer to use it over the iPad.

The iPad can basically do everything that the MacBook can. There’s only two big problems.

First of all, the keyboard. Touchscreen keyboards work for typing quick messages to people, but for typing an entire blog post, it gets a bit annoying. The other problem with the keyboard is that it absolutely SUCKS for coding. I mean, it takes three taps to insert a <, /, or >. And when writing something as basic and simple as HTML, it’s a complete pain.

I can hear all of you saying “Wait a sec, you can connect a bluetooth keyboard! Heck, you can connect a USB keyboard using the Camera Connection kit!” But come on people, why carry around an iPad and a keyboard when you can just carry around a MacBook? I mean, doesn’t having to bring a keyboard with you everywhere prove my point even further?

Next, there’s the lack of a windowed operating system. That’s the really nice thing about Macs: you can have multiple things going on at once.

Okay, now I can hear all of you saying “Wait a sec, iOS 4 brought multitasking in! You CAN do multiple things at once!” But, once again, come on people, it’s painful to switch between different apps. What if you have something in one application that you need to read and get information from while typing in another? This will requite quite a lot of four-finger swiping back and forth between apps. With a windowed operating system, I can have multiple applications and pages open, and see what’s going on in each. Heck, I can watch a movie while scrolling through my twitter feed. The flexibility of a windowed operating system is unmatched to the multi-tasking interface on an iPad.

Then, there’s power. Sure, the iPad has a dual-core A5 chip. But the time that it takes for a video to be rendered on an iPad is easy to compare to the speed of a dual-core hyper-threaded i7 in my MacBook air.

And this brings me to my very last point – availability , flexibility, and power of applications. The iMovie available for the iPad is quite handicapped to the iMovie on my MacBook. In fact, it’s that way with every single application available for both the iPad and the Mac. Then, of course, there’s port options. I can’t plug an external hard drive into my iPad and transfer my files to and from it. It’s all very closed off, as the iPad only has the proprietary Apple 30 pin connector and a headphone jack.

And that, people, is why I enjoy taking my MacBook places more than my iPad.

Spotify Answers our Prayers: the Spotify iPad app!

Look at the beautiful artwork!

It’s about time.

I have been craving this exact item on the menu for the longest time, and finally Spotify has granted our wishes.

Previously, it was necessary to use the iPhone application on the iPad, which was disappointing as spotify could have done so much more with the large screen real estate.

The new iPad Spotify app is really the new Android Spotify app‘s older brother. It features a similar interface with  all of your standard Search, New, Inbox, and other menu functions in a left menu. It is also similar to the Facebook and Twitter iPad apps thanks to it’s clean, sliding panels.

Spotify integrates a lot of album artwork, with their signature two-by-two paneling of playlist album art.

If you want Spotify on your iPad, it is a free update for those who had the iPhone app installed previously, or you can go to this iTunes store link.

Thank you Spotify!

Apple Releases New iPad

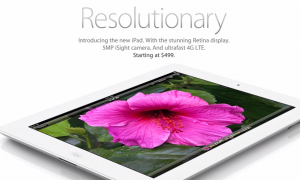
Apple has (finally) released the newest iPad. Unlike speculations, the iPad has dropped it’s following number and is simply being referred to as the new iPad.

The new iPad features almost exactly what was speculated: a new, high resolution retina display, and a 5.0 megapixel camera. In addition, the new iPad features 4G LTE, allowing its users to browse at increased speeds.

iLife has also been added to the iPad – GarageBand and iMovie have already been released, and joining them is the iPadular version of iPhoto.

The new iPad also features a new A5X graphics card, which is necessary to power the 3.1 million pixels in its high resolution display.

Other than a few new other software features, the iPad remains the same. It has the same outer shell as the iPad two, and has the same pricing regimen as well.

The new iPad will be available on March 16th, which is a short 9 days from its launch date.

I will get my hands on one then, although I doubt that I will end up owning one – my MacBook air completely gets rid of the need/use of the iPad, as it has an identical form factor with a much larger array of features.

iPad homepage

How-to: Hack the Apple Smart Sign

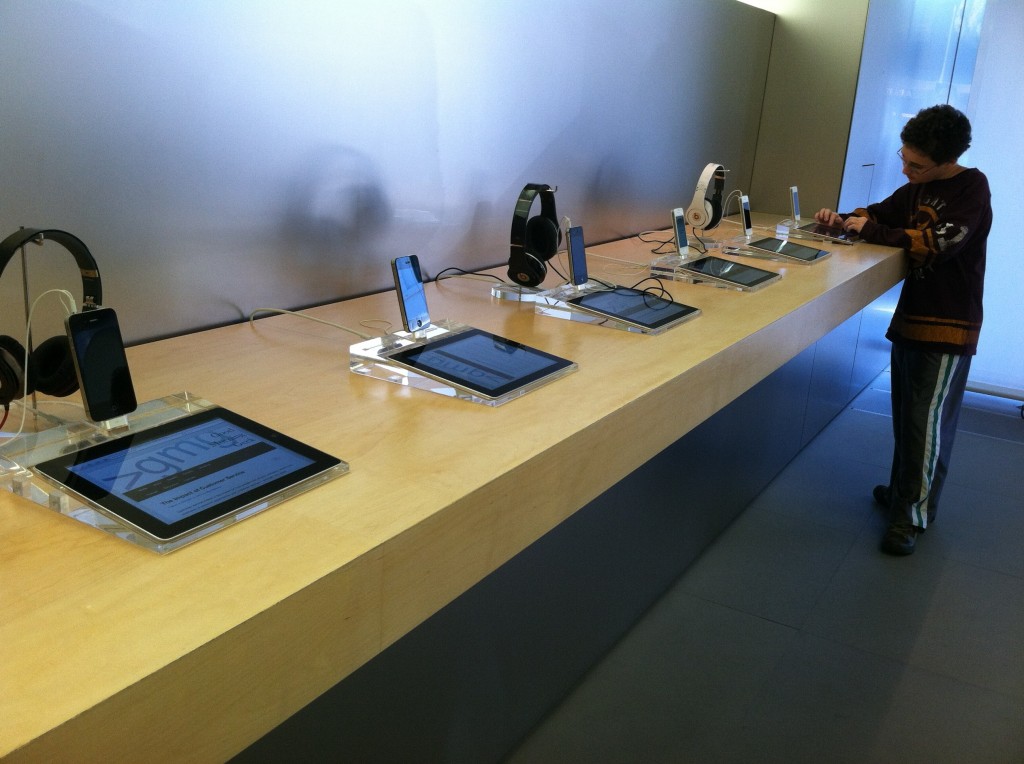
My friend Amit and I set all of the Smart Signs to GMG!

If you were recently at an Apple Store, you may have noticed their new “Smart Signs.” These are iPads that have information about the Apple product you’re looking at, however these iPads are locked in the smart sign mode. The iPad’s physical buttons are embedded into the plastic stand, and the home button has been disabled.

Sources say that there is a “secret gesture” that gets the iPads out of this mode, but after a ton of online research and asking many different Apple store employees, I still couldn’t figure it out.

So I went the easier way – I had to figure out a way to push the buttons.

I pushed as hard as I could on the edge of the iPad’s bezel, and this activated the lock button in the top right and locked the iPad. The plastic of the stand pushed against the button, so I wouldn’t be damaging any of the inside contents.

After I successfully locked the smart sign, I turned it back on and I was greeted with the lock screen. However, after unlocking the iPad I was returned to the same Smart Sign mode. Darn.

So instead of just locking it, this time I held down the bezel and got the “Slide to Power Off” slider. I swiped across, let it shut down, then held down the bezel to reboot it. (Check out the video at the end of the post for more detailed instructions.)

Tada! The iPad booted into its normal mode, and I was able to open the default applications and such. Unfortunately, the Home button is still disabled – so if you open an app, you won’t be able to get out of it without rebooting the iPad.

While we were at it, my friend/helper Amit decided to help me out and assisted me in setting every smart sign in the Apple Store to Good Morning Geek. Because the home button was disabled, the customers either had to browse my site or scroll up and find the URL bar. Also, the screens are set to never turn off – also handy!

By the time we were done, an Apple Store employee came up to us and nicely said “Would you guys please stop messing around with the smart signs?”

In the end, it was really fun. I tried to jailbreak it with jailbreakme.com, but that site is blocked – :(.

So if you’re ever in an Apple Store and want to either a. Annoy the employees or b. Show your friends a cool trick, this is a pretty fun and easy hack.

I hope to eventually find out the actual gesture, and after trying everything I could possibly think of, it must be fairly complicated.

App of the week: Tiny Tower for iOS

Tiny Tower is a simple, 8-bit graphics game. You own a tower in an urban metropolis, and your goal is to make money and build floors.  You start out by making a residential floor and moving people in. Then, you make a store and give the people who live on the residential floor jobs at the store. You make money from the store, and have to constantly keep the items in stock (and pay and even wait to restock it).

Once you have enough money, you can build another floor with another store.

And you just keep going trying to make your tower as high as possible. One of the coolest aspects of the game is that you have to wait; it takes time to restock supplies in your stores, and it can take hours to construct a new floor.

And having gritty, 8-bit graphics just makes the whole thing even more addicting.

Tiny Tower is compatible with the iPhone, iPod Touch, and iPad for a wallet-loving $0.

Click here to view it in iTunes.

Free WiFi Tethering with iPhone

You may have read my post on tethering with Android.

However, I did switch over to iPhone!

Now, you can tether using the iPhone by paying AT&T or Verizon, and you’ll get a portable hotspot.

But that’s extremely expensive!

Here’s an easier way: MiWi.

MiWi is an application available from Cydia (you need to be jailbroken, if you have a Verizon iPhone 4 click here) for $20. That may sound expensive, but it’s much cheaper than spending $20 each month! If you have read elsewhere about the Sinful repo, you can get it for free, but that’s cheating the developer out of what he has earned, so I don’t encourage it.

Installation

If you know how to get apps from Cydia, skip this paragraph. If you don’t, continue reading. To get MiWi, open the Cydia app from your homescreen, wait for all of the data to “reload,” and click search. Type in MiWi, and tap the result. Then, click “Install” in the top right corner, followed by “Confirm.” Let it install, and then click the big black button at the bottom. MiWi will now be on your homescreen.

Use

MiWi is an extremely simple app.

Upon opening it, you will be greeted with three tethering possibilities: USB, Bluetooth, and WiFi.

Bluetooth is advertised to use mainly with iDevices, however I don’t like bluetooth tethering as it is unreliable compared to USB and WiFi tethering.

USB Tethering only works with Laptops, and I had a terrible experience with it. Although it may boast a faster connection, you need to get it connected in the first place. That’s where I had my problems.

So that leaves WiFi. And let me just say, getting WiFi to work is painlessly easy.

You can easily setup a WiFi Password, change your SSID (network name), and even control which computers are on the network. Even better, you will get a notification bar at the top of your screen that tells you how much has been downloaded and uploaded. Handy!

The speed isn’t too shabby either! I was able to crank 1.0MB/s down, which isn’t too bad. It works great for email and basic web browsing, but I wouldn’t try to stream video over it.

Conclusion

MiWi works great for WiFi tethering. But I wouldn’t recommend it for USB or Bluetooth, as they are far less reliable.

MobileNotifier

As Zach Orr mentioned in a post about iOS 5 Notifications, MobileNotifier is pretty nice until iOS 5 comes out. Here’s a more in depth review.

The Basics

MobileNotifier has three main features. In-app notifications, Lockscreen Notifications, and Switcher Notifications.

In-app Notifications

Nothing’s more annoying than having a big blue block-up when you’re trying to navigate an app. If it’s playing a game or replying to an email, having a big blue window that blocks everything else is quite obnoxious. Mobilenotifier solves that issue in an extremely elegant way.

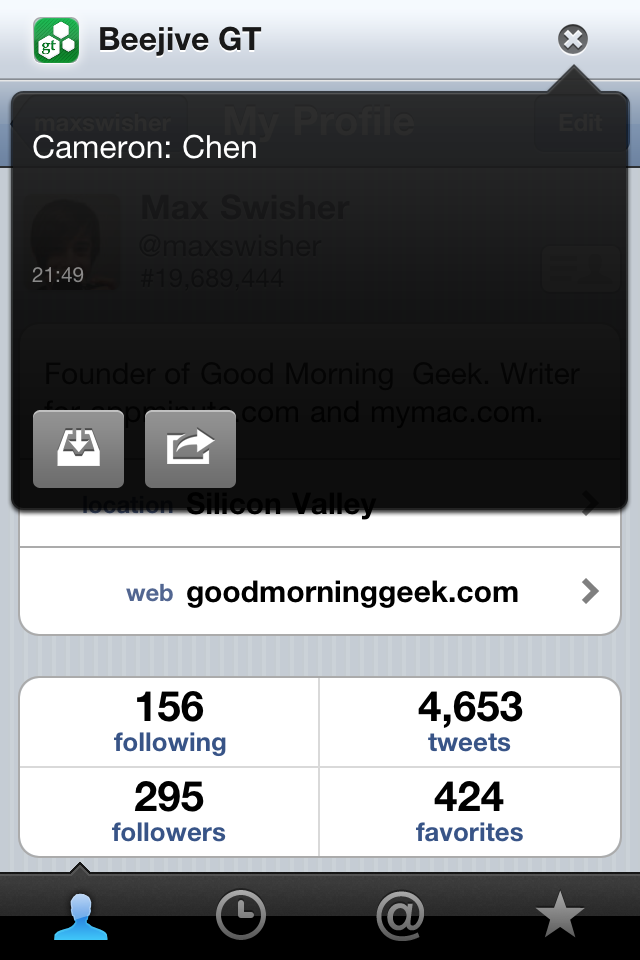
Instead of that annoying blue box, you’ll get a little notification at the top of your window with the icon and name of the app the notification is from.

Unobtrusive notifications

The left button saves it for later. The right opens the appropriate app.


When you tap on the notification, it will tell you the notification text then give you the option to go to the app right now or just ignore it. Or, you can not interact with it at all and the strip will disappear after a little while.

Lockscreen Notifications

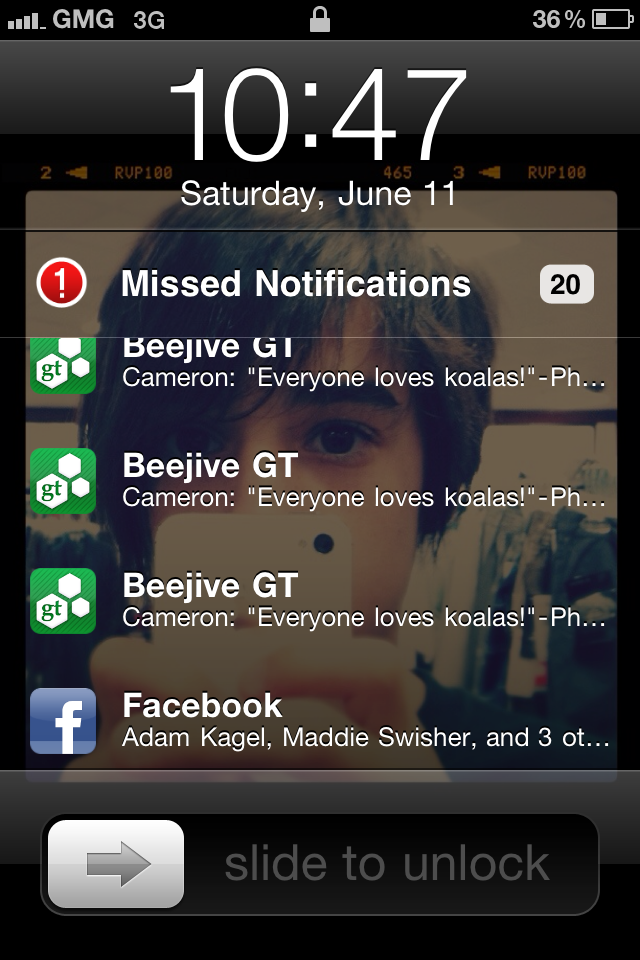
Normally in iOS the lockscreen notifications suck just as much as the in-app notifications. It gives you a blue window with a cute little list of notifications. MobileNofifier gives you a list that you can scroll through of all of your notifications. Much nicer than the normal iOS notifications! Unfortunately, you can’t select the notifications  to open the appropriate app. But it’s still much nicer than usual!

This list is scrollable!


Switcher Notifications

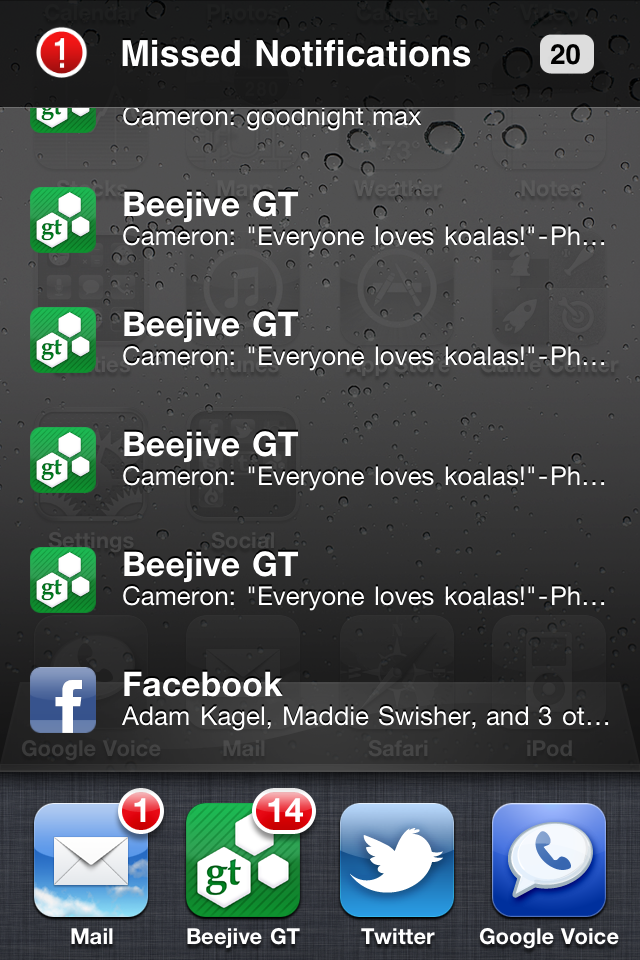
Notifications end up here in one of two ways: either they are ignored in app, or they came in when your screen was locked (that’s how you can get to the appropriate app of the lockscreen notifications). The interface is identical to the lockscreen interface, but you can touch the notifications to open their appropriate apps.

This list is scrollable and interactive!

Installation

As you can tell, this notification is pretty nice.

And luckily, the installation is pretty easy! 🙂

Go into Cydia, tap Manage, tap Sources, tap Edit, and tap Add. When it asks for the URL, enter http://phajas.xen.prgmr.com/repo. Once that’s added, click search. Enter MobileNotifier, and install the result.

That wasn’t too hard, was it?

Conclusion

Until iOS 5 is released, MobileNotifier is quite a nice notification system.

Now, if you aren’t jailbroken, click here to go to a post on how to jailbreak the Verizon iPhone 4.

Enjoy!


Using AirPort express for AirPlay alongside a Time Capsule

You may remember that a long time ago I reviewed the Time Capsule. It’s a wonderful wireless AP, and all of my data is totally safe.

But the Time Capsule doesn’t have AirPlay. On AirPort extremes and expresses, there is a headphone jack, and when connected, you can wirelessly stream your music to your speakers from your iDevice.

I’ve had an airport express for a long time, but I stopped using it when I got my time capsule. After hearing about the AirPlay improvements, I decided to break the thing out.

The AirPort Express creates its own WiFi network, and if I’m connected to that then I won’t be able to backup to my time capsule. Luckily, it is now possible to plug the AirPort Express directly into the Time Capsule, and have them both work as the same wireless network. This means that I can stream music AND backup at the same time!

With this all settled, you will now see the AirPlay icon appear on all of your devices. From this point on, it’s all extremely easy. Just tap the icon and up pops a menu of all AirPlay devices on the network. Tap the speaker system you wish to stream to Voila, we have wireless music!

If you’re on a computer, however, you can only stream your music from iTunes. That is, of course, unless you have an app called AirFoil.

This allows any application on your computer to output sound to your AirPlay speakers.

However, there’s a small issue.

There is a two second delay between when you cause the sound to happen and when it actually comes out of your speakers. On the iDevices, the movies are in sync because they are decoupled 2 seconds back. When you change the volume on your computer, you will see the small notification popup, yet you won’t hear anything for two seconds. Quite annoying.

For videos, AirFoil has included the “AirFoil Video Player.” I don’t know if it’s very good, as I can’t even get it to work without freezing and crashing.

In general, this system is simple and functional. But if you’re trying to stream content from your computer, you will notice an extremely distinct delay. It’s not like that audio quality isn’t good, so all audio (including pandora and other streaming services) work fine.

AirPort Express

AirFoil

Hanging restore after Jailbreak fix

Here’s the storyline.

You jailbreak your iPad.

Then, you find an app called Wi-Fi sync, where you can sync your iPad over Wi-Fi with your computer. This includes both an app from Cydia on your iPad AND it requires an app on your PC/Mac.

Then, you want to undo the jailbreak.

So you go into iTunes and click the Restore button.

It restores for the most part, but then, it hangs at the very end.


Uhoh.

Now your iPad is in recovery mode, and you can’t restore it.

Well, as you might have thought, you need to uninstall Wi-Fi Sync!

Just download the file HERE (mac only) and run the uninstaller. After you uninstall, the restore should go perfectly.

3as1ly Charg3 Cr3d1t Card5

You are a babysitter.

You are a bartender.

You are a photographer.

You made a bet with a friend over a football game.

All of these require payments. And while yes, you could take cash, sometimes it’s just easier with a credit card, as the money goes straight from their account to your account and you don’t have to deal with any of this green paper stuff.

Usually, you have to have one of those little thingies that they have at supermarkets with a single-purposed computer just for making a bill and accepting a credit card. But now, you can be on your way to accepting credit cards for a very small amount.

The key to this whole task is Square.

Square is completely free and consists of two parts: An app for your iPhone, android, or iPad, and the physical Square card reader.

Amazingly, the square card reader works with all of these. One model for android AND iPhone AND iPad. How you say? This picture should sum pretty much everything up.

So in case you didn’t figure it all out from that picture, basically the square is a little plastic thing that you plug into the headphone jack that has a slot that you can slide a credit card though. In the app, you can select how much you want to charge.

Now after you have put in an amount and swiped the card, you have to sign to authorize it. Of course that would usually be done with first a pen and paper, but now you can with a stylus on one of those thingamajigs in supermarkets. With square, you are supposed to use your finger on the touchscreen, but that can be hard as we are used to having pens. So that’s why in addition to your app and a reader, you need a pogo sketch to go along with it.

That should pretty much explain it.

Now after you are done with all of this swiping and signing and lolly-gagging, its time to print a receipt. I don’t think so. Instead, you can have the receipt emailed to a specified email address. cool, eh?

So wherever you are, at a wedding or the house of a small child, you can always accept credit cards and let people sign and get their receipts without ever seeing a piece of paper.

Square

Pogo Sketch