I am currently in Japan, and in the Hotel we have no wireless in our room. We do have a wired connection, but we have iPads that need WiFi. Here’s how to take your mac and turn it into a WiFi network in a few steps.
1. Plug in ethernet
into your Mac. Make sure the internet connection is working by visiting a few sites. Many hotels have pages where you have to agree to terms. Make sure you agree and/or pay before proceeding.
2. Turn on internet sharing
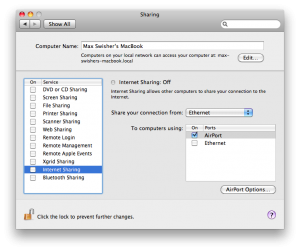
Open up System Preferences and click on Sharing. In the list, click on Internet Sharing, but don’t click the checkbox. Configure it so it looks like this:
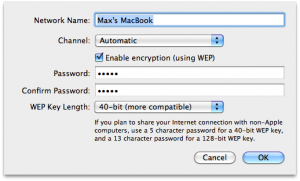
Then, click on AirPort options in the bottom right. Here you can put in the name of your Wifi network and a password if desired.
Click OK, and now you can click the checkbox next to internet sharing.
3. Connect your devices
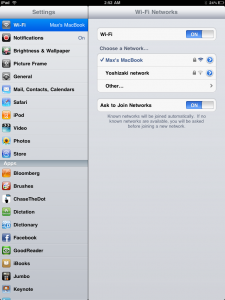
On your WiFi enabled devices you should be able to see a WiFi network with the name you put in under Airport Options in step 2. Connect to it and enter a password if you configured one.
Tada! Now your devices should be able to browse the internet. Cool! Be aware that you can’t be on a WiFi network on your Mac while sharing your internet.
Use it wisely!


