Wireless Tether with Droid Incredible

So let’s just say that you are driving somewhere and you have your computer (or iPad or iPod touch for that matter) along with your droid incredible. Well now for free (actually, the expense of battery life) you can use your Droid Incredible as a wifi tether, so you can have an iPad on verizon.

Sadly, the speeds are dramatically reduced to a groping 70 kb/s. But I think it’s better than nothing. Can load pages, not so great for downloads and video/audio streaming such as youtube or pandora.

Step 1. Make sure your phone is rooted. Just do steps 1-4 of the tutorial HERE (continue the steps to install android 2.2, if desired!).

Step 2. On your incredible go to THIS LINK (try using chrometophone, review on that soon!)

Step 3. Once the link is downloaded open it and install the application.

Step 4. Open the application on your phone.

Step 5: Press menu and go into the settings and change around your preferences. change the SSID, and add a passphrase. Enable access control if desired.

Step 6: Press the big tether button.

Step 7: On your wifi enabled device go to the network selection and select the nework name that you had entered in the SSID preferences. Enter your asscode and Voila, you can connect to the internet!

One of the cool benefits of this is that you can be on the internet while in a car. Cool, eh?

How-to: Install Android 2.2 (Froyo) on Droid Incredible

NOTE: I DONT TAKE ANY RESPONSIBILITY FOR LOSS OF DATA ON YOUR PHONE!

Thank you droid life, you have a build of froyo for droid incredible. Cool!

The only problem is that you have to be rooted. And from what I hear that is a command line disaster. Here I’ll show you how to root and convert to android 2.2 simply and easily. You’ll have to have a USB cable and an SD card in your phone. Sadly I can’t give you screenshots for the whole process as this can’t be undone. But I’ll give all of the screenshots I can. So here goes!

WARNING: THIS PROCESS MAY OR MAY NOT BE REVERSIBLE. THE ONLY BUG I’VE FOUND IS THAT GPS NO LONGER WORKS. DO NOT PROCEED IF YOU USE THE GPS FREQUENTLY (HOWEVER AN OFFICIAL RELEASE WILL NOT HAVE THAT PROBLEM SO IT SHOULD BE RESOLVED IN A FEW MONTHS)!

Step 1:

Download this zip. Once it has started downloading proceed to step 2.

Step 2:Backup all of the photos and videos from your phone. This process will indeed wipe out your whole phone and make it brand new. I am not responsible for anything that happens to your data!

Step 3: Download THIS application for mac, and THIS application for windows. These are the unrevoked.com reflashers.

Step 3a: Open the reflash application on your Mac or PC. I will show the process for mac as I assume that it is similar for Windows.
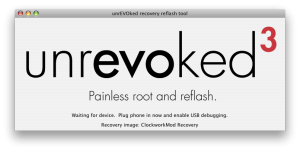
Step 3b: Plug in your phone to your computer with the USB cable.

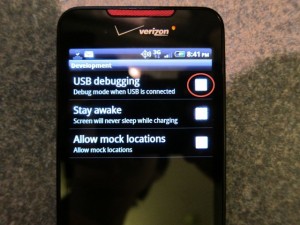
Step 3c: On your incredible go to settings>Applications>Development and enable USB debugging.
There’s no turning back now, as things will start to happen. Your screen will be flashing terminal commands and all this crazy stuff that I couldn’t explain. Once it is done you should be shown a screen like this (if not, you should be on a white page with skateboarding android logos and select recovery from that list, and if not that, boot up while holding the optical trackpad button and select recovery from that list, and if not that then select bootloader then recovery to get to this list):
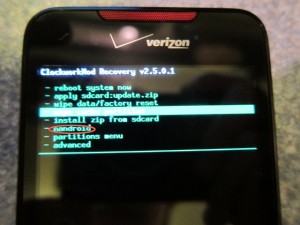
Step 4: You are now rooted! At this screen scroll down and select nandroid. from here click backup and let it run. When it is over reboot. I’m *pretty sure* that it should just reboot into 2.1. using nandroid backs up all of your data just in case something goes wrong so you can restore.

Step 5: Your download of the zip should be complete by now. Plug in your incredible to the USB cable (if it isn’t already) and set the USB mode to disk drive. Then copy that zip over to the SD card (NOT THE PHONE STORAGE! to figure this out your phone storage will be 8GB, the other mounted drive is the SD card!). Copy it to the root not under any other subfolders.

Step 6: Turn off your phone and reboot while holding the optical trackpad.Select bootloader from the list then select recovery. Then select Install zip from SD card.
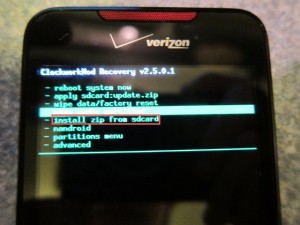
Next, select choose zip from sdcard.
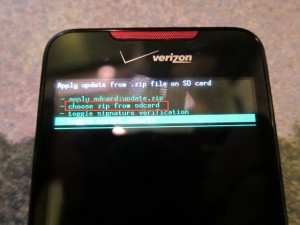
Then, scroll down the list and select the zip that you downloaded.
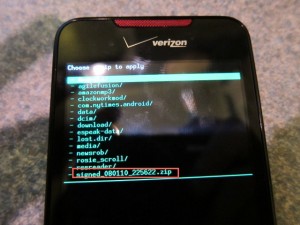
It will begin to install android 2.2, and this could take a few minutes.

After, reboot and you should see this new boot animation
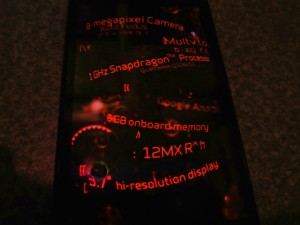
followed by this red eye.
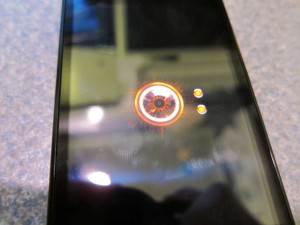
It may hang at the red eye for a few minutes, so don’t freak out (like I did)!

After it boots you will be introduced to android 2.2 with sense. Congratulations! To prove it, go into settings> About Phone> Software. It should say 2.2 under the firmware! Enjoy!

Swype

These days, to type on a keyboard, you press the touchscreen. This usually requires thumbs, which can get VERY tired after a lot of typing. It can also take a while…………

Swype is a way to replace typing by instead of touching the keys you swipe over the letters on the keyboard to create the word instead of typing them. It has already broken the world record for fastest typing speed.

Luckily, Swype is allowing beta users on Android. And thanks to my Droid Incredible I got the chance to try it out.

As you can see, it may take a little bit of practice, but there are other videos where people are much faster than me. I’ll probably be able to swype a bit faster when Im not in japan, as here it is so humid my screen fogs up and becomes sticky.

Swype is rolling out on many new phones and the beta seems to work just as advertised.

To get swype, you need to have an android phone, an internet connection (which it looks like you have), and an email address.

Just go to beta.swype.com and register. Make sure you can access that email address on your android phone. After registering, check your email on the phone and click the link. You will need to allow third party installations, which the process varies depending on your phone. Once it is downloaded, open it and login with the information you entered into the swype website. Continue through the rest (it is quite self explanitory) and once it is done installing, just long press any text field, select input method, and select swype. Tada! You’ve just installed swype on your android phone.

New betas are always on the way, and there are numerous tips for Swype here.

Traitor? I think not.

Some people have said some hurtful but understandable things about me, as said in the title of the post.

Well, allow me to say, that I’m not switching over to chrome OS. I’m not switching to windows either, I’m just switching over to android.

What’s the big difference between Mac OS X and iOS? Well, I mean other than one is a mobile operating system. Mac OS X allows development to run in the background. Mac OS X also allows applications to manipulate the core of the operating system (although not preferred).

iOS is completely shut off. For example, people can’t even use their own APIs! It is a closed off system and it is completely CLOSED source.

Android on the other hand seems more like Mac OS X. It is open source, so people can use their own APIs to do whatever they want. Apps still need to be accepted into Android Market, but there is an option to allow other applications that weren’t approved by the app store to be installed. And that’s what makes the difference.

So I’m not exactly a traitor, I’m just supporting what I believe in and personally is best for me. I’m sure I’m not the only one…. Anyone?…….. Comments welcome.

picplz

We all have twitter accounts.

What is twitter for? It’s for sharing what you are doing right then in less than 140 characters.

picplz is similar, but it uses pictures with tags and captions instead of just text.

Sorry guys, but the app is only available on android. 🙁

So here’s how it works:

Open up the app and you are instantly greeted with the view of your phone’s camera. Tap the camera button to take a picture. If you have foursquare configured, tap the venue that you are at. You can then tap someone/something to tag them in the photo. Then you can click edit details and enter a caption and decide which services you want to post it to (twitter and foursquare). Then click post and your picture will be posted! This is great because you can see which pictures you’ve taken at different foursquare venues. Your profile will be located at picplz.com/user/username. Check mine out here!

Tether your android device

As you know, I got my beautiful new HTC incredilble.

It comes with built in support for tethering, but another $30/ mo.??!! NO. Luckily, there’s an easier way: PDAnet.

It’s a free download from the android market and works without any extra charge.

Sadly, I can’t give you any screenshots due to android. 🙁

But it is simple enough.

First, open the app. You will be introduced with the option to turn on USB or Bluetooth tethering. The USB tethering requires an extra plugin to be installed, and my mac supports bluetooth DUN built in, so I just used that. Here’s a video on how I set it all up.

There you go! Sadly this does not work with the iPad, as DUN isn’t available quite yet.