How-to: Make Your Dock REALLY Big!

Okay, this post is FAR from useful. But if you’re bored, or want to play a prank on someone, this is a cool visual effect.

If you go into System Preferences > Dock, you’ll be able to enable dock magnification. This will cause the dock icons to magnify when you hover over them.

But using this simple trick, you can make it even BIGGER!

Open Terminal (in Applications/Utilities) and type in:

defaults write com.apple.dock largesize -float 256.000000

You can change 256 to be even bigger or smaller, depending on how big or small you want your dock magnification to be.

Hit the enter key and, well, nothing will happen.

Next, type:

killall Dock

Your dock will disappear and reappear.

Now hover and enjoy!

To set it back, just type the same thing you did to activate it but replace 256 with 128.

This has absolutely nothing useful about it. But it’s fun if you’re really bored, or you’re just waiting for Lion to come out.


Google+ for iOS released, Welcome to Crash Central

Google+ is Google’s stab at facebook that has some great new features that really puts it in the competition (read more here). The Android app was available immediately; the iOS app was supposed to come a few weeks after.

Well, it’s here. Unfortunately, it’s not worth getting.

You are greeted with a front page where you can view your stream, profile, huddles, circles, etc. Everything works until you hit stream; that’s where it crashes. It will give you a spinner saying that it’s loading… then it will keep spinning… and spinning… and spinning… and when you’re sick and tired of it, you just hit the grid to go back to the home screen. But it doesn’t go. So you hit it again. Same result. So you start frantically hitting buttons, but it’s not going to respond. Then, there’s the crash.

For now, this is all you’ll get. Jailbroken or not, iOS 5 or 4. The app is just a crasher.

Mac OS X Lion: Coming Tomorrow!

During an earnings call with Apple, the CFO nonchalantly announced that Lion is being released tomorrow.

Lion is the “big cat” name for Mac OS X 10.7, the next operating system for Mac Computers. It was announced a little while ago, and was said to be announced in “July.” Lion brings some new features in Exposé and Spaces, fullscreen apps, and an iOS-like homescreen called Launchpad.

The update will be available in the Mac App Store for $30, and there’s no more discs available.

If you have a Mac, I recommend that you read this post to make sure your mac is ready for Lion.

After using Lion for a little while, I will write a post describing the good and bad of the new features.

Integrate Google Voice into Built-in Apps

So, you’ve been using Google Voice for a while now. Everyone is switched to your new number, and everything works fine. But there’s one drawback: to send messages, you need to open the Google Voice app. Unfortunately, that google voice app is kinda buggy. Then, you have to hide the messages app so you don’t accidentally send messages with it instead of Google Voice.

However, if you’ve jailbroken, there’s a plugin that will allow you to integrate Google Voice into the Messages app.

To download it, Open cydia and search for SMS GV Extension. Install the first result.

You’ll get a trial, but it’s a good idea to get a license as a couple of times a day it will remind you asking you to buy a license. Purchase isn’t as simple as it should be, but you can read the detailed purchase method by clicking here.

Aside from the purchase of a license, setup is unfortunately not as simple as it should be.

Open Settings>SMS GV Extension. Here, put in your Google credentials and turn the send box to on.

That was easy.

For receiving, you’ll actually have to have the official app installed and working – so don’t go uninstalling just yet!

Go into Receive settings and turn on Official GV App.
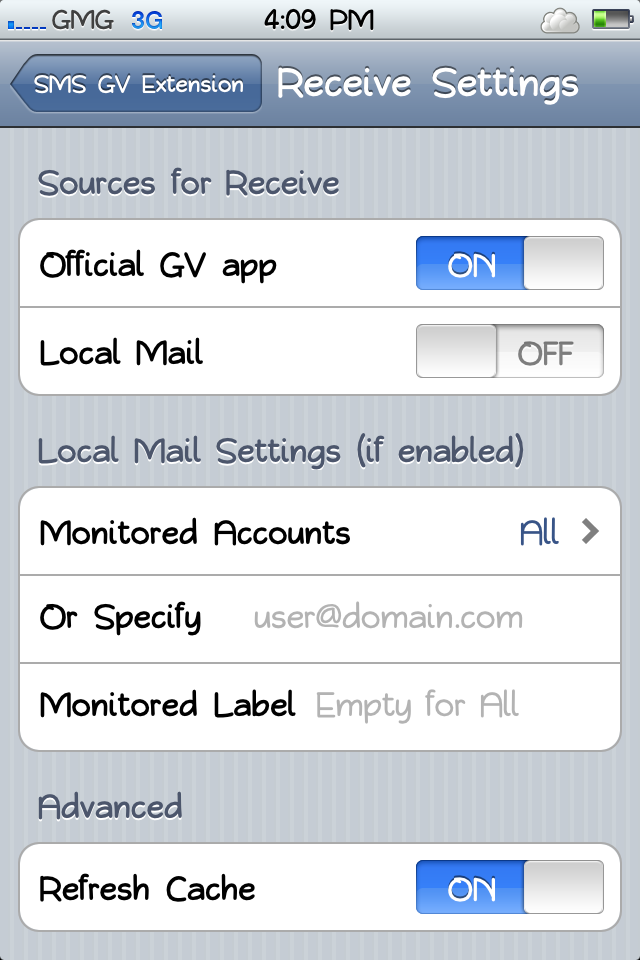
You should now be able to send and receive texts through the Messages app. Functionality wasn’t too reliable, but after a little while it started working 99% of the time.

Okay, now you have Messages working. But you still want to get rid of the darned Google Voice app!

Instead of moving it to a folder somewhere secret, you can actually use a free app from Cydia to hide it.

The app is called SBsettings. It’s primary use is that you can swipe across the status bar (the bar with the time and battery at the top) and toggle WiFi, 3G, and more. But it can also hide apps.

To download it, just search SBsettings in Cydia and install the first result.

Once that’s installed, swipe across your menubar and click “more.” Here, scroll down and find “Hidden Apps.” Scroll down in the list and turn off Google Voice. You’ll never know it was there!

So now you’ve gotten messages done. But what about phone?

It’s actually much easier to get the phone to work.

Search in Cydia for GV Phone Extension. It’s made by the same creator as the Messages integrator, and it’s also the same registration and price.

Go into Settings>GV Phone Extension and enter your credentials.

That’s all the setup that’s needed!

That’s how to get Google Voice totally integrated into your phone. Your original phone number will still work, but you won’t be able to tell what the difference is between them!

If you have the Verizon iPhone 4, I would usually direct you to my post on easy jailbreaking. However, JailbreakMe.com is back! To jailbreak, just go to jailbreakme.com and you’re set from there. Easy!

The Google voice app is a bit buggy, but you no longer have to suffer. Enjoy! 🙂

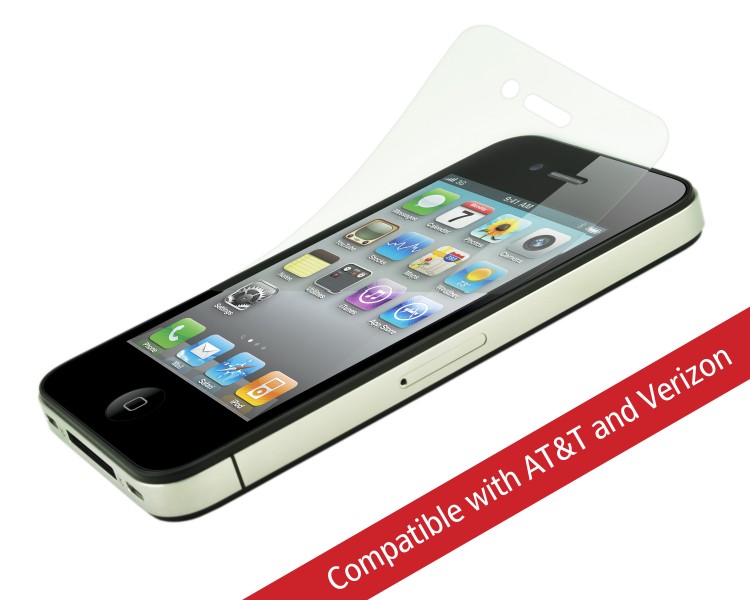
Power Support HD Anti-Glare Screen Protector for iPhone 4

When I first got my iPhone 4, the screen seemed really durable. Through the first couple of weeks I didn’t have a single scratch. I wasn’t worried or careful about it, and that still hasn’t proved a problem.

However I was definitely sick of all the smudges and fingerprints, and how if there was enough fingerprints on the screen it would get difficult to even move my finger across the screen.

I didn’t think I would benefit from any kind of screen protector until I was at a class and tried a friend’s.  The anti-glare cover made it much easier and smoother to run my finger across the screen. It also didn’t attract fingerprints. Cool!

I got one of these for myself, and I’m quite happy with it. As I said, it doesn’t attract fingerprints, and makes it much easier to move my finger across the screen – two things you will benefit from every time you take the phone out of your pocket.

It all sounds good, right?

Well there’s only one drawback: having the screen protector will make your screen the tiniest bit blurry.

No, it’s not terrible – you can still easily read the text, and it doesn’t make much of a difference. But if you are picky about super sharp edges on everything, this may cause a problem to arise.

Sometimes people have a VERY hard time installing the protectors, usually because of lint and air bubbles.

Well, this screen protector has something new: a sticky, clingy sticker thing that you press against the screen and remove, bringing all of the dirt and dust with it.

However, if you’re buying this at an Apple store, you can usually get around all of that. They will install it for you, and they’re pretty good at it, too. They know all of the tips and tricks, and actually installed my screen protector FLAWLESSLY. Yes, there’s not a SINGLE SPECK of dust under that screen protector, and it lines up perfectly.

If you’re looking for a screen protector, this is the way to go. However, if you’re picky about your sharp lines, you should look into a crystal style screen protector, which, in addition to providing sharper edges, attracts more fingerprints.

The Power Support Anti-Glare Film Set (a pack of two) is available online here and at most Apple Retail Stores for only $15.

Mac OS X Lion is Right Around the Corner!

Mac OS X Lion was announced a while ago and brings new features like Launchpad, an iOS like App Launcher; Mission Control, which combines Spaces and Exposé into one, easy to view panel; and plenty of other new features.

The announcement stated that the update would be released in July 2011, and would be downloaded directly from the Mac App Store for $30.

Well would you like at the time, it’s July!

The Mac OS X Lion update is estimated to be released to the public in the next couple of weeks, according to my reliable sources.

There’s a few things you should probably do to make sure your computer is ready

  1.  Make sure you have some disk space available!

If you don’t, you’ll download the Lion update and your computer won’t be able to easily boot. Make sure you have at least 6 gigs of disk space free. If you don’t, you’re in trouble whether you’re installing Lion or not! Try an app called GrandPerspective (reviewed here) and delete the biggest files.

2. Say goodbye to PowerPC

Over the years, Intel machines have been compatible with PowerPC Apps through a bridge called Rosetta. Now, with Lion, Rosetta is no longer compatible. If you have any apps that run on Rosetta, it’s time to find Intel compatible alternatives.

3. Install all available updates

Go to the Apple Menu > Software Update… and install any available updates. After you’ve installed the updates, re-check for updates in case there are updates for the other updates.

As I said, OS X Lion should be available from the Mac App Store in the next couple of weeks for only $30.

Where’s those thunderbolt devices?

Fourth months ago, a new MacBook Pro line was released. And as I said here, it was a total disappointment. The biggest thing on it was probably the new “Thunderbolt” port, which is a port with the same form-factor as the Mini DisplayPort, however it allows for transfer up to 10 GBPS. Yah, that’s fast.

Everyone I talked to said that it was awesome; it would be so good to use.

My argument was that it was too proprietary – Only three models of computers have that port, so why would a manufacturer go after making products for it?

The usual argument was that “It will standardize and products will be released for it eventually.”

Okay…

So here we are four months later, and the only product I’ve ever seen compatible with the thunderbolt port is an external hard drive from LaCie.

That’s it.

So….. Where’s those thunderbolt devices?

I believe that thunderbolt was (and still is) a total failure. Nobody uses it – and because no body uses it, manufacturers won’t create devices for it. And because manufacturers won’t create devices for it, nobody uses it. It’s a total loop – a manufacturer would have to make a product for it, so people would use it, so other manufacturers would make more products for it.

Nowadays, the only other computer line with a thunderbolt port is the most recent line-up of iMacs, which few people have.

But there still is hope for Thunderbolt. If every single Mac gets a thunderbolt port, after a while every Mac that is in use will have a port – that’s when manufacturers will start making products for it.

But until then, don’t expect much from Thunderbolt.

Free WiFi Tethering with iPhone

You may have read my post on tethering with Android.

However, I did switch over to iPhone!

Now, you can tether using the iPhone by paying AT&T or Verizon, and you’ll get a portable hotspot.

But that’s extremely expensive!

Here’s an easier way: MiWi.

MiWi is an application available from Cydia (you need to be jailbroken, if you have a Verizon iPhone 4 click here) for $20. That may sound expensive, but it’s much cheaper than spending $20 each month! If you have read elsewhere about the Sinful repo, you can get it for free, but that’s cheating the developer out of what he has earned, so I don’t encourage it.

Installation

If you know how to get apps from Cydia, skip this paragraph. If you don’t, continue reading. To get MiWi, open the Cydia app from your homescreen, wait for all of the data to “reload,” and click search. Type in MiWi, and tap the result. Then, click “Install” in the top right corner, followed by “Confirm.” Let it install, and then click the big black button at the bottom. MiWi will now be on your homescreen.

Use

MiWi is an extremely simple app.

Upon opening it, you will be greeted with three tethering possibilities: USB, Bluetooth, and WiFi.

Bluetooth is advertised to use mainly with iDevices, however I don’t like bluetooth tethering as it is unreliable compared to USB and WiFi tethering.

USB Tethering only works with Laptops, and I had a terrible experience with it. Although it may boast a faster connection, you need to get it connected in the first place. That’s where I had my problems.

So that leaves WiFi. And let me just say, getting WiFi to work is painlessly easy.

You can easily setup a WiFi Password, change your SSID (network name), and even control which computers are on the network. Even better, you will get a notification bar at the top of your screen that tells you how much has been downloaded and uploaded. Handy!

The speed isn’t too shabby either! I was able to crank 1.0MB/s down, which isn’t too bad. It works great for email and basic web browsing, but I wouldn’t try to stream video over it.

Conclusion

MiWi works great for WiFi tethering. But I wouldn’t recommend it for USB or Bluetooth, as they are far less reliable.

MobileNotifier

As Zach Orr mentioned in a post about iOS 5 Notifications, MobileNotifier is pretty nice until iOS 5 comes out. Here’s a more in depth review.

The Basics

MobileNotifier has three main features. In-app notifications, Lockscreen Notifications, and Switcher Notifications.

In-app Notifications

Nothing’s more annoying than having a big blue block-up when you’re trying to navigate an app. If it’s playing a game or replying to an email, having a big blue window that blocks everything else is quite obnoxious. Mobilenotifier solves that issue in an extremely elegant way.

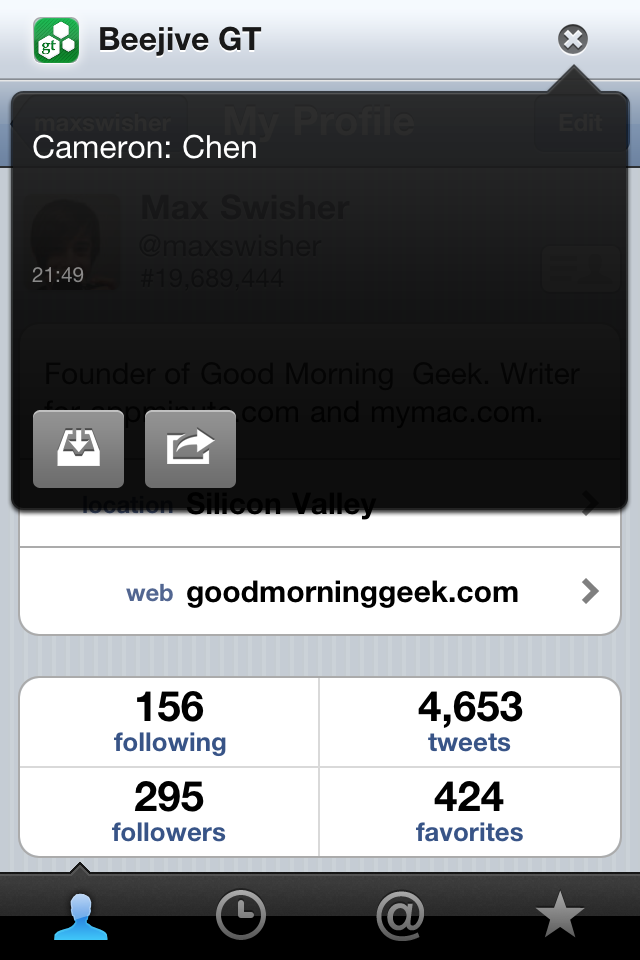
Instead of that annoying blue box, you’ll get a little notification at the top of your window with the icon and name of the app the notification is from.

Unobtrusive notifications

The left button saves it for later. The right opens the appropriate app.


When you tap on the notification, it will tell you the notification text then give you the option to go to the app right now or just ignore it. Or, you can not interact with it at all and the strip will disappear after a little while.

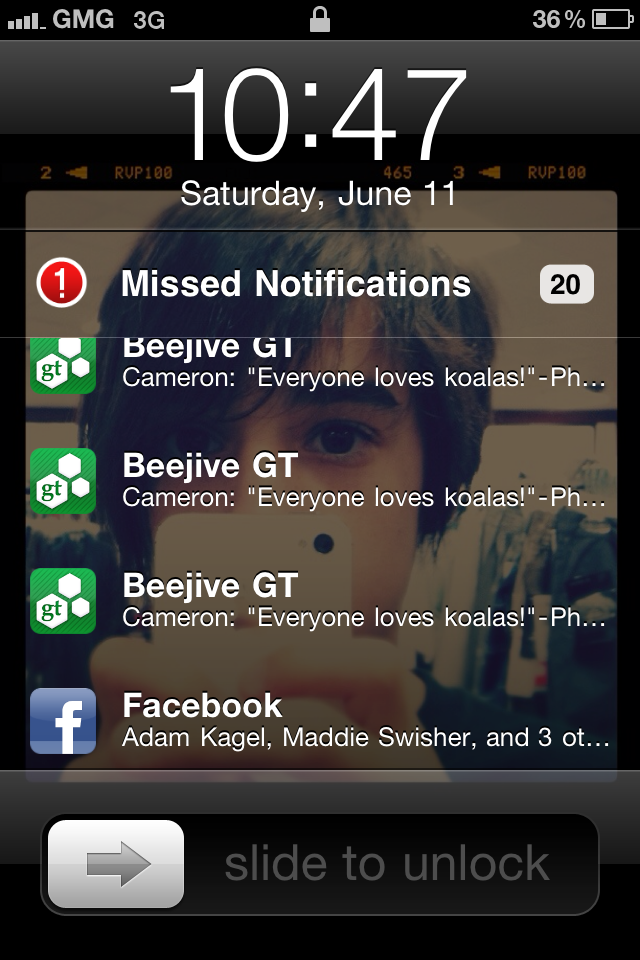
Lockscreen Notifications

Normally in iOS the lockscreen notifications suck just as much as the in-app notifications. It gives you a blue window with a cute little list of notifications. MobileNofifier gives you a list that you can scroll through of all of your notifications. Much nicer than the normal iOS notifications! Unfortunately, you can’t select the notifications  to open the appropriate app. But it’s still much nicer than usual!

This list is scrollable!


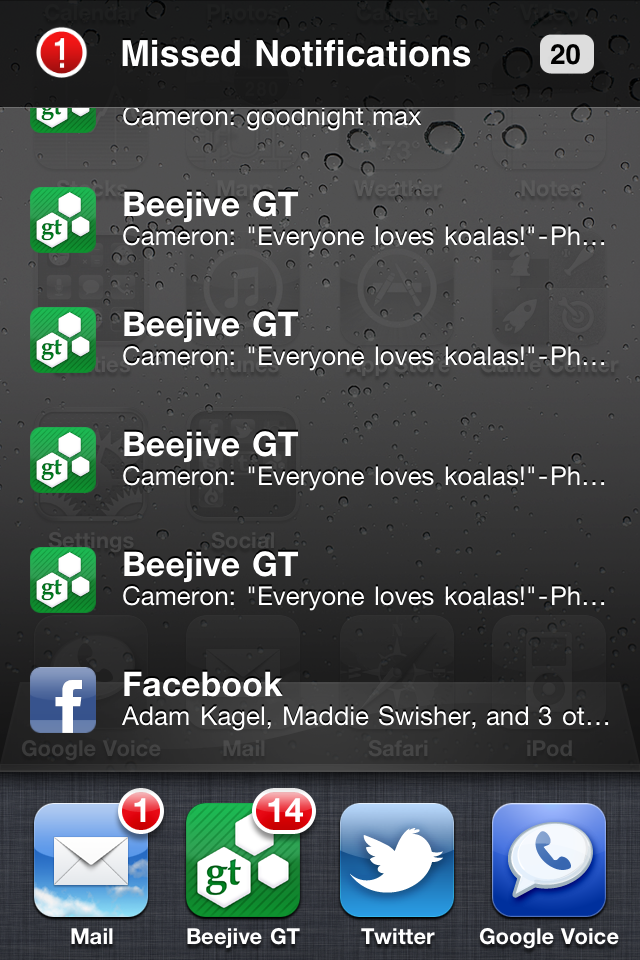
Switcher Notifications

Notifications end up here in one of two ways: either they are ignored in app, or they came in when your screen was locked (that’s how you can get to the appropriate app of the lockscreen notifications). The interface is identical to the lockscreen interface, but you can touch the notifications to open their appropriate apps.

This list is scrollable and interactive!

Installation

As you can tell, this notification is pretty nice.

And luckily, the installation is pretty easy! 🙂

Go into Cydia, tap Manage, tap Sources, tap Edit, and tap Add. When it asks for the URL, enter http://phajas.xen.prgmr.com/repo. Once that’s added, click search. Enter MobileNotifier, and install the result.

That wasn’t too hard, was it?

Conclusion

Until iOS 5 is released, MobileNotifier is quite a nice notification system.

Now, if you aren’t jailbroken, click here to go to a post on how to jailbreak the Verizon iPhone 4.

Enjoy!


Jailbreak iPhone 4 Verizon

Yes, I got an iPhone 4.

Do I support apple’s business ethics?

No.

Do I think the iPhone is pretty and shiny? Yes.

Now, don’t think that I’m immediately jumping on the Apple bandwagon.

The very first thing that I did with this was jailbreak it.

If you have one of these suckers and are looking to jailbreak, I’m about to make it WAY easier for you.

But JUST so you know how much easier I’m making it for you, here’s the traditional way of doing it.

Traditional

You’ll need a few things: PwnageTool 4.2, the original IPSW for the Verizon iPhone 4, and the Pwnage bundle for 4.2.8.

First, download everything mentioned above. Unfortunately, all of the links on every other website are all dead. That means you have to go on a search on the internet looking for all of the above.

Then, open the package contents for PwnageTool 4.2, go into Contents>FirmwareBundles and click and drag the Pwnage bundle for 4.2.8 in.

Next, open up PwnageTool and select advanced. Drop in the IPSW for the Verizon iPhone 4, And hit continue, continue, continue, wait for ten or so minutes. In the end you’ll have an IPSW that you need to use.

In PwnageTool, select Put phone into DFU Mode to put the iPhone 4 into DFU. It gives you step by step instructions on what buttons to press and for how long. Once you’ve put it into DFU, open up iTunes and it will tell you that it detects an iPhone in recovery mode. In iTunes, select your iPhone, then hold down the option key while clicking restore. It will give you a selection window, where you need to browse to find the custom IPSW that you made with pwnagetool. Then, let it work its magic. After the restore is complete, you will have a jailbroken iPhone!

Easier way.

Time to make this much easier!

I am going to give you the custom built IPSW and the download for PwnageTool. That means that all you have to do is the very last paragraph! 🙂

Download the files

Now that link right there will download a ZIP of the Custom built IPSW and a copy of PwnageTool.

Then, just follow these directions:

In PwnageTool, select Put phone into DFU Mode to put the iPhone 4 into DFU. It gives you step by step instructions on what buttons to press and for how long. Once you’ve put it into DFU, open up iTunes and it will tell you that it detects an iPhone in recovery mode. In iTunes, select your iPhone, then hold down the option key while clicking restore. It will give you a selection window, where you need to browse to find the custom IPSW that you made with pwnagetool. Then, let it work its magic. After the restore is complete, you will have a jailbroken

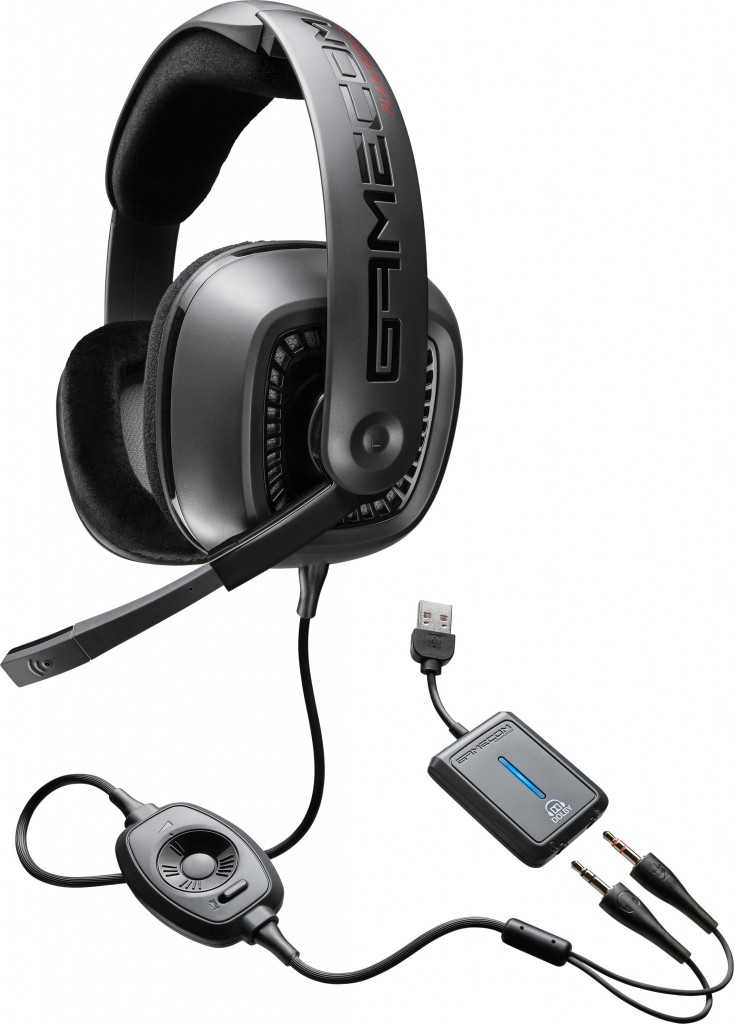
Plantronics Gamecom 777

I am so confused.

I thought the Beats by Dr. Dre were the best headphones, and they’re $350.

But I’m liking these Gamecom 777s more – and they’re only $100.

Design


These things are RUGGED. When you use them, they feel more metal then plastic. There’s no squeaking, and I feel like they’re well build and well put together. All of these things I couldn’t feel with the Beats by Dre.

A microphone comes out from the headband of the headphones, which is a genius idea and the perfect way to conceal the microphone when not in use. The inline audio and mute control is very helpful, and can often come in handy.

There’s one thing I don’t like about these headphones – the open-ear design. All sound leaks through a TON, so don’t expect ANY privacy from these. It’s nice because when someone is trying to talk to you, you aren’t totally spaced out. But it’s also a bit annoying to the people around you who might want to listen to their own soundtrack.

Sound Quality

When it comes to headphones, this is really what it boils down to. And my god, I’d choose these any day over Beats. These have dolby surround sound technology, and through USB an included small box will convert standard stereo sound into full on dolby surround sound. If you remember my post about the new dolby technology and how it brings the music out of your ear and puts it around you? You can feel that in these speakers. Thanks to the 7.1 technology, stereo sound turns into extremely immersing rich sound. It’s amazing. Much better than the beats by dre.

Overall, the sound quality is just plain stunning and amazing.

Comfort

With these headphones, you are getting the luxury experience.

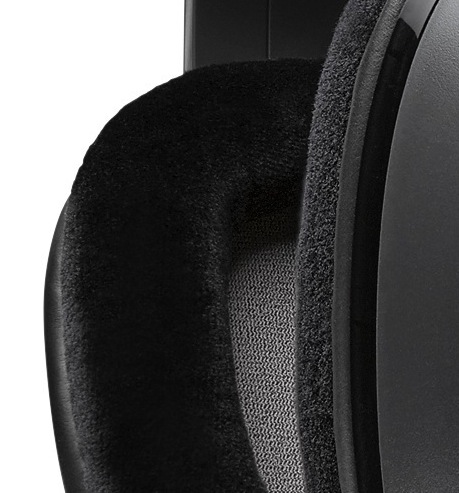
The pads are a soft, smooth fabric, as opposed to the plasticy rubbery earcups on the beats. The earcups distribute pressure really nicely, and you can keep these on without any discomfort for hours on end. The earcups are extremely spacious, which is also a nice addition. Overall, these things are extremely comfortable and don’t give you the same aches that the beats do.

Value

If you’re looking for a nice new pair of headphones, whether it’s for gaming or not, you should DEFINITELY consider the gamecoms. If you are thinking of getting beats, slap yourself and wake up out of the mainstream daze. The gamecom 777s are $250 cheaper than the beats, and give you more sound quality and a higher value of sound technology from Dolby. They also deliver a much better build quality and an extra feature such as a boom microphone extending out from the side. When you are buying beats, you are really paying $300 for fancy marketing a d nice big b on the side.

If you are looking for an extremely high-quality pair of ruggedized headphones, look no further than the Plantronics Gamecom 777s. You can get them here for $100.

Also, thank you Plantronics for sending me these for review!

Disappearing Disk Space?! 10 Step Fix

Today, I left my Mac alone for a few hours. When I come back, I am confronted with messages telling me that I don’t have enough disk space left.

A quick check of my available disk space using Finder reveals that I only have 200mb of free space left on my 115GB SDD.

Wait, WHAT?! I left my computer and it had 50 GB free. How can 49.5GB just magically appear on my hard drive?!

I couldn’t even DOWNLOAD that much during the time I was gone.

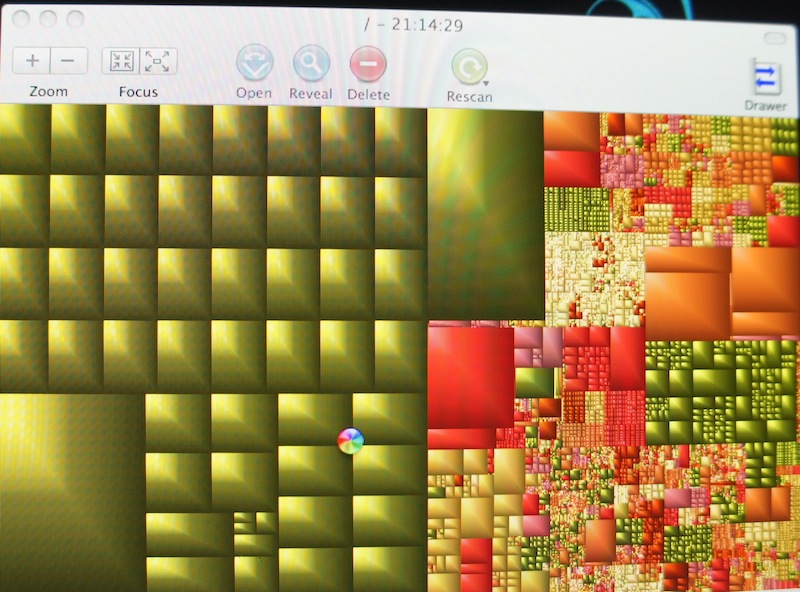
So I decided to find out what was taking up so much space using a wonderful free application called GrandPerspective (review here, what a wonderful app if I may say so myself) and decided to try and find out what was taking up so much space. Here’s what the result looked like:

WHOW THERE! What is all that green that’s taking up half of my hard drive?

A quick hover reveals that these are “swap” files that live in a hidden folder that’s reserved for system use.

Swap files are spaces where application memory/files is held. It’s like a less random access version of RAM. And somehow, my computer had 50GB of it.

Here’s the fix:

  1. Shut down your computer. If necessary, just hold down the power button and force shut it down.
  2. Hold down the shift key.
  3. Press the power button while still holding the shift key.
  4. When the apple logo appears on screen, lift your finger from the shift key.
  5. A loading bar will now appear. Wait a while and it will eventually show the login screen. It will let you know that you are booted into safe mode.
  6. Don’t log in!
  7. press the Back button on the login window, then press Shut Down.
  8. Press the power button without pressing any keys.
  9. Wait for the computer to boot.
  10. Enjoy your spacious computer!

There ya go! It’s a simple fix for a near catastrophic problem.

To prevent this from happening, restart your computer every couple of days. That was probably my problem, as I haven’t restarted in about a week. Oops!

When you restart, you don’t need to do the safe boot, as it will still clear a large amount of the swap files and cache. This is more proof that it’s a good idea to restart now and then, preferrably daily!

A reboot a day keeps the swap files away!