Instagram for Android

Finally. At long, long, long, long, long, long, long last. Instagram has released their official Android Application.

In case you don’t know, Instagram is a photo-sharing platform which incorporates different fun-style effects and third party sharing into the mix. It’s been available for the iPhone since late 2010 and has collected over 30 million users. Yeah. Whow.

There were many speculations of an Android App over the past while, but no confirmed release date.

Now that Instagram has released their Android version, they are well on their way to a giant user base. After all, Android does have more of a market share than the iPhone.

As far as the application goes, it’s the exact same as the iPhone with one important exception: The android application does not have the tilt-shift function, a popular option among Instagrammers. (Tilt-shift is where a selected part of the photo is in focus and the rest is not.)

If you are an android user longing for some instagrammal love, click here to download the free app for android. Enjoy!

Google Ditches Android Market for Google Play

Play logo

Android Market, the typical android counterpart to iOS. Widely used, known, and enjoyed.

Recently, Google added Movies, Music, and Books to the Market. Thanks to the general nature of the word Market, no name change was necessary.

All of your music showed up in the separate Google Music app. Your movies in the Google Movies app. Simple enough, right?

Google disagrees.

Google has completely ditched that entire scheme around a new name: “Google Play”. Google Play is the new name for the Android Market, while the Google Music app has changed to “Google Play Music” and movies changed accordingly to “Google Play Movies.”

Honestly, it’s nice that they’re congregating all of their purchases under one name, however “Google Play Movies” sounds like someone with awful grammar trying to say Google Plays Movies. I think they just need a semicolon – Google Play: Movies… actually, no. They just should have gone with something other than Play.

The new logo and name are all that has changed – the general interfaces are still identical, so nobody needs to freak over yet another interface change. However, it’s still a bit annoying that Google decided to mix everything up – all at once – and will probably manage to confuse a lot of people in the process.

AppCleaner: A Thorough Uninstallation

One of the conveniences of Mac is that applications come in packaged files ending in .app. For this reason, they are usually said to be easy to uninstall – just delete the .app file from your applications folder and it’s gone.

True, this will get rid of most of the files, but often there’s still some application metadata gunk left laying around in hidden folders.

That’s why AppCleaner is so handy.

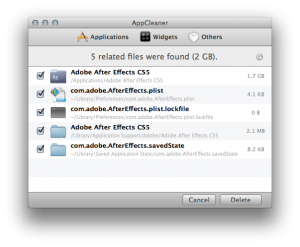
Drag in a .app file, and it will find all of the supporting files and allow you to delete them. This allows you to get a completely clean uninstall of an application on your mac.


Did I mention it’s free? Pick it up from FreeMacSoft using this link. Enjoy!

Otterbox Defender Series for Galaxy Nexus

Over my years of reviewing and testing, no other case company has ever been able to  replicate the protective properties of Otterbox’s cases. When I plan on dropping my phone off of a two story building, they’re the only ones with a case I can trust.

That’s why when I got my Galaxy Nexus, I knew that the case I would be getting would be from otterbox. Here’s my scoop.

Design

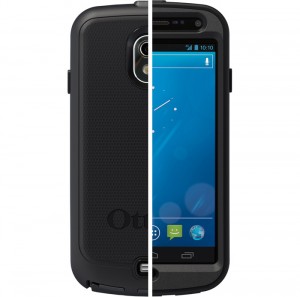
The case consists of two main parts: an outer silicone skin, and an inner hard plastic shell (with a screen protector built in).

The outer silicone skin has a nice grip and absorbs a majority of the initial shock if you happen to drop the device. It has openings for all ports, so you can attach everything you need without having to ever remove the case. This is a nice feature, although it does add more parts and complexity to the overall design of the case.

The Flaw

The inner shell is the hard layer of protection for the device. It has two parts: a bottom and a top section, which snap around the phone. This is where the only problem with the case is.

A "practically indestructible" case?

The top section is a frame around the screen (with openings for speakers, cameras, lights, etc.) which also has a screen protecter glued in. This means that you need to clean off the screen protector of the case in addition to your phone’s screen and try to get them together before any other dust settles. The only issue with this is that if any dust settles after you’ve snapped it on, good luck getting it off – without breaking it, that is. After my first attempt at putting it together, I noticed a bunch of dust particles under the protector. So I take the case off, but the tiny snaps on the edges that hold the case together aren’t willing to let go. In the end, I need to pry them apart to even get to my phone. This bent the frame a bit. On my second attempt at taking the case off, I tried to use a key in the tiny slots next to the snaps. I ended up cracking the frame, and it still took a good ten minutes for me to get the case off of the device.

Conclusion

Otterbox was always (and most likely will always be) known for it’s super-protective lines of cases. At $50, the materials are not very well-built and are extremely prone to cracking and bending. Although it may protect your device, the case is oddly fragile for its super-hefty title. I can’t say I don’t recommend this case, as the protection it offers is above-par, but I can’t highly recommend it as it is fragile and the plastic materials are prone to breaking and bending.

If you want to pick one up for yourself, click here to be redirected to the Otterbox page.

P.S. Thank you otterbox for sending me this awesome (but fragile) case!

Bananapress: a super-simple CMS

WordPress is wonderful. People love to use it, and some extremely beautiful and large sites implement it as their backend.

But then there’s those who get tired of wordpress. It works, well, yes. But it is a bit heavy, it can be a bit slow, and it’s not the lightest thing in the world.

So you try our Drupal, but that’s just disgusting – the interface is impossible to use, it has high requirements, and the error messages are nearly indecipherable.

There’s plenty of other CMSes, but they’re all a bit blech. So I decided hey, why don’t I just make my own?

That’s why I made bananapress. It started as just for personal use, then I realized that I could easily create an installation script and make it open source for all of you to use.

Bananapress is a bare-bones simple CMS. It only requires PHP v5.2 and a MySQL Database. Unzip the file, put it in the root of your domain, then go to http://yourdomain.com/install. It will give you instructions on editing the config.php file (I’m hoping to make that webpage be able to edit the configuration file, but I’m not familiar with write and reading text files in PHP). Put in your database information in the config file, then click next on the install page. It should configure a database for use with your site.

Now, you can go to http://yourdomain.com/login.php, enter the password that you entered in the config file, and write and save your first post. Voila, it should show up on your homepage.

And that’s it! I’m working on getting an editing page and some more documentation for it, but it’s a work in progress. So far the feedback has been good.

Feel free to check it out for yourself by going to http://bananapress.co.cc !

Verizon Can’t Get it Right

One of the most anticipated phones if the year is the Galaxy Nexus. It boasts a ton of new features, courtesy of Andoid 4.0.

One of Apple’s strongest points is how they release their phones. They send out an invite to an event, then at the event make a clear availability date. This causes people to get excited for the product and even line up for it.

Verizon took a different approach. They added a release date of Dec. 9 to the stores’ databases, and never made an official announcement. Everyone gets excited for that day, but Verizon has decided to stamp that down as well. Verizon took down the date from the databases and replaced it with “Launch Date Coming Soon.”

I don’t understand what Verizon is going for. Are they trying to get hype? Are they attempting to draw more in with their deadline extension? Or are the marketing people really just that clueless?

Many people have their two year upgrades coming up and would like to upgrade to the Nexus, but with so much waiting and games people are beginning to lose patience with Verizon. It’s not sure whether the phone isn’t actually going to be released on the 9th, and other sources are saying that it could be on the 13th. Who knows?

Verizon either needs to stick to the leaked dates to encourage more hype assurance or just give us a solid, set release date.

How Hex Codes Work

I know, a lot of you out there won’t be needing this anytime soon, but I think that the way digital web colors work is cool, and I think that you will too!

When designing websites, color is always important. What color should the background be? The font?

All of these colors are chosen within CSS. CSS has a few basic colors built in, like white and black but everyone would like more specific colors. My screen doesn’t have millions of colors for ‘nuthin!

In CSS, specific colors are entered via hex codes. These go #123456, where each digit ranges from 1-F (0123456789ABCDEF). Because colors are composed of three values, Red, Green, and Blue, two digits of a hex code are for each.

This is a bit difficult to explain, so I made a diagram just for you:


For example, if your hex code is #FFFFFF, thats FF for red, FF for green, and FF for blue. FF is the highest possible value, so as much of all colors as possible results in white. It’s the same with #000000: no color at all means black.

If you were to have #FF0000, that’s the highest value for red and no value for anything else; you’ll end up with pure red.

I hope you enjoy having yet another little nugget of tech information in your mind! Use it wisely! 🙂

Why Google+ Is Failing

When I was at the Teens In Tech conference, a speaker told me this:

For your product to succeed, it either must be a new idea or be better than a previous one.

It makes sense – why would anyone switch to your product if there’s already one that does the same thing? Your product needs to have more to offer so people would actually have a reason to “convert.”

Unfortunately, there are few tech companies that succeed with new ideas – so a lot take old ideas and refresh them to make ’em better. For example, every Apple product ever created; The iPhone wasn’t the first phone in the world – it was just better than the rest; The iPod wasn’t the first small music player ever created – it was just better because it could hold so many more songs and didn’t need CDs or Cassettes.

Okay, so lets take a look at Google+. It’s a great social network that has tons of new features that are definitely in demand. Who would wan’t multi-person video chat, along with a slew of easier to manage privacy features?

“Okay, so Google+ “better” than facebook – but why isn’t it succeeding?”. This is a question I’ve been asked many times.

Lets think about it in terms of a lamp (yes, the one on your desk). First, we have our facebook: A standard lamp with a normal switch that emits very bright light. Then, lets look at our Google+: A large, fancy lamp with pretty designs on it, a bendable neck, and voice activated controls – but we forgot to add in a socket for a lightbulb.

In this analogy, our Google+ Lamp is “better” than our facebook lamp – but it doesn’t do what people want to use it for (illumination).

Lets take that analogy back to Facebook and Google+. What is the real reason people ever go on facebook?

The real reason is their user base. There are very very few people who aren’t on facebook, and there are very very few people on Google+. Google+ has all the new doohickeys and thingamajigs, but it’s forgetting the light bulb (user base).

And because nobody is on Google+, nobody wants to join – they’re satisfied with Facebook and their 1500+ “friends.” What’s the use of having a ten person video chat if there’s not even ten people on Google+?

Google+ is a good idea, with a perfect execution – but the social networking field has been completely dominated by Facebook and Twitter. It’s unfortunately like this for many social internet startups: many of them rely on a user-base to be the least bit useful, and without a user base you won’t be able to expand your user base. You can get a user base by having a user base, because if you have a small user base people want to join to be part of that user base, which makes more people want to join etc.

Hence the reason most social startups fail. Gaining a user-base is a domino effect, with the first domino being a giant brick wall. You need to hope that something will come and knock it over, as getting the domino train started is definitely the hardest aspect of the whole process.

How-to: Hack the Apple Smart Sign

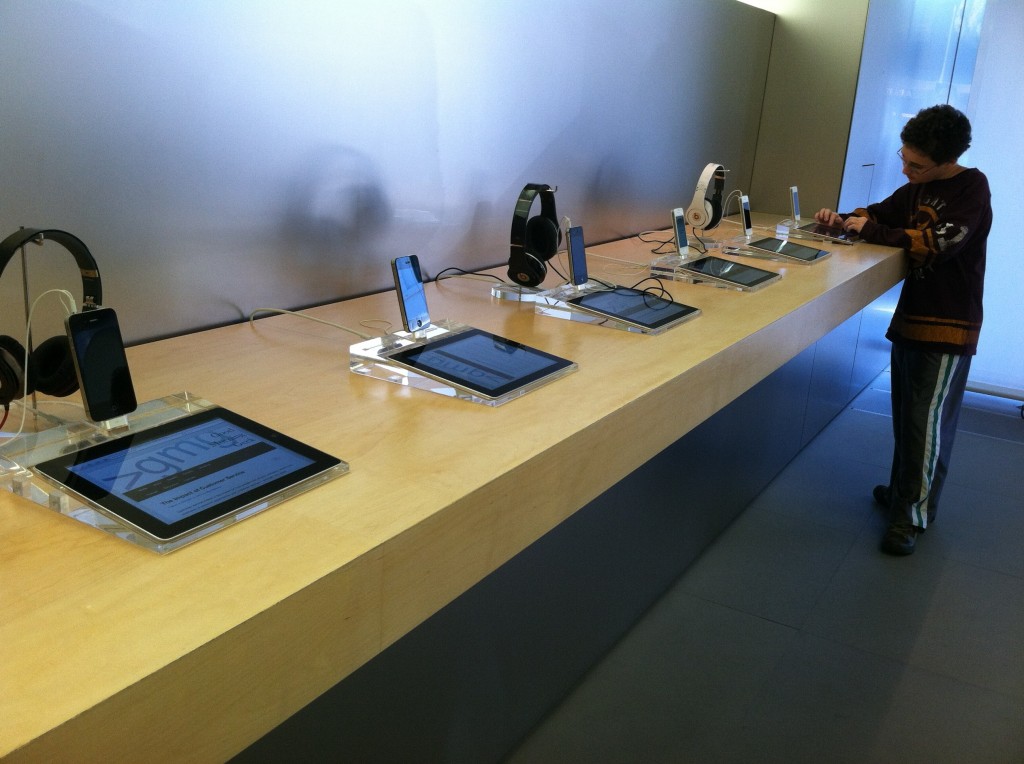
My friend Amit and I set all of the Smart Signs to GMG!

If you were recently at an Apple Store, you may have noticed their new “Smart Signs.” These are iPads that have information about the Apple product you’re looking at, however these iPads are locked in the smart sign mode. The iPad’s physical buttons are embedded into the plastic stand, and the home button has been disabled.

Sources say that there is a “secret gesture” that gets the iPads out of this mode, but after a ton of online research and asking many different Apple store employees, I still couldn’t figure it out.

So I went the easier way – I had to figure out a way to push the buttons.

I pushed as hard as I could on the edge of the iPad’s bezel, and this activated the lock button in the top right and locked the iPad. The plastic of the stand pushed against the button, so I wouldn’t be damaging any of the inside contents.

After I successfully locked the smart sign, I turned it back on and I was greeted with the lock screen. However, after unlocking the iPad I was returned to the same Smart Sign mode. Darn.

So instead of just locking it, this time I held down the bezel and got the “Slide to Power Off” slider. I swiped across, let it shut down, then held down the bezel to reboot it. (Check out the video at the end of the post for more detailed instructions.)

Tada! The iPad booted into its normal mode, and I was able to open the default applications and such. Unfortunately, the Home button is still disabled – so if you open an app, you won’t be able to get out of it without rebooting the iPad.

While we were at it, my friend/helper Amit decided to help me out and assisted me in setting every smart sign in the Apple Store to Good Morning Geek. Because the home button was disabled, the customers either had to browse my site or scroll up and find the URL bar. Also, the screens are set to never turn off – also handy!

By the time we were done, an Apple Store employee came up to us and nicely said “Would you guys please stop messing around with the smart signs?”

In the end, it was really fun. I tried to jailbreak it with jailbreakme.com, but that site is blocked – :(.

So if you’re ever in an Apple Store and want to either a. Annoy the employees or b. Show your friends a cool trick, this is a pretty fun and easy hack.

I hope to eventually find out the actual gesture, and after trying everything I could possibly think of, it must be fairly complicated.

RIP Steve Jobs

Yes folks, the long feared day has finally come.

Steve Jobs, Founder and CEO of Apple Inc, is dead.

He’s been very sick for a long time, and recently also stepped down from his position at Apple. He was able to turn a couple of guys in a Palo Alto Garage into the worlds largest company, with funds clocking in over the US Government’s.

Steve Jobs was a truly revolutionary man who will be remembered in the endless world of technology forever.

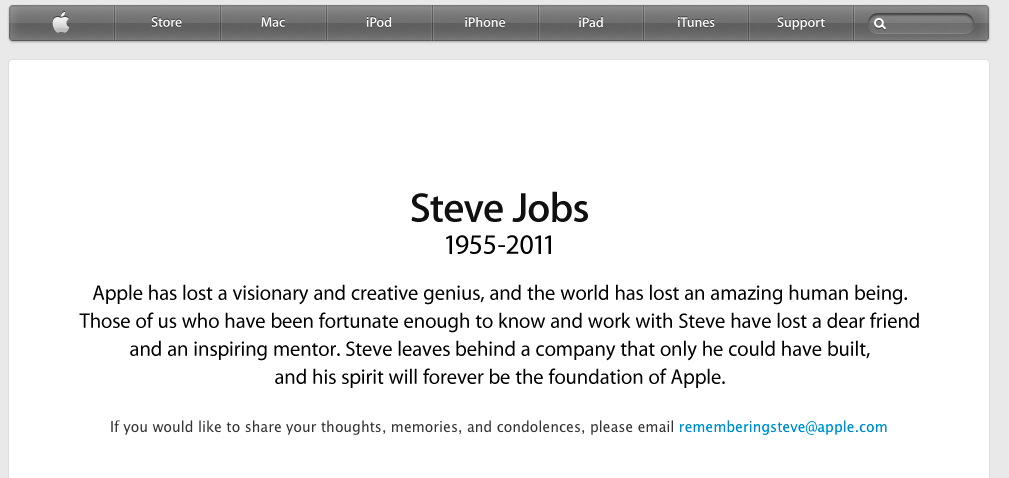
For this event, Apple has changed their homepage to a tribute that looks something like this.

Upon clicking the homepage you get this:

RIP Steve Jobs.

Instagram – with a DSLR

Instagram is an amazing iPhone application that can transform your normal iPhone photos into interesting, old-ish photos. Unfortunately, your iPhone doesn’t have the best camera that you could put your hands on.

Here’s two applications that will give you Instagram-like photo effects and filters, but you can supply your DSLR’s pictures!

Focus

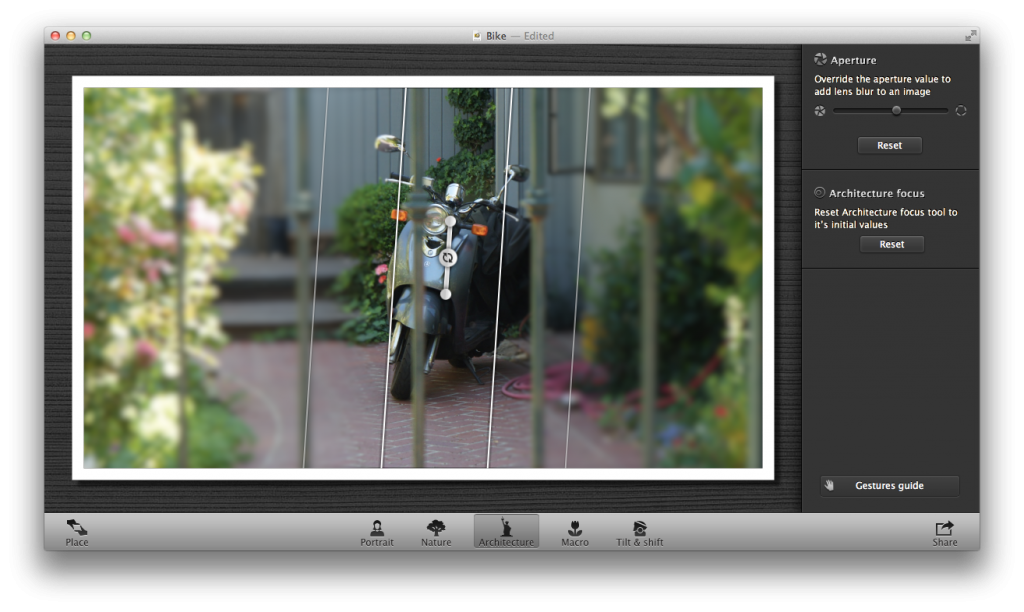
Focus is an application available from the Mac App Store for $5. The app basically allows you to add tilt-shift effects to your photo. It’s a very straightforward application, and I think I can basically sum up the controls in this screenshot.

First, open a picture in the app. Then, click “Place” in the bottom left corner. This will allow you to rotate, crop, and align your photo to your liking. Then, click on one of the options that are shown. I personally don’t understand why they had to add a bunch of options – I mean, why couldn’t they have just added a button for circular, a button for linear, and a slider for Vividness? The world may never know.

After you’ve selected one of those options, you can click and drag the focused area around and rotate it to your liking. Once you have it in a place you like, hit File > Export and save it as a JPEG. Now you have a tilt-shifty photo!

Lomo Express

Now that we have the tilt-shifty part of your photo complete, we need to add some filters. This will be done with another app from the Mac App Store that is available for a painful $13 – worth it I think so.

This is as bare-bones as you can make this application, as you open up your photo then choose what effect you want – then save it. Here’s what the app looks like:

There are 12 awesome filters to choose from, and it’s as easy as clicking on the one you’d like and bam, there’s your new photo.

When you’re done and you like the results, go to File > Save As and save it as a JPEG.

That’s it!

Conclusion

Your final picture will look like an instagram shot, but higher quality and resolution!

To go even farther, you can print them out on nice paper and post them around, like I did with instagram photos in this post.

Even though this will cost you $19, if you’re really into editing photos with tilt-shift and Lomo effects, this is the way to do it!

Click here to download Focus

Click here to download Lomo Express


Here’s a couple of photos that I have gotten out of this system.

How-to: Create a Lion Recovery Disk


OS X Lion removes the need for any kind of media for the installation. That’s nice, because there’s no disk for you to lose!

However, if something terrible happens to your computer, you’ll end up installing Snow Leopard, then upgrading to Lion once again. Thankfully, Apple has made a utility that allows us to easily and painlessly create a bootable USB Lion Recovery Disk. Unfortunately, you must have either the MacBook Air or Mac Mini Mid 2011 for this to work. This is because those are (currently) the only computers with the Lion Recovery Partition.

1. Download

Click here to download the Recovery Disk Assistant from Apple. Once downloaded, open the Disk Image and launch the Application.

2. Create

Now would be a good time to plug in a USB disk. Plug it in and continue through the installation. There’s nothing for you to configure, so this is extremely straightforward.

3. Use

If your computer stops booting, or you get a new hard drive, it’s time to use this disk. Plug it in to a slot on your computer, then boot holding the alt/option key. In the menu that appears, select the recovery disk. Now you can download and install Lion right back on to your computer!