Android Wifi Tether Now Working on Galaxy Nexus

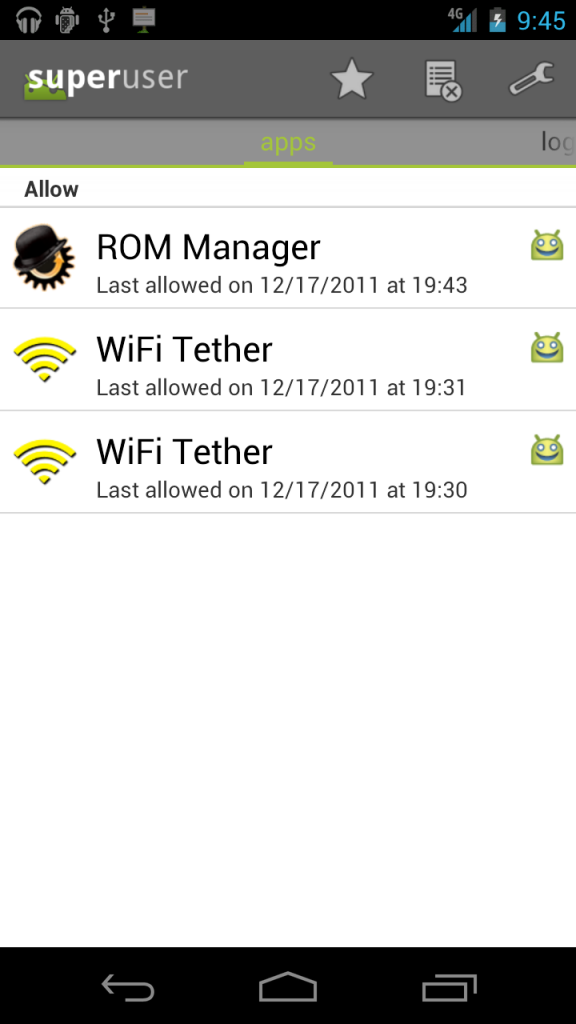
The only real reason I ever root my phone is to use the Wifi Tether app. Wifi Tether is a free application that allows you to get the internet from your rooted android phone onto your computer, without having to pay for Verizon’s ridiculous tethering plans.

Right after I rooted, I installed Wifi Tether and was disappointed when it gave me an error and didn’t work. I went to their Google Code page and there was already a very popular thread about it’s dysfunctionality on the Galaxy Nexus.

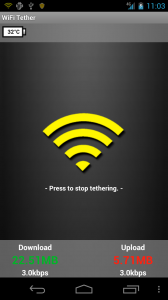
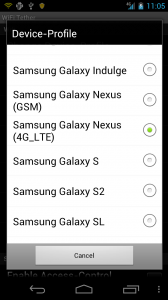
Well, rooters unite – Wifi Tether has just released an experimental pre-beta version that has support for the Nexus. Although it’s considered “experimental,” I’ve had absolutely no problems with it and I’m loving the 4G speeds. It’s like having a 4G Mifi with no data limits and a much cheaper data plan ($30 a month!).

Click Here to download the app. I recommend browsing to this page on your phone (here’s a shortlink to save you a little bit of time: http://wp.me/p1GtXy-vW) and hitting that download link.

Once it’s downloaded, go into Settings > Security and check the box that says “Install Apps from Unknown Sources.” This will allow you to install the apk file you just downloaded.

Now open your downloads and tap the apk file I told you to download up there, and you will go through a quick install process.

Open up the app and you’re ready to tether over 4G speeds!

If you’re not rooted yet and would like to be, click here for my post on how to root the Galaxy Nexus.

Enjoy your 4G Tethering!

How-To: Root the Galaxy Nexus LTE

I just got my hands on this beautiful Galaxy Nexus. I love it so far, and a full review is in the making.

But in the meantime, I figured I might as well show you how to root it.

So here you go.

(FYI: This how-to only applies to mac)

1. Download the files

First, download this file: Android root tools


Unzip it and put the folder on your desktop.

Now we can get started!

1. Unlock your Bootloader

Unfortunately, this is necessary with the LTE version of the galaxy nexus. It can be a little bit risky at times and is said to void your warrantee, but you can always undo this part.

First, plug in your Galaxy Nexus to your Mac and hold down the power button to turn the phone off.

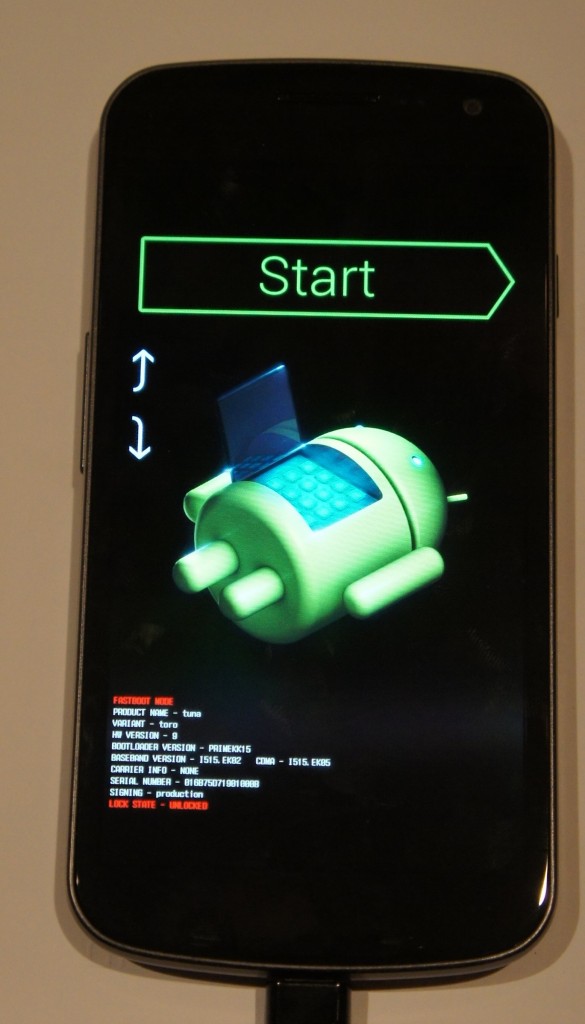
Now, hold down both the up and down volume buttons at the same time and hold down the power button. You should be greeted with a screen that looks like this (if not, shutdown and try again):

If you’re having a lot of trouble with this, here’s a video that I made showing you how:

Open up Terminal.app and type the following:

./~/Desktop/androidsdk/platform-tools/fastboot-mac oem unlock

You should see a prompt on your Nexus’ screen asking if you want to unlock the bootloader. Press the volume up key followed by the power key. You’re done!

Once you’re back at the android-open-thing screen, hit the power button to start the phone.

Now, it should boot up and start cycling through the boot animation. It may do this for a good ten minutes – whatever you do, DO NOT PULL THE BATTERY! (I learned this the hard way).

Eventually your Nexus will boot up, and you’ll be safe and sound in your little Ice Cream Igloo.

2. Root

Now it’s time to ROOT!

Put your phone back into fastboot mode plugged into your computer.

Open up Terminal and type this:

chmod +x ~/Desktop/androidsdk/r2-galaxynexus-superboot/install-superboot-mac.sh (hit enter)

./~/Desktop/androidsdk/r2-galaxynexus-superboot/install-superboot-mac.sh (hit enter)

That should be it! Your phone should start up.

It may hang on the Google logo for a while – If this happens, wait about 10 minutes and pull and replace the battery. Turn it on and it should cycle through the boot animation for a few minutes.

Once your phone boots up, you’ll be completely rooted! Enjoy!


How Hex Codes Work

I know, a lot of you out there won’t be needing this anytime soon, but I think that the way digital web colors work is cool, and I think that you will too!

When designing websites, color is always important. What color should the background be? The font?

All of these colors are chosen within CSS. CSS has a few basic colors built in, like white and black but everyone would like more specific colors. My screen doesn’t have millions of colors for ‘nuthin!

In CSS, specific colors are entered via hex codes. These go #123456, where each digit ranges from 1-F (0123456789ABCDEF). Because colors are composed of three values, Red, Green, and Blue, two digits of a hex code are for each.

This is a bit difficult to explain, so I made a diagram just for you:


For example, if your hex code is #FFFFFF, thats FF for red, FF for green, and FF for blue. FF is the highest possible value, so as much of all colors as possible results in white. It’s the same with #000000: no color at all means black.

If you were to have #FF0000, that’s the highest value for red and no value for anything else; you’ll end up with pure red.

I hope you enjoy having yet another little nugget of tech information in your mind! Use it wisely! 🙂

Why Google+ Is Failing

When I was at the Teens In Tech conference, a speaker told me this:

For your product to succeed, it either must be a new idea or be better than a previous one.

It makes sense – why would anyone switch to your product if there’s already one that does the same thing? Your product needs to have more to offer so people would actually have a reason to “convert.”

Unfortunately, there are few tech companies that succeed with new ideas – so a lot take old ideas and refresh them to make ’em better. For example, every Apple product ever created; The iPhone wasn’t the first phone in the world – it was just better than the rest; The iPod wasn’t the first small music player ever created – it was just better because it could hold so many more songs and didn’t need CDs or Cassettes.

Okay, so lets take a look at Google+. It’s a great social network that has tons of new features that are definitely in demand. Who would wan’t multi-person video chat, along with a slew of easier to manage privacy features?

“Okay, so Google+ “better” than facebook – but why isn’t it succeeding?”. This is a question I’ve been asked many times.

Lets think about it in terms of a lamp (yes, the one on your desk). First, we have our facebook: A standard lamp with a normal switch that emits very bright light. Then, lets look at our Google+: A large, fancy lamp with pretty designs on it, a bendable neck, and voice activated controls – but we forgot to add in a socket for a lightbulb.

In this analogy, our Google+ Lamp is “better” than our facebook lamp – but it doesn’t do what people want to use it for (illumination).

Lets take that analogy back to Facebook and Google+. What is the real reason people ever go on facebook?

The real reason is their user base. There are very very few people who aren’t on facebook, and there are very very few people on Google+. Google+ has all the new doohickeys and thingamajigs, but it’s forgetting the light bulb (user base).

And because nobody is on Google+, nobody wants to join – they’re satisfied with Facebook and their 1500+ “friends.” What’s the use of having a ten person video chat if there’s not even ten people on Google+?

Google+ is a good idea, with a perfect execution – but the social networking field has been completely dominated by Facebook and Twitter. It’s unfortunately like this for many social internet startups: many of them rely on a user-base to be the least bit useful, and without a user base you won’t be able to expand your user base. You can get a user base by having a user base, because if you have a small user base people want to join to be part of that user base, which makes more people want to join etc.

Hence the reason most social startups fail. Gaining a user-base is a domino effect, with the first domino being a giant brick wall. You need to hope that something will come and knock it over, as getting the domino train started is definitely the hardest aspect of the whole process.

How-to: Hack the Apple Smart Sign

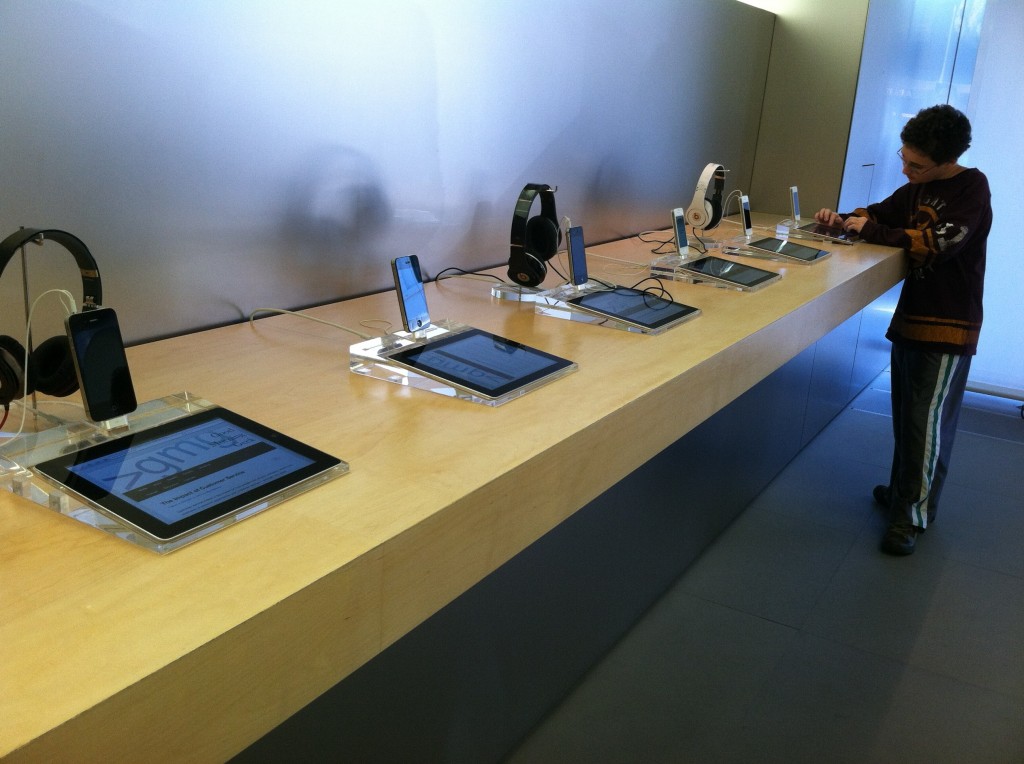
My friend Amit and I set all of the Smart Signs to GMG!

If you were recently at an Apple Store, you may have noticed their new “Smart Signs.” These are iPads that have information about the Apple product you’re looking at, however these iPads are locked in the smart sign mode. The iPad’s physical buttons are embedded into the plastic stand, and the home button has been disabled.

Sources say that there is a “secret gesture” that gets the iPads out of this mode, but after a ton of online research and asking many different Apple store employees, I still couldn’t figure it out.

So I went the easier way – I had to figure out a way to push the buttons.

I pushed as hard as I could on the edge of the iPad’s bezel, and this activated the lock button in the top right and locked the iPad. The plastic of the stand pushed against the button, so I wouldn’t be damaging any of the inside contents.

After I successfully locked the smart sign, I turned it back on and I was greeted with the lock screen. However, after unlocking the iPad I was returned to the same Smart Sign mode. Darn.

So instead of just locking it, this time I held down the bezel and got the “Slide to Power Off” slider. I swiped across, let it shut down, then held down the bezel to reboot it. (Check out the video at the end of the post for more detailed instructions.)

Tada! The iPad booted into its normal mode, and I was able to open the default applications and such. Unfortunately, the Home button is still disabled – so if you open an app, you won’t be able to get out of it without rebooting the iPad.

While we were at it, my friend/helper Amit decided to help me out and assisted me in setting every smart sign in the Apple Store to Good Morning Geek. Because the home button was disabled, the customers either had to browse my site or scroll up and find the URL bar. Also, the screens are set to never turn off – also handy!

By the time we were done, an Apple Store employee came up to us and nicely said “Would you guys please stop messing around with the smart signs?”

In the end, it was really fun. I tried to jailbreak it with jailbreakme.com, but that site is blocked – :(.

So if you’re ever in an Apple Store and want to either a. Annoy the employees or b. Show your friends a cool trick, this is a pretty fun and easy hack.

I hope to eventually find out the actual gesture, and after trying everything I could possibly think of, it must be fairly complicated.

How-to: Create a Lion Recovery Disk


OS X Lion removes the need for any kind of media for the installation. That’s nice, because there’s no disk for you to lose!

However, if something terrible happens to your computer, you’ll end up installing Snow Leopard, then upgrading to Lion once again. Thankfully, Apple has made a utility that allows us to easily and painlessly create a bootable USB Lion Recovery Disk. Unfortunately, you must have either the MacBook Air or Mac Mini Mid 2011 for this to work. This is because those are (currently) the only computers with the Lion Recovery Partition.

1. Download

Click here to download the Recovery Disk Assistant from Apple. Once downloaded, open the Disk Image and launch the Application.

2. Create

Now would be a good time to plug in a USB disk. Plug it in and continue through the installation. There’s nothing for you to configure, so this is extremely straightforward.

3. Use

If your computer stops booting, or you get a new hard drive, it’s time to use this disk. Plug it in to a slot on your computer, then boot holding the alt/option key. In the menu that appears, select the recovery disk. Now you can download and install Lion right back on to your computer!

DIY $5 Lightbox

We all wish we could have studio-reminiscent photos for our blog posts, etsy listings, ebay items, etc.

Well, you can always buy a lightbox like this one, but that’s $2000!

Here’s how to build an extremely functional lightbox using things that you probably already have around the house. I built this one out of stuff that I had laying around, so for you it might be as low as $0!

Materials:

  • Cardboard box
  • Large paper (the thinner the better)
  • Cutting tools
  • Some desk lamps and/or flashes
Instructions
1. Cut three holes in the cardboard box
Tape up the ends so you have the box, then cut out big windows on three of the sides of the box. Leave only about 1.5 inches from the edges of the window to the edges of the sides.
I wish I could have a picture for you, but I already built mine! You can look at the final picture at the end of this post and you’ll probably get an idea of where you need to cut.
2. Get out the paper

I had a huge roll of white paper laying around, and the thickness was just the same as my lightbox’s windows.

You’re going to want to cover two opposite sides of your box with paper, as the third you will be taking pictures through.
Take your paper and cut it so it is barely bigger than the windows you cut in your box, then tape them so they completely cover the two opposite windows.

3. Add the back

Now it’s time to add the backdrop. I cut a strip of my roll of paper, but you might have to take some pieces of paper together – unfortunately that might mean that you have some pieces of tape in your photos. 

Take the paper and tape one end to the back top edge of your box. Push the paper inside the box so you get a nice, smooth curve at the back bottom edge. 

4. Add lights, finish up

The front window still has an edge at the bottom, which will probably get in the way of your shooting. Cut that little edge off so the front window is open.

Now, you just need to add some light. I have some photography modeling lamps around, so i propped those up and put them on each side. In addition, I got a desk lamp for each side and put in 100w bulbs. For the final touch, I put a light right in front so that the front was filled in as well.

5. Shoot!

You’ll probably want to set your camera on manual, then put it in a tripod. I’m using as wide as an aperture as possible, as low as an ISO as possible, and change the shutter speed so that you get the right light.

This will give you the smallest depth of field and littlest amount of grain, and as long as your camera is on a tripod the long shutter speed won’t blur anything. If possible, set the white balance on your camera by finding the setting for white balance and set it to custom, then take a picture of your white backdrop. Most DSLRs have this feature, but if your camera doesn’t then just set the white balance to Incandescent.

Here’s some photos.


How-To: Create Instagram Photo Booth Strips in 3 Easy Steps

You’ve been using Instagram, the social network of quirky and cool pictures.

So now you have a profile with all these awesome pictures with comments, and all this other techy stuff.

But sometimes it’s nice to convert all that cool digital stuff into something analog.

And that’s why today, I’m going to show you how to make photo booth reminiscent photo strips.

You will need:

  • An instagram account with pictures
  • Photo paper
  • Photo printer
  • Rotary cutter, paper cutter, or at least scissors
Step 1: Get your photos

The first part of this project is to make strips of all of your photos.

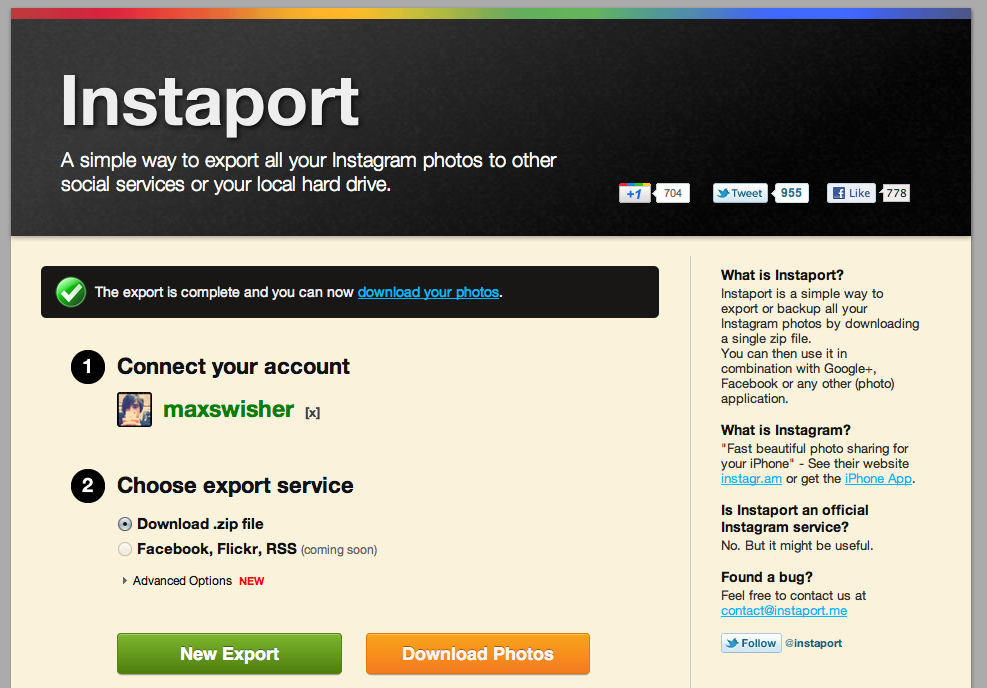
Start out by going to http://instaport.me and downloading all of your pictures to your computer as a zip. Instaport is a simple service that allows you to download all of your instagram photos as JPGs for free.

Once you have a zip saved and you can view your instagram images, you might want to go through deleting the ones that you don’t want to be included in your photo strips.

Step 2: Print your Photos

The next step is to open all of them up in preview. Go into the instagram folder (the folder containing all of the JPG images from instaport) and press Command A. This will select all of your instagram photos. Then just double click anywhere in the window and you will eventually get a preview window with all of your images open.

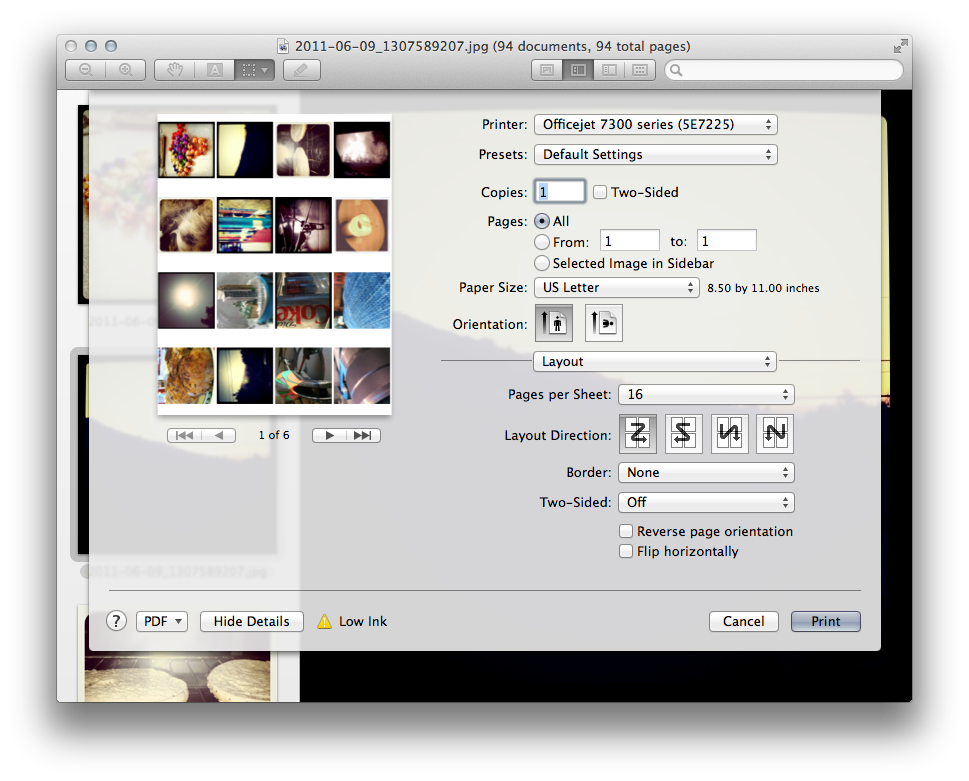
Next, press File>Print and configure the settings to look like so:

If possible, try to print borderless – your printer may or may not support this feature.

Next, hit the big Print button and let the magic happen. In a few minutes, you should have a few pages of instagram photos.

Step 3: Cut your Photos

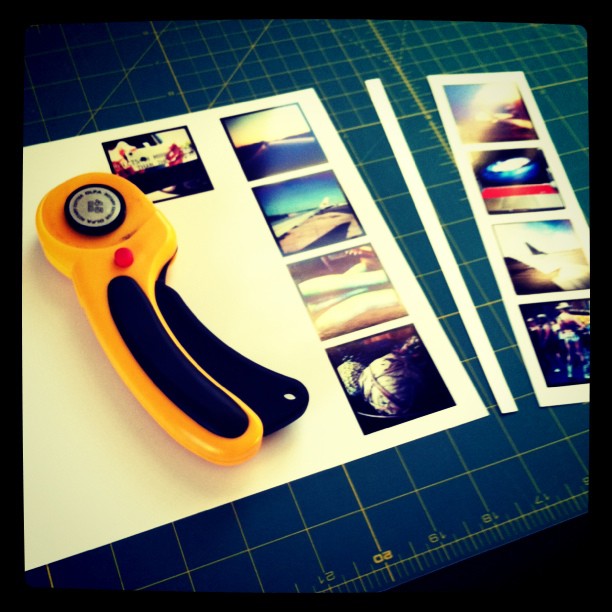
Get out your rotary cutter / paper cutter / scissors and cut them into even strips horizontally (so that you have strips of four). Here I’m using a rotary cutter to to cut the strips evenly and cleanly.

Step 3: You’re done!

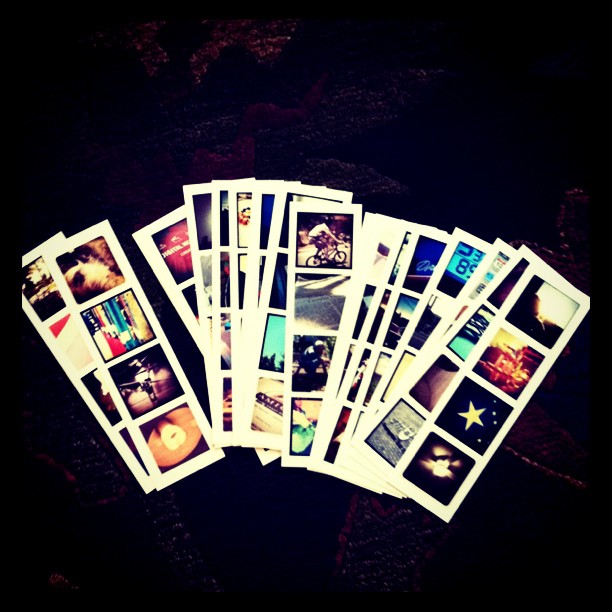
Once you’ve done that, you’ll have a ton of cool instagram photo strips.


Step 3.5: Do stuff with them

Well, now you have these cool strips! There’s tons of things you can do with them. Use them as bookmarks, give them to friends, collect them, hang them, use them as business cards, or my favorite: start an instant photo wall!

Also, feel free to follow me in instagram! My username is maxswisher.

NetBeans

I code HTML, PHP, and CSS quite often.

Usually, I use an application like VIM. VIM is a command-line based application that shows you syntax and if your quotes are in the right places. Helpful, compared to Notepad/TextEdit.

If you’ve ever coded Java then you know about Eclipse. If not, Eclipse is a free java development environment that includes auto-fill, error highlighting, manual libraries, and more.

It’s the same thing with Objective C in Xcode; there are manuals, auto-correct, and error highlighting.

Finally, we have PHP in NetBeans. Netbeans brings all of the features of Eclipse/Xcode to PHP, HTML, and CSS coding. It provides auto-fill, error highlighting, manual libraries, and more.

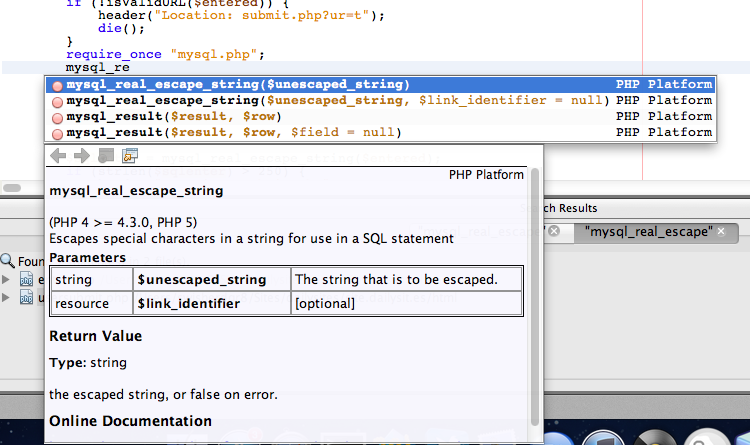
I was recently working on a fairly large project that includes PHP, HTML, CSS, and MySQL. Watch what happens when I have a partially typed PHP function:

There you have it. As I type, it gives me live suggestions and the manual for the top most relevant function right there.

I can hit enter and it will automatically fill it in and put my cursor in the parenthesis. It’s like having the familiar Eclipse shortcuts – but for PHP.

HTML and CSS are the same way. Type an opening ” and it will automatically fill in the second for you. It also has all of the CSS/HTML documentation and auto-fill.

The other main feature with NetBeans would be error detection.

Lets say I forget to put a semicolon at the end of a PHP line.

There you have it. You immediately get the error underlined, a notification in number bar, and when hovered over you get what the syntax error is.

Now, what does all this mean for a developer?

1. You can type a lot less and no longer need to look up functions in google so much

2. You don’t need to upload your files to see if they have errors

3. You can save a lot of time between error detection and auto-completion

This is the magic of NetBeans – but it doesn’t end there.

It’s free.

Yeah. Free. Completely.

It’s open-source, cross-platform, and available to anyone who wishes to download it’s magical amazingness.

The truly sad part about this is that few developers know about NetBeans. It’s sad how they end up wasting so much time and effort due to things that NetBeans could easily fix. If you’re a web developer, this application is a MUST HAVE. And it’s free – you really have nothing to lose.

If you’re interested, click here to go to the NetBeans main site and experience the magic of da beanz.


Goodbye, Old Twitter

Image Credit: Mashable

A little while back, Twitter started to slowly roll out a new version of the Twitter web interface to their users. Reactions were mixed; some loved it, some hated it, and some really just didn’t care.

For the haters out there, there was an option to switch back to the old version. However, Twitter is going to be removing the old version of the twitter web interface over the course of the next week – not that many users will notice the change, as the majority of twitter users have already switched over.

Personally, I am indifferent to the new Twitter web interface; it’s pretty and all, has some cool effects, and nicer fonts and rounder edges. The previous Twitter interface was simply getting old, and I believed it needed a revamp – which is exactly what we got.

Users of “old Twitter” will get a message saying that they are soon going to automatically upgraded to the new version of twitter, and twitter also announced this publicly on their twitter page. It was bound to happen eventually, and I guess the day (or week) has arrived.

A Few New Little Features in OS X Lion

Yes, there’s those few big announcements that Apple made at Back to the Mac and are constantly being advertised. But here’s a few little features that people don’t really take note of.

Change Background on Desktop Right Click


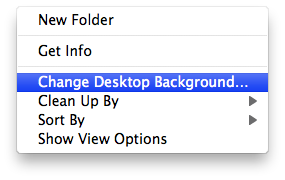
In the past, to change your desktop background you had to open System Preferences and open Desktop & Screensaver to change your Desktop Background. Now, you can simply right click anywhere on the desktop and there is a selection to change your background.

Different Backgrounds for Different Spaces

It used to be that you could have different wallpapers on different displays, but now you can also have different wallpapers on different spaces. Just go to the space for which background you would like to change, then right-click and select “Change Desktop Background.” Make sure you quit System Preferences every time you change the background on a Space.

Web Search in Spotlight

Spotlight is a great way for you to find files, look up definitions, and do basic arithmetic problems. With the update to OS X Lion, you can now also use it to search the Web or Wikipedia. Just type in your search and the Web and Wikipedia selections will always show up in the list.

Plus Button now Maximizes 

In the top left of every window, there are three distinct buttons: an x to close, a – to minimize, and a +. The + usually made the window some weird bigger size, and you could set it and toggle between them. It was so confusing that nobody really ever bothered to try and figure out how to use it. Now, however, it will actually make the window take up the screen (without using Lion’s full screen application feature).

With an External Display, closing the lid no longer sleeps

Previously, to use an external display with your MacBook’s lid closed you had to close the lid, wait for the computer to fall asleep, then use a bluetooth/external mouse to wake it up again. This is no longer the case; when you close the lid with an external monitor connected, your display will flash blue to adjust to the new display settings, but your computer will not go to sleep.

I hope you enjoyed this little guide on a few of the hidden features of Lion. They may come in handy someday, and they’re good to know. I’ll continue to post as I find others.

About This Mac in Lion

For the longest time, if you wanted to get to your information about your computer, you used System Profiler. The interface was clunky and confusing, obviously aimed at more advanced users.

Although it’s not advertised much, there is a new app replacing System Profiler called About This Mac, introduced in Lion.

Unlike system profiler, About This Mac is easy to use, and makes the more important things stand out. It also uses graphics to make explanations easier to understand.
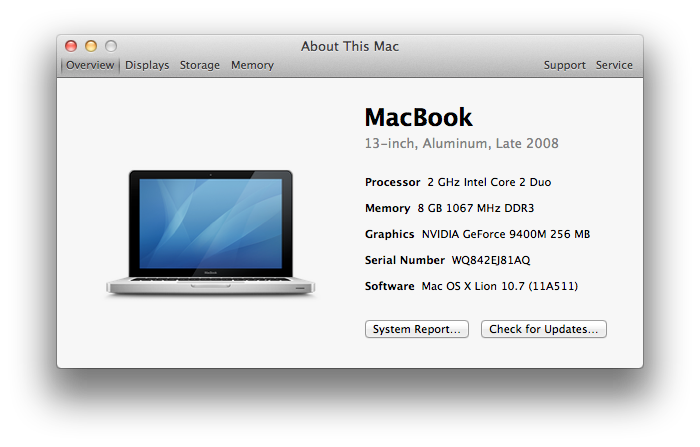
As you can tell by the above picture, it’s a very easy to understand and streamlined interface.

Displays

The Displays Pane is simple and easy to understand.
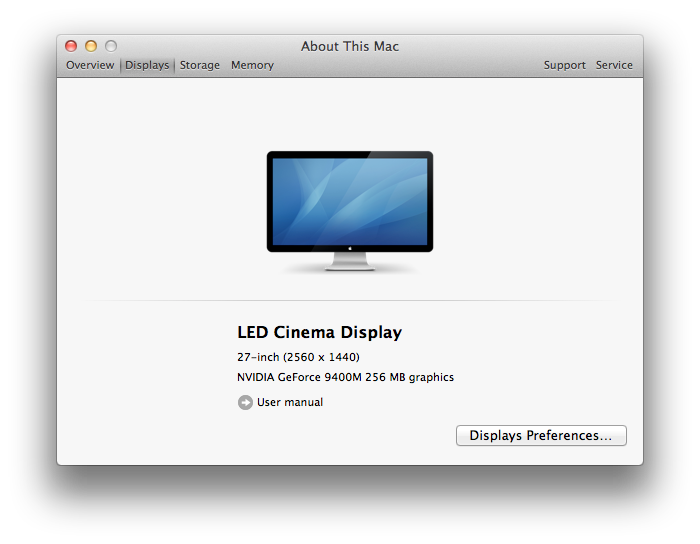
As you can tell, it’s quite easy to understand.

It gives you a graphic of the display, and the name of the display. Then, in smaller text (indicating that it’s probably less important to you) it tells you the dimensions, size, and graphics card.

If it’s an Apple monitor, it will even give you a link to the user manual – handy!

Storage

The storage pane gives you some quite-welcome insight into what’s taking up your disk space. It may seem similar to something you’ve seen in iTunes.
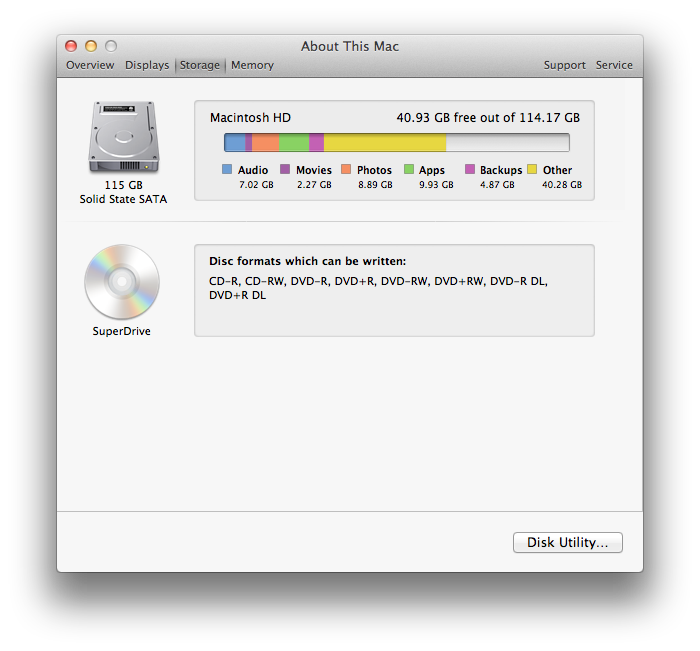
It’s definitely handy that it gives you this info.

It also lists other volumes that you have mounted/installed, such as your CD/DVD Drive and any USB drives.

Memory

Memory, the easier term for RAM, is crucial to your computer. If you didn’t have any Memory installed, you would have an EXTREMELY slow computer.  The Memory Pane gives you an easy explanation using graphics and easy to understand english.
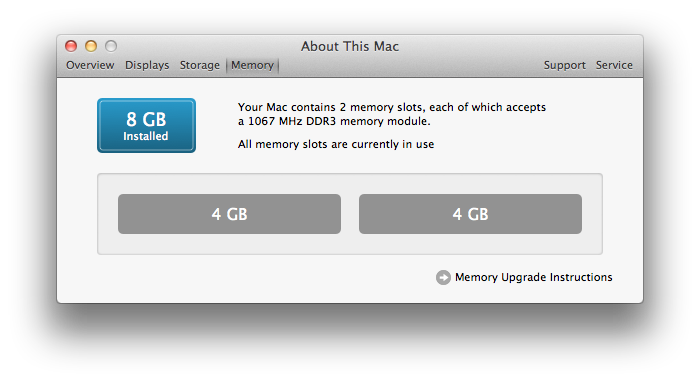
It gives you a simple box telling you how much total memory you’ve installed in your computer. It then tells you how many slots your computer has, and tells you the specifications for what Memory modules can go in .

Then it gives you an easy to comprehend graphic telling you how much Memory is in each slot. So easy to understand, even your grandpa can understand it.

In case it needed to get even more useful, they added a link to the Memory Upgrade Instructions – just in case you want to add some more, and don’t want to go around fishing online. Handy!

Support

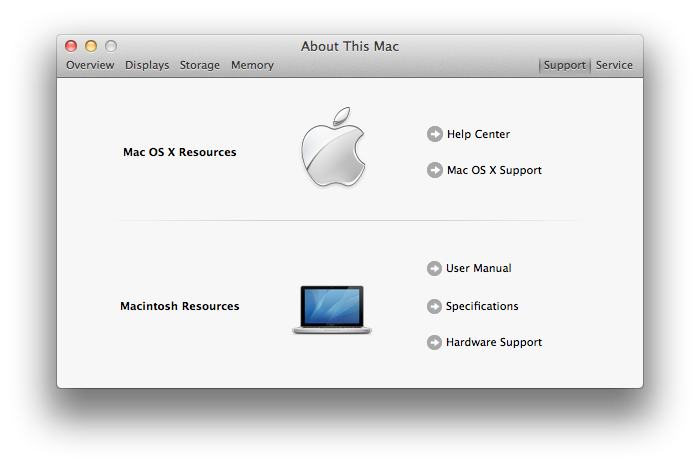
The support pane just gives you links to different online Apple support resources.
 

Service

This is definitely an extremely useful pane. Use this pane to clearly understand your warranty information, and get more information about the AppleCare support plan.
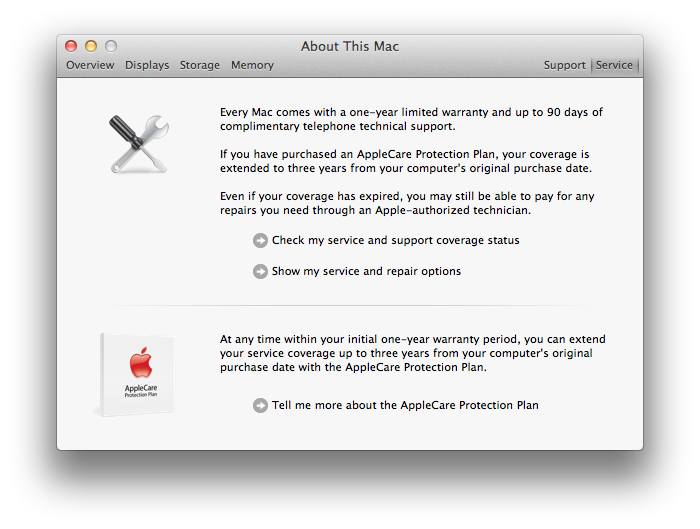
In addition to giving easy to understand repair descriptions, it also gives you links that you can use to check the status of your current warranty. It will send your serial number to Apple, then you will get a page telling you about the warranty status of your computer.


About This Mac is definitely a welcome replacement to system profiler, especially because it brings easier to understand graphics and descriptions, all in basic english. This will definitely be a big help for Mac users who need to learn more about their computers, but aren’t rocket scientists.

About This Mac can be found under the Utilities folder in the Applications Folder.