
Almost everyone is very used to the default iPhone font – Helvetica. It’s plain, simple, and easy to read.
People are usually just fine with Helvetica – but if you’re jailbroken, it might be a nice unique touch to change your font. And because text shows up EVERYWHERE in iOS, you’ll always get to enjoy your font change.
To change the font(s) on your iPhone, you’ll need an app called BytaFont from Cydia. Just open up Cydia, go to search, and type BytaFont and install it – no additional repos needed ;). If you have a Verizon iPhone 4, click here to read my post about 2 step jailbreaking.
After you’ve downloaded BytaFont, you can tap “Browse Fonts” to get a few options for browsing: Staff picks, most recent, most downloaded, most appreciated, alphabetical, and by category. Unfortunately it’s as hard to navigate as it sounds. The fonts under most appreciated are nearly impossible to read, and looking through a huge list of fonts (where all you see is the title of the font in Helvetica) doesn’t help me determine which font I’m looking for.
There are tons of fonts that are available for you to use (all for free, of course) from BytaFont. Some of them are basic, like Tin Birdhouse. Some of them are complex, like Halo 3 (which I simply just can’t read).
I decided that I liked the Ubuntu font. It’s clear and still easy to read, but it’s still different from boring helvetica. Here’s how it looks in a few situations on iOS.
-
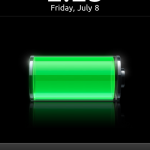
- Lockscreen Text
-
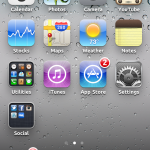
- App Labels
-
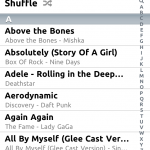
- Even song names
-

- App store too!
-
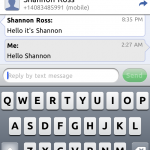
- Even the keyboard!!